Loading ...
Loading ...
Loading ...
Yourcleaningsystemrequiressomeassemblyandis
readyforuseonlyafterit hasbeenproperlyserviced
withtherecommendedoil andfuel.
If you haveanyproblemswith the assemblyof
your pressurewasher,pleasecallthe pressure
washerhelplineat 1-800-222-3136.
REMOVE PRESSURE WASHER
FROM CARTON
1. Slice two corners at the end of carton from top to
bottom so the panel can be folded down flat.
2. Remove hose reel box, fillers, and parts bag
shipped with cleaning system.
3. Remove spray gun, nozzle extension, and engine
oil from fillers.
4. Roll cleaning system out open end of carton.
5. Check carton for additional loose parts.
CARTON CONTENTS
Check all contents. If any parts are mtssing or
damaged, ca[[ the pressure washer helpline at
1-800-222-3136.
Main Unit
Handle with Chemical Reservoir Assembly
Accessory tray
Hose Reel Components
High Pressure Hose
Spray Gun
Nozzle Extension with Quick Connect Fitting and
Tip Holder
• Oil Bottle
• Parts Bag (which includes the following):
• Owner's Manual
• Owner's Registration Card
• Bag containing 4 multi-colored ProjectPro TM
nozzles
• Fresh Start Fuel Cartridge
• Handle Fastening Hardware Kit (which includes):
• Carriage Bolts (2)
• Plastic Knobs (2)
• Tree Clips (4)
Become familiar with each piece before assembling
the pressure washer. Identify all contents with the
illustration on page 6. If any parts are missing or
damaged, call the pressure washer helpline at
1-800-222-3136.
ASSEMBLING CLEANtNG SYSTEM
Your Craftsman cleaning system ,,viii need assembly
before operation:
1. Attach handle to main unit.
2. Connect chemical hose to pump.
3. Attach hose reel to handle as shown on page 6
according to instruction sheet included with hose reel.
4. Add oil to engine crankcase.
5. Add fuel to fuel tank.
6. Connect high pressure hose to spray gun and pump.
7. Connect water supply to pump.
8. Attach nozzle extension to spray gun.
9. Select/attach quick connect nozzle to nozzle
extension.
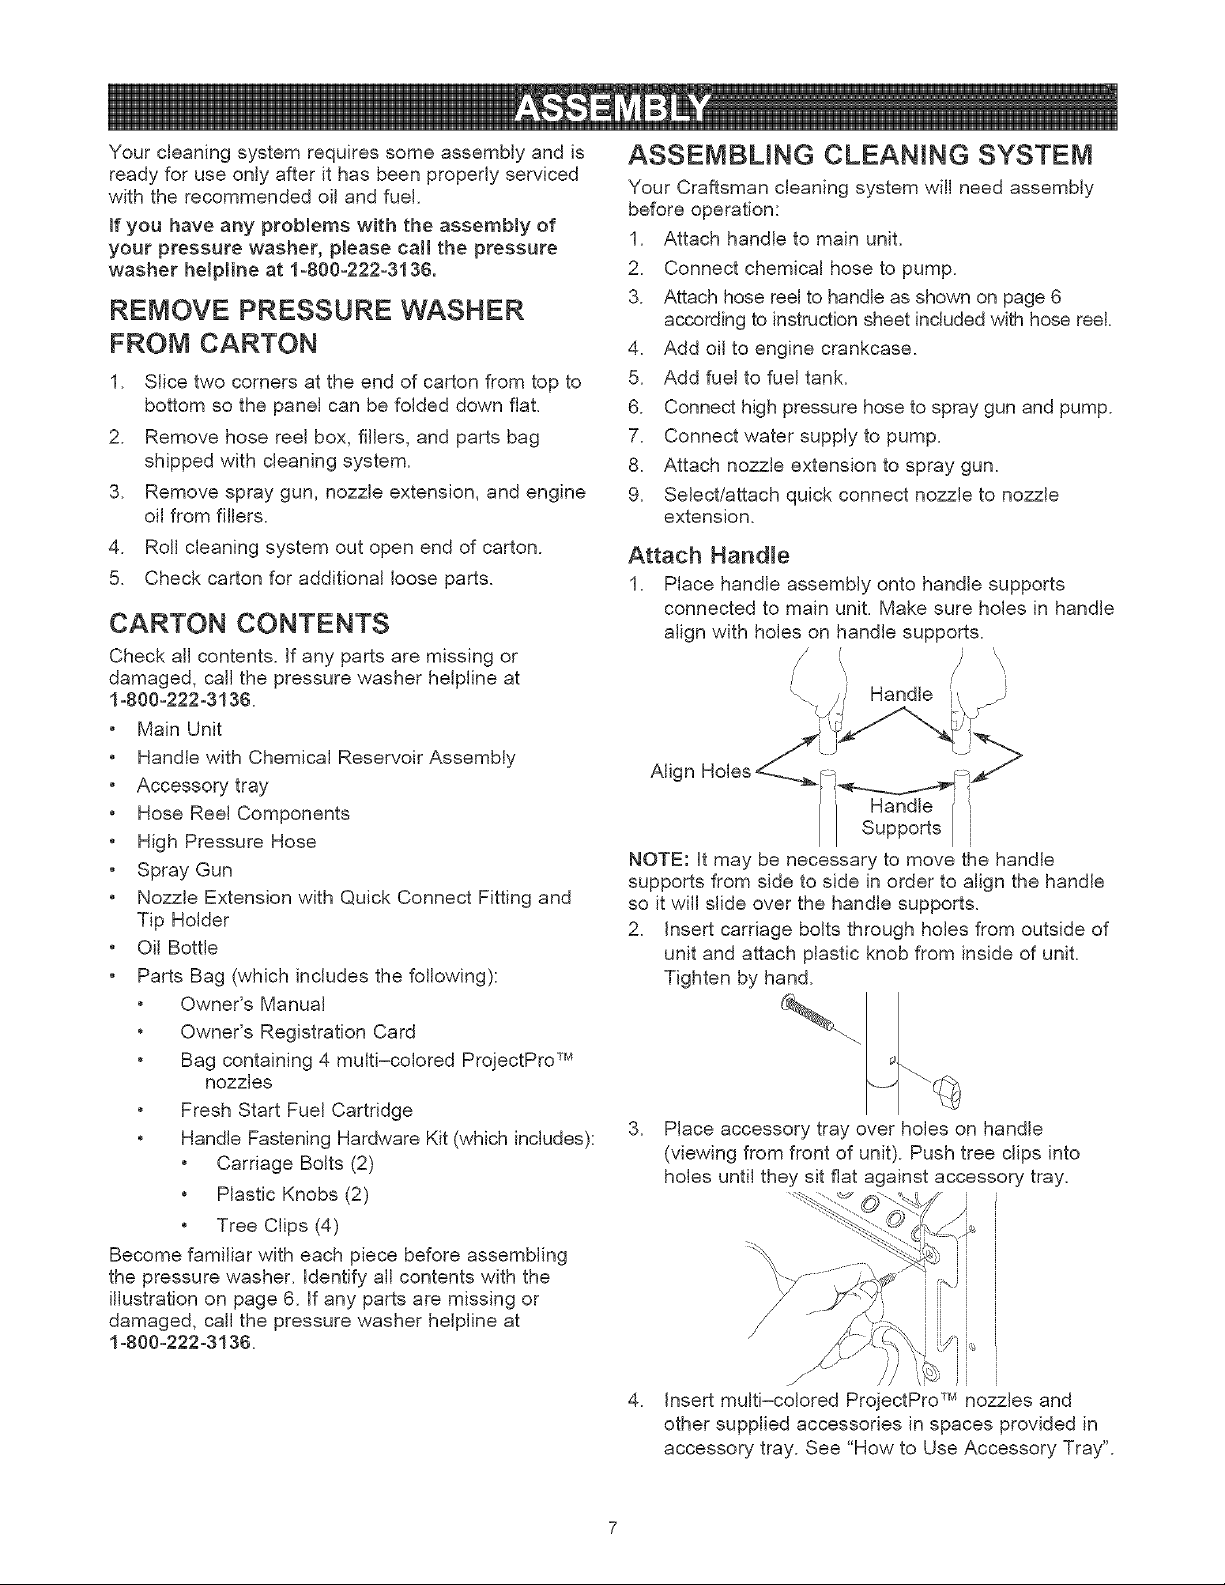
Attach Handme
1. Place handle assembly onto handle supports
connected to main unit. Make sure holes in handle
align with holes on handle supports.
/ I
Handle '
Hoes F_ r-__,,_
Align i_ i
Handle i i
// Supports/i
NOTE: It may be necessary to move the handle
supports from side to side in order to align the handle
so it will slide over the handle supports.
2. Insert carriage bolts through holes from outside of
unit and attach plastic knob from inside of unit.
Tighten by hand.
3. Place accessory tray over holes on handle
(viewing from front of unit). Push tree clips into
holes until they sit flat against accessory tray.
.
: i
J J
Insert multi-colored ProjectPro TM nozzles and
other supplied accessories in spaces provided in
accessory tray. See "How to Use Accessory Tray".
Loading ...
Loading ...
Loading ...