Loading ...
Loading ...
Loading ...
Setting Oven Controls
FEATURE OVERVIEW
• Preheat for Gas Ranges
Setting Preheat
The PREHEAT @ pad controls the Preheat feature. The Preheat feature will bring the oven up to temperature and then
indicate when to place the food in the oven. Use this feature in combination with the Bake pad when recipes call for
preheating. Preheating is not necessary when roasting or cooking casseroles. The oven can be programmed to preheat at
any temperature between 170°F to 550°F.
INSTRUCTIONS PRESS DISPLAY
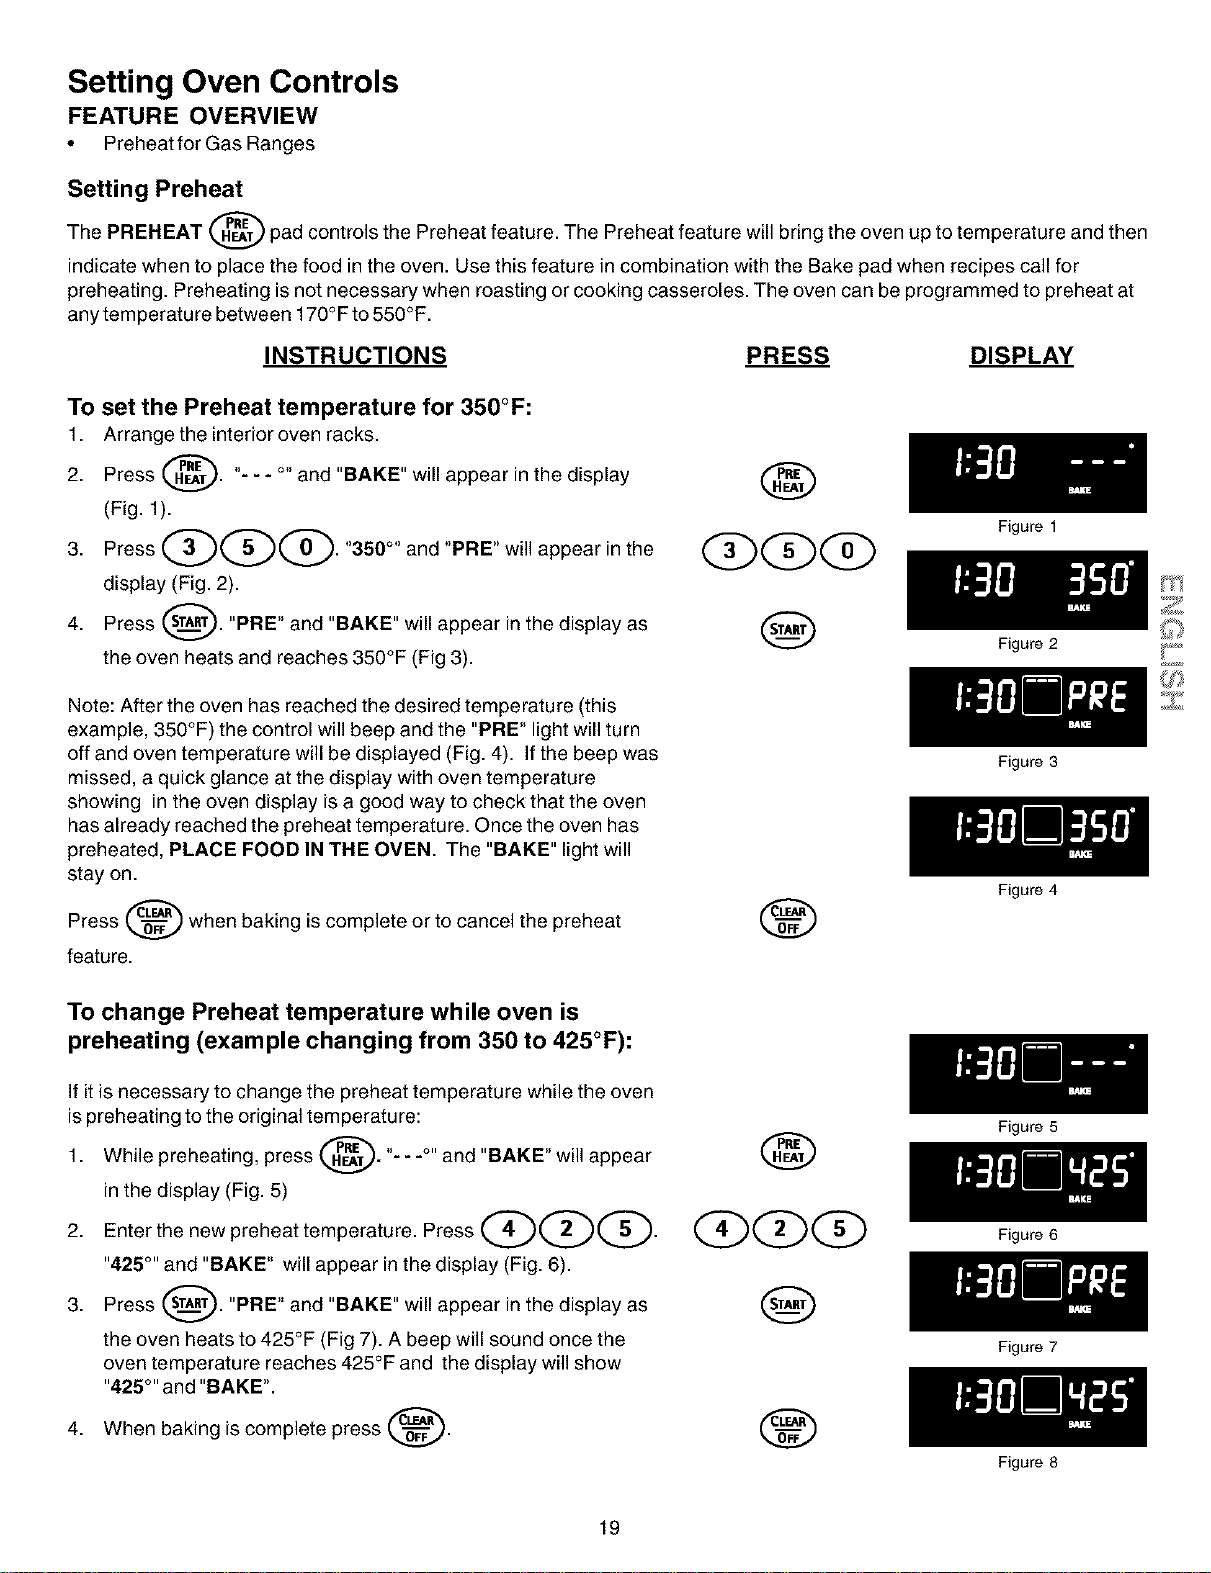
To set the Preheat temperature for 350°F:
1. Arrange the interioroven racks.
2. Press @. "- - - °" and "BAKE" will appear inthe display
(Fig. 1).
3. Press_@_."350°"and"PRE"willappearinthe
display (Fig. 2).
4. Press _. "PRE" and "BAKE" will appear inthe display as
the oven heats and reaches 350°F (Fig 3).
Figure 1
Note: After the oven has reached the desired temperature (this
example, 350°F) the control will beep and the "PRE" light will turn
off and oven temperature will be displayed (Fig. 4). If the beep was
missed, a quick glance at the display with oven temperature
showing in the oven display isa good way to check that the oven
has already reached the preheat temperature. Once the oven has
preheated, PLACE FOOD IN THE OVEN. The "BAKE" light will
stay on.
Press _ when baking is complete or to cancel the preheat
feature.
Figure 2
To change Preheat temperature while oven is
preheating (example changing from 350 to 425°F):
If itis necessary to change the preheat temperature while the oven
is preheating to the original temperature:
1. While preheating, press @. "- - -°" and "BAKE" will appear
in the display (Fig. 5)
2. Enter the new preheat temperature. Press __.
"425°'' and "BAKE" will appear in the display (Fig. 6).
3. Press _. "PRE" and "BAKE" will appear inthe display as
the oven heats to 425°F (Fig 7). A beep will sound once the
oven temperature reaches 425°F and the display will show
"425°'' and "BAKE".
4. When baking iscomplete press _.
@
QQG
Figure 3
Figure 4
Figure 5
Figure 6
Figure 7
Figure 8
19
Loading ...
Loading ...
Loading ...