Loading ...
Loading ...
Loading ...
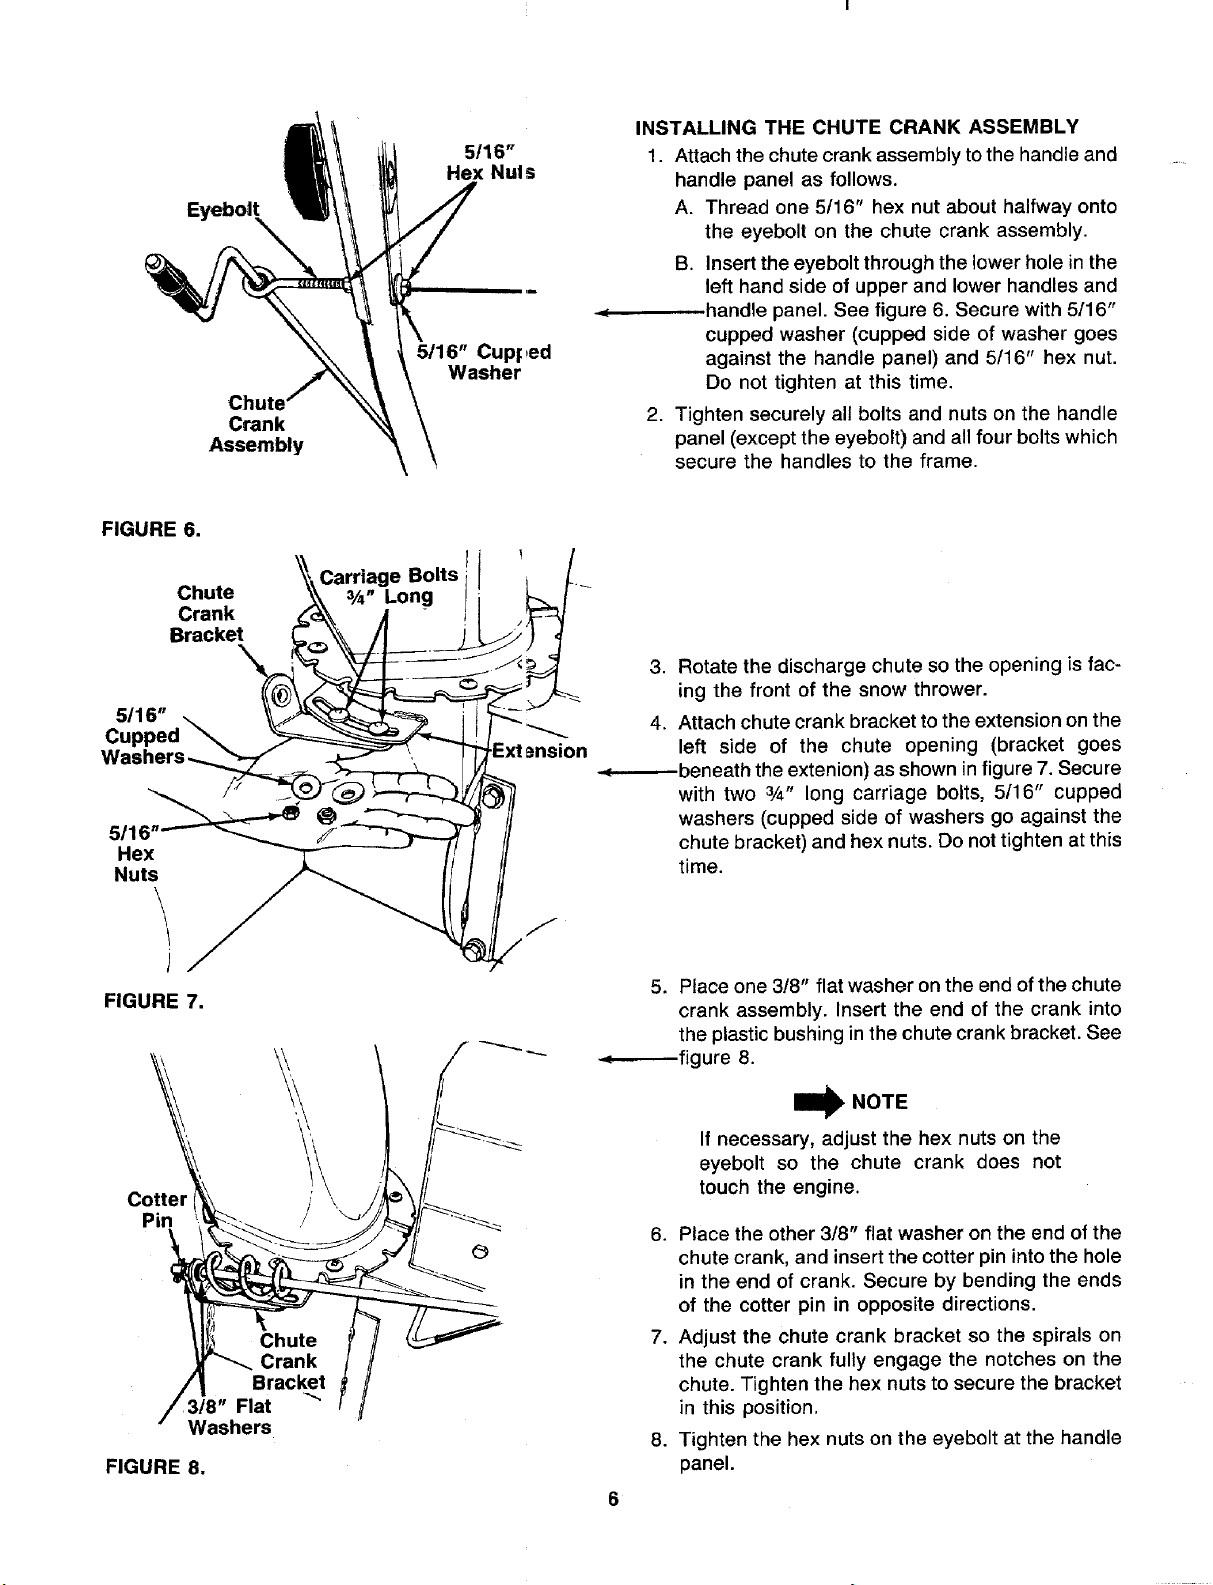
EyeboIt
Crank
Assembly
5116"
Hex Nui s
5/16" Cupped
Washer
INSTALLING THE CHUTE CRANK ASSEMBLY
1. Attach the chute crank assembly to the handle and
handle panel as follows.
A. Thread one 5/16" hex nut about halfway onto
the eyebolt on the chute crank assembly.
B. Insert the eyebolt through the lower hole in the
left hand side of upper and lower handles and
handle panel. See figure 6. Secure with 5/16"
cupped washer (cupped side of washer goes
against the handle panel) and 5/16" hex nut.
Do not tighten at this time.
2. Tighten securely all bolts and nuts on the handle
panel (except the eyebolt) and all four bolts which
secure the handles to the frame.
FIGURE 6.
Chute
Crank
Bracket
Carriage Bolts
3/_" Long
5116"
Cur
5116
Hex
Nuts
\
J
FIGURE 7.
Cotter _\ /'\ _/j_'_/_
• Washers
FIGURE 8.
3. Rotate the discharge chute so the opening is fac-
ing the front of the snow thrower.
4. Attach chute crank bracket to the extension on the
left side of the chute opening (bracket goes
-.(---_--beneath the extenion) as shown in figure 7. Secure
with two 3/4" long carriage bolts, 5116" cupped
washers (cupped side of washers go against the
chute bracket) and hex nuts. Do not tighten at this
time.
5. Place one 318" flat washer on the end of the chute
crank assembly. Insert the end of the crank into
the plastic bushing in the chute crank bracket. See
-.,_-----fig ure 8.
W NOTE
If necessary, adjust the hex nuts on the
eyebolt so the chute crank does not
touch the engine.
6. Place the other 3/8" flat washer on the end of the
chute crank, and insert the cotter pin into the hole
in the end of crank. Secure by bending the ends
of the cotter pin in opposite directions.
7. Adjust the chute crank bracket so the spirals on
the chute crank fully engage the notches on the
chute. Tighten the hex nuts to secure the bracket
in this position.
8. Tighten the hex nuts on the eyebolt at the handle
panel.
Loading ...
Loading ...
Loading ...