Owner's manual Dishwashers for GE GSD2100V65BB
Contents
- Safety Infformation
- Using the Dishwasher
- Getting Started
- Dispensers
- Loading
- Care and cleaning
- Troubleshooting tips
- Limited Warranty
- Accessories
- Consumer Support
Proper Installation and Maintenance
- Connect the dishwasher/appliance to a grounded metal, permanent wiring system; or run an equipment-grounding conductor with the circuit conductors and connect to the equipment-grounding terminal or lead of the appliance.
- Improper connection of the equipment-grounding conductor can result in a risk of electric shock. Check with a qualified electrician or service representative if you are in doubt whether the appliance is properly grounded.
- Detailed grounding instructions can be found in the “PREPARE ELECTRICAL WIRING” section of the Installation Instructions.
- Dispose of discarded appliances and shipping or packing material properly.
- Do not attempt to repair or replace any part of your dishwasher unless it is specifically recommended in this manual. All other servicing should be referred to a qualified technician.
- Use only cord kit WX09X70910 or hard-wire to building electrical. Failure to follow this instruction, could result in risk of fire and personal injury.
- To minimize the possibility of electric shock, disconnect this appliance from the power supply before attempting any maintenance. NOTE: Turning the dishwasher off does not disconnect the appliance from the power supply. We recommend having a qualified technician service your appliance.
Care and cleaning
Control Panel
- To clean the control panel, use a lightly dampened cloth. Then dry thoroughly
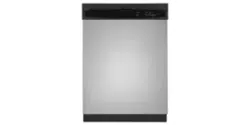
Exterior Door Panel
- Use a clean, soft, lightly dampened cloth, then dry thoroughly.
- Do not use scouring pads or powered cleaners because these products can scratch the finish.
Dishwasher Interior
- To clean and de-odorize your dishwasher, use citric acid, or Cascade® Platinum™ Dishwasher Cleaner or Finish® Dishwasher Cleaner, a detergent additive. They will break up mineral deposits, and remove hard water film and stains.
Stainless Steel Inner Door and Tub
- The stainless steel used to make the dishwasher tub and inner door provides the highest reliability available in a GE Appliances dishwasher.
- If the dishwasher tub or inner door should be scratched or dented during normal use, they will not rust or corrode. These surface blemishes will not affect their function or durability
Protect Against Freezing - If your dishwasher is left in an unheated place during the winter, ask a service technician to:
- Turn off electrical power to the dishwasher. Remove fuses or trip circuit breaker.
- Turn off the water supply and disconnect the water inlet line from the water valve.
- Drain water from the water inlet line and water valve. (Use a pan to catch the water.)
- Reconnect the water inlet line to the water valve.
- Remove the plastic sump cover in the tub bottom and use a sponge to soak up water in the rubber boot.
Does Your Dishwasher Have an Air Gap? An air gap protects your dishwasher against water backing up into it if a drain clogs. The air gap is not a part of the dishwasher. It is not covered by your warranty. Not all plumbing codes require air gaps, so you may not have one. The air gap is easy to clean.
- Turn off the dishwasher and lift off the air gap cover.
- Remove the plastic cap under the cover and clean with a toothpick. 3 Replace the cap and cover when the air gap is clean.
Installation Instructions Built-In & Spacemaker® Dishwashers for GE GSD2100V65BB
Cabinet Preparation & Wire Routing
- The wiring may enter the opening from either side, rear or the floor within the shaded area illustrated above in figure and defined in PREPARE DISHWASHER ENCLOSURE section.
- Cut a 1-1/2" maximum diameter hole to admit the electrical cable. Edges of hole should be smooth and rounded. Permanent wiring connections may pass through the same hole as the drain hose and hot water line, if convenient. If cabinet wall is metal, the hole edge must be covered with a bushing.
Electrical Connection to Dishwasher
Electrical connection is on the right front of dishwasher.
- For permanent connections the cable must be routed as shown in figure. Cable must extend a minimum of 24" from the rear wall.
- For power cord connections, install a 3-prong grounding type receptacle in the sink cabinet rear wall, 6" min. or 18" maximum from the opening, 6" to 18" above the floor.
- Use only WXO9X70910 (5’ 5” long) or WX09X70911 (7’ 11” long) Dishwasher Power Cord Kit. Do not use an extension cord or adapter plug with this appliance
Water Line Connection
- If using a flexible braided supply hose, label the hose with the installation date to use as reference. Flexible braided hoses, elbows and gaskets should be replaced in 5 years.
- Turn off the water supply.
- Install a hand shut-off valve in an accessible location, such as under the sink. (Optional, but strongly recommended and may be required by local codes.) • Water connection is on the left side of the dishwasher. Install the hot water inlet line, using no less than 3/8” copper tubing or a flexible braided hose. Route the line as shown in PREPARE HOT WATER LINE section and extend forward at least 19” from rear wall.
- Adjust water heater for 120°F to 140°F temperature.
- Flush water line to clean out debris.
- The hot water supply line pressure must be 20-120 PSI.
Level Dishwasher
Dishwasher must be level for proper dish rack operation, wash performance and door operation. The dishwasher must be leveled left to right and front to back. This ensures the dish racks will not roll in or out on their own, circulation water will flow to the pump inlet, and the door will close without hitting the side of the tub.
- Remove the lower dish rack and place a level on the door and lower rack track
- Adjust the level of the dishwasher by individually turning the 4 legs on the bottom of the dishwasher as shown. Ensure all 4 legs are firmly in contact with the floor. • The dishwasher is properly leveled when the level indicator is centered left to right and front to back. Also, the dishwasher door should close without hitting the side of the tub.
- Replace the lower rack
Connect water supply
Connect water supply line to 90° elbow. If using a flexible braided hose connection:
- Attach nut to 90° elbow using an adjustable wrench.
If using a copper tubing connection:
- Slide compression nut, then ferrule over end of water line.
- Insert water line into 90° elbow.
- Slide ferrule agains