Loading ...
Loading ...
Loading ...

13
en
Use
Use
Note: The food is processed in different
ways depending on the application.
X “Preparation” see page 11
Recommended speeds
1-2 Use as whirl maker
1-2 Use as kebbe maker
3-4 Use as sausage filler
7 Use as a meat mincer or pasta
maker
r
z
Not suitable for use with this
accessory!
The following example describes use of
the base attachment as a meat mincer:
W Risk of injury!
– Do not reach into the feed chute with
your hands.
– Only use the pusher when adding more
food.
Caution!
– Do not process bones, gristle, sinews or
other solid components.
– Do not process frozen meat.
– Do not apply great force with the pusher.
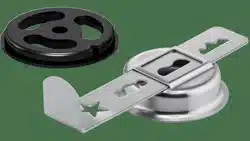
X Image sequence H
Important: Only prepare the base unit as
described in the main operating instructions.
1. Place the bevel gear on the main black
drive with the locking lever open as
shown.
Note: The bevel gear can also be fitted
rotated through 180° if you wish to work on
the left-hand side of the appliance.
2. Rotate the bevel gear in a clockwise
direction until it is securely fitted to the
main drive. Fully close the locking lever
to fix the bevel gear in position.
3. Position the prepared attachment on the
drive of the bevel gear, holding it at an
angle.
4. Turn the attachment anticlockwise until
you hear it click into position. The release
button must protrude from the bevel gear.
Caution!
– Check that the foot is at the right height.
– It should not be possible to turn the
attachment any further.
5. Attach the filling tray.
Caution!
Never use without the filling tray! The pusher
will otherwise block the worm gear and the
accessory damaged.
6. Prepare your food. Chop up large parts
beforehand so they fit into the feed chute
without having to press them in.
7. Plug the mains plug into the mains. Turn
the rotary switch to the recommended
setting.
8. Place a suitable container under the
attachment. Add the prepared food to the
filling tray.
9. Use the pusher to slide the food down
the feed chute, applying light pressure.
10. Once you have finished work, move the
rotary switch to y. Wait until the drive
comes to a standstill. Disconnect the
mains plug.
11. Remove the filling tray and pusher.
12. Hold down the release button and rotate
the attachment in a clockwise direction
until it disengages.
13. Remove the attachment and take apart.
14. Open the locking lever on the bevel gear.
Rotate the bevel gear in an anticlockwise
direction and remove.
Clean all parts directly after use.
X “Cleaning and maintenance” see
page 13
Cleaning and maintenance
The attachments and accessories used must
be thoroughly cleaned after each use.
Caution!
– Do not use any cleaning agents
containing alcohol or spirits.
– Do not use any sharp, pointed or metal
objects.
– Do not use abrasive cloths or cleaning
agents.
– Never clean the bevel gear under
running water or put in the dishwasher.
Loading ...
Loading ...
Loading ...