Loading ...
Loading ...
Loading ...
76
Before First Use
Remove your tower fan from its carton
and associated protective wrapping.
Ensure that all parts listed are
accounted for before discarding
the packaging.
Unwind the cord to its full length and
remove any promotional labels and
or packaging materials from the
tower fan.
Place the tower fan on a firm, level
surface in a stable position. Visually
inspect the air inlet and outlets to
ensure no foreign materials are
blocking these areas.
WARNING: When
unpacking the fan, check
to see you have all the
items listed in the parts
list, before discarding the
packaging.
NOTE: Assembly of the fan requires
a Phillips head screwdriver
(not supplied).
Assembling Your Arctic
Tower Fan
To assemble the base stand:
1. The tower fan base stand comes
in two separate pieces; piece (a)
and piece (b) that must be fixed
together before being fitted to the
fan body (see Fig.1).
Fig. 1
2. To assemble the base stand, first
carefully place the tower fan body
on its side. Holding base stand
piece (a), align the four locating
posts on piece (b) with the
corresponding slots found in base
stand piece (a) and firmly push
downwards until the base stand is
securely fixed together (see Fig. 2).
Fig. 2
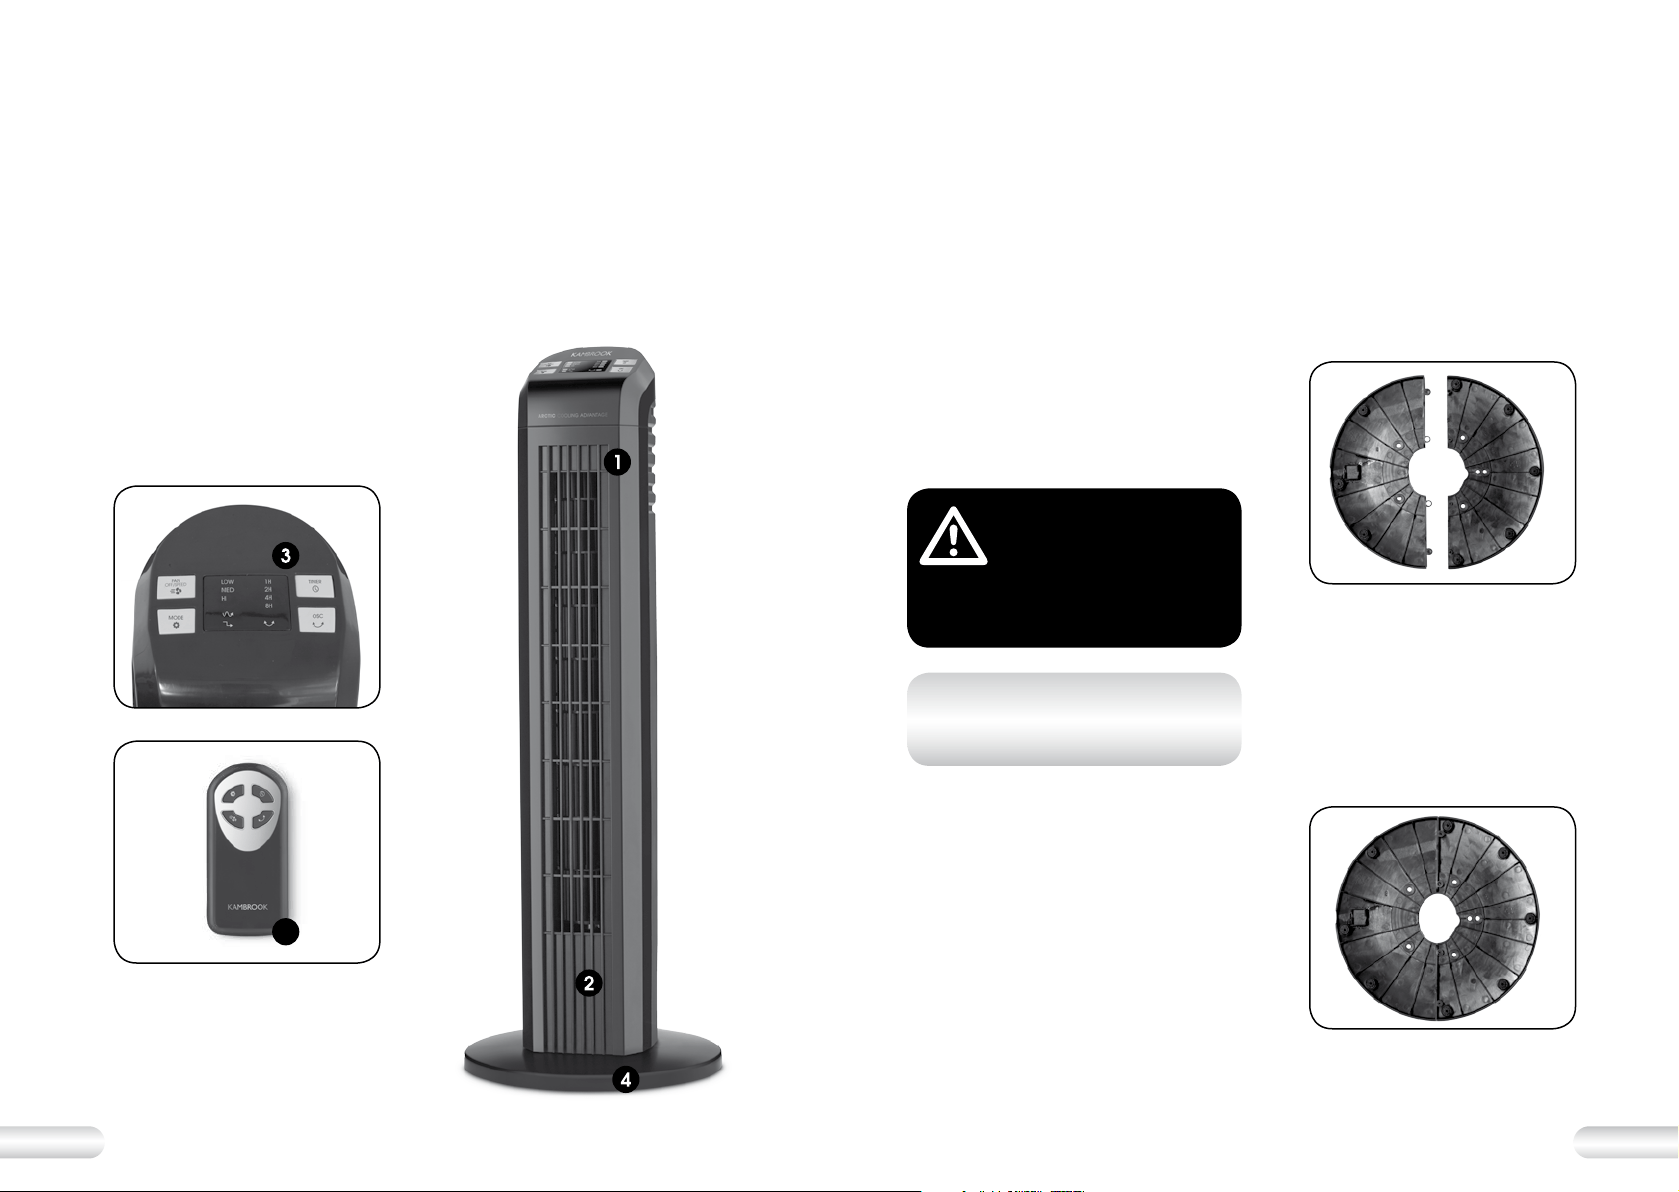
Your Kambrook Arctic Tower Fan
1. 77cm tower fan
2. Oscillating body to circulate air
throughout the room
3. Control panel featuring;
• FAN Off/Speed button
(Includes 3 speed settings;
low, medium and high)
• MODE button
(includes 2 cooling modes;
nature and reduction mode)
• TIMER button (Max. 8 hours)
• OSC button to set oscillation
4. Base stand (two fitted pieces)
5. Remote Control with soft touch
buttons
Not Shown
• Convenient carry handle for
easy portability
• 5 base stand fastening screws
Using Your Kambrook Arctic Tower Fan
(b)(a)
(b)(a)
5
Loading ...
Loading ...