Loading ...
Loading ...
Loading ...
12 13 14 15
16
17
19
18
20
21
22
30 31 32
23
24
25
26
27
28
29
3334
PHANTOM
0 1 HA L L 1
0 2 HA L L 2
0 3 R OO M 1
0 4 R OO M 2
0 5 R E VE R B +D E L AY
0 6 1 2 5 M S D E L AY
0 7 1 7 5 M S D E L AY
0 8 2 2 5 M S DEL AY
1 0 5 6 0 M S DEL AY
0 9 2 8 5 M S DEL AY
1 1 8 6 0 M S DE LAY
1 2 1 0 0 0 M S DE LAY
1 4 8 0 0 M S PI N GP O N G DE L AY
1 3 1 4 0 0 M S DE L AY
1 5 1 0 0 0 M S PI N GP O N G DE L AY
1 6 1 4 0 0 M S PI N GP O N G DE L AY
F X
REC
REP/
MODE
35
36
37 38
4039 41 42
4039
www.PyleUSA.com www.PyleUSA.com
11 12
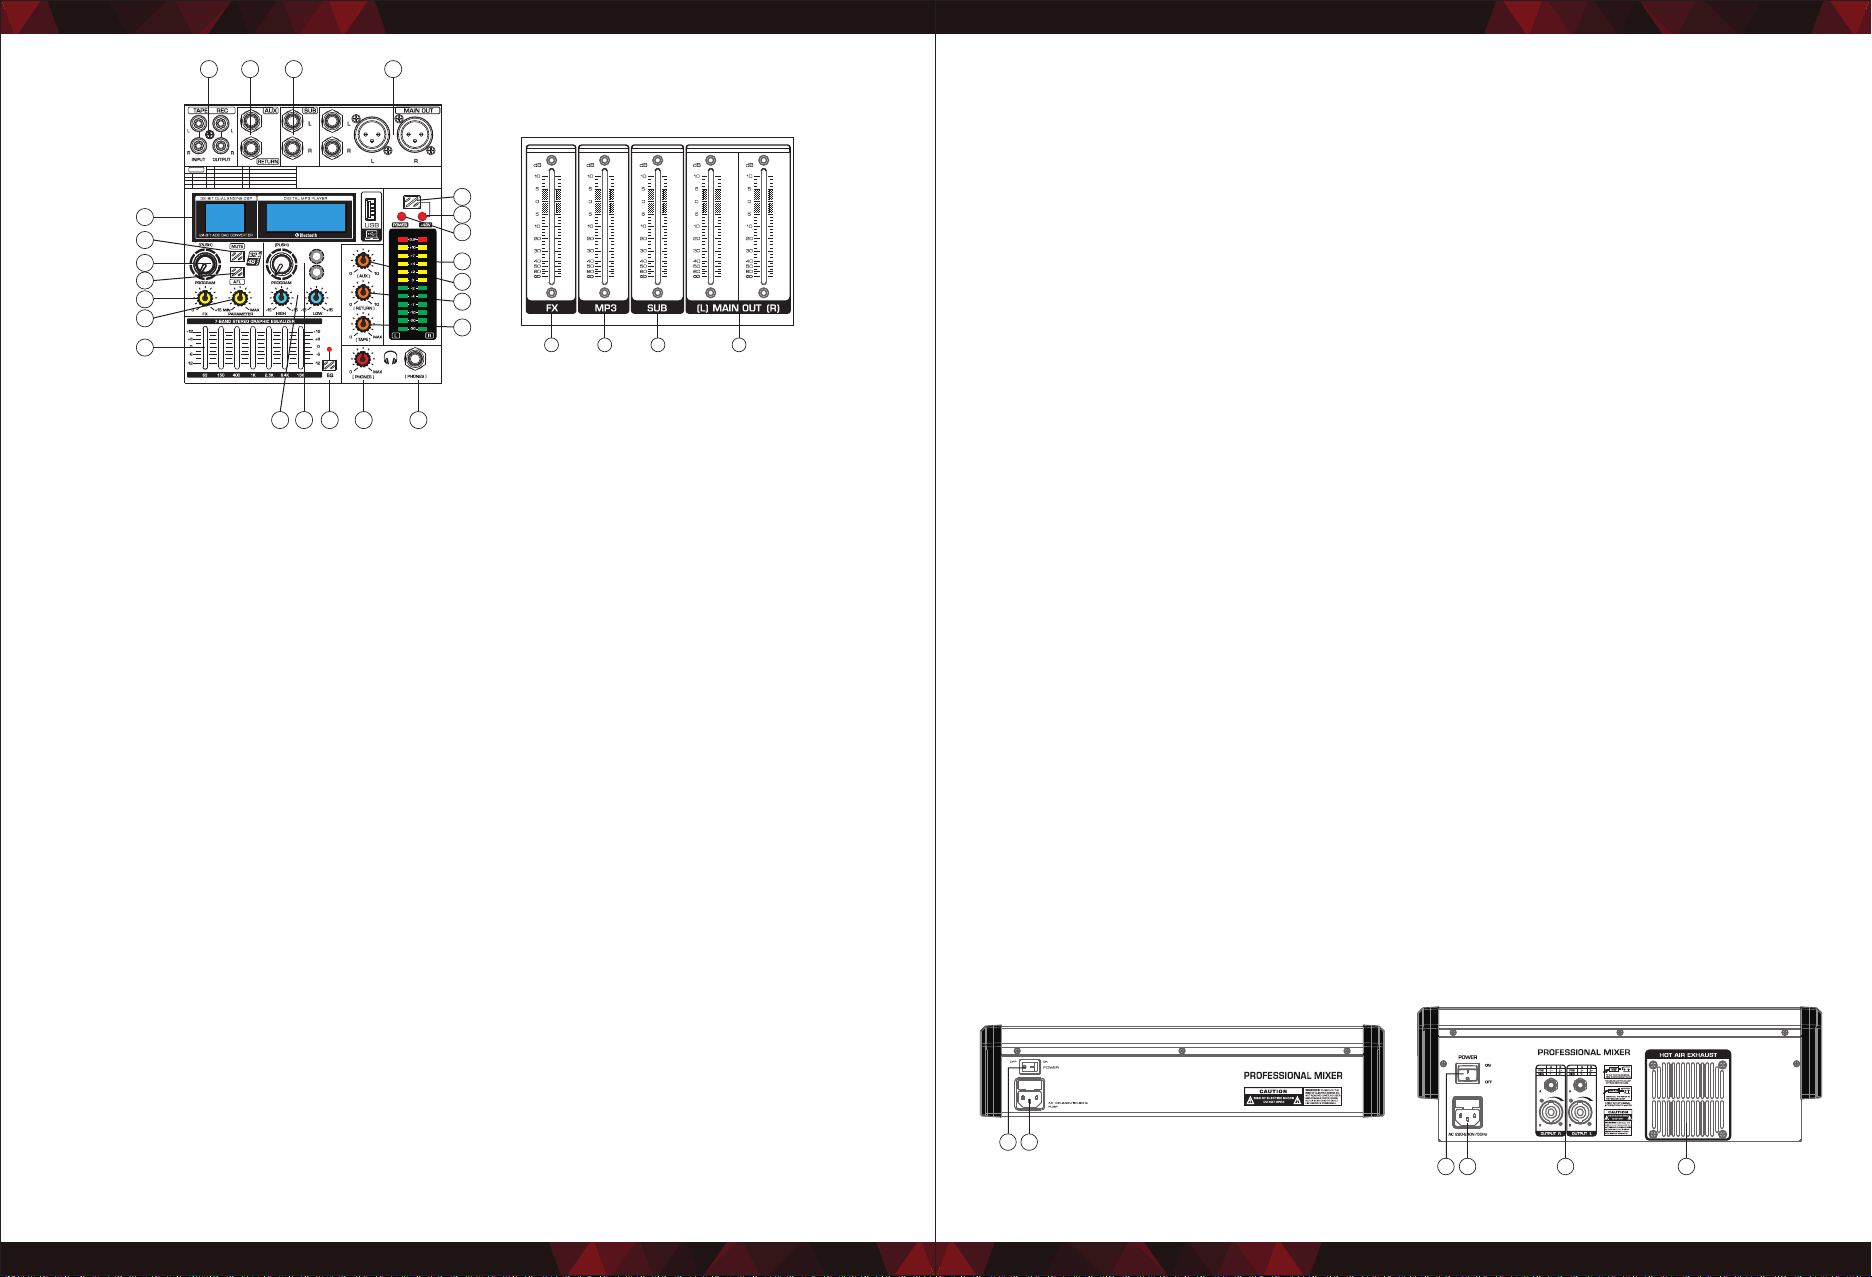
19. AFL SWITCH
The AFL switch is used to route the channel signal to AFL bus (post-fader listen), it
allows you to listen to a channel signal that is aected by the main output signal.
The signal you hear is taken after PAN control.
20. FX Control Used to adjust size eect.
21. PARAMETER Control
Used to adjust the depth of the selected eect, speed, etc.
22. ST GRAPHIC EQUALIZER
This 7-band equalizer adjusts the sound of the signal sent to the MAIN OUT jacks.
23. + 48 V PHANTOM Power
This switch toggles phantom power ON and OFF. When the switch is turned ON,
the mixer supplies +48V phantom power to all channels that have XLR mic input
jacks. Turn this switch ON when using one or more phantom-powered condenser
microphones.
24. +48 V Indicator: This indicator lights up when the +48V is turned ON.
25. POWER Indicator: This indicator lights up when the mixer is turned ON.
26. Level Meter: Shows the signals level
27. AUX Control: Used to adjust the output to the AUX pin signal level.
28. RETURNS Control: Adjusts the level at which the signal received at the RETURN
jacks (L (MONO) and R) is sent to the STEREO L/R bus.
29. TAPE Control: Used to adjust the output to the TAPE pin signal level.
30. EQ IN SWITCH: Use this switch to activate the graphic equalizer.
31. PHONES Control: Controls the level of the signal output to the PHONES jack OUT
jacks.
32. PHONES Jacks: Connect a pair of headphones to this TRS phone-type output
jack.
33. MP3 Control
a. Selected Songs / Play / Pause: When playing music, rotate to change up /
down the song, press to pause / play.
b. Recording: When playing music, long press to record, short press to nish
recording and enter to playback the recorded music. When playing the
recorded music, short press to switch into playing the USB music rst track.
When playing the USB music, short press to switch into playing the recorded
music rst track
c. Mode/Repeat: Short press to switch into USB model or BLUETOOTH, long
press to repeat the current song. While playing the current song, long press to
return to normal play.
34. MP3 player EQ: Adjust the MP3 Player two-band equalizer level.
35. FX SEND Fader: Control eect input signal level.
36. MP3 VOL Fader: To increase or decrease the MP3 VOL.
37. SUB Fader: Adjust the SUB output level.
38. MAIN MIX Fader: High-precision quality faders to control the output
level of the main mix.
39. POWER Switch
Use the POWER switch to turn ON the mixing console. The POWER switch should
always be in the "OFF" position when you are about to connect your unit to the
mains. To disconnect the unit from the mains, pull out the main cord plug. When
installing the product, ensure that the plug is easily accessible.
40. FUSE HOLDER / IEC MAINS RECEPTACLE
The console is connected to the mains via the supplied cable, which meets the
required safety standards. Blown fuses must only be replaced by the same type
and rating. The mains connection is made via cable with IEC mains connector.
The appropriate mains cable is supplied with the equipment.
41. AMPLIFIER OUTPUT: Connect with two 4ohm speakers.
42. COOLING FAN: Cools the amplier to avoid overheat.
Loading ...
Loading ...