
Loading ...
Loading ...
Loading ...
TO ATTACH THE FENCE
See Figure 6.
• Position the fence on the tame as shown in figure 6.
• Align the ho(es on the bottom of the fence with the
channe(s on the router tame.
• Using the two carriage bolts and fence lock knobs,
secure the fence to the tame.
BLACK
KNOB
FENCE
LOCK
KNOBS
BLACK.CUTTERKNOBTO GUARD
LOOSEN
GUARD ,_1_T
POST TO
IGHTEN
FENCE
FENCE
i
CARRIAGE
BOLT
Fig. 6
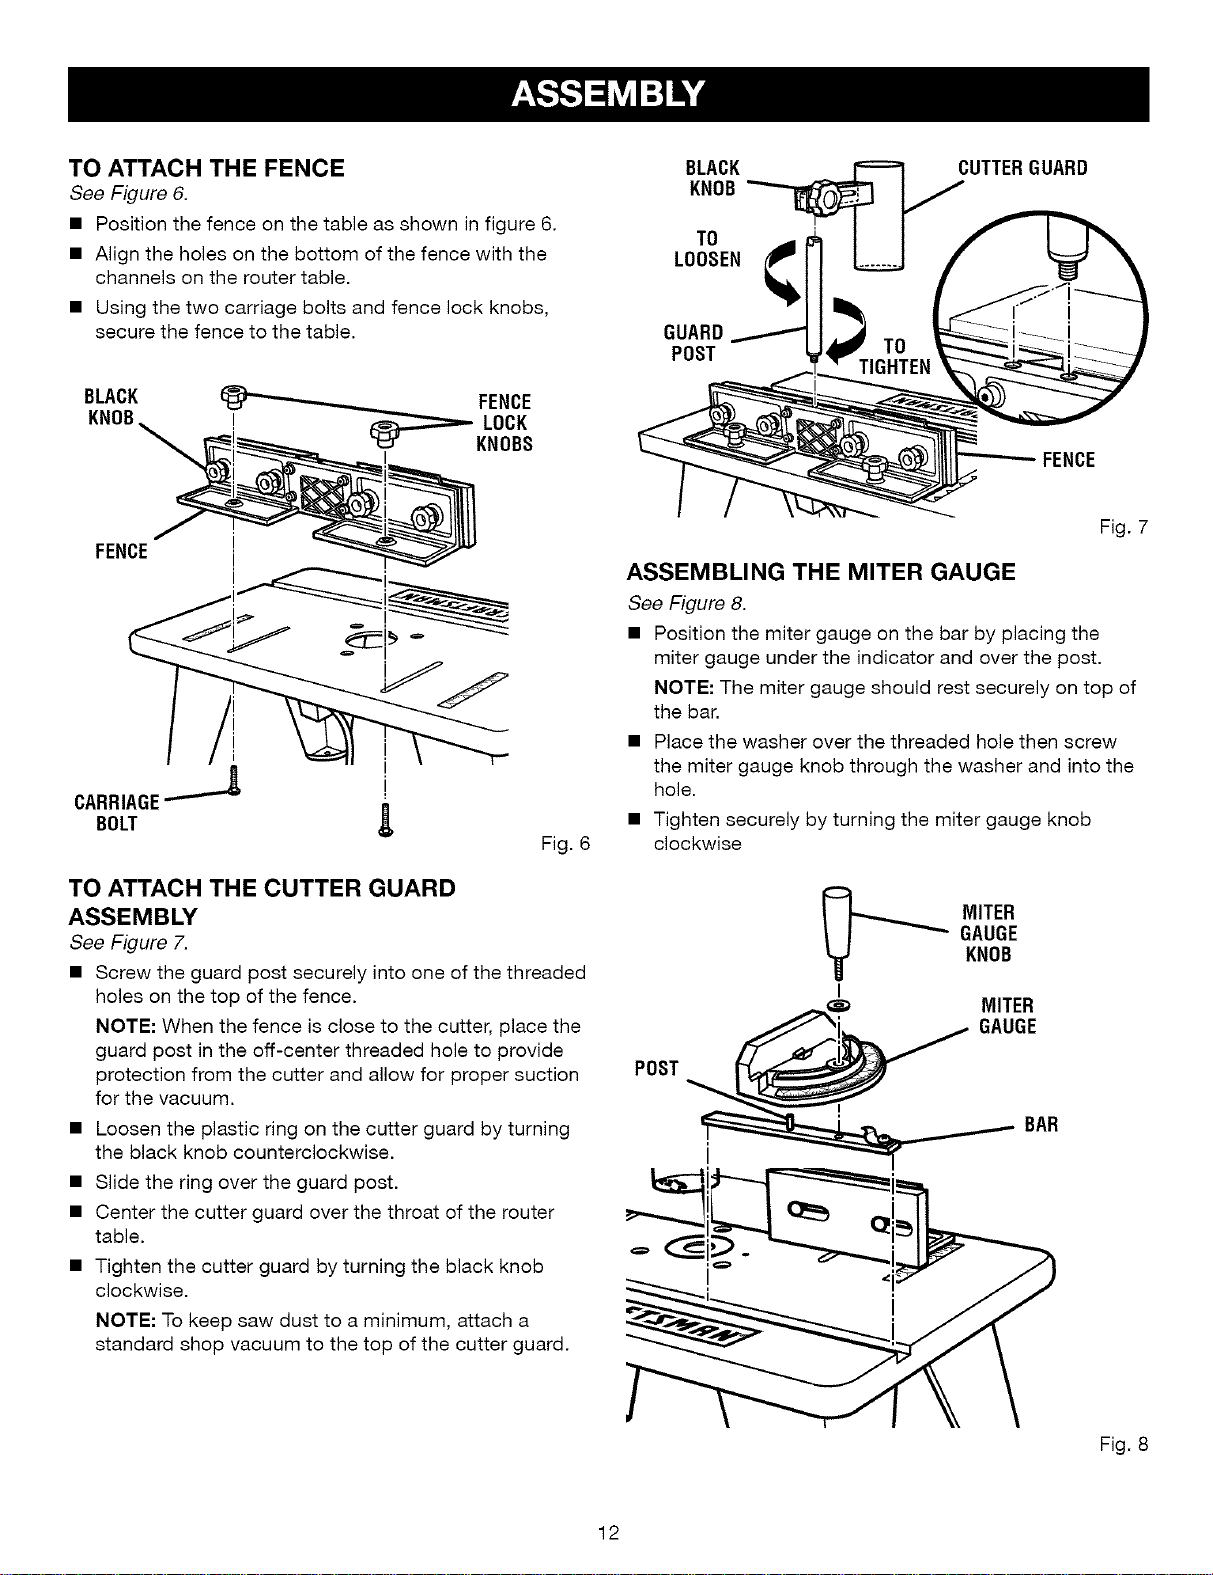
TO ATTACH THE CUTTER GUARD
ASSEMBLY
See Figure 7.
• Screw the guard post securely into one of the threaded
holes on the top of the fence.
NOTE: When the fence is close to the cutter, place the
guard post in the off-center threaded hole to provide
protection from the cutter and allow for proper suction
for the vacuum.
• Loosen the plastic ring on the cutter guard by turning
the black knob counterclockwise.
• Slide the ring over the guard post.
• Center the cutter guard over the throat of the router
table.
• Tighten the cutter guard by turning the black knob
clockwise.
NOTE: To keep saw dust to a minimum, attach a
standard shop vacuum to the top of the cutter guard.
Fig. 7
ASSEMBLING THE MITER GAUGE
See Figure 8.
• Position the miter gauge on the bar by placing the
miter gauge under the indicator and over the post.
NOTE: The miter gauge should rest securely on top of
the bar.
• Place the washer over the threaded hole then screw
the miter gauge knob through the washer and into the
hole.
• Tighten securely by turning the miter gauge knob
clockwise
MITER
GAUGE
KNOB
I
MITER
/ GAUGE
POST_BAR
Fig. 8
12
Loading ...
Loading ...
Loading ...