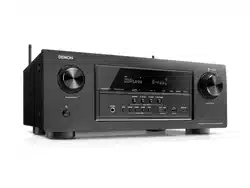
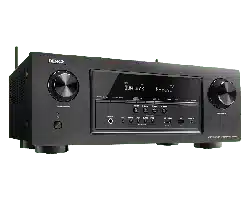
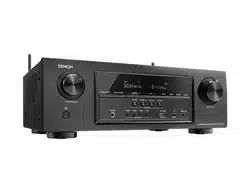
User Manual for Denon AVR-3312CI
Table of Contents
- Read before use
- Accessories
- About this manual
- Cautions on handling
- Preparing the Setup Wizard
- SETUP WIZARD
- Playback (Basic operation)
- Important information
- Selecting the input source
- Adjusting the master volume
- Turning off the sound temporarily
Getting Started
1. Insert the main unit power plug into the wall socket.
2. Press ZONE SELECT to switch the zone mode to J (MAIN ZONE).
• This remote control can be operated in three separate zones, MAIN ZONE, ZONE2 and ZONE3.
• Set the remote control to MAIN ZONE to operate the Setup Wizard.
3. Press AMP to set the remote control unit to AMPoperation mode.
• This remote control is a preset remote control that can be used to control connected devices.
4. Press ON ( Z ) to the this unit. The power switches on, and the Setup Wizard start screen is displayed on the television screen.
5. Press ENTER. Start the Setup Wizard.
To start the Setup Wizard again after exiting it, select “SETUP WIZARD” in the menu (vm page 85 “Menu map”).
When power is switched to standby
Press STANDBY (X). GPower indicator status in standby modeH
• Normal standby : Off
• When “HDMI Control” – “Control” (vm page 109) is set to “ON” : Red
NOTE During power standby, a minimal amount of power is consumed. To totally cut off the power, remove the power cord from the power outlet.
Connecting the speakers
The speakers are connected in “2. Speaker Connection” of the Setup Wizard but if you did not use or cancelled the Setup Wizard, connect the speakers as shown below. For details, see the included CD-ROM (Owner’s manual).
Connect
Carefully check the left (L) and right (R) channels and + (red) and – (black) polarities on the speakers being connected to the this unit, and be sure to interconnect the channels and polarities correctly.
Connecting the speaker cables
Peel off about 0.03 ft/10 mm of sheathing from the tip of the speaker cable, then either twist the core wire tightly or terminate it.
NOTE
• Connect so that the speaker cable core wires do not protrude from the speaker terminal. The protection circuit may be activated if the core wires touch the rear panel or if the + and – sides touch each other (vm page 144 “Protection Circuit”).
• Never touch the speaker terminals while the power supply is connected. Doing so could result in electric shock. (When the Setup Wizard is running, follow the instructions in the Setup Wizard screen for making connections.)
Playback (Basic operation)
Important information
Before starting playback, make the connections between the different devices and the settings on the unit.
NOTE Also refer to the operating instructions of the connected devices when playing them.
Selecting the input source
Press the input source select button (BD, SAT/CBL, TV, NET/USB, DVD, V.AUX, DOCK, TUNER, GAME1, GAME2, DVR, CD or PHONO) to be played back. The desired input source can be selected directly.
You can also use the following operation to select an input source.
Using the knob on the main unit
Turn SOURCE SELECT.
• Turning SOURCE SELECT switches the input source, as shown below.
• When iPod 1 on the main unit is pressed, the input source of this unit is switched to “DOCK” or “NET/USB” and the connected iPod is automatically played (vm page 34 “iPod play function”).
Using the “SOURCE SELECT” menu
Switch the remote control unit to the J (MAIN ZONE) mode when performing this operation (vm page 121 “Operating AV device”). If the remote control unit is in K (ZONE2) or L (ZONE3) mode, the “SOURCE SELECT” menu will not be displayed when SOURCE SELECT is pressed.
1 Press SOURCE SELECT. Display the “SOURCE SELECT” menu.
2 Use to select the input source, then press ENTER. The input source is set and the source selection menu is turned off.
Note
• When using with an iPod connected directly to the USB port of this unit, select “ (USB/iPod)” for the input source.
• Input sources that are not going to be used can be set ahead of time. Make this setting at “Source Delete” (vm page 116).
• To turn off the source selection menu without selecting an input source, press SOURCE SELECT again.
• When SOURCE SELECT is pressed, the AMP-operation mode starts automatically (vm page 121).
Adjusting the master volume
Use Mdf to adjust the volume.
When the “Volume Display” setting (vm page 116) is “Relative” GAdjustable rangeH – – – –80.5dB – 18.0dB
When the “Volume Display” setting (vm page 116) is “Absolute” GAdjustable rangeH 0.0 – 99.0
• The variable range differs according to the input signal and channel level setting.
Note : You can also operate via the main unit. In this case, perform the following operations. Turn MASTER VOLUME to adjust the volume.
Turning off the sound temporarily
Press .
• The power indicator flashes green.
• “MUTE” indicator on the display lights.
• appears on a TV screen.
Note
• The sound is reduced to the level set at “Mute Level” (vm page 116).
• To cancel, press N again. Muting can also be canceled by adjusting the master volume.