
Loading ...
Loading ...
Loading ...
MOTOR ROTATION INSTRUCTIONS
Getting Started
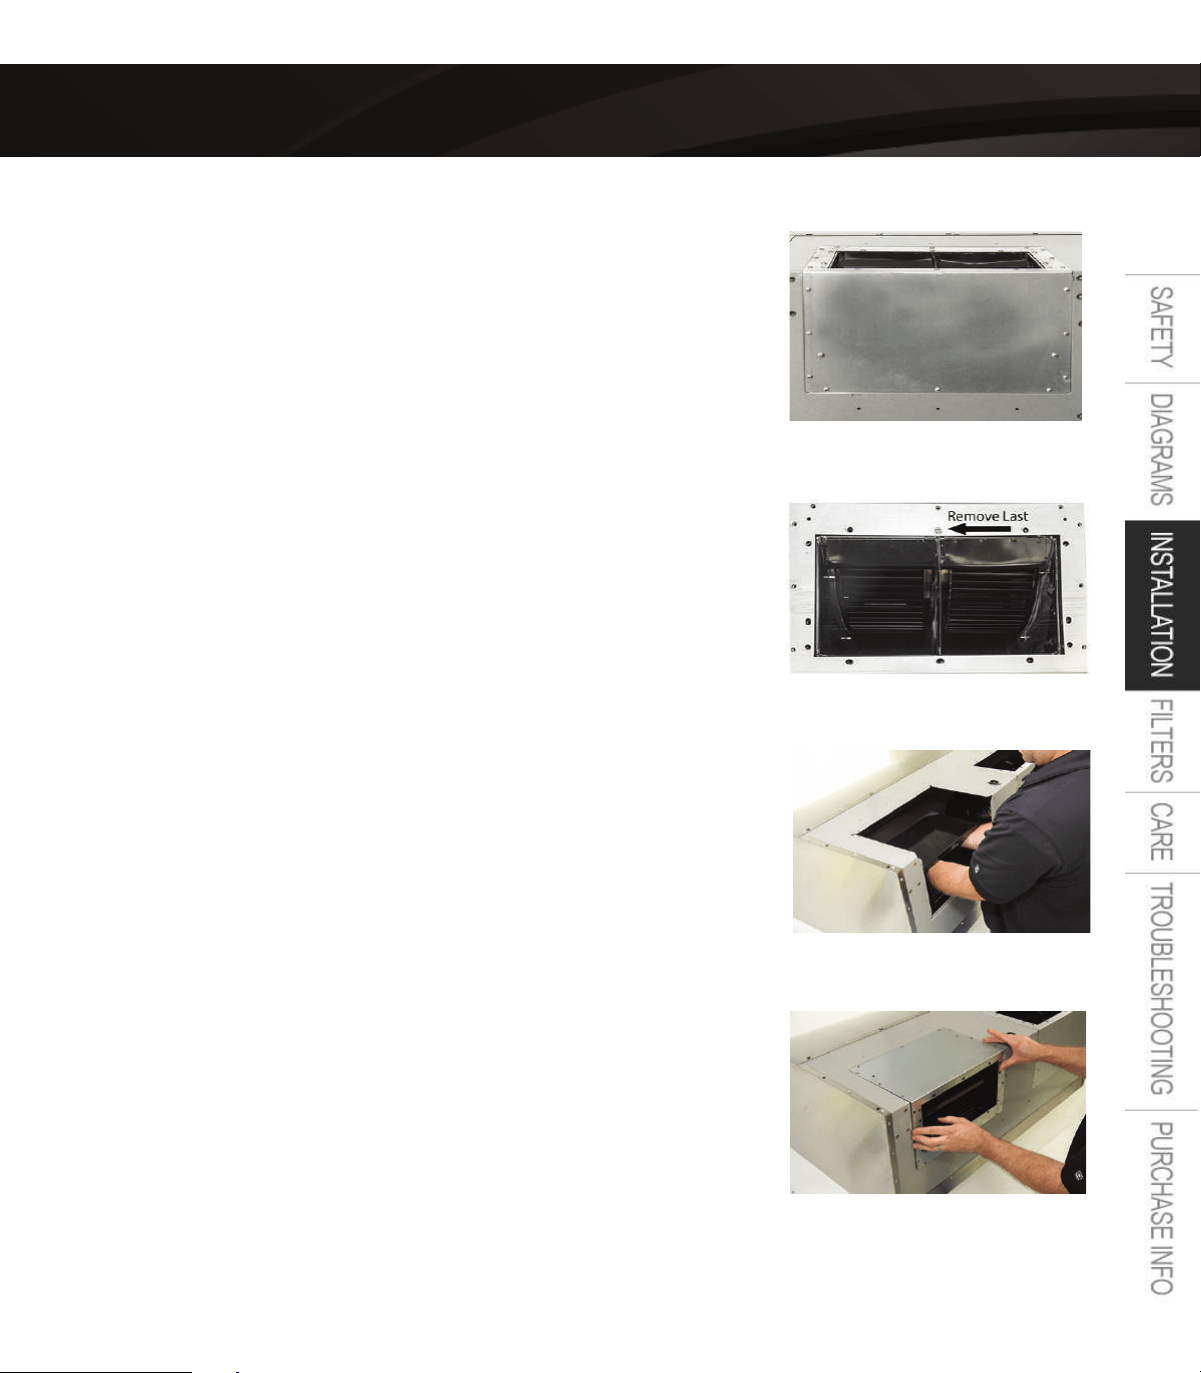
The image to the right shows the position of the motors directly from the
factory.
This position of the motor is used when running vertical pipe
for your venting.
STEP 1 REMOVE COVER PLATE
There are two sets of screws you will be
working with on the cover plate.
The smaller screws closest to the edges of the plate hold the plate to the
hood itself. The larger screws closer to the center hold the motor to the
cover plate. Remove all of the smaller screws holding the cover plate to
the hood body.
STEP 2
Next, remove all of the larger screws,which hold the motor to the cover
plate leaving the center screw . The center screw to be left in place can
be seen in the below image.
REMOVE MOTOR SCREWS
STEP 3 DETACH MOTOR FROM PLATE
Holding the center of the motor, remove the nal screw, which will free
the motor from the cover plate. Lower the motor gently until it comes to
resting position.
STEP 4 ROTATE MOTOR
At this point, the cover piece can be removed and you are ready to rotate
the motor to the horizontal discharge position. When lifting the motor out
of the housing, tilting the motor down on one side is typically the best
method for getting the motor out of the opening.
Once out of the hood, simply rotate 180 degrees and place the motor back
into the hood. For both the removal and reinstallation of the Motor, be
careful not to pinch the wiring. Allow it to rest at the initial position when
you started.
STEP 5 REPLACE THE COVER PLATE
Next, re‐install the cover plate with the discharge in the horizontal
position. The cover plate can be reattached with the small screws.
STEP 6 ATTACH THE MOTOR
Re attach the motor to the cover plate. Start with the center screw
which was the last screw removed when the motor was disattached.
Once the initial screw is in place, attach the remaining screws to
hold the motor onto the cover plate.
STEP 7 SECURE LOOSE CABLES
You will nd some of the connecting cables now lying below the motor. Secure wires above motor and the
rotation process is complete. Repeat same process for additional motor.
USER MANUAL |
10
Loading ...
Loading ...
Loading ...