
Loading ...
Loading ...
Loading ...
PREPARATION
Plan where the ductwork will be located. Install proper-sized ductwork, and roof or wall cap, depending on where
you will be venting your hood. Adjust your measurements to accommodate heights of ceilings, cabinets, or range-tops.
Remember to plug in and test the hood prior to installation. When planning for the installation of the vent hood -
please include an opportunity to access the top of the hood when the installation i s complete. This i s necessary for
service or replacing parts over time as there are several fasteners that will need to be accessed over time.
Electrical Requirements - Hood comes with
foot
cord, and will plug into the top of the hood and then into an
GFI protected outlet that should be wired to a AMP breaker.
STEP1
wall hood installation
3-
10
110V
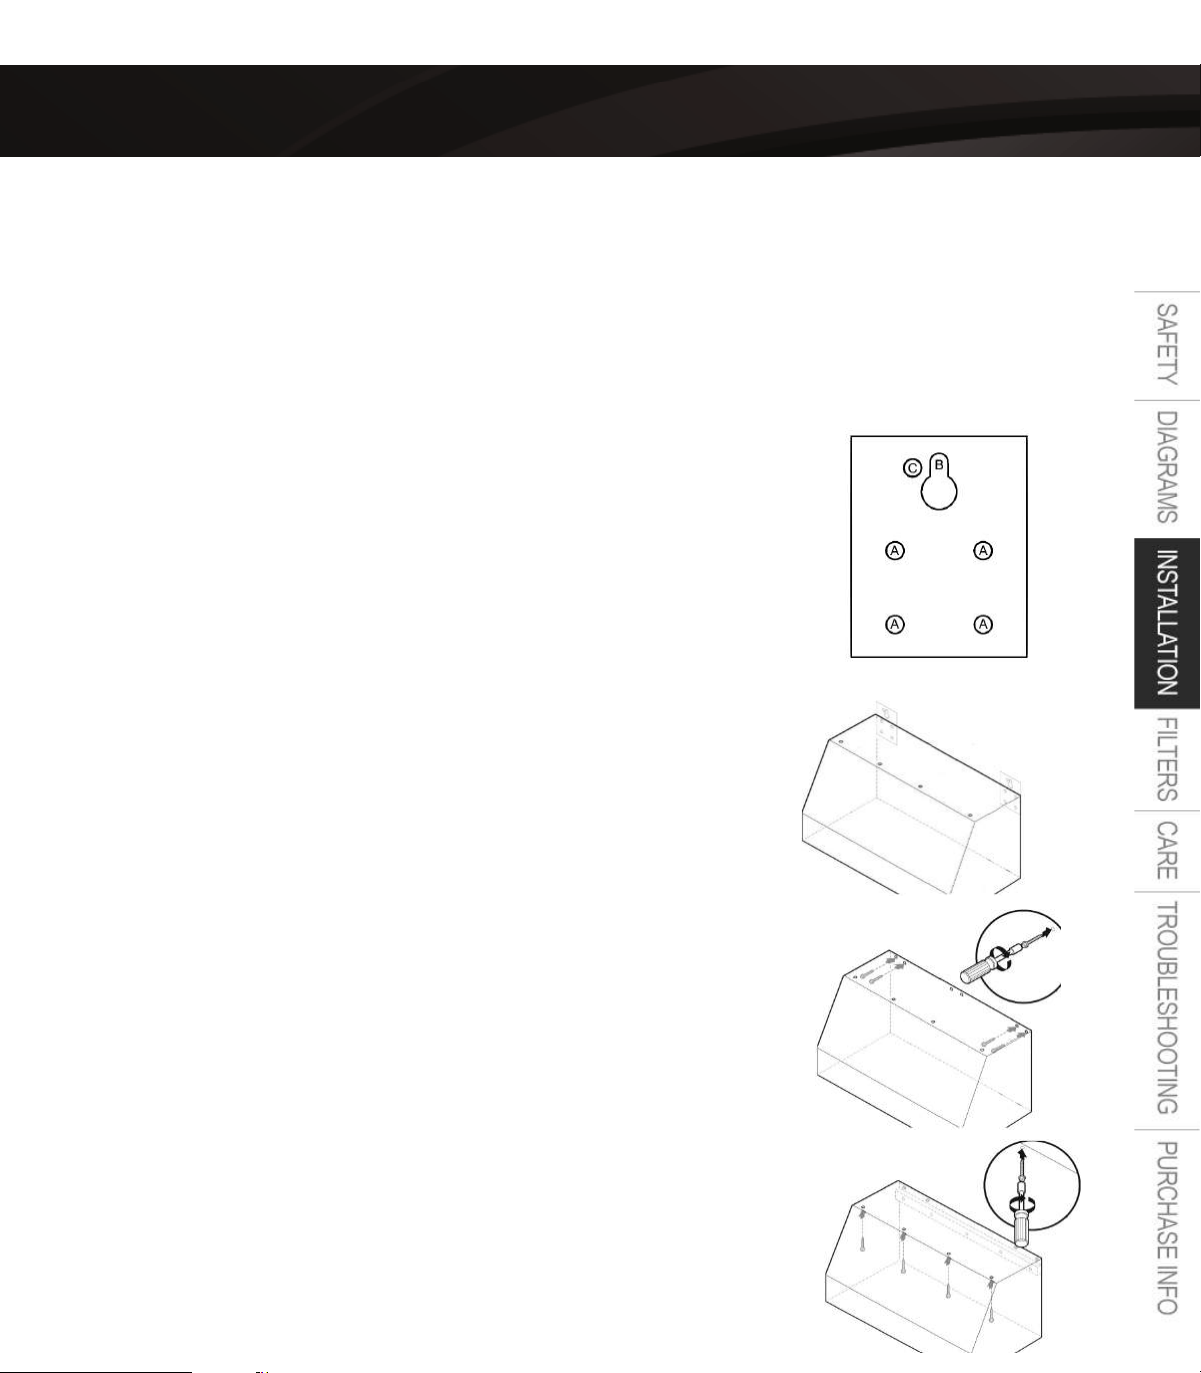
Secure hood to wall using appropriate screws and parts.
Different wall material situation using different method.
Wooden wall without studs:
Using three mounting bracket (pictured) to help secure the
hood to the wall.
1. Using 8pcs of flat screws #1 through hole “A” to secure the
3pcs of mounting brackets on the back of the hood.
2. Using 2pcs of mounting screws #3 through top of the hole
“B” to secure the hood on the wall.
3. Using 2pcs f mounting screws #2 through hole “C” into the
Wall to make double secure.
Dry wall or sheet rock wall:
1. Using 8pcs of flat screws #1 through hole “A” to secure the 3pcs
of mounting brackets on the back of the hood.
2. Beat 2pcs of wall anchors #3 (make sure the inside screws are
taking out) into the wall first, screw the wall anchor’s screw
into the wall anchors (leave a space to hang the mounting bracket).
3. Hang the hood on the wall, then tighten the screws #3 into the wall
anchors.
Install the range hood on the wall studs:
Using 4pcs of mounting screws #2 directly to the wall studs.
-OPTIONAL-
If not using a duct cover, using #4 of shorter mounting screws,
make sure top mounting screws are secured into soffit or cabinet
framing use additional mounting screws, if necessary.
USER MANUAL |
8
Loading ...
Loading ...
Loading ...