Loading ...
Loading ...
Loading ...
9
ENGLISH
To turn the appliance on, squeeze the lock-off button
2
and then the On/Off trigger
1
. Once the unit is running,
you may release the lock off button. To turn the appliance
off, release the On/Off trigger.
Speed Control Switch (Fig. A)
This string trimmer gives you the choice to operate at a
more efficient speed to extend the runtime for larger jobs, or
accelerate the trimmer speed for high-performancecutting.
To extend runtime, pull the speed control switch back
toward the battery housing
12
into the "LO" position. This
mode is best for larger projects that require more time
tocomplete.
To accelerate the trimmer, push the speed control
switch
3
forward toward the auxillary handle
5
into the
"HI" position. This mode is best to cut through heavier
growth and for applications that need higherRPM.
NOTE: When in "HI" mode, runtime will be decreased as
compared to when trimmer is in "LO"mode.
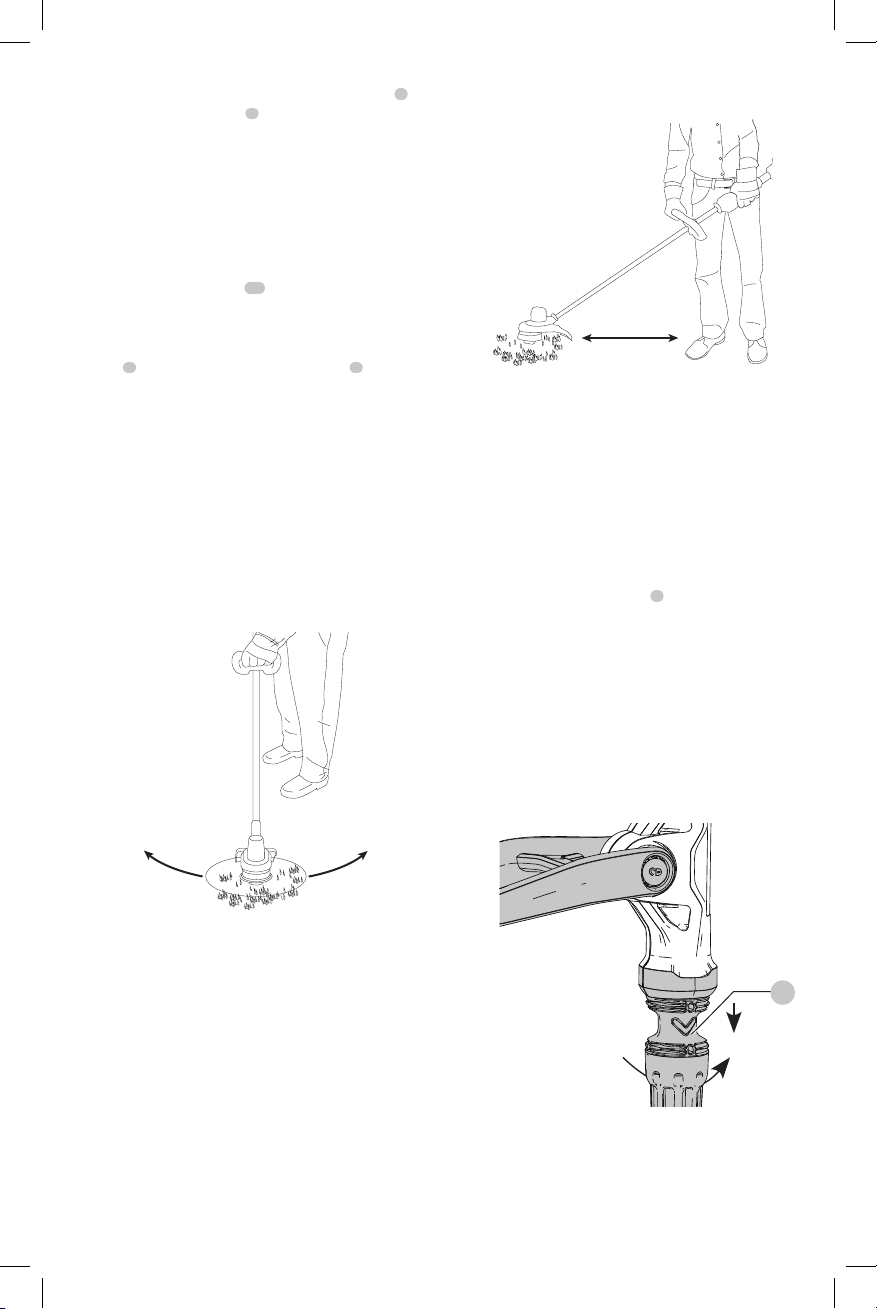
Trimming (Fig. H, I)
With the trimmer on, angle it and swing side to side as
shown in FigureH.
Maintain a cutting angle of 5° to 10° as shown in Figure I. Do
not exceed 10°. Cut with the tip of the line.
Maintain a minimum distance of 24" (610 mm) between the
guard and your feet as shown in FigureI.
Fig.H
Fig.I
Minimum
24" (610 mm)
Convert to Edging Mode (Fig. J)
CAUTION: The wire edge guide should only
be used when in the edging mode.
The trimmer can be used in trimming mode or edging
mode to trim overhanging grass along lawn edges and
flower beds. To convert the trimmer to edging mode:
1. Remove the battery from the trimmer.
2. Grasp the turn-to-edge collar
7
and pull down as
shown in Figure J.
3. Rotate the turn-to-edge collar 180° counterclockwise as
shown in Figure J., until the handle snaps back into the
upper half of the trimmer.
4. To return to trimming position, pull the turn-to-edge
collar up and rotate the head clockwise back to its
original position.
NOTE: You will experience faster than normal cutting line
wear if the trimmer line is positioned directly over the
sidewalk or abrasive surface.
Fig.J
7
Edging Mode Operation (Fig. A, H)
WARNING: When being used as an
edger, stones, pieces of metal and other objects can be
Loading ...
Loading ...
Loading ...