Loading ...
Loading ...
Loading ...
page 4
4. Installation of Wall Bracket. (cont.)
wall
bracket
wall
bracket
fan assembly
slots
set screw
5. Installation of Fan.
stud
1/4"
(6.5mm)
mounting
hole
pilot holes
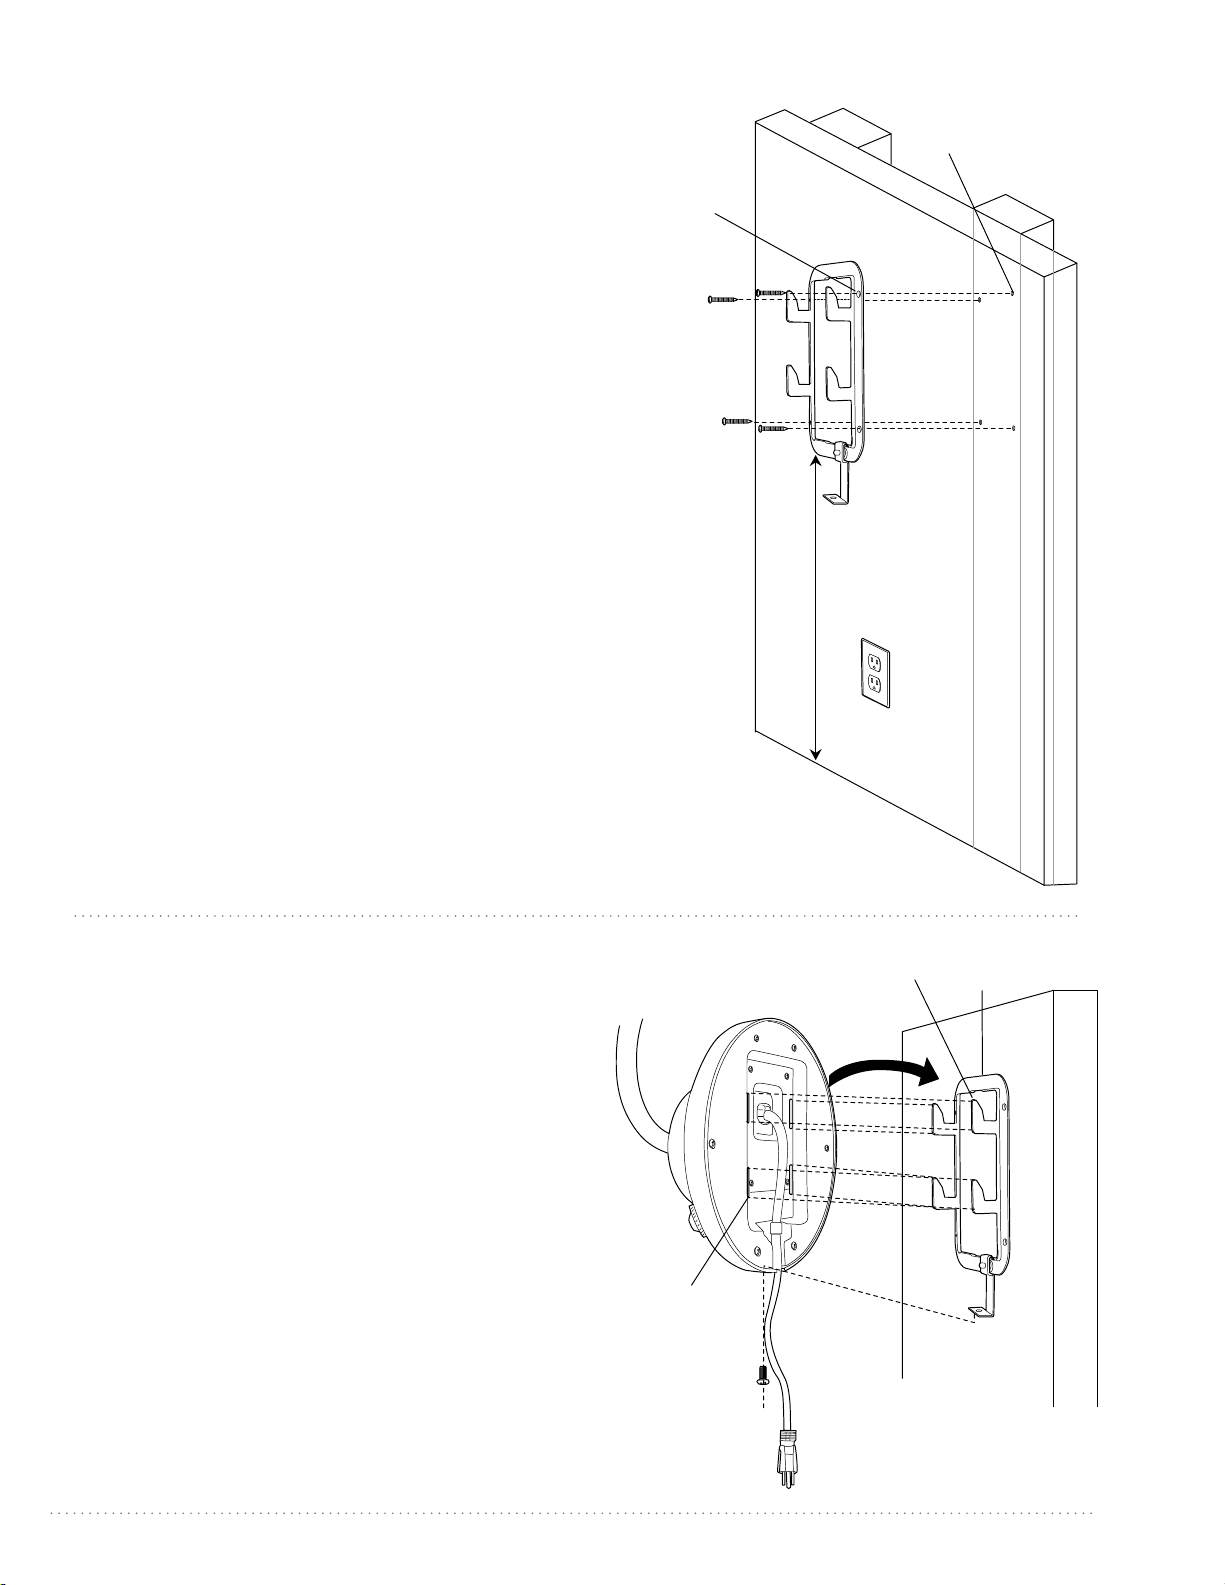
7 feet
(2.13m)
First determine the approximate position of
where you want the fan to be located on the
wall. [Remember that the fan must be mounted
at least 7 feet (2.13m) from the floor.] Then,
locate the stud in the wall.
You MUST use ALL FOUR holes in wall bracket
when installing wall bracket. Position wall
bracket on wood stud or wood post and mark 4
hole locations.
Drill 4 pilot holes over holes marked into wood
stud or wood post. Position wall bracket over
pilot holes and install a wood screw (provided
in hardware pack) into each hole.
ALTERNATE CONCRETE WALL INSTALLATION:
Use all 4 mounting 1/4" (6.5mm) holes when
installing wall bracket on a concrete wall. The
3/16 in. (5mm) concrete wall anchors necessary
for this type of installation are NOT provided and
must be purchased separately. Make sure that
concrete wall anchors can support a total of
80 lbs.
WARNING: It is very important that you use the
proper hardware when installing the wall
bracket as this will support the fan.
Tip: Seek the help of another person to hold
the stepladder in place and to help lift the fan
up to you once you are set on the ladder.
Remove set screw at bottom of fan assembly.
With the wall bracket secured to the wall and
able to support the fan, you are now ready to
hang the fan.
Grab the fan firmly with two hands. Align the 4
slots in the middle of the back of the fan
assembly with the 4 hooks on the wall bracket
and then pull down firmly on fan assembly.
WARNING: Make sure that all 4 hooks on the
wall bracket have engaged completely with
the 4 slots in the fan assembly and that the fan
assembly is stable.
Replace set screw at bottom of wall
bracket--be sure to securely tighten set screw.
wood screws
wood screws
hooks
Loading ...
Loading ...
Loading ...