Loading ...
Loading ...
Loading ...
MAKING FINE ADJUSTMENTS
See Figure 5.
Make a test cut in a scrap piece of wood. Fit the correct
size biscuit into the biscuit slot. The biscuit slot should
be deep enough to allow slightly more than one-half of
the biscuit into the slot. This extra room allows for proper
alignment of the wood being joined.
If the biscuit slot is too deep or too shallow, fine adjust-
ments to the depth setting can be made by loosening the
knurled adjustment knob and making fine adjustments
with the jam nut.
• Unplug the tool.
• Loosen the knurled adjustment knob. This knob is used
as a lock nut only. Loosen by twisting it in the opposite
direction away from the jam nut.
• Rotate the jam nut to the right for a more shallow cut,
or to the left for a deeper cut.
• Once desired depth of cut is reached, hold the jam nut
so that it will not move out of adjustment. Next, tighten
the knurled adjustment knob against jam nut.
• Recheck the depth setting by making a test cut in a
scrap piece of wood. Also periodically check the depth
setting for accuracy. Rotating the jam nut to the right
will cut shallow biscuit slots. Rotating the jam nut to
the left will cut deeper biscuit slots.
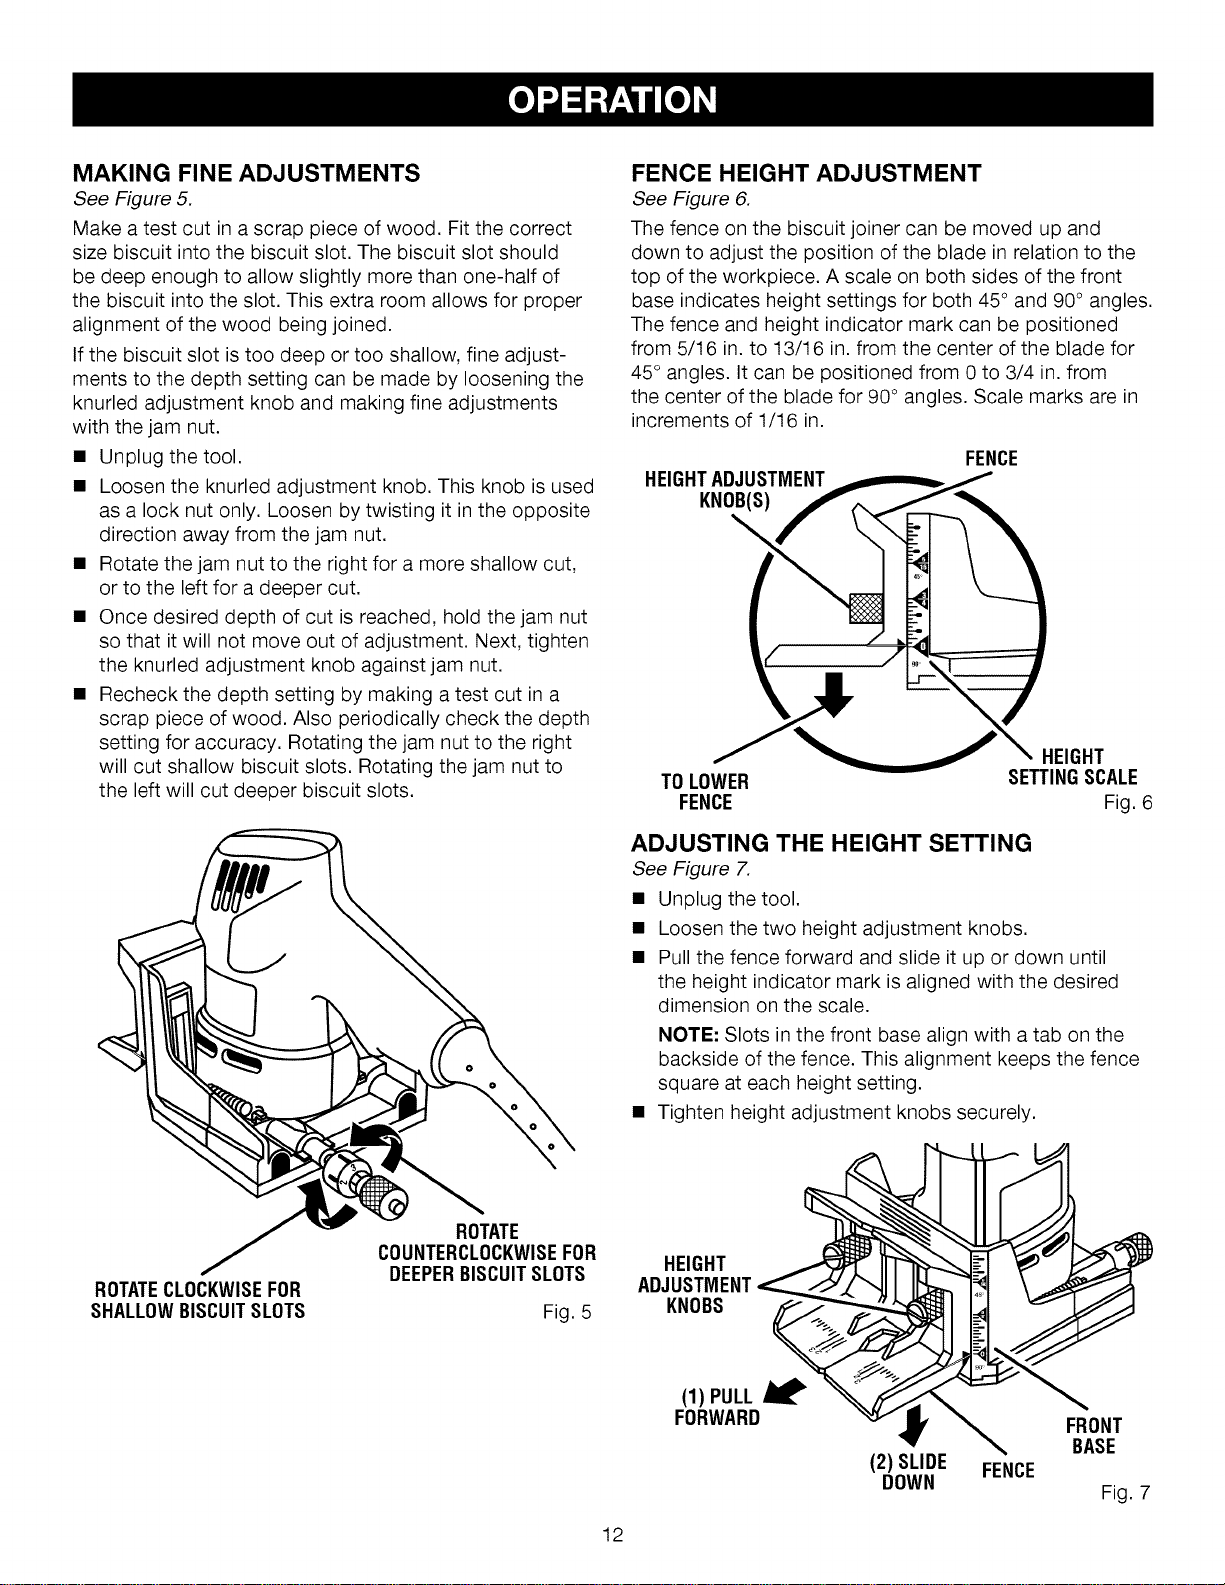
FENCE HEIGHT ADJUSTMENT
See Figure 6.
The fence on the biscuit joiner can be moved up and
down to adjust the position of the blade in relation to the
top of the workpiece. A scale on both sides of the front
base indicates height settings for both 45 ° and 90° angles.
The fence and height indicator mark can be positioned
from 5/16 in. to 13/16 in. from the center of the blade for
45° angles. It can be positioned from 0 to 3/4 in. from
the center of the blade for 90 ° angles. Scale marks are in
increments of t/16 in.
FENCE
HEIGHTADJUSTMENT
KNOB(S)_'_
HEIGHT
TOLOWER SETTINGSCALE
FENCE Fig. 6
ADJUSTING THE HEIGHT SETTING
See Figure 7.
• Unplug the tool.
• Loosen the two height adjustment knobs,
• Pull the fence forward and slide it up or down until
the height indicator mark is aligned with the desired
dimension on the scale.
NOTE: Slots in the front base align with a tab on the
backside of the fence. This alignment keeps the fence
square at each height setting.
• Tighten height adjustment knobs securely.
ROTATECLOCKWISEFOR
SHALLOWBISCUITSLOTS
ROTATE
COUNTERCLOCKWISEFOR
DEEPERBISCUITSLOTS
Fig. 5
HEIGHT
ADJUSTMENT
KNOBS
12
(1) PULL
FORWARD
(2) SLIDE FENCE
DOWN
FRONT
BASE
Fig. 7
Loading ...
Loading ...
Loading ...