Loading ...
Loading ...
Loading ...
6.
Attaching
an
alternative
anti-tip
device
IMPORTANT
NOTE
if
the
anti-tio
brackets
cannot
be
attached
securely,
an
alternative
anti-tio
device
can
be
attached.
However,
ensure
that
there
is
no
play
between
the
appliance
and
the
anti-tip
device.
if
possible,
always
screw
the
wooden
beam
to
existing
studs
on
the
rear
panel
of
the
cavity.
i
Saw
the
wooden
beam
(cross
section
min.
3"
x
4")
to
the
required
length.
Length
is
equal
to
the
width
of
the
installation
cavity!
—
If
the
installation
cavity
is
deeper
than
the
appliance,
select
a
beam
which
has
a
larger
cross
section
or
attach
2
beams.
—
The
beam
must
cover
the
appliance
by
at
least
2"
(50.8
mm).
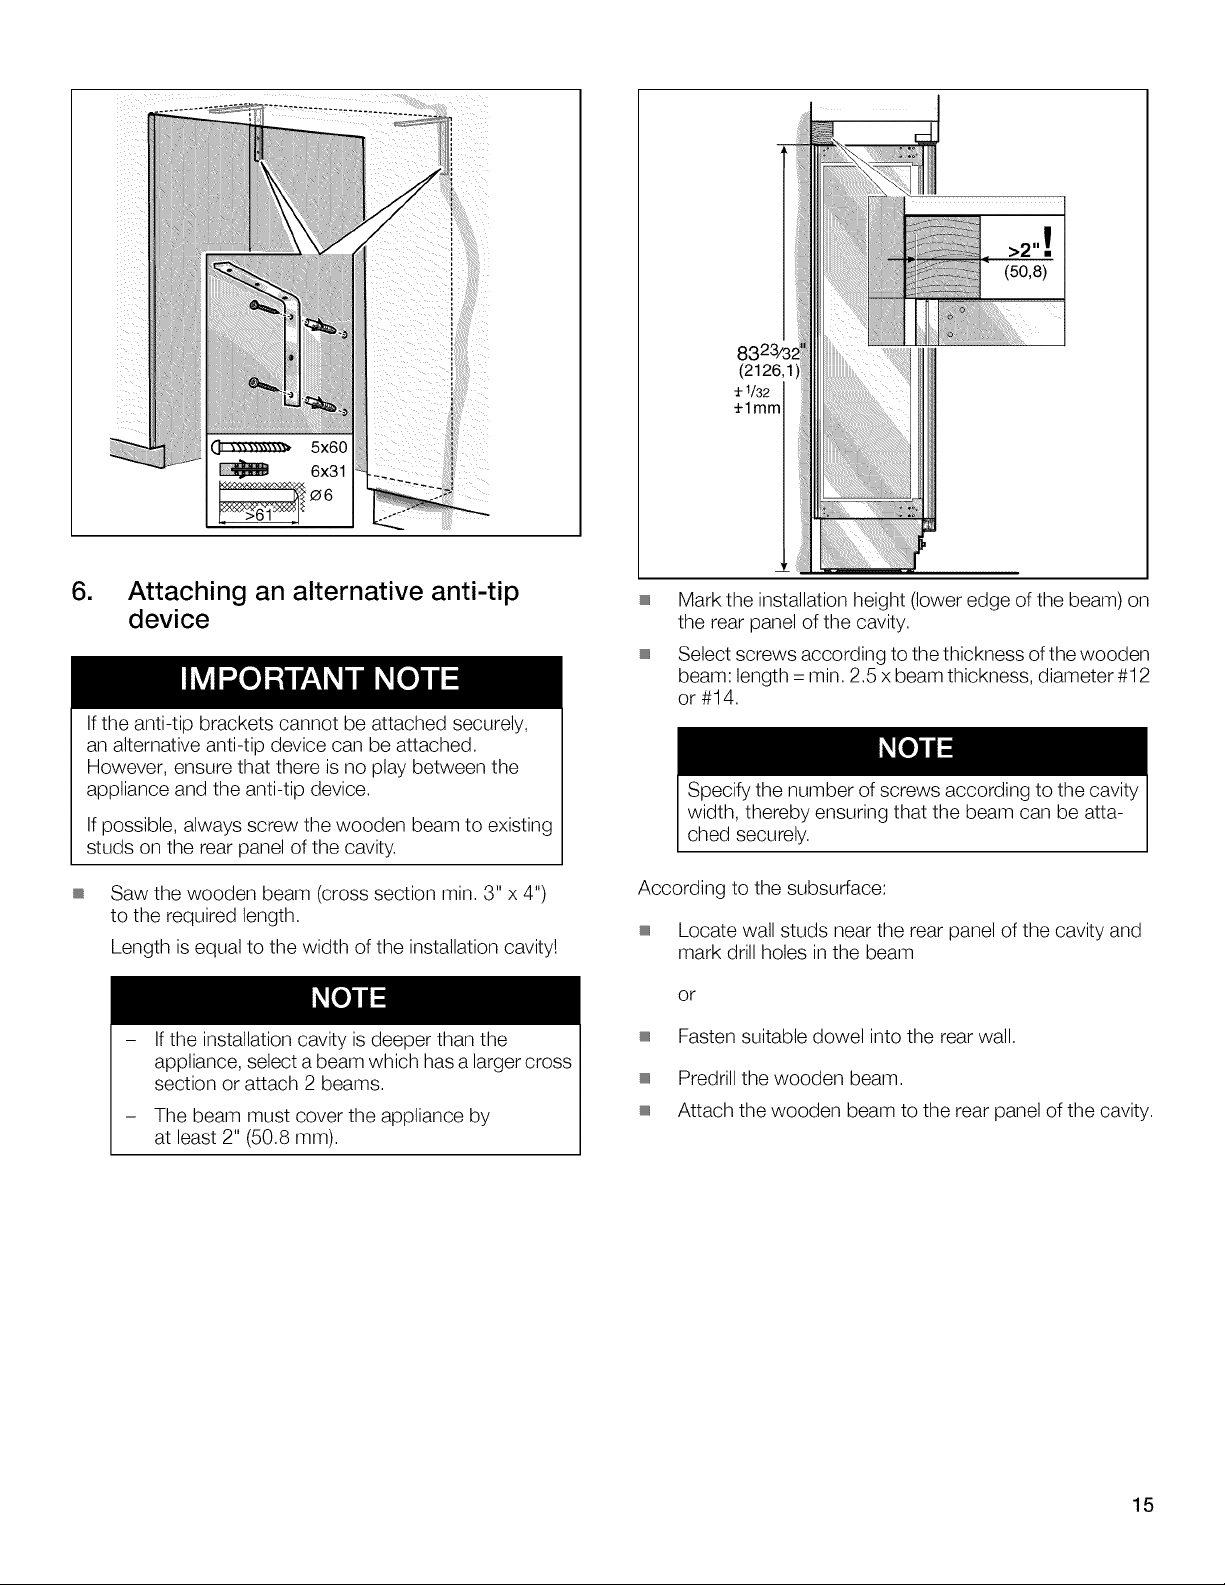
832932
(2126,1)
+
1/32
+imm
Mark
the
installation
height
(ower
edge
of
the
beam)
on
the
rear
panel
of
the
cavity.
Select
screws
according
to
the
thickness
of
the
wooden
beam:
length
=
min.
2.5
x
beam
thickness,
diameter
#12
or
#14.
Specify
the
number
of
screws
according
to
the
cavity
width,
thereby
ensuring
that
the
beam
can
be
atta-
ched
securely.
According
to
the
subsurface:
i
Locate
wall
studs
near
the
rear
panel
of
the
cavity
and
mark
drill
holes
in
the
beam
or
Fasten
suitable
dowel
into
the
rear
wall.
Predrill
the
wooden
beam.
Attach
the
wooden
beam
to
the
rear
panel
of
the
cavity.
15
Loading ...
Loading ...
Loading ...