Loading ...
Loading ...
Loading ...
4.
Installation
preparation
Unpack
installation
materials
and
accessories.
To
improve
allocation
to
the
work
steps,
the
packages
are
identified
differently.
To do
this,
comply
with the
overview
sheet
attached
to
the
appliance!
5.
Preparing
the
installation
cavity
WARNING
Assure
that
there
are
no
electrical
wires
or
plumbing
in
the
area
which
the
screws
could
penetrate.
Risk
of
injury
and
damage!
—
2anti-tio-angles
are
required
for
each
appliance.
—
The
supplied
set
contains
fastening
screws
for
various
applications.
Select
the
fastening
screws
according
to
the
local
conditions.
r
min.
Bv16"
(205)
The
anti-tio-angles
must
have
a
minimum
length
of
At/,"
(105
mm)
over
the
appliance
to
ensure
a
secure
stand
of
the
appliance.
14
if
this
minimum
length
cannot
be
observed
for
structural
conditions
it
is
possible
to
do
this
by
fastening
a
spacer
behind
the
anti-tio
angle,
e.
g.
a
sufficiently
dimensioned
wood
plank.
The
length
of
the
plank
should
correspond
to
the
width
of
the
installation
niche!
m
Specify
the
attachment
points
of
the
anti-tip-angles.
Specify
the
detailed
dimensions
according
to
the
section
on
“Installation
dimensions”
starting
on
page
9.
m
Attach
the
anti-tio-angles
completely.
Be
sure
screws
hold
tight.
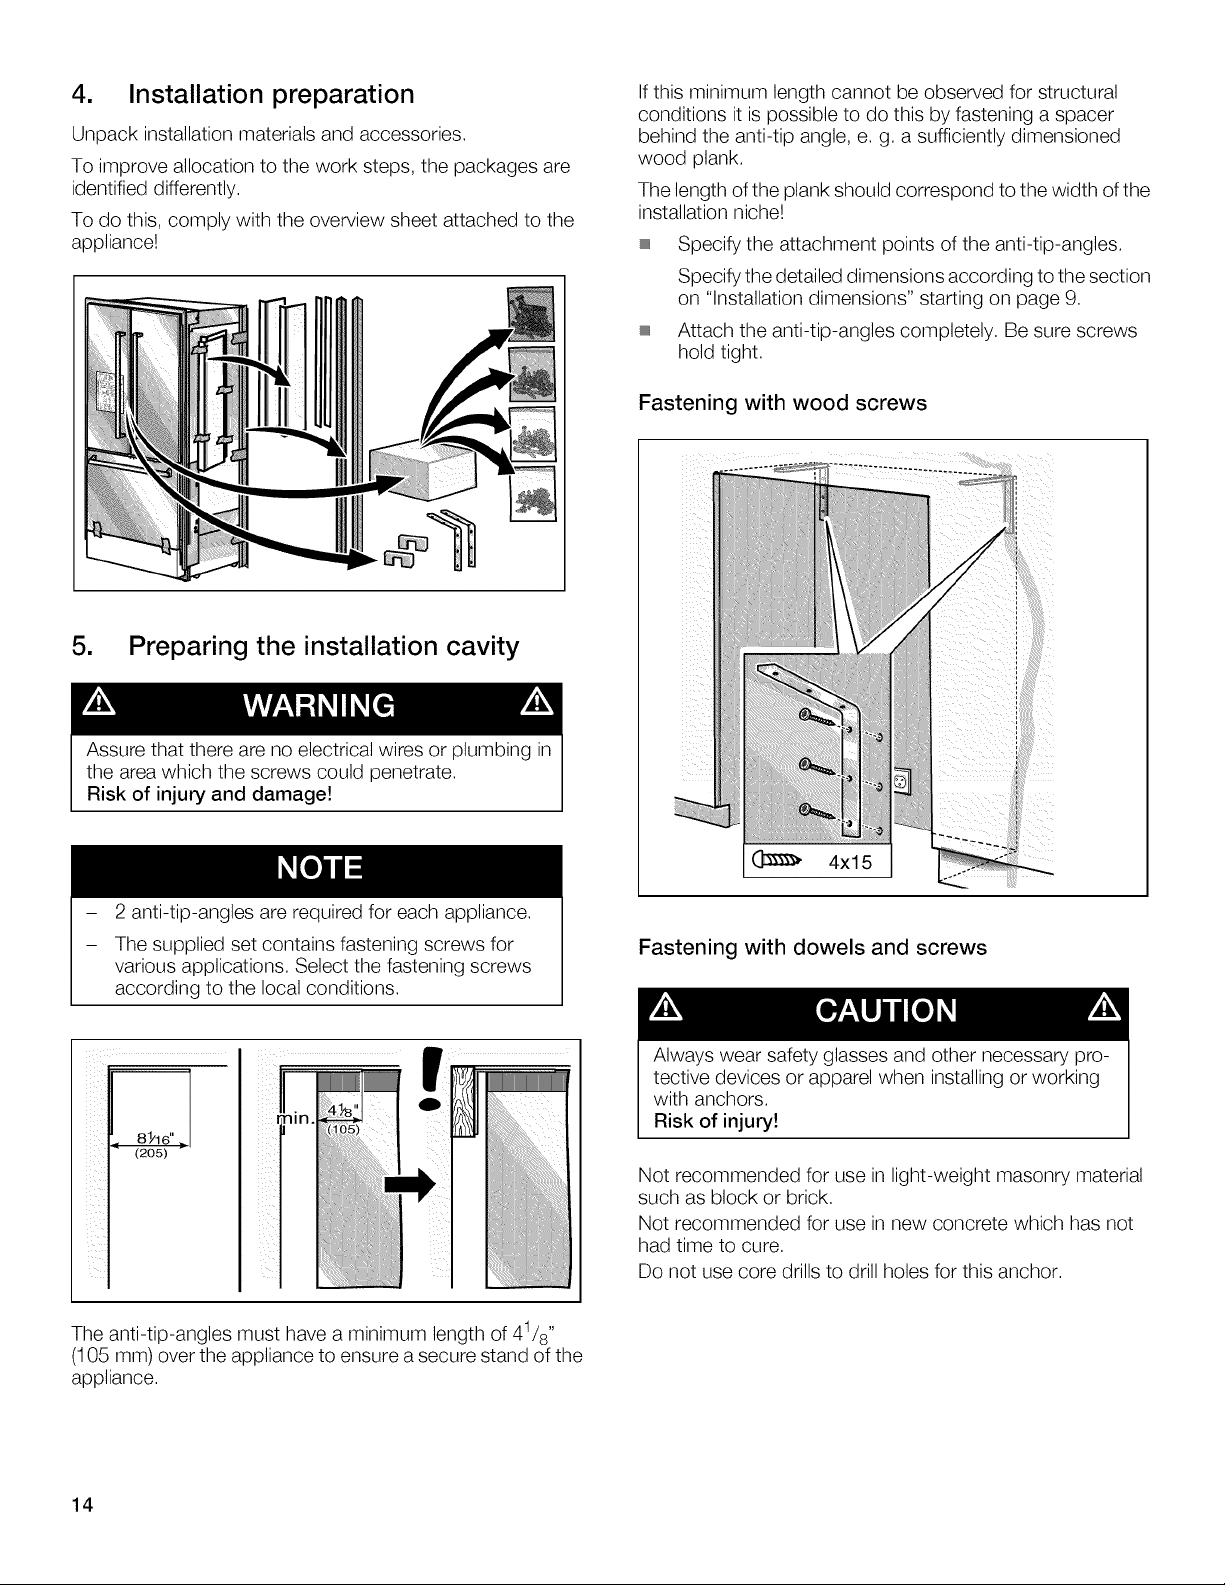
Fastening
with
wood
screws
Fastening
with
dowels
and
screws
CAUTION
Always
wear
safety
glasses
and
other
necessary
pro-
tective
devices
or
apparel
when
installing
or
working
with
anchors.
Risk
of
injury!
Not
recommended
for
use
in
light-weight
masonry
material
such
as
block
or
brick.
Not
recommended
for
use
in
new
concrete
which
has
not
had
time
to
cure.
Do
not
use
core
drills
to
drill
holes
for
this
anchor.
Loading ...
Loading ...
Loading ...