Loading ...
Loading ...
Loading ...
SERVICE AN ADJUSTM TS
M ................... ii i , i,i u,J,,,JJlI_,I,,L
TO REPLACE THE AUGER
@ Remove the (3) screws from the access panel on the
rear of the top cover
@ Disconnect the spark plug wire.. (See To Replace
Spark Plug section)
@ Remove the belt cover (See To Remove Belt Cover
paragraph on page 15) and the drive belt. See the
Drive Belt Replacement paragraph on page 15
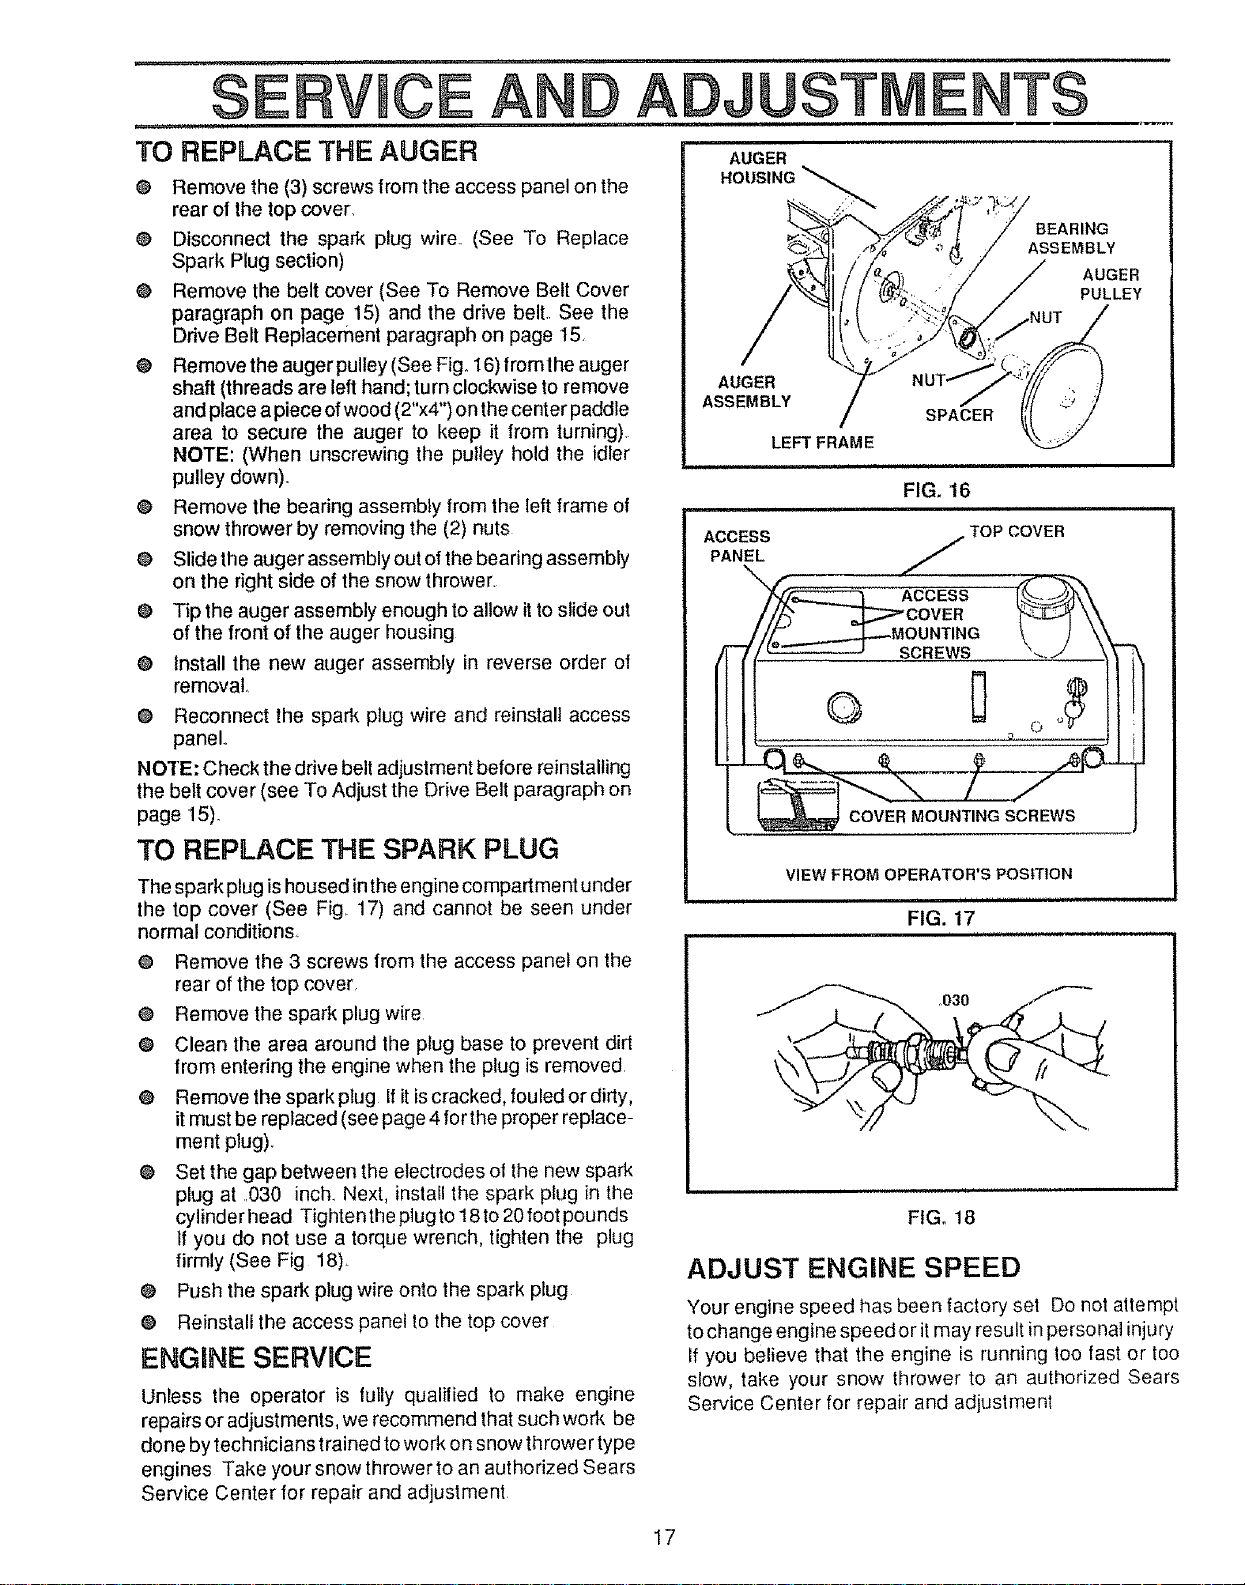
@ Remove the augerpulley (See Fig. 16) fromthe auger
shaft (threads are left hand; turnclockwise to remove
and place a piece ofwood (2"x4") on the center paddle
area to secure the auger to keep it from turning)
NOTE: (When unscrewing the puiley hold the idler
pulley down).
@ Remove the bearing assembly from the left frame of
snow thrower by removing the (2) nuts
@ Slide the auger assembly out of the bearing assembly
on the right side of the snow thrower.
@ Tip the auger assembly enough to allow it toslide out
of the frontof the auger housing
@ Install lhe new auger assembly in reverse order of
removal..
@ Reconnect the spark plug wire and reinstall access
panel
NOTE: Check the drive belt adjustment before reinslalting
the belt cover (see To Adjust the Drive Belt paragraph on
page 15)..
TO REPLACE THE SPARK PLUG
The spark plug is housed inthe engine compartment under
the top cover (See Fig. 17) and cannot be seen under
normal conditions_
@ Remove the 3 screws from the access panel on the
rear of the top cover
@ Remove the spark plug wire
@ Clean the area around the plug base to prevent dirl
from entering the engine when the plug is removed
@ Remove the spark plug If it iscracked, fouled or dirty,
it must be replaced (see page 4 for the proper replace-
ment plug).
@ Set the gap between the electrodes ol the new spark
plug at .030 inch.. Next, install the spark plug in the
cylinderhead Tighten the plug to 18 to 20 foot pounds
If you do not use a torque wrench, tighten the plug
firmly (See Fig 18)_
@ Push the spark plug wire onto the spark plug
® Reinstall the access panel to the top cover
ENGINE SERVICE
Unless the operator is fully qualilied to make engine
repairs or adjustments, we recommend that such work be
done by technicians trained to work on snow thrower type
engines Take your snow thrower to an authorized Sears
Service Center for repair and adjustment
BEARING
ASSEMBLY
AUGER
PULLEY
AUGER
ASSEMBLY
LEFT FRAME
SPACER
FIG. 16
ACCESS TOP COVER
PANEL /
OVER \\
?22'#?
_ COVER MOUNTING SCREWS
VIEW FROM OPERATOR'S POSITION
FIG. 17
FIG. 18
ADJUST ENGINE SPEED
Your engine speed has been factory set Do not attempt
to change engine speedor it may result in personal injury
if you believe that the engine is running too fast or too
slow, take your snow thrower to an authorized Sears
Service Center for repair and adjustment
17
Loading ...
Loading ...
Loading ...