CAT I V
CAT III
1. Safety Information
1.1 Preparation
1.2 Using the meter
1.3 Safety Symbols
1.4 Maintenance
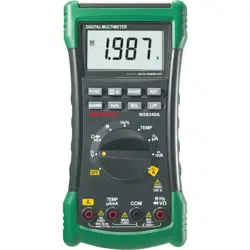
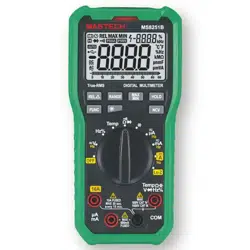
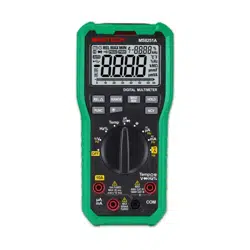
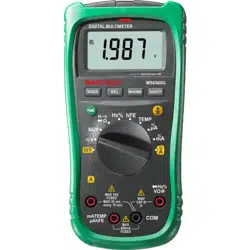
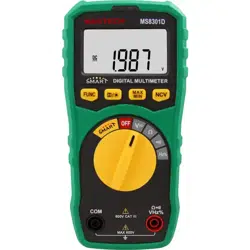
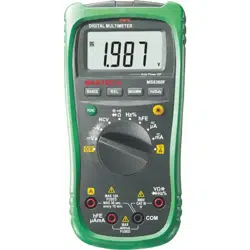
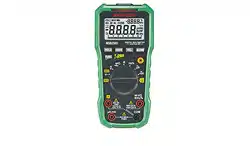
2. Description
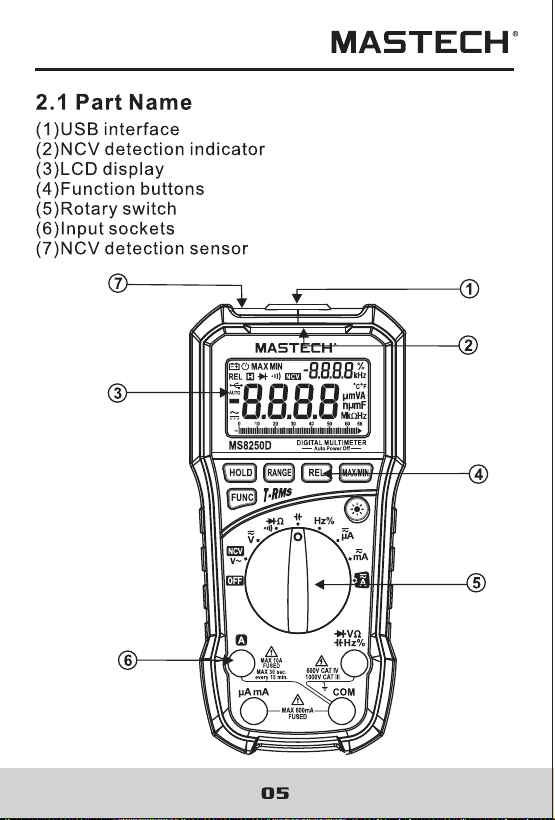
2.1 Part name
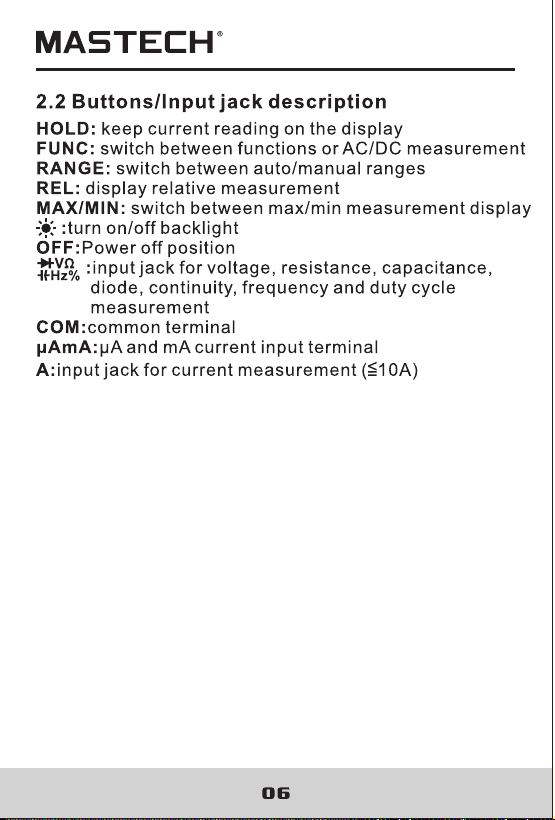
2.2 Buttons/Input jack description
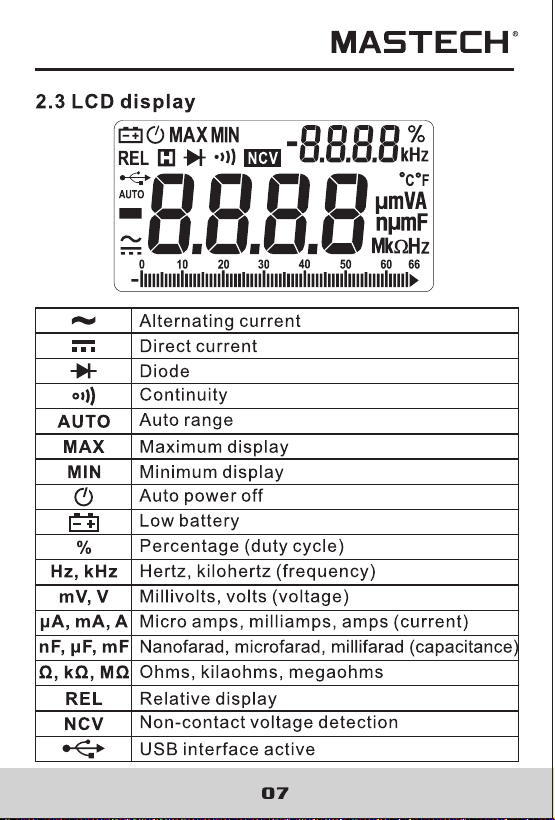
2.3 LCD Display
3. Specifications
3.1 General Specifications
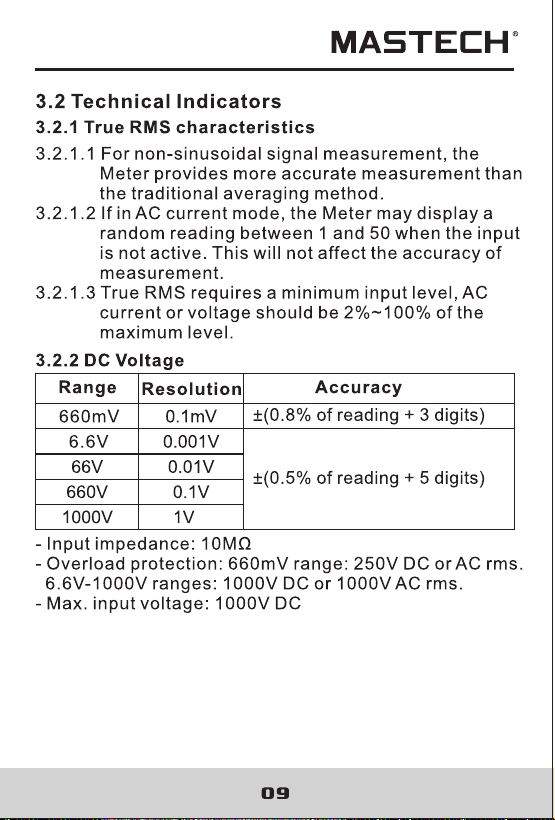
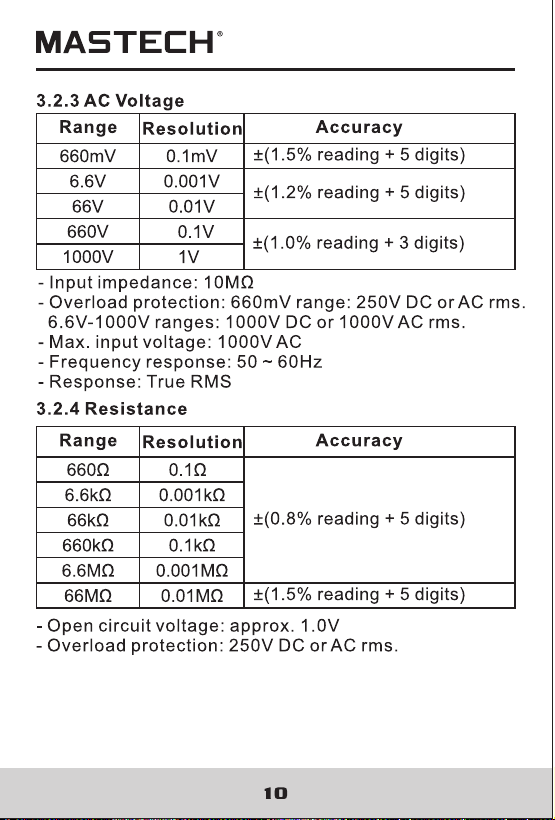
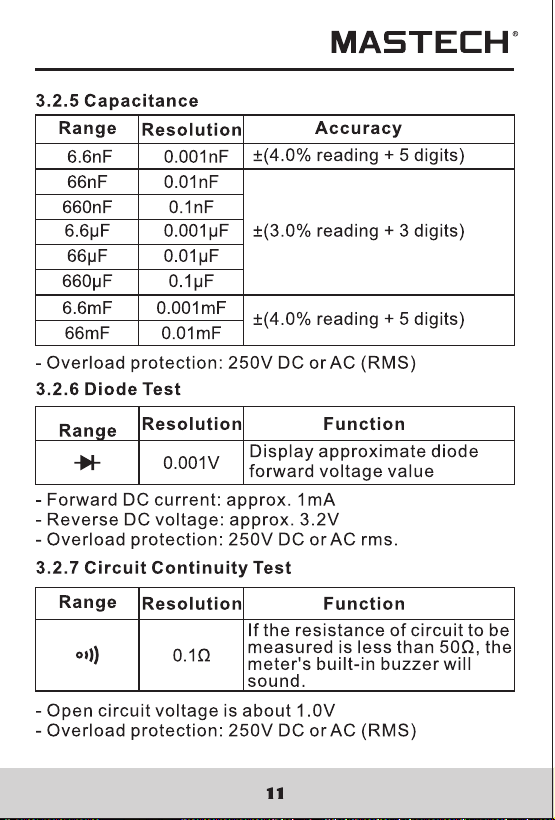
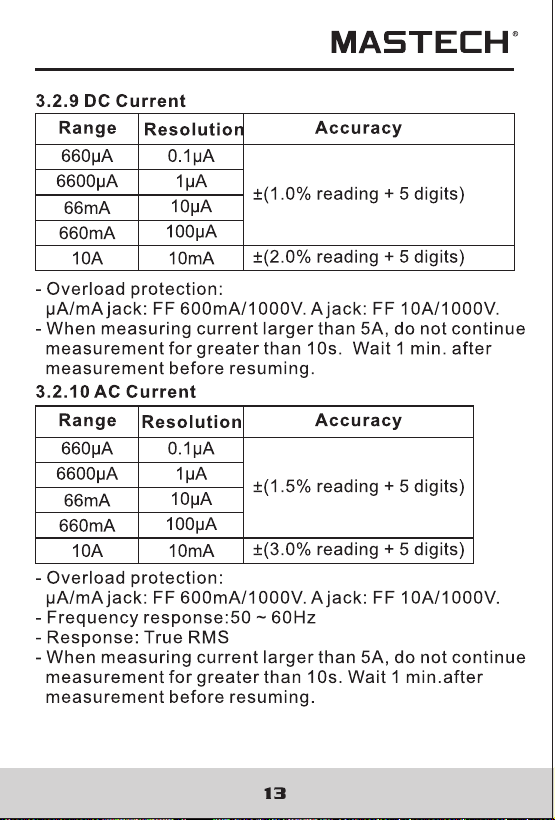
3.2 Technical indicators
4. Using the meter
5. Maintenance
5.1 Replacing the battery
5.2 Replacing test leads
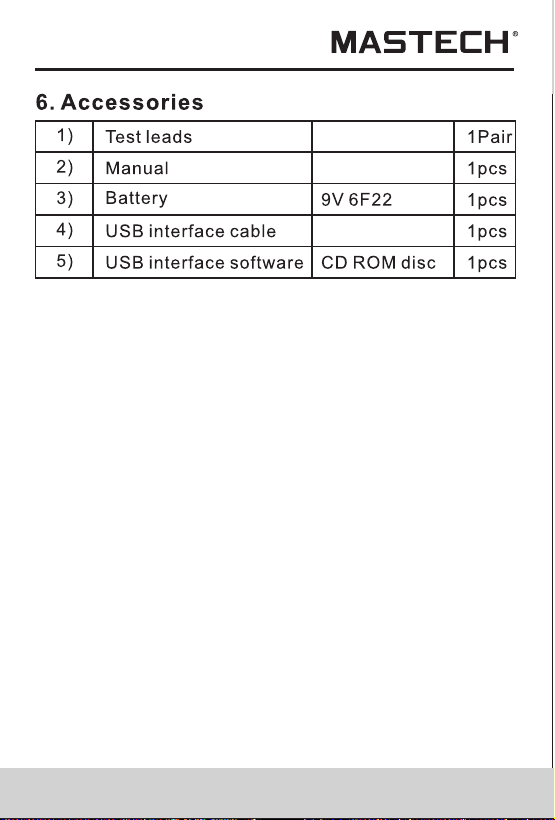
6. Accessories
01
01
02
03
03
04
05
06
07
08
08
09
14
19
19
20
21
Contents

CAT I V
CAT III
1. Safety Information
1.1 Preparation
1.2 Using the meter
1.3 Safety Symbols
1.4 Maintenance
2. Description
2.1 Part name
2.2 Buttons/Input jack description
2.3 LCD Display
3. Specifications
3.1 General Specifications
3.2 Technical indicators
4. Using the meter
5. Maintenance
5.1 Replacing the battery
5.2 Replacing test leads
6. Accessories
01
01
02
03
03
04
05
06
07
08
08
09
14
19
19
20
21
Contents
If the equipment is used in a manner not specified
by the manufacturer, the protection provided by
the equipment may be impaired.
The multimeter meets the safety standards of
EN/UL/CSA 61010-1, 61010-2-030, 61010-2-033 for
electronic testing instruments. This meter meets
CAT III 1000V, CAT IV 600V installations and a pollution
degree of 2.
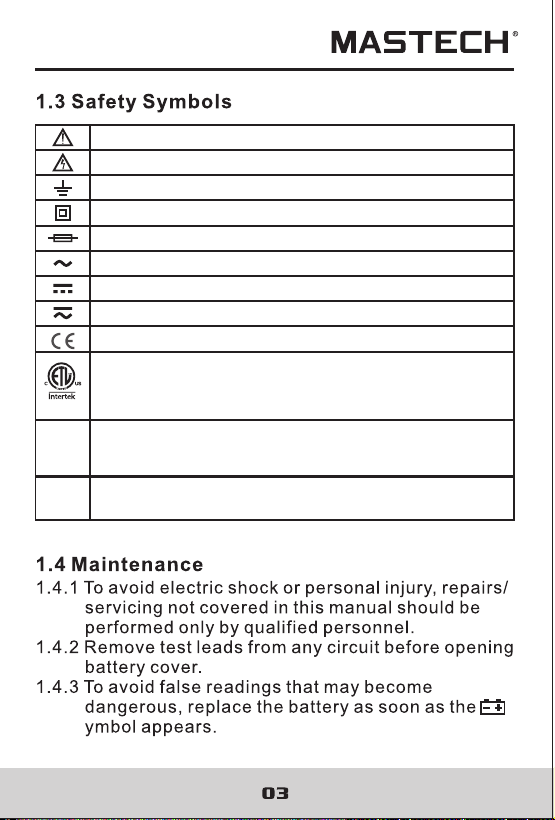
AC & DC (Both direct and Alternating Current)
Important safety information.
High voltage with danger.
Ground.
Double Insulation (Class II safety equipment).
Fuse must be replaced as per the specification herein.
AC (Alternating Current)
DC (Alternating Current)
Conforms to UL STD. 61010-1, 61010-2-030 and
61010-2-033; Certified to CSA STD. C22.2, NO. 61010-1,
61010-2-030 and 61010-2-033
CAT III
It is applicable to test and measuring circuits connected to
the distribution part of the building’s low-voltage MAINS
installation.
Accord with the related EU laws and regulations
CAT IV
It is applicable to test and measuring circuits connected at
the source of the building’s low-voltage MAINS installation.
0.1-99.9%
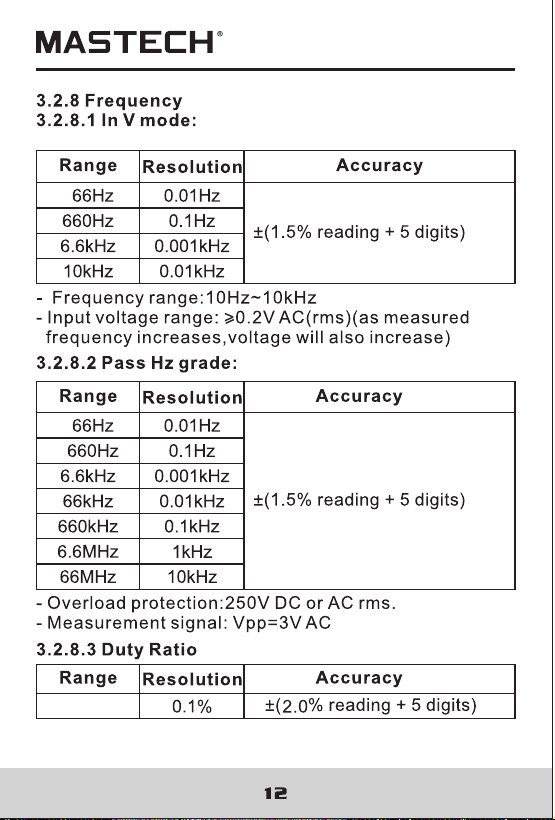
0.1-99.9%
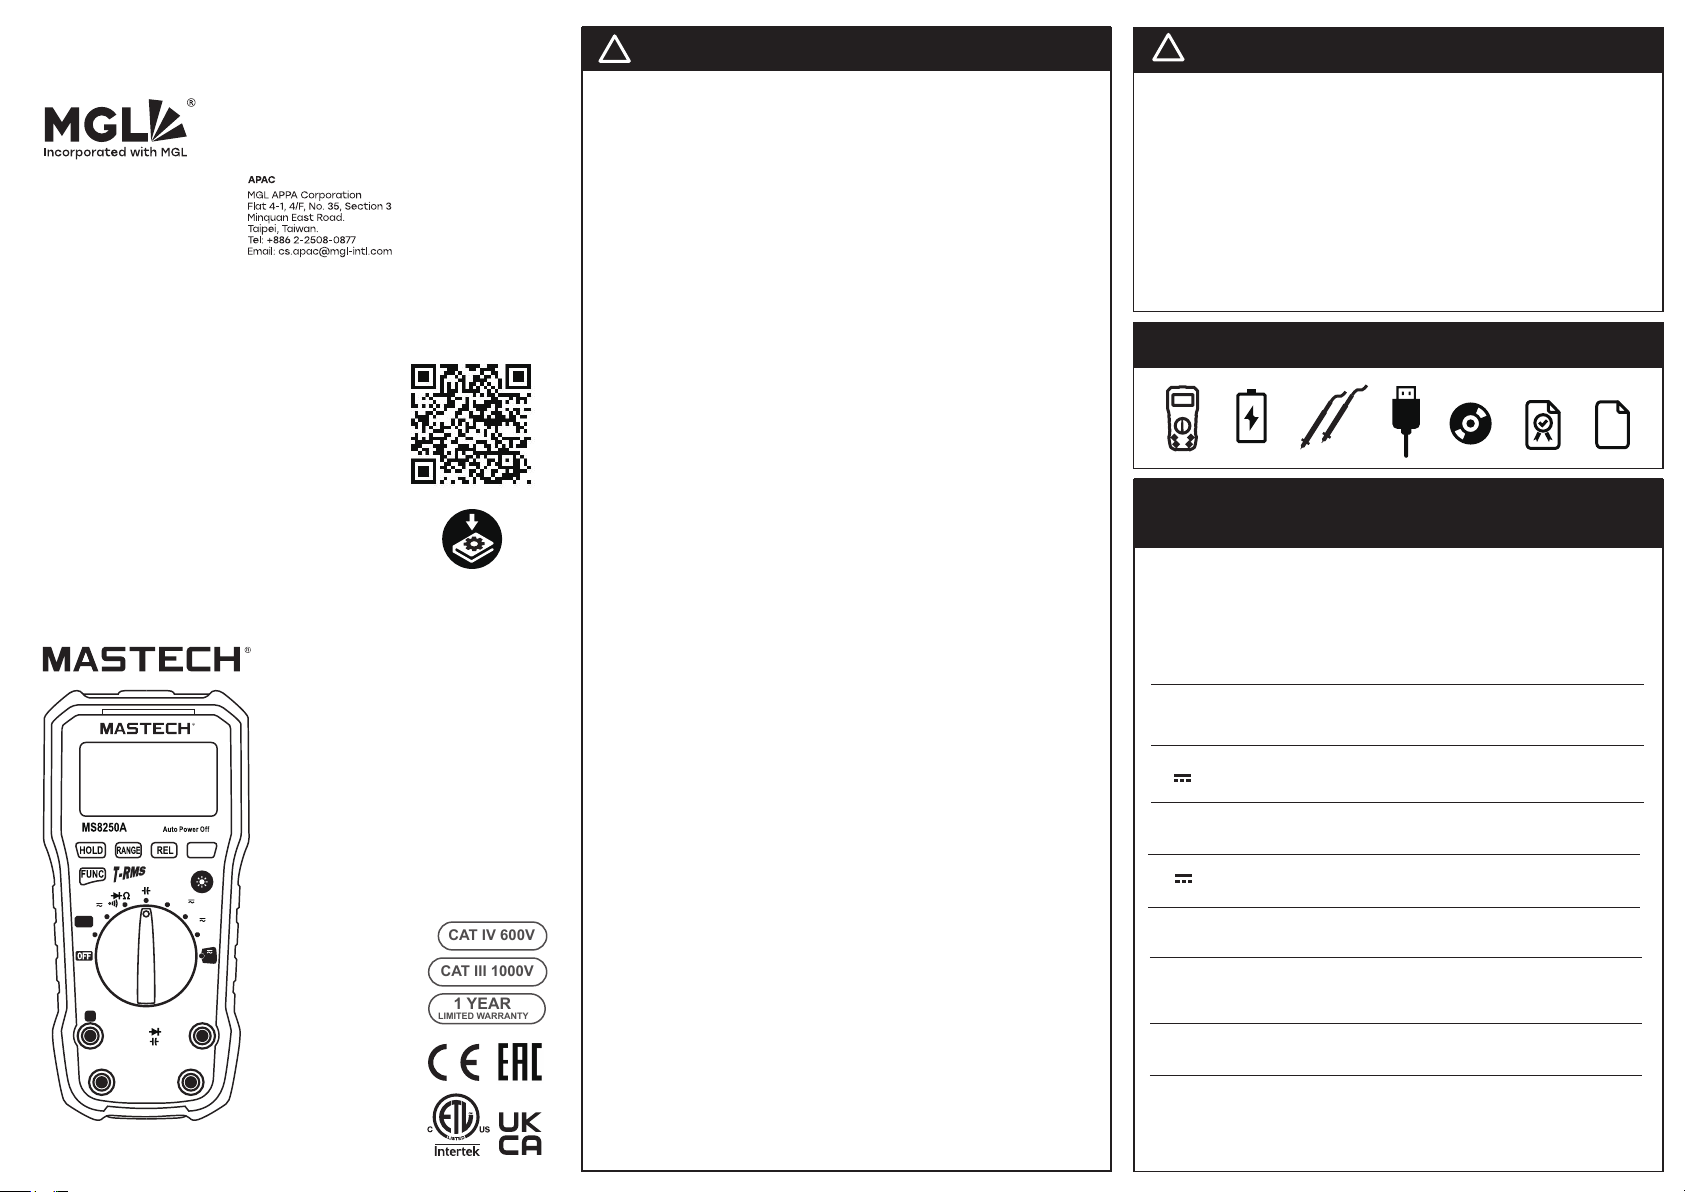
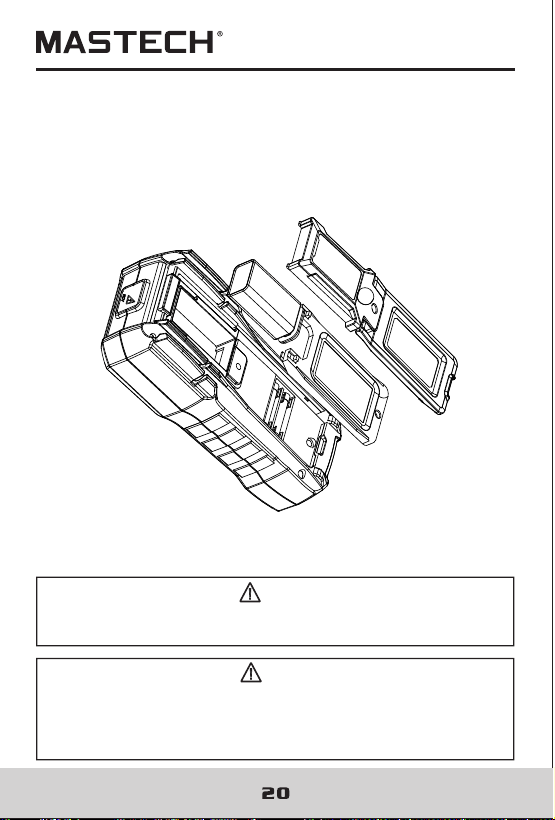
5.2 Replacing Test Leads
Replace test leads if leads become damaged or worn.
Use meet EN 61010-031 standard, rated CAT III 1000V
10A, or better test leads.
WARNING
To avoid electric shock, make sure the probes are
disconnected from the measured circuit before removingthe
rear cover. Make sure the rear cover is tightly screwed before
using the instrument.
WARNING
To avoid electrical shock or personal injury, before
opening the battery cover to replace battery, you should
turn the meter off and make sure that the test probe is
disconnected from the measurement circuit.
WARNING
To avoid wrong readings, electric shock or personal
injury, when “ ”appears on the meter display, replace
the battery immediately.
Use only a fuse with specified amperage, fusing rated
value, voltage rated value and fusing speed
(F1:FF 600mA H 1000V, F2:FF 10A H 1000V)
Please follow below steps to replace battery or fuse:
5.1.1. Turn off the power supply of the meter.
5.1.2. Pull out all test probes from the input socket.
5.1.3. Loosen two screws on the fixed battery cover with
screwdriver.
5.1.4. Remove the battery cover.
5.1.5. Remove the old battery or damaged fuse.
5.1.6. Replace with a new battery with 9V (NEDA 1604,
6F22 or 006P ) or a new fuse.
5.1.7. Replace the battery cover and tighten the screws.
Note:
Pay attention to the polarity of the battery to avoid damage
to the meter
5.1 Replacing the Battery and Fuse
21
21