Loading ...
Loading ...
Loading ...
9
GAS CONNECTION
Connection: LP Hose with a type 1 quick disconnect and regulator. Operating pressure: 11.0” W.C.
Connecting LP regulator/hose assembly to the tank/valve assembly
First, ensure the main valve on the tank is completely closed, all burner dials are in the
OFF
position and the cart is stable. Although the flow of gas is stopped when the Type 1 system is
disconnected as part of its safety feature, you should always turn off the LP tank main valve
after each use and during transport of the tank or unit.
Open the tank drawer of the cart and place the LP tank into the tank retention device (as
shown in the cart installation guide). Insert the regulator inlet into the tank valve and turn
the black coupler clockwise until it tightens. Do not over tighten the coupler. Turn the main
tank valve
ON and the burner control valves to HI for about 20 seconds to allow the air in the
system to purge. Turn valves OFF and wait 5 minutes before attempting to ignite the burners.
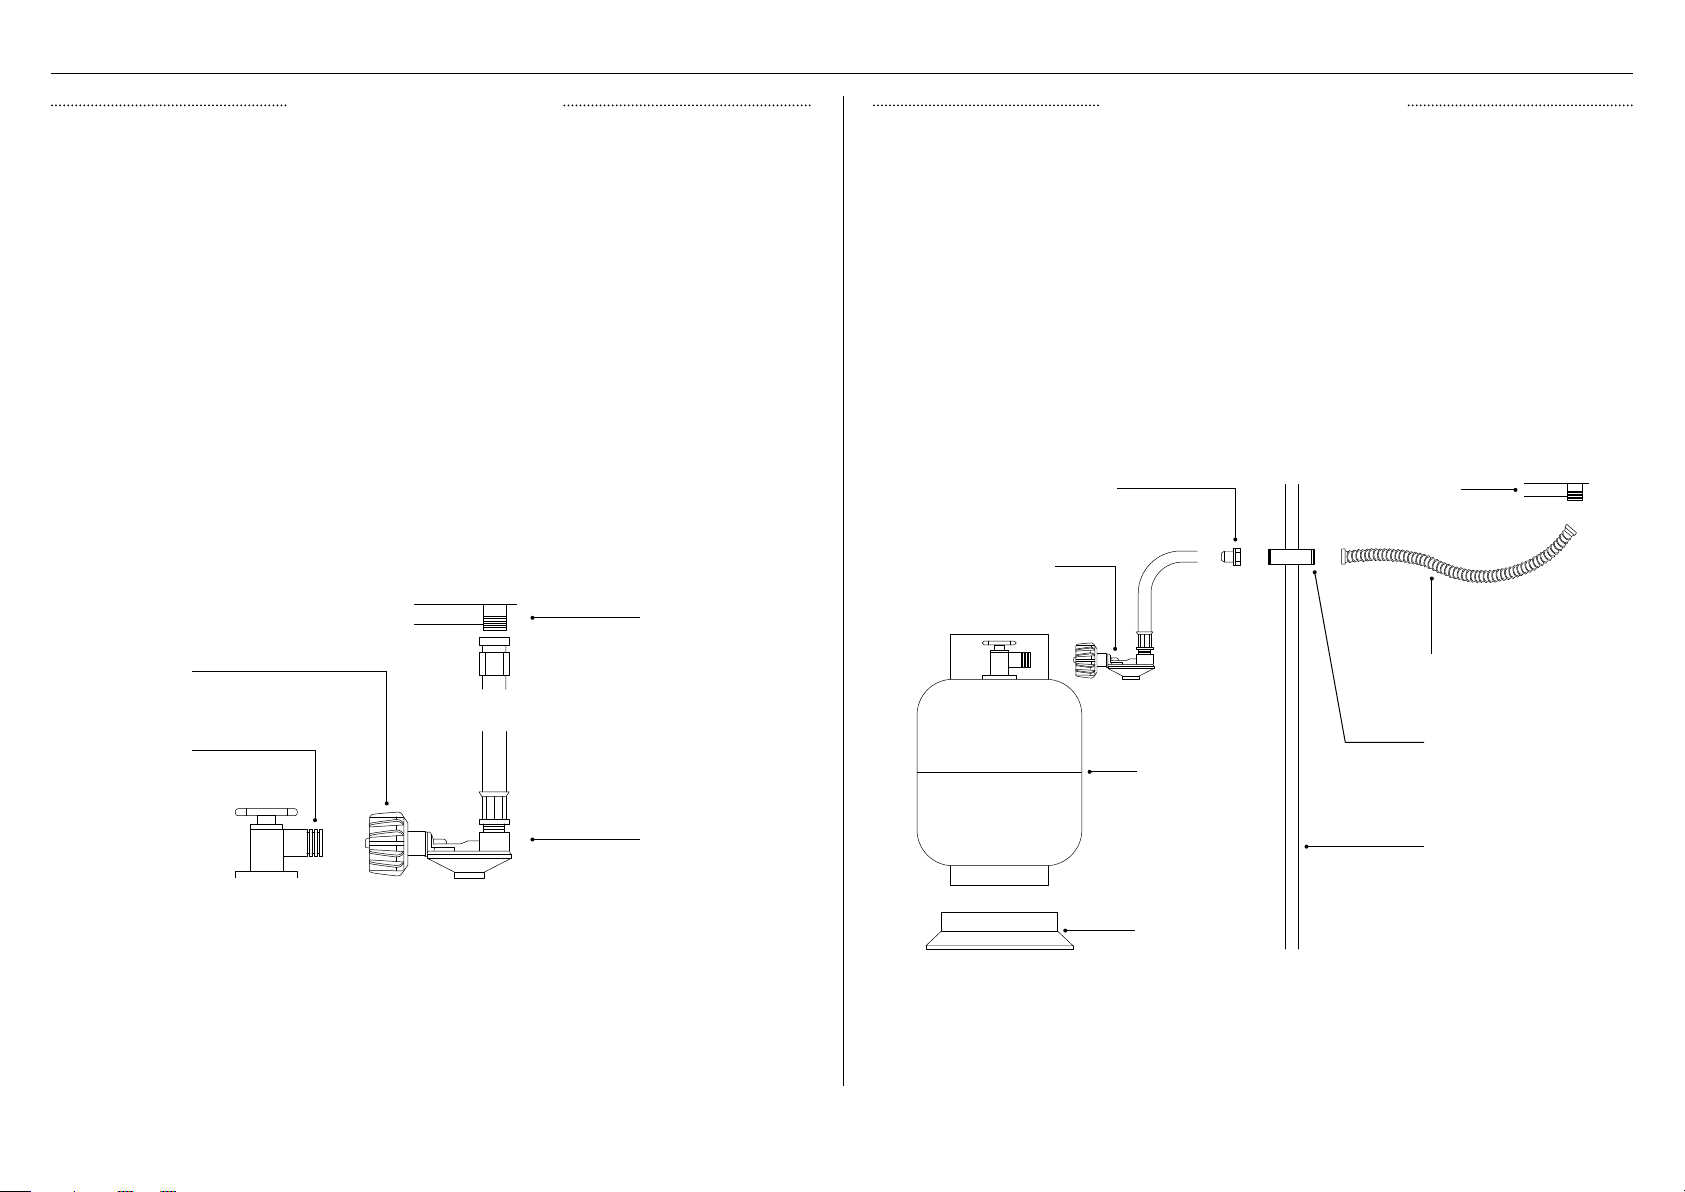
CART LP CONNECTION
base of product
1/2” female NPT
x 3/8 male flare
(installed on unit)
Threading compound must
be resistant to LP gas
LP regulator hose
assembly 11” W.C.
(installed on unit)
main tank valve
to type 1 tank
type 1 regulator
Connection: LP Hose with a Type 1 quick disconnect and regulator. Operating pressure: 11.0” W.C.
To operate your built-in grill on LP gas utilizing a 20lb type 1 cylinder, then a built-in LP tank
restraint must be installed prior to initial use of the grill. The Installer must supply ½” ID Flex
hose and fixed pipe and a flare adaptor
BUILT-IN LP CONNECTION
1/2” ID flex hose with 1/2”
NPT fittings*
Enclosure wall
Tank retention
device*
20lb LP tank*
1/2” NPT fixed pipe*
adapter 3/8” flare
fitting 1/2” NPT female
If the grill is to be installed in a built-in application, then the grill must be installed in
accordance with the built–in installation guidelines and the LP regulator/hose assembly must
be removed from the product.
When an LP unit is being directly connected to an LP house system, you must follow the
natural gas connection guidelines. The installer must provide the proper gas regulator to
reduce the gas pressure to 11” W.C.
Units set for use with LP gas come equipped with a high capacity hose/regulator assem bly
for connection to a standard 20 lb. LP cylinder (Type 1). The LP tank is not included. The grill
system is leak tested, do not remove the Regulator/Hose assembly from the product during
cart installation.
LP regulator/
hose assembly
*not supplied
base of product
open top manifold
Changing the LP cylinder
Ensure the main tank valve is turned off before turning the coupler counter clockwise, the
inlet will then disengage. Remove the inlet from the tank valve opening. Your local LP filling
station should be equipped with the proper equipment to fill your tank.
Do not attempt to remove, repair or replace the regulator/hose assembly. This must be
done by qualified and licensed technician only.
Loading ...
Loading ...
Loading ...