ge.com
vl
Safety Instructions ............ 2-4
Operating Instructions
Control Panels ....................... 5
Control Settings ...................... S
Fabric Care Labels .................. ZO
Features ........................... 6, 7
Loading and Using the Washer ...... 8, 9
Installation Instructions ..... 11-16
Drain Requirements ................. 14
Electrical Requirements .............. 14
Installing the Washer ............. 15, 16
Location of Your Washer ............. 12
Preparing to Install Your Washer ...... 11
Replacement Parts .................. 16
Rough-In Dimensions ................ 12
Unpacking Your Washer ............. 13
Water Supply Requirements .......... 14
Troubleshooting Tips ........ 17-19
Consumer Support
Consumer Support .................. 22
Worrontg for Canadian Customers .... 21
Warrantg for U.S.Customers ........ 20
As on ENERGY STAR® portner,
GEhas determined thot this
product meets the ENERGYSTAR®
guidelines for energy efficiency.
U.S. Models:
WSXH208
WPXH214
Conodo Models:
WCXH208
WCXH214
175D1807P524 49-9025g 11-05 JR
350A4502P294 Rev.1 134203500

IMPORTANTSAFETYINFORMATION.
READALLINSTRUCTIONSBEFOREUSING.
WARNING!
For your safety, the information in this manual must be followed to minimize the risk
of fire or explosion, electric shock, or to prevent property damage, personal injury, or
loss of life.
Theinstructions in this manual and all other literature included with this washer are
not meant to cover every possible condition and situation that may occur. Good, safe
practices and caution MUSTbe applied when installing, operating, and maintaining
any appliance.
WATERHEATERSAFETY
Under certain conditions hydrogen gas may be produced in a water heater that has not been used for two weeks
or more. Hydrogen gas can be explosive under these circumstances.
If the hot water has not been used fi)r two weeks or more, prevent the possibility of damage or ii_jtu T by
turning on all hot water fimcets and allowing them to mn fi)r several minutes. Do this befi)re using any
electrical appliance which is connected to the hot water system. This simple procedure _ill allow any built-up
hydrogen gas to escape. Since the gas is flammable, do not smoke or use an open flame or appliance dunng
this process.

PROPERINSTALLAtiON
This washer must be properly installed and located in accordance with the Installation Instructions before it is used.
[] Install or store M_ere it will not be exposed to [] Properly ground _s}_e_" to confi)rm with all
temperatures below fi'eezing o1"exposed to the ,governing codes and ordinances. Follow details in
_vathe_: Installation Instructions.
YOURLAUNDRYAflEA
• Keep the area underneath and around your
appliances fl'ee ot combustible materials such as
lint, paper; rags and chemicals.
• D() not leave the washer door open. An open door
could entice children to hang on the door or
crawl inside the washe_:
• Close super\ision is necessa_ T if this appliance is
used 1)_ or near children. Do not allow children to
pla} on, with, or inside this or any other appliance.
3

IMPORTANTSAFETYINFORMATION.
READALLINSTRUCTIONSBEFOREUSING.
WHENUSINGTHEWASHER
Use this
appliance
only for its
intended
purpose as
• Never reach into washer while it is moving.
_'\_dt 5mtil tile machine has completely stopped
be%re opening tile door.
• Do not mix chlorine bleach with ammonia 05"
acids such as vinegar and/or rust remover.
Mixing different chemicals can produce a toxic
gas which may cause death.
described in • Do not wash or dry articles that have been
this Owner's cleaned ill, washed in, soaked in, or spotted
with combustible or explosive substances (such
Manual.
as wax, oil, paint, gasoline, degreasers, dry-
cleaning solvents, keiosene, etc.) which may
ignite or explode. Do not add these substances
to tile wash water. Do not use or place these
s[lbstances ;iro[lnd VO/lr washer or dr}'er dtlring
operation.
• The laundry process can reduce the flame
retardancy of thbrics. To avoid such a result,
caretully t_llow the garment manuthcturer's
wash and care instructions.
• Never attempt to operate this appliance if
it is damaged, malhmctioning, partially
disassembled, or has missing or broken parts,
including a damaged cord or plug.
• Do not slam tile washer door closed or try
to fi)rce tile door open when locked (Door
Lock light ON). This could result in damage
to the washer.
• Tile washer is equipped with an electrical
overload protector. Tile motor will stop if it
becomes overheated. The washer will
automatically restart after a cool-down
period of up to 30 minutes, if the washer
has not been manually turned off during
this time.
To minimize tile possibility of electric shock,
unplug this appliance fi'om tile power supply
or disc(mnect tile washer at tile household
distribution panel by removing tile fuse or
switching off tile circuit b_eaker befbie
attempting am' maintenance or cleaning.
NOTE:Tm'ning tile Cycle Selector knob to
all off position does NOT disconnect tile
appliance fl'om tile power supply.
WHENNOTIN USE
• Turn off water th ucets to relieve pressure on
hoses and wdves and to ndnilnize leakage if
a break (5i"iupture should occur. Check tile
condition of the fill hoses; they should be
replaced every 5 years.
•Betore discarding a washer, or removing it
frOlll selwice, rell/OVe tile washer door to
prevent children fl'oln hiding inside.
• Do not attelnpt to repair oi" replace any part of
this appliance unless specifically recolnlnended
ill this Owner's Manual, or ill published useI_
repair instluctions that you understand and
have the skills to carry out.
• Do not talnper with controls.
READANDFOLLOWTHISSAFETYINFORMATIONCAREFULLY.
SAVETHESEINSTRUCTIONS
4

About the washer controlpanel.
Youcan locate your model number at the top inside of the door opening.
Models WPXH214 and WCXH214
7 TEMPERATURES EXTRA RINSE FINAL SPIN SPEED
WARM con_ JE_Y_A_/UL_CARE RP_
WARM
COLD COLD ON
AO M
R _ C D
Models WCXH208 and WSXH208
A_o DISPENSER_E_Y _T_SUOETOOPEN_
4 TEMPERATURES CYCLE SIGNAL
W_HEN_
WARM COB
COB .... COB
i _OFF LOUD
COID WARM
}J} i .... i JJi
EXTRA RINSE
_noNs/_sv c_
ControlSettings
O Autumatic Dispenser and Safety Latch
Safet_ latch slides to the right to open drawer. (I,at('h locks to the leit on its own.) Add detergent,
liquid bleach and t_d)ric softener to this drawer.
Temperature
Select the water teml)erature for the wash and rinse c_cles. Always follow garment manufacturer's
care label or instiuctions when laundering.
Wash Cycle
The wash cwle controls the length of the washing process. The chart below will hel I) you match the
wash cycle setting with your loads.
PREWASH
COTTONS
EASYCARE
DEUCATES/
ULTRACARE
QUICKWASH
Forheavilysoiledandprotein-staineditems.FollowPreWashwith acompletewashcycle.
Forheavyto lightlysoiledcottons,householdlinens,work andplayclothes.
Forwrinkle-freeandpermanentpressitems,andknits.
Forlightlysoiledlingerieandspecial-carefabrics.
Forlightlysoileditemsyouneedina hurry.
O Final Spin Speed (on some models)
The Fast spin speed is for durable items.
The N(mnal spin speed is for delicate items like sweaters and lingerie.
_,_hen usino,_ Normal spin speed, cl(/thes will be less dry than when using, Fast spin speed.
O
Set the desired wash cycle by pushing in cycle knob and turning clockwise.
Start the washer by closing the door and pulling ()tit the cycle knob.
To stop the washer, push in the cycle knob and pull ()tit to restart.
• Thewasher wi//not operate with the door open.
• Thedoor wit automatically lock during the entire wash cycle.
Features and appearance may vary.

About the washer feature& NOTE:Not all features are available on all washer models.
Cycle Signal (on some models)
CYCLE SIGNAL
\'Vhen the (k(le Signal is ON it _dll sound
at tile end of tile c}cle. The signal cml be
set _lt OFF (no sound), LOUD or anywhere
in between.
EXTRA RINSE
CQ_0N$/T_S¥ £ARE
ON iFF
Extra Rinse
(available on some cycles)
Llse ;m extra rinse when additional rinsing
is desired to remove excess dil_ and
detergent fl'om soiled loads.
DOOR
LOCKED
Door Locked Indicator Light
Tile indicator light is ON and tile door is
locked when the cycle knob is pulled out.
Tile light ttlI'ns OFF at tile end of tile cycle.
Auto Temp(onsome models)
AUTO TEMP senses tile incoming water
temperattu'e and a(!justs tile fill water to
obtain tile correct wash temperature. This
teature is activated only when selecting a
COLDor WARM wash telnperature.
For example, if a COLDwash is selected,
some wmm water may be added to reach
a temperature needed to better dissolve
detergents. Often, dete_Nents are not
completely dissoh'ed in \'e_' cold water;
especially in cooler climates.

The Dispenser Drawer
Slowly open the dispenser drawer by first
sliding the safety latch to the right, then
pulling the drawer out until it stops.
After aoUing laundry products, slowly close the
dispenser drawer C/osbg the drawer too quickly
could result in early dispensing of the bleach and
fabric softener.
Youmay see water in the bleach and fabric
softener compartments. Thisis a result of the
siphoning action and is part of the normal
operation of the washer
_ lf the dispenser drawer is puffed out
more than 1-1/2" when the washer is b
operation, the washer wifl shut off. The
DOORLOCKindicator h_?htwill turn off and
the door will be unlocked. Slowly close the
drawer, and the washer will automatically
resume operation.
The Detergent Compartment
• Add ineasured detergent to the
detergent COlni_artlnent of the
dispenser drawer.
• Detergent is flushed froln the
dispenser at the beginning of the
cycle. Either powdered or liqtfid
detergent can be used.
NOTE: Liquid detergent will drain into the
washer drum as it is added
• Low sudsing detergent is
recommended for this washer. Use
the manufacturer's recommended
amount.
• Detergent usage Inav need to be
a(!iusted for water teml_erature ,
water hardness, size and soil level
of the h)ad. Avoid using too nmch
detergent ill yore" washer as it can
lead to oversudsing and detergent
residue being left on the clothes.
TheLiquidBleach Compartment
If desired, ineasure ()tit the recolulnended
alnount of liqtfid chh)rine bleach, not to
:4
exceed 1/. cup (80 inl) and pour into the
center compamnent labeled "LIQUID
BLEACH" marked with this symbol/_.
Do not exceed the maximum fir fine. Overfilling
can cause eaHydispensing of the bleach which
could result in damaged clothes.
NOTE"Do not use powdered bleach in the
dispenser
The Fabric Softener Compartment
If desired, pour the recolnlnended
alnount of liqtfid fabric softener into
tile COlni)artn]ent labeled "FABI_.IC
SOFTENER" and marked with this
symbol _)_ .
Dilute with water tothemaximumfill line.
Donot exceedthemaximumfill hne.Overfilling
cancauseearlydispenslbgofthe fabricsoftener
whichcouldstainclothes.
NOTE:Donotpourfabricsoftenerdirectlyon
thewashload

Loadingand usingthe washer. Always follow fabric manufacturer's care label when laundering.
SortingWashLoads
Sort laundry into loads that can be washed together.
Colors Soil Fabric Lint
Whites Heavy Delicates LintProducers
Lights Normal EasyCare Lint Collectors
Darks Light Sturdy Cottons
• Combinelarge and small items in a load. Load large items first. Large items should not be more than half the total
wash loacL
• Do not wash single items. This may cause an out-of-balance loacLAdd one or two similar items.
Loadbg the Washer
_A'ash (hun/ may be fllllv loaded with loosely
added items. Do not wash fabrics containing
flammable materials (waxes, cleaning fluids, etc.).
To add items after washer has started, push in
cycle knob and wait tmtil there is no longer any
water on the door window. Do not force open the
locked door; open gently: Add items, close the
door and pull cycle knob out to restart.
Careand Cleaning
Exterior: hnmediately wipe off any spills, Wipe with damp cloth, Try not to hit Stli'th(e with
shar I) objects.
Interior: Dry arotmd the washer door opening, flexible gasket and door glass. These areas should
always be clean to ensure a water tight seal.
Movingand Storage:Askthe service technician to remove water fl'om drain pump and hoses.
Do not store the washer where it will be exposed to the weather. When moving the washer, the
tub should be kept stationa_ T by using the brackets and bolts removed dm'ing installation. See
Installation Instructions in this book. If these parts are not available, they can be ordered in the
United States by visiting ore" _A'ebsite at ge.com or by calling 800.GE.CAI),ES. In Canada, write to
Manager, Consumer Relations, Camco Inc., 1 Factory i,ane, Suite 310, Moncton, N.B. E1C 9M3.
Long Vacations: Be sure water supply is shut off at fimcets. Drain all water fl'om hoses if weather will
be below fl'eezing.

_l _ DispenserDrawerPrea: Detergent and rid)rio softener ma) bsd]d up in the
_ _ dispenser drav, er. Residue should be removed once 5)5"t_ke a m,md,.
[] Remove the dra_er bx first sliding the safet_ latch to the right, then pulling
drawer cax_ty and press d(),_n firml) on the lock tab, pulling out the drax_er.
Lock tab is visible only after drawer
has beenpulled out
[] Remoxe the inserts from the bleach and thbric softener compartments.
Rinse the inserts and the drawer with h(st water to remove traces (sf
accmn ulated laundr) products.
[] To clean the drawer 5) _enin,, small brush to clean the recess. Remoxe
] _, tsse a
all residue from the upper and lo_er parts of the recess,
[] Retm'n the bleach and thbric softener inse_ts to the proper c(5Illp_lI'[Illeslts.
Replace the dispenser (h'a_er and mn the PRE_kSH (55"QUICK _kSH c) cle
_ithout an) wash load in the dram.

Aboutthe washerfeatures.
FabricCareLabels
Below are tid_-ic care label "symbols" that affect the clothing you will be launde_-ing.
WASH LABELS
wash m
cycle Normal P.......... t Press/ Gentled/ Do not wash Do not wring
wrinkle resistant delicate Hand wash
Water
temperature
000 O0 •
Hot Warm Cold/cool
(50"C/120"FI (40"C/105°FI (30°C/85°FI
DRYLABELS
Tumble D
dry
Dry
Do not dry
Normal Permanent Press/ Gentle/ Do not tumble dry (used with
wrinkle resistant delicate do not wash)
Hoot ._
setting
High
® ® •
Medium bow No heat/air
instructions
Line dry/ Drip dry Dry flat
hang to dry
BLEACHLABELS
SymuOla Any bleact) Only ....... Norine bleach Do not bleach
(when needed) (when needed)
Pq
In the shade
lO
Installation
Instructions
Spacemaker er
Models WCXH208
WCXH214
WSXH208
WPXH214
I ffyou haveanyquestions,call800.GE.CARES(800.432.2737)orvisitour Website at: ge.comIn Canada,call 1.800.361.3400orvisitourWebsiteat:geappliances.ca I
BEFORE YOU BEGIN
Read these instructions completely and carefully.
• IMPORTANT - S_,,ethese
instructions for local inspector's use.
• IMPORTANT - Obse,ve;,ll
governing codes and ordinances.
• Note to Installer - Be sure to leave these
instructions with the Consmner.
• Note to ConsulTler - Keep these instructions
for fllture refereuce.
• Skill level - Installation of this appliance reqtfires
basic mechanical and electrical skills.
• Completion time - 1-3 horn's
• Proper installation is the responsibili w of the
installer.
° Product thih,re due to improper installation is not
covered trader the _,Varrantv.
FOR YOUR SAFETY:
WARN IN G
" This appliance must be I)r°I)erlv,,gr°unded and
installed as described in these Installation Instructions.
• Do not install or store appliance in an area where it
will be exposed to w'ater/we'ather. See Location of }lout
Washer section.
° NOTE: This applimace must be properly grounded,
mid electrical service to the washer must conform with
local codes mid ordJnm_ces and the latest edition of
the National Electrical Code, ANSI/NFPA 70 or in
Canada, CSA C22.1 CmmdJm_ Electrical Code Part 1.
TOOLS REQUIRED FOR
WASHER INSTALLATION
1/4" mlt (hirer
F_I 3/8" socket with ratchet
F_I 3/8" open-end wrench
A(!iustable wrench or 7/16" socket with ratchet
F_IA(!iustable wrench or 9/16" open-end wrench
F_I (]ham_el-lock a(!j ustable pliers
Caq)enter's level
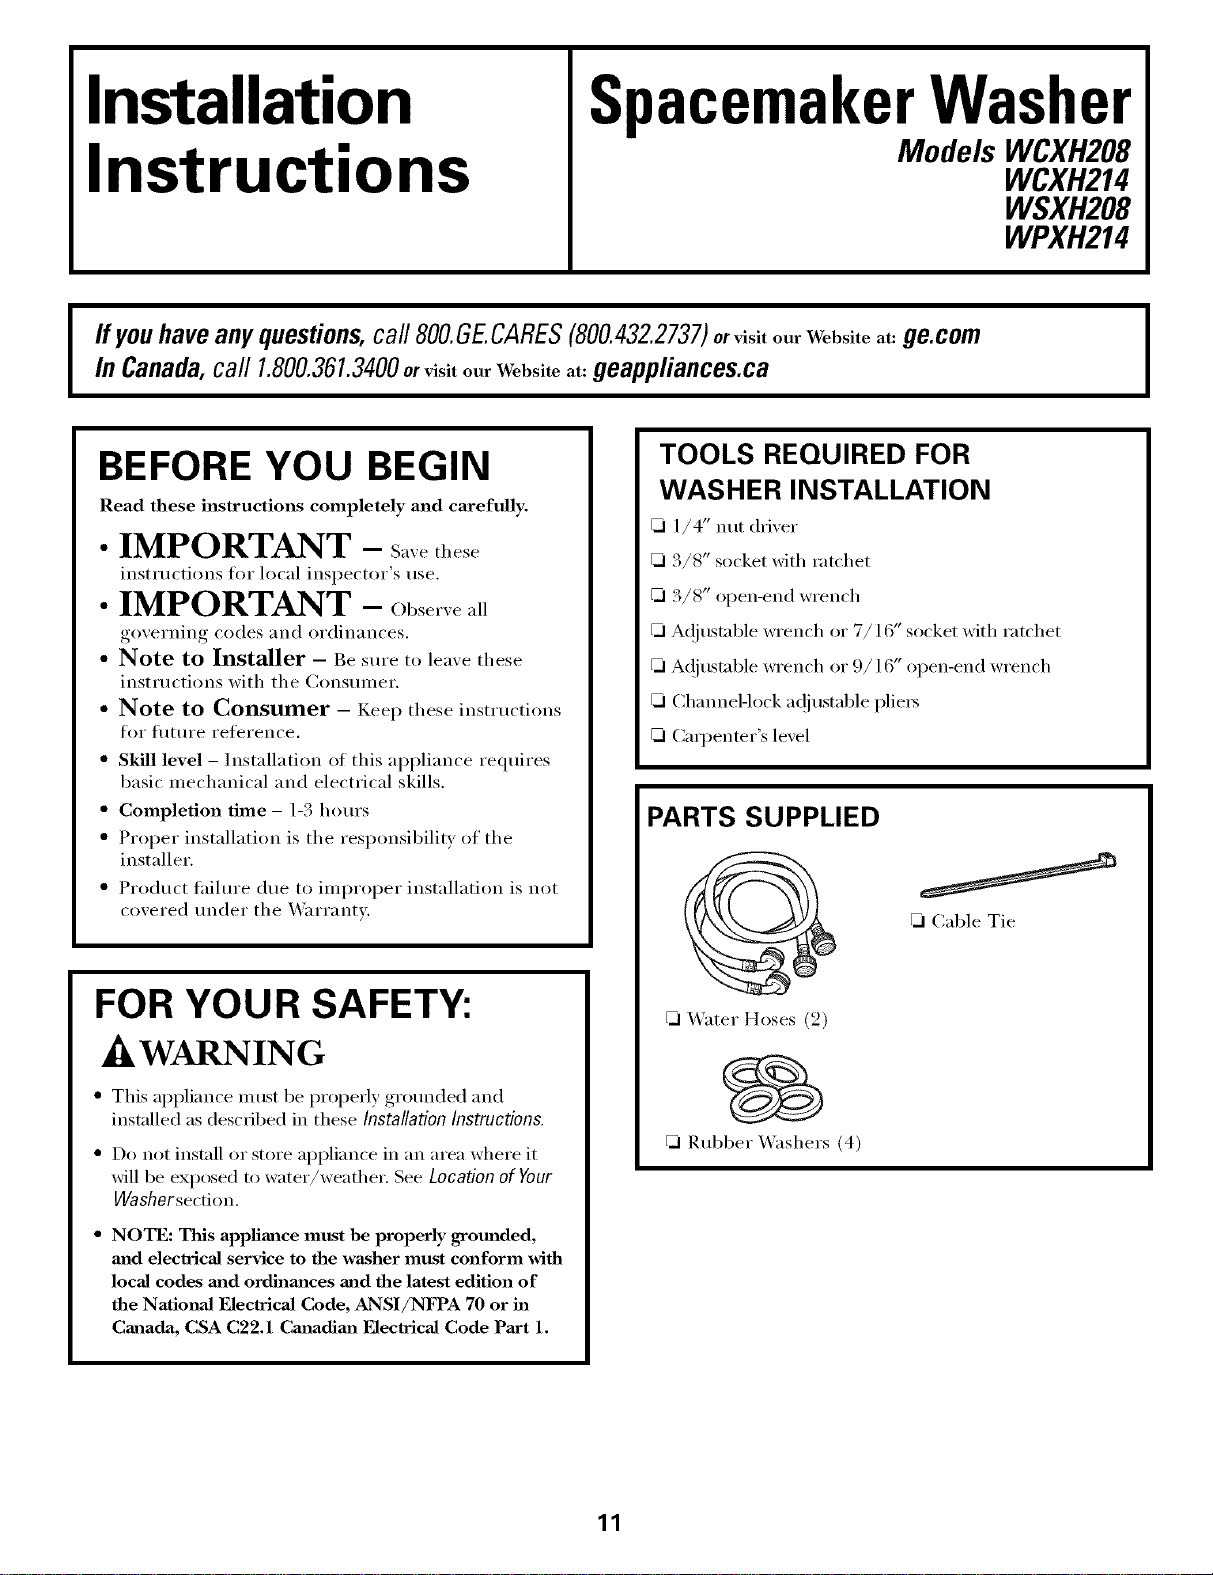
PARTS SUPPLIED
Cable Tie
F_I Water Hoses (2)
F_I Rubber Washers (4)
11

Installation Instructions
LOCATION OF YOUR WASHER
Do Not Install the Washer:
1. In an area exposed to dripping water or outside
weather conditions, The ambient teml)erature
should never be below 60°F (l 5.6°(;) fl)r proper
washer operation.
2, In an area where it will come in contact with cm'tains
or drapes.
3, On carpet, The floor MUST be a hard surtace with
a maximum slope of l/2" per foot (1.27 cm per
30 cm). To make sm'e the washer does not vibrate
or illove, yo/I Ill}Iv have to reinforce tile floor.
IMPORTANT:
Minimum Installation Clearances
" _]/en installed in alcove: Sides, Rein;
Top : 0" (0 cm)
" _]_en installed in closet: Sides, Rein;
Top = 0" (0 cm), Front = 1" (2.54 cm)
" Closet door ventilation openings required:
2 lou\'e_ each 60 square in. (387 cmQ, located 3"
(7.6 cm) fl'om top and bottom of door
Undereounter Installation
If an undercomKer* installation is desired, you MUST
install a top sheet kit, 14-A037. This kit is axailable through
your (;E retaile_;
*()lstom-sized counterto I) is required.
Mobile Home Installation
Installation must confimn to Standard fi)r Mobile Homes,
ANSI A119.1 and National Mobile Home Construction
and Satetv Standards Act of 1974 (PI,93-383).
ROUGH-IN DIMENSIONS
17
(43.2) ,_
3A 24%
(62.9)
I (11s24
Power
Cord
33V2
(85)
SIDE
inch (cm) Adjustable Legs
36
(91.5)
Under
Counter
34%
(87.9)
(67.9)
113/4 1
(298)÷1 i
I i
O I
O i )
BACK
2_
(7.3)
Water
Inlets
31%
(80.3)
12

Installation Instructions
UNPACKING THE WASHER
A WARNING:
bags after tile washer is unpacked. Children might use
then/fi)r play. Caroms covered with rugs, bedspreads,
or plastic sheets can become airtight chambeI_
causing suffocation. Place all materials in a garbage
container or make materials inaccessible to children.
1. Cut tile shil)ping carton along tile dotted line at tile
base of tile refit.
2. X4q/ile it is in tile carton, careflfllv lay tile washer on its
back side.
3. Reillo_,e tile st_rofoaill base.
4. CareflflE retm'n tile washer to an ui)ri(*ht_ position and
i'eillo_,e the c_li'ton,
5. Careflfll) move tile washer to within 4 teet (122 cm) of
the final location,
6. Remove tile fl)llowing fl'om tile back side of tile washer:
4 bolts
4 yellow plastic space_
3 metal "P" clamps
BOLT
SPACER
_1_ "P" CLAMP
7. Remove tile service panel fl'om tile fl'ont ot tile washer:
8. Remove the 4 nuts mad 6 large washers that attach the
2 yellow shipping braces to the &cmn mad the base.
Lift up on the drum mad remove the braces (a yellow
ribbon surromads the items to be removed). These
braces must be removed to allow the power supply
cord to be released from the shipping ring.
NOTE: Failure to remove tile shil)l)ing braces can catlse
tile washer to become severely unbalanced.
9. Rein(we tile large Styrofi)am block located trader tile
drum. i,ifl up on tile drum, tilt tile base of tile fi)am
block inwards toward the rear of the washer tmtil flee,
and then pull tile block out.
10. Remove and discard tile vellow ribbon and label fl'om
the fl'ont of the washer;
@
11. From tile rear ot tile washeI; careflflly pull out tile
power supply cord through tile hole in tile backsheet.
12. Replace the service panel aim SCI'e_vs.
Save all bolts, washers, spacers, brackets, damps, and
blocks for future use.
NOTE: If you must tr;msl)ort tile washer at a later date,
u)/, Inust reinst;lll tile shil)ping SUl)l)ort hardware to
prevent shiI)I)ilag damage. Kee I) the hardware in the
plastic bag pr(wided.
13

Installation Instructions
ELECTRICAL REQUIREMENTS
Read these instructions completely
and carefully.
CIRCUIT - Individual, properly polarized and grounded
15-amp branch circuit fllsed with 15-amp time-delay fllse
or circuit breaker:
POWER SUPPLY- 2-wire, with grotmd, 120wolt, single-
phase, 60-Hz, Mternating CmTent.
OUTLET RECEPTACLE - Properly grotmded
3-prong receptacle to be locamd so the power supply coM
is accessible when the washer is in an installed position.
@
@
GROUNDING REQUIREMENTS
WARNING: ImI,,oI,e,connectionofthe
equipment grotmding conductor can result in a risk
(ff electrical shock. Check with a licensed electrician
if you are in doubt as to whether the appliance is
propedy grotmded.
1. The washer MUST be grotmded. In the event ot
malflmcfion or breakdown, grounding will reduce
the risk ot electrical shock by providing a path of least
resistance t0r electrical cmTent.
Since v(>m"washer is equipped with a power sui_plv
cord having an equipment-gromMing conductor and
a grotmding plug, the plug MUST be plugged into an
ai)i)ropriate , coppe_vired receptacle that is i)roperly
installed and grotmded in accordance with all local
codes and ordinances or in the absence ot local codes,
with the National Electrical Codes, ANSI/NFPA 70
(latest edition)./t in doubt, call a licensed electfidan.
DO NOT ('lit off-or alter the grotmding prong on the
power supply cord. In situations where a two-slot
receptacle is present, it is the owner's responsibility to
have a licensed electrician replace it with a properly
grounded three-prong gromMing-Qpe receptacle.
WATER SUPPLY REQUIREMENTS
Hot and cold water fimcets MUST be installed within
42 inches (] 07 cm) of yore" washer's water inlet. The
fimcets MUST be 3/4" (1.9 cm) garden hose-t)'l)e so
inlet hoses can be connected. Water pressm'e MUST be
bet_ven 10 and 120 pounds per square inch (maMmum
tmbalanced pressm'e, hot vs. cold, l 0 psi.) Y_)m"water
department can a(Mse you of yore" water pressm'e.
The hot water temperature should be set to deliver
water at 120 ° to 140°F (48°-60°C).
DRAIN REQUIREMENTS
1. Drain capable ot eliminating 17 gals (64.3 i,)
per minute.
2. A standpipe diameter of 1 1/4" (3.18 cm) minim urn.
3. The standpipe height above the floor
should be:
Minimum height: 24" (61 cm)
Maxim um height: 96" (244 cm )
O
o oo
BACK
96 in.
(244 cm)
Max.
24 in.
(61 cm)
Min.
NOTE: The drain hose attached to the washer can reach
a 58" (147 cm) high standpipe. For a higher standpipe,
contact an authorized parts distributor: If the drain is less
than 24" (61 cm), install a siphon break kit, available at
yore" local hardware store.
14

Installation Instructions
INSTALLING THE WASHER
1. Run some water fl'om the hot and cold fimcets to flush
the water lines and remove particles that might clog up
the water valve screens.
2. Remove the inlet hoses and rubber washers fl'om the
plastic bag and install the rubber washe_ in each end
of the inlet hoses.
3. (90 ° elbow end)
Carefifllv com_ect the inlet
hose marked HOT to the
outside "H" outlet of the
water \;five. Tighten by
hand, then tighten another
2/3 mrn with pliers.
Carefifllv com_ect the other
inlet hose to the inside "C"
outlet of the water wflve. Tighten by hand; then tighten
another 2/3 mrn with pliers. Do not crossthread or
over-tighten these comaections.
4. Com_ect the inlet hose ends to the HOT and COI,D
water fimcets tightly by hand, then tighten another 2/3
mrn with pliers. Turn the water on and check fin" leaks.
5,
6,
Careflfllv move the washer to its final location. Genflv
lifi up on the fl'ont of the washer and slide back.
NOTE: Do not use the dispenser drawer or door to lifi
the washer.
_]th the washer in its
final position, place a
level on top of the
washer (if the washer
is installed trader a
counter, the washer
should not be able to
rock). At!just the fl'ont
leveling legs up or
down to ensure the washer is resting solid. Tm'n the
lock nuts on each leg up towards the base of the
washer and snug with a wrench.
NOTE: Keep the leg extension at a minimum to
prevent excessive vibration. The fi_rther out the
legs are extended, the more the washer will vibrate.
If the floor is not level or is damaged, you may have
to extend the rear leveling legs. For tmdercounter
instnllations, you can at!just the rear legs by removing
the front service panel.
15

Installation Instructions
INSTALLING THE WASHER (cont.)
7. Fo_m a U shape on tile end of tile drain hose with
tile hose pointed toward tile drain. Place tile hose
in a laundry tub or standi)ipe and secure it with
tile cable tie provided in tile enclosm'e package.
NOTE: If the drain hose is placed in a standpii)e
without limning a U shape, a siphoning action could
occm: There must be an air gap around tile drain hose.
A snug hose fit can also cause a siphoning action.
CableTie
CableTie
CableTie
8.
Plug tile power cord into a grounded outlet.
NOTE: Check to be sure the power is off at a
circuit breaker/fllse box before plugging the power
cord into an outlet.
9. Turn on tile power at a circuit breaker/fllse box.
10. Read the rest of this Owner's Manual. It contains
wfluable and hell)tiff information that will save vou
time and monev.
11. Before starting the washer, check to make sure:
Main power is turned on.
Tile washer is plugged in.
Tile water fimcets are turned on.
The unit is level.
Tile shiI)ping support hardware is removed
and saved.
Tile drain hose is properly tied up.
There are no leaks at tile fimcet, drain line
or w;ishei:
12. I_am tile washer through a complete cycle. Check
fl:,r water leaks and proper operation.
13. If yam" washer does not operate, please review
the Before You Call For Service section before
calling fin" service.
14. Place these inst_ uctions in a location near the
washer fin" fllture reference.
REPLACEMENT PARTS
If replacement parts are needed fi:,r your washe_; they
can be ordered in tile United States by visiting ore"
_4'ebsite at ge.com or by calling 800.GE.CARES.
In Canada, write to Manager, Consumer Relations,
Camco Inc., 1 Factory i,ane, Suite 310, Moncton, N.B.
E1C 9M3.
16

Beforeyoucall forservice...
Troubleshooting -tips
Save time and money! Review the charts on the following
pages first and you may not need to call for service.
Possible Causes What ToDo
Waterleaks Fill hoses or drain hose is • Make sure hose connections are tight at washer and
improperly commcted timcets and make sure end of drain hose is co_xecflv
inserted in and secured to drain tiwilil_'.
Household drain may " Check household l)lumbing. You may need to call
he dogged a plumbe_:
Constaa_t water pressure • Tighten hoses at the tilt/cets ;Ind tt/Yn the water off
to the fill hoses at the atter each use.
water source
" Check condition of the fill hoses; they should be
tel)laced e\'el T 5 veals.
Oversudsh_g " Use less deteI'gent or low sudsing detel'gent.
Toomany suds Type of detergent " Switch t_ a l_sudsing detergent and fl_ll_w
instructions on package.
Very soft water " Try less detergent.
Water won't drain Drain hose is khaked or " Straighten drain hose and make St/l'e washer is not
improperly commcted sitting on it.
• Top of drain outlet should be less than 8 ft. (2.5 m)
nb_)x'e flO_)l:
Household drain may • Check household l)lumbing. You may need to call
be clogged a plulubel:
Watertemperature Control is not set properly • (',heck water temperature control and a(!just.
is incorrect
Water supply is hnpmperly " Make sure hoses ;u'e connected to correct thucets.
commcted
Water valve screens are • WtlF/l ot_ the x_zlter SOtlFCe _lJl(l FeHIo\re the _;iter CO/l/IeCtiOlI
stopped up hoses ti'om the upper back of the washe/: Use a brus]l or
toothpick to cle:m file screeHs ill die m;whilm, Recommct
the hoses mid tunl the s_atel" back on.
House water heater is • Make sure house water heater is delivering water
not set properly at 120°-140°F (48°-60°C).
Water does not enter Water supply is turned off " Turn on b()th h()t and cold tiu/cets fidlv.
washer or enters slowly
/7

Beforeyoucall forservice...
Possible Causes What ToDo
Washerpauses in cycle The washer normally pauses
between washing steps
Washer won't operate Washer is tmplugged • Make sure cord is I)lugged,, securely• into a working, outlet.
Water supply is turned off • Turn both hot and cold fimcets flllE on.
Circuit breaJ_er/fuse is • Check house circuit breakei_/fllses. Replace fuses or
tripped/blown reset breaker: Washer should ha'_e separate outlet.
Controls axe not set • Check controls and make S/li'e Cycle knob is pulled o/it.
properly
Door is open • Close door and pull C_cle knob out.
Dispenser drawer is open • Close drawe_:
Motor is overheated • _M_sher motor will stop if it becomes oxerheated. It
will automatically restart after a cool down period of
up to 30 minutes (if washer has not been manually
turned off).
Washer won'tspin Washer door open • Make sm'e door is ch)sed.
Dispenser drawer open • Close drawe_:
Load is too small • Add one or two similar items to help balance tile load.
Possible Causes What ToDo
Washer is noisy Washer is uneven • Make sure washer is level and rests firefly on tile floox:
Washer load is m_balm_ced • Push tile Cycle knob in to stop tile washe_; open tile
door and redistribute tile h)ad evenlx. Close tile door
and restnrt.
High pitchjet engh_e seined • This is nomml dtwino the spincvde._ ,
Squealing sound or hot • _'asher is oxerloaded. Stop washer and reduce h)ad.
rubber odor
Shipping b
olts m_d foam block • See ]nstnllation ]nstru(tions fin" directions to remoxe
have not been removed shipping bolts and loam bh)ck.
Rattling m_d clm_khag caused • Check (hmn for foreign objects. Tm'n items with
by foreign objects in tub metal fasteners inside out. Call authorized servicer to
or pump or metal fasteners inspect pump.
hitting tub
i!!
Lint orresidue on
clothes
Possible Causes
Incorrect sorting
Washing too long
What ToDo
• Separate lint produce_ ti'om lint collecting.
• Excess wash time max create lint.
ii
Detergent not dJssolvh_g • Try a liquid detergent.
• /_.lse _g}lIl/leY water teinperattlre.
Overloading • Wash drmn max be rifle loaded with loosely added items.
Incorrect use of fabric softener • Check rid)tic softener package fi)r instructions and fi)lh)w
directions for using dispense_:
/8

Possible Causes What ToDo
Clothes too wet Load is too slnall * Add one to two similar items.
Load is out of balance • Redistribute load.
Pilling Result of normal wear on • \_]file this is not caused by tire washe_, you can slow file
poly-cotton blends mad pilling process by washing gamwnts inside out.
fuzzy fabrics
Grayed or yellowed Not enough detergent • Llse c(m'ect amount o I detergent.
clothes
Hard water • Use hottest water safe fin" tid)ri('.
• Use a water conditioner like Calgou brand or install
:1 wHteI" S()ttellel',
Water is not hot enough • Make sure water heater is deliveYiug watel" at
120°-14t)°F (48°-60°C).
Detergent is not • TI_' a liquid detergent.
dissolving
Dye lrmasfer • Sort clothes by colo_:/f fhbfic label states wash separatelg,
trustable dyes may be indicated.
Colored spots Incorrect use of fabric • Check rid)rio softener package flw instructions mad fi)llow
softener directions tot using dispeuseL
Dye transfer • Sort whites or lightly colored items fl'om dark colors.
• Proml)tly Yel//ove W:lsh load fl'om washer.
Wrinkling Improper sorting • Avoid mixing heavv items (like work clothes) with
light items (like blouses).
Overloading • l,oa d )'_)ur washer s_) cloth Ks have era)ugh ro_)m
tO ll/ove fl'eelv.
Incorrect wash cycle • Match (kcle selection to flw t}])e ot t:abric you are
washing (especially fin" easy care loads).
Repeated wasl_lg in • Wash in w:mu or cold water:
water that is too hot
Snags, holes, tears, rips Phas, snaps, hooks, sharp • Fasten snaps, hooks, buttons and zippers.
or excessive wear buttons, belt buckles,
• Remove loose items like pins, objects in pockets
zippers, mad sharp objects
left in pockets and shaq) buttons.
• TlU'U knits (which snag easily) inside out.
Undiluted chlorine bleach • Never add tmdiluted bleach to wash or allow clothes
to come in coutnct with tmdiluted bleach. Follow
directions for use of bleach dispeuseL
Chemicals like hair bleach
or dye, permmaent wave
solution
• Rinse items that may have chemicals on them beflwe
washing.
/9

GEWasher Warranty. (forc.stome sintheUnitedStates)
Aft warranty service provided by our Factory Service Centers,
or an authorized Customer Care_ technician. Toschedule service, on-line,
24 hours a day, visit us at ge.com, or carl 800.GE.CARES(800.432.2737).
Please have serial number and model number available when calling
for service.
Staple your receipt here.
Proof of the original purchase
date is needed to obtain service
under the warrant_
,_We Will Replace:
One Year Anypatt of the washer which fails due to a defect in materials or workmanship. During this
Fromthe dateofthe limited one-yearwarranty, GE will also proxide, freeof charge,all labor and related serxice
origina!purchase costs to replace the defectixe part.
• Service trips to your home to teach you how to use
the product.
• Improper installation, delivery or maintenance.
• Failure of the product if it is abused, misused, or used for
other thml the intended purpose or used commercially.
• Dmnage after delivery.
• Replacement of house fuses or resetting of circuit
breakers.
• Dmnage to the product caused by accident, fire, floods
or acts of God.
• IncidentaJ or consequential dmnage caused by possible
defects with this applimlce.
• Product not accessible to provide required service.
EXCLUSION OFIMPLIED WARRANTIES--Your sole and exclusive remedy is product repa# as provided in this
Limited Warranty. Any implied warranties, including the implied warranties of merchantability or fitness for a
particular purpose, are limited to one year or the shortest period allowed bylaw.
Thiswarrantyis extendedto the owlbal purchaserand anysucceedingowner for productspurchasedfor home usewithlb the USA.If the product
islocatedin anarea where serviceby a GEAuthon2eflServicerisnot available,youmay be responsiblefora trip chargeor youmaybe required
tobringtheproducttoanAuthon2edGEServicelocatlbnforservice.InAlaska,the warrentyexcludesthecost ofshippingorservicecallsto yourhome.
Somestates do not allow the exclusionor l/rnitationof incidental orconsequentialdamages. Thiswarrantygives youspecihclegal nghts,and you
may alsohaveotherwhts which varyfrom state tostate. Toknow what yourlegal whts are, consultyourlocal orstate consumeraffairs office or
yourstate_ Attorney General.
Warrantor:General Electric Company.Louisville, KY 40225
2O

GEWasher Warranty. (Forc.stomersinCanada)
All warranty service provided by our Factory Service Centers or an authorized technician.
For service, call 1.800.361.3400.Please have serial number and model number available
when calling for service.
We Will Replace:
OneYear Anypartof the washer which tails due to a defect in materials or workmanship. During this
Fromthe date oftho limited one-year warranty,(,E will also proxide, free of charge, all labor and related serxice
originalpurchase costs to replace the defective part.
.... .....
• Service trips to your home to teach you how to use
the product.
• hnproper h_staJlation, delivery or mahltenmlce.
• Failure of the product if it is abused, misused, or used for
other than the intended purpose or used commereiaJly.
• Dmnage after delivery.
• Replacement of house fuses or resetting of circuit
breakers.
• Dmnage to the product caused by accident, f'tre, floods or
acts of God.
• h_cidentaJ or consequential dmnage caused by possible
defects with this appliance.
• Product not accessible to provide required service.
EXCLUSION OFIMPLIED WARRANTIES--Your sole and exclusive remedy is product repa# as provided in this
Limited Warranty. Any implied warranties, including the implied warranties of merchantability or fitness for a
particular purpose, are limited to one year or the shortest period allowed by law.
Thiswarrantyisextendedtotheon)lbalpurchaserandanysucceedingownerforproductspurchasedforhomeusewithlbCanada.
In-homewarrantyservicewillbeprovidedinareaswhereitisavaffableanddeemedreasonablebyCamcotoprovide.
I X4__RRANTOR IS NOT RESPONSIBLE FOR CONSEQUENTIAI_ D?d_4A(;ES. I
[ _rarrantor: CAMCO IN(;. ]
21
ConsumerSupport.
GEAppliancesWebsite i,,the,_.,.8.:go.cam
Have a question or need assistanre with yam" appliance? Try the (;E Appliances Website 24 hom_ a day,
any day of the year! For greater comvnience and faster se_Mce, you can now download Owner's Manuals,
order pints, catalogs, or even schedule service on-line. You can also '%sk Ore" Team of Experts "l" yoHr questions,
and so much more... In Canada: geappliances.ca
ScheduleService ix,the_.8.:go.cam
Expert (;E repair sexvice is onl_ one step awa} fl'om _om" do(m Get (m-line and schedule _our service at _our
convenience 24 hom_ an_ da} of the _ear! Or call 800.(lIE.CARES (800.432.2737) during mmnal business ham's.
In Canada, call 1.800.361.3400.
RealLifeDesignStudio ix,the_.8.:go.cam
GE supports the Llniversal Design concept--products, services and enviromnents that can be used by people at all
ages, sizes and capabilities. We recognize the need to design fi)r a wide range at physical and mental abilities and
impaim_ents. For details of GE's L)nive_al Design applications, including ldtchen design ideas fi:,r people with
disabilities, check out our Website today. Fox" the hearing impaired, please call 800.TDD.GEAC (800.833.4322).
In Canada, contact: Managex; Consmner Relations, Camco, Inc.
Suite 310, 1 Factorx I,ane
Moncton, N.B. E1 C 9M3
ExtendedWarranties
In the Ij.S.: go.cam
Purchase a (;E extended _<u'rant} and learn about special discomlts that are available _l_ile }ore" _<m'ant} is still
• o (( -c _c ,in effect. You can ptlrchase it on-line amq:ime, r call 8 ) ).(7)26.2224duxing noxinal business hotlrs. (;E (]OlXStllner
Home Services will still be there after }our warrant} expires. In Canada, call 1.888.261.2133.
PartsandAccessories
In the Ij.S.: go.corn
Individuals qualified to service their own appliances can have parts or accessories sent direcdy to their homes
(VISA, MasterCard and Discover (axds die accepted). Order on-line today, 24 hours evel y day or by phone at
800.626.2002 during normal business hours.
Instructions contained in this manual cover proceduresto fie performedbyany user. Other servicinggenerallyshould he
referred to qualified servicepersonnel Caution must fie exercised since impreperservicing may cause unsafe operation.
Customex_ in Canada shouk] consult the yelh)w pages fin" the nearest Camro service centeL or call 1.888.261.3055.
ContactUs
In the U.S.: go.cam
If you are not satisfied with the service you receive fl'om GE, contact us on ore" Website with all the details
including your phone numbe_; or write to: General Manage_; Customer Relations
GE Appliances, Appliance Park
Ix_uisville, KY 40225
In Canada: geappliaaaces.ca, or write to: Direct(m Consumer Relations, Camco, Inc.
Snite 310, 1 Factory Hme
Moncton, N.B. E1C 9M3
RegisterYourAppliance i,x the L).S.: _O, COm
Register your new appliance on-line---at your convenience! Timely, })r°duct registration, will allow for enhanced
commmfication and prompt service trader the terms of }our ",_arran_,,_ shotdd the need arise. You max also
mail in the pre-pfinted registration card included in the l)acldng, material. In Canada: geappliaaaces.ca
22