Loading ...
Loading ...
Loading ...
6
To Activate Sabbath Mode:
1. Press BAKE.
2. Press the number keypads to set the desired temperature. If
the temperature entered is not in the range of the temperatures
allowed, the minimum or maximum allowed temperature will
be displayed. Enter a temperature in the allowable range.
3. Press START LOWER.
For timed cooking in Sabbath mode, press COOK TIME, and
then press the number keypads to set the desired cook time.
Press START LOWER.
4. Press SETTINGS. Three tones will sound. Then press “7.”
“SAb” will appear in the display.
To Adjust Temperature:
1. Press the number keypad as instructed by the scrolling
text to select the new temperature.
NOTE: The temperature adjustment will not appear on
the display and no tones will sound. The scrolling text
will be shown on the display as it was before the keypad
was pressed.
2. Press START LOWER.
To Deactivate Sabbath Mode:
Press SETTINGS, and then press “7” to return to regular baking,
or press CANCEL LOWER to turn off the oven(s).
Aluminum Foil
IMPORTANT: To avoid permanent damage to the oven bottom
finish, do not line the oven bottom with any type of aluminum
foil or liner.
For best cooking results, do not cover entire oven rack with
aluminum foil because air must be able to move freely.
Positioning Racks and Bakeware
IMPORTANT: To avoid permanent damage to the porcelain
finish, do not place food or bakeware directly on the oven
door or bottom.
Racks
■ Position racks before turning on the oven.
■ Do not position racks with bakeware on them.
■ Make sure racks are level.
■ Place food so it will not rise into the broil element. Allow
at least ¹⁄₂" (1.3 cm) between pans and the broil element.
To move a rack, pull it out to the stop position, raise the front
edge, and then lift it out. Use the following illustrations and
charts as a guide for positioning racks.
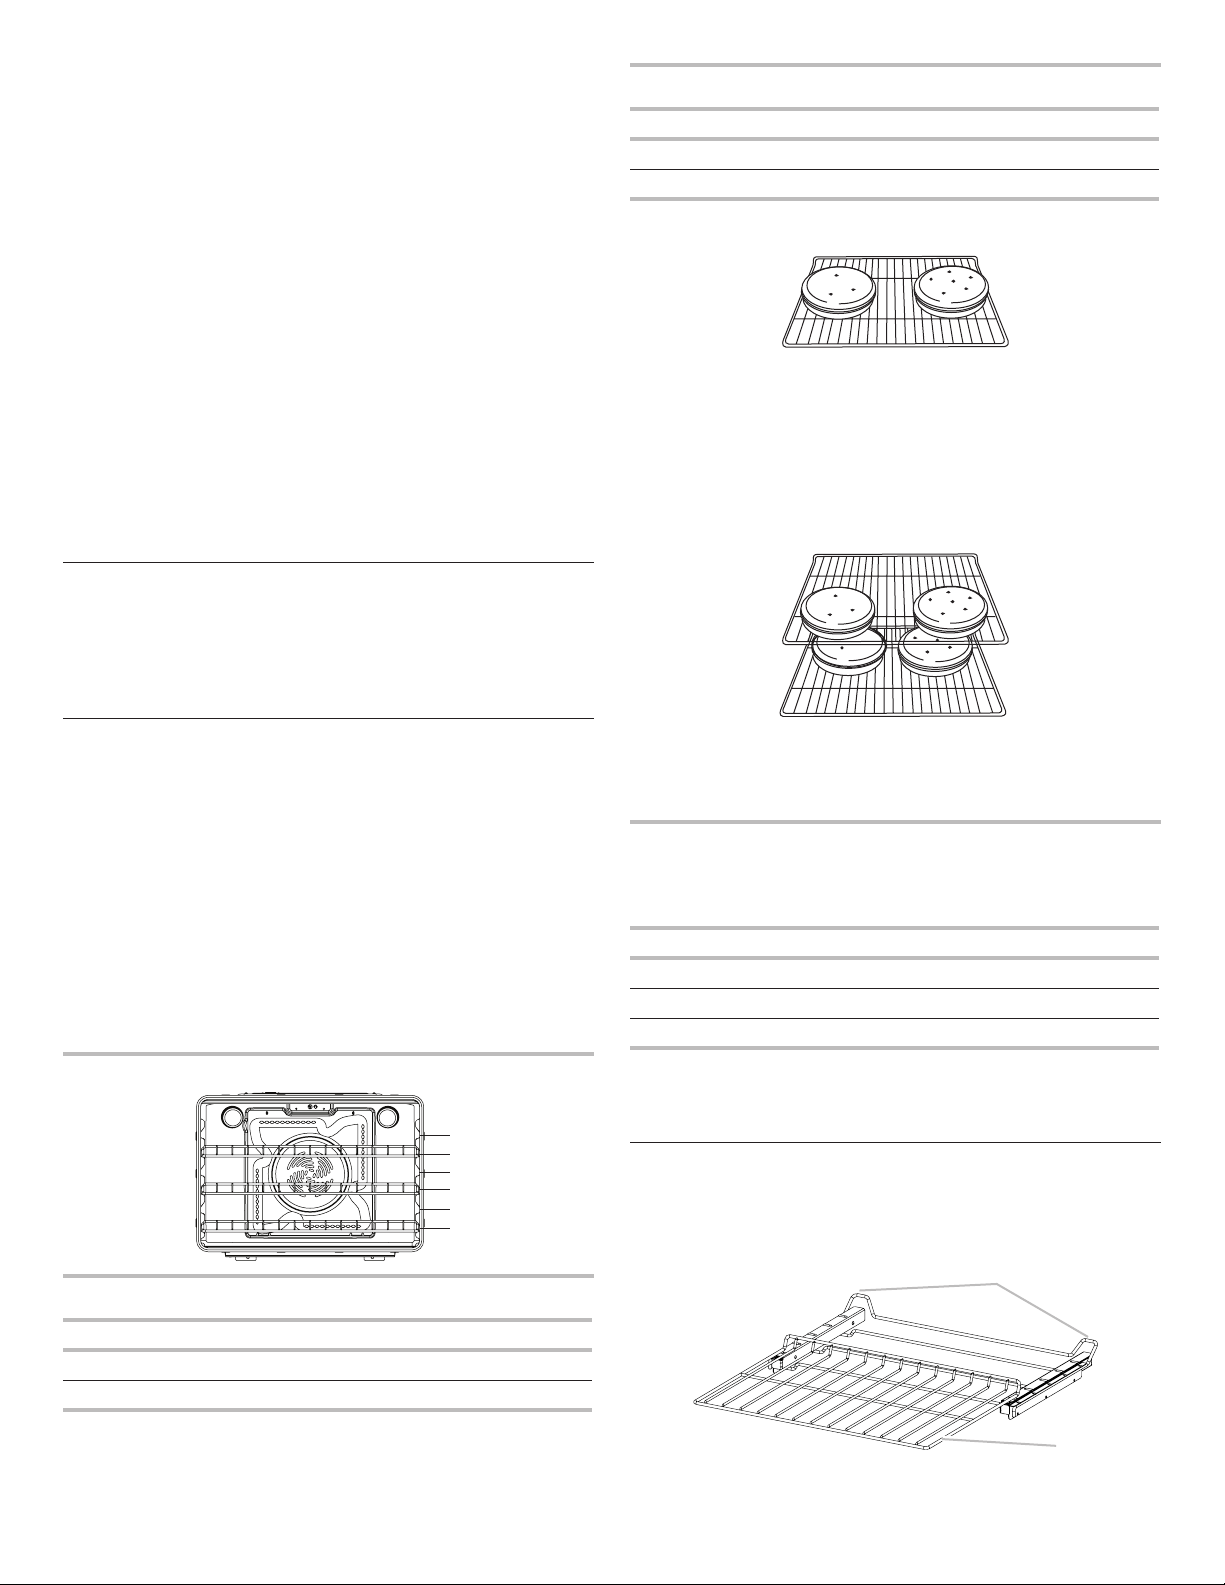
Rack Positions
Broiling
Food Rack Position
Broiled meats, poultry, fish 6
Broiling/searing meats, hamburgers, steaks 6
6
5
4
3
2
1
Baking
Food Rack Position
Large roasts, roasted meats, or poultry 1 or 2
Most baked goods, casseroles 2 or 3
Baking Layer Cakes on 1 Rack
Place the cakes on the rack as shown.
Multiple-Rack Cooking
2-rack: Use rack positions 2 and 5 for regular baking.
2-rack (convection only): Use rack positions 2 and 5
for convection baking.
Baking Layer Cakes on 2 Racks
For best results when baking cakes on 2 racks, use rack
positions 2 and 5 with the Bake function. Place the cakes
on the racks as shown.
Baking Cookies on 2 Racks
For best results when baking cookies on 2 racks, use rack
positions 2 and 5 with the Convection Bake function.
Bakeware
To cook food evenly, hot air must be able to circulate. Allow
2" (5.0 cm) of space around bakeware and oven walls. Use the
following chart as a guide.
Number of Pan(s) Position on Rack
1 Center of rack
2 Side by side
3 or 4 Refer to the previous illustration.
NOTE: Bakeware materials and color may affect results. Dark,
dull, non-stick, or glass pans may require shorter baking times.
In contrast, insulated or stainless steel pans may require longer
baking times. Follow bakeware manufacturer's recommendations.
Roll-Out Rack
The roll-out rack allows easy access to position and remove
food in the oven. The roll-out rack will fit in all positions.
Open Position
A
B
A. Slide rails
B. Sliding shelf
Loading ...
Loading ...
Loading ...