
Loading ...
Loading ...
Loading ...
5. HEALTH AND SAFETY INFORMATION
5.5 SAFETY INSTRUCTIONS FOR MAINS POWERED BATTERY PACKS
AND CHARGERS
Chargers
– The charger is for indoor use only.
– Prior to plugging the charger in to the supply, check that the plug and the cable are in good repair.
If either are damaged, have the defective item replaced immediately by a suitably qualified person.
If the casing of the battery charger is damaged, it is good policy to have the charger checked over
by a suitably qualified person.
– Only use a correctly rated mains outlet to provide power, do not plug into site generators, attach to
engine generators or D.C. sources. Do not use a mains socket outlet that is not switched.
– Use the correct Draper charger in conjunction with it’s corresponding battery pack. Do not charge
any other batteries with Draper chargers. Any other application is considered misuse. Do not
attempt to charge battery packs that are too hot (over 30ºC) or too cold (under 5ºC), if these
conditions apply set the battery pack aside to “normalise” before proceeding with the charging
operation.
– Set up the charger and cable in a safe place where it won’t be knocked, tripped over, stepped on,
etc. and where it is well ventilated. Make sure the ventilation slots in the charger case are not
obstructed, plug the charger into the socket outlet. Inspect the battery pack for damage, if it is
undamaged, plug it into the charger, ensuring the
correct orientation. (Most chargers and batteries have ‘keys’ etc, to make sure the battery pack is
not inserted incorrectly, if you are having to ‘force’ the battery pack into the charger, the chances
are you have it the wrong way round, check and try again). Switch the charger on and check that
the correct indicators illuminate, allow the battery pack to charge (see the Preparing the Battery
Charger instructions for your charger). Once charging is complete, switch the charger off, remove
the battery pack and store in a dry place, repeat the procedure if you have more than one battery
pack to charge.
Caution: When the battery charger has been continuously used, the battery charger will be hot.
Once the charging has been completed, give 15 minutes rest until the next charge.
– If, when the charger was switched on, the correct indications did not occur, leave for two or three
minutes to allow the charger to stabilise, if the correct indications occur, allow the charging cycle to
proceed as normal. If no indication appears at all switch off, remove the battery pack, unplug the
charger, check that the charger contacts and the battery contacts are clean and repeat the
process, if there is still no indication, switch off, remove the battery pack, unplug the charger and
check the fuse. If the fuse is blown, replace and repeat the process, if the fuse blows again, or if
the fuse was intact, attempt no further action. Refer the charger to a suitably qualified person for
repair.
5.6 CONNECTION TO THE POWER SUPPLY (CHARGER)
– Make sure the power supply information on the charger’s rating plate is compatible with the power
supply you intend to connect it to.
– The charger used by this product is designed for connection to a domestic power supply rated at
230V AC.
– If an extension lead is required, use an approved and compatible lead rated for this appliance.
Follow the instructions supplied with the extension lead.
– If using an extension lead, follow the instructions that came with your lead regarding maximum load
while the cable is wound. If in doubt, ensure that the entire cable is unwound. Using a coiled
extension lead will generate heat, which could melt the lead and cause a fire.
– †Double insulated : The charger used by this product requires no earth connection as
supplementary insulation is applied to the basic insulation to protect against electric shock in the
event of failure of the basic insulation.
- 11 -- 14 -
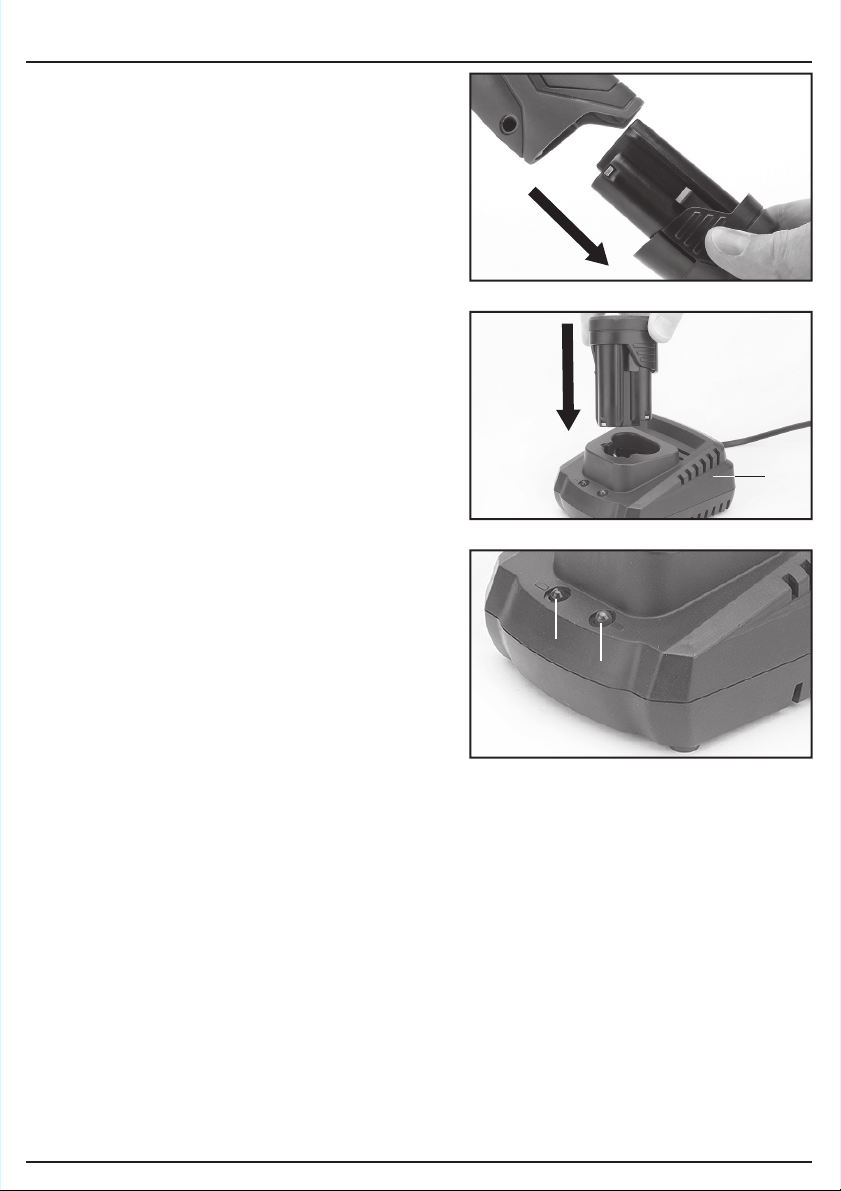
8. PREPARING THE BATTERY CHARGER
8.1 BATTERY PACK CHARGING –
FIGS.1 – 3
A full range of battery packs, chargers and accessories
are available from Draper Tools.
Please visit our website for details:
www.drapertools.com
Important: Only Draper designated battery packs and
chargers can be used in conjunction with this product.
Use of any other third party battery packs/chargers with
this product is considered misuse and will invalidate
the product’s warranty.
Once connected to the mains supply, recharging of the
battery can be left generally unsupervised, requiring
minimal attention. Complex circuit construction
monitors the battery condition, adjusting the recharge
current to suit. When the recharge cycle is complete,
to maintain the full capacity, a low output current will
continue as required.
Warning! Check the condition of the charger and
battery prior to each charge. If there is any sign of
damage then do not commence charging, seek advice
from Draper Tools.
– Check the mains voltage. Make sure the voltage of
the power source is the same as the voltage
specified on the rating plate of the charger unit.
– Plug the battery charger mains plug into the power
source. The green LED indicator will blink
indicating stand-by mode.
– Insert battery pack into the battery compartment of
the charger. The red LED indicator will light
solid. This indicates that the battery pack is being
fast charged automatically.
– When the battery pack is fully charged, the red LED
indicator will turn off and the green LED will
illuminate solid.
– Remove the battery pack from the charger and
unplug.
Important charging notes
– Longest life and best performance can be obtained if the battery pack is charged when the
surrounding air temperature is between 18°C (65°F) and 24°C (75°F).
– Do not charge battery pack in an air temperature below 4.5°C (40°F), or above 40.5°C (105°F).
This is important and will prevent serious damage to the battery pack.
– The charger is designed to fast charge the battery pack between 0°C (32°F) AND 45°C (113°F).
If the battery pack, when inserted, is too cold or too hot, the charger will not charge. The green
LED and the red LED will blink alternatively and continuously to indicate this situation. Once the air
temperature is within tolerance, the fast charging will begin.
FIG.2
FIG.3
FIG.1
Loading ...
Loading ...
Loading ...