the Tape Cassette Compartment Cover. Conrm that the
P-TOUCH PT-D460BT
D460BT
Thank you for purchasing the PT-D460BT (hereafter referred to as “the Label Maker”). Your
PT-D460BT produces professional, high-quality, durable labels. In addition, the variety of tape
cartridges available allows you to print labels with different widths and exciting colors.
Please read this guide, including the Product Safety Guide, before using this Label Maker. After
reading this guide, keep it in a safe place.
For FAQs, troubleshooting, and to download software and manuals, visit support.brother.com.
• Manuals in Spanish for this model are available at support.brother.com.
• Manuales en Español para este modelo están disponibles en support.brother.com.
Supplies
Brother TZe Tape Cassette Available widths:
0.13 in., 0.23 in., 0.35 in., 0.47 in., 0.70 in.
3.5 mm, 6 mm, 9 mm, 12 mm, 18 mm
Head Cleaning Tape Cassette TZeCL4
barcodes, ofce equipment labels, and folder
Safety Precautions
Be sure to read this section before using the product. It contains important safety instructions.
We recommend that you keep this document nearby for future reference.
• For servicing, adjustments, or repairs, contact Brother Customer Service or your local Brother dealer.
• If the product operates abnormally or any error occurs, or if any cable is damaged, turn off the product,
disconnect all cables, and contact Brother Customer Service or your local Brother dealer.
• We assume no responsibility for damages arising from earthquakes, re, other disasters, actions of third
parties, the user’s intentional or negligent operation, misuse, or operation under other special conditions.
• We assume no responsibility for damage (such as losses, loss of business prot, lost prots, business
disruptions, or a lost means of communication) that may result from the use of, or inability to use, the
product.
• We assume no responsibility for damages that may result from incorrect operation of the product by
connecting incompatible equipment or using incompatible software.
• We assume no responsibility for any damages or lost prot arising from the use of labels created with this
product, the disappearance or change of data due to failure, repair, or consumables and we do not accept
any claim from a third party.
• Brother reserves the right to make changes without notice in the specications and materials contained
herein. Furthermore, Brother shall not be responsible for any damages (including consequential) caused
by reliance on the materials presented, including but not limited to typographical and other errors relating
to the publications.
• For more information about the available software, see the User’s Guide on the Brother support website
at support.brother.com.
• The latest version of your product documentation is available on the Brother support website
at support.brother.com.
• The available models, accessories, and supplies may vary depending on the country or region.
• This product is approved for use in the country or region of purchase only.
WARNING
Failure to observe instructions and warnings could result in death or serious injuries.
• DO NOT operate, charge, or store the Label Maker, AC Adapter, USB Cable, and Alkaline Batteries in the
following locations (otherwise a re, electrical shock, smoke, or damage may occur):
- Near water, such as in a bathroom or near a water heater, or in an extremely humid or cold location.*
- In a location where it is exposed to rain or moisture.
- In an extremely dusty location.
- In an extremely hot location, such as near open ames, heaters, or in direct sunlight.
- In a closed car in direct sunlight.
- In a location where condensation may form.
- At a high altitude.
- During a thunderstorm.
• DO NOT use the Label Maker with a foreign object in it. If water, a metal object, or any other foreign object
enters the Label Maker, disconnect the AC Adapter and remove the batteries (if installed), and then contact
your local Brother dealer for repairs.
• If foreign objects are inserted into the Label Maker or its slots, connectors, ports, or Battery Compartment,
stop using the Label Maker, turn off the power, and then disconnect each cable or remove the batteries
(if installed).
• Stop using the Label Maker if there are noticeable abnormalities such as smell, heat, noise, deformities,
or discoloration.
• DO NOT use a damaged AC Adapter.
To avoid damaging the Label Maker, AC Adapter, USB Cable, or Alkaline Batteries, DO NOT:
- Place heavy objects on them.
- Dissamble or modify them.
- Drop or hit them.
- Allow them to get wet, for example, by handling them with wet hands or spilling liquids on them.
• DO NOT allow babies and children to play with the plastic bag that contained the Label Maker.
Dispose of the bag or keep it away from babies and children. There is a risk of suffocation.
Use only the specied AC Adapter.
responsibility for any accident or damage resulting from not using the specied AC Adapter and USB Cable.
Insert the plug rmly into the electrical outlet.
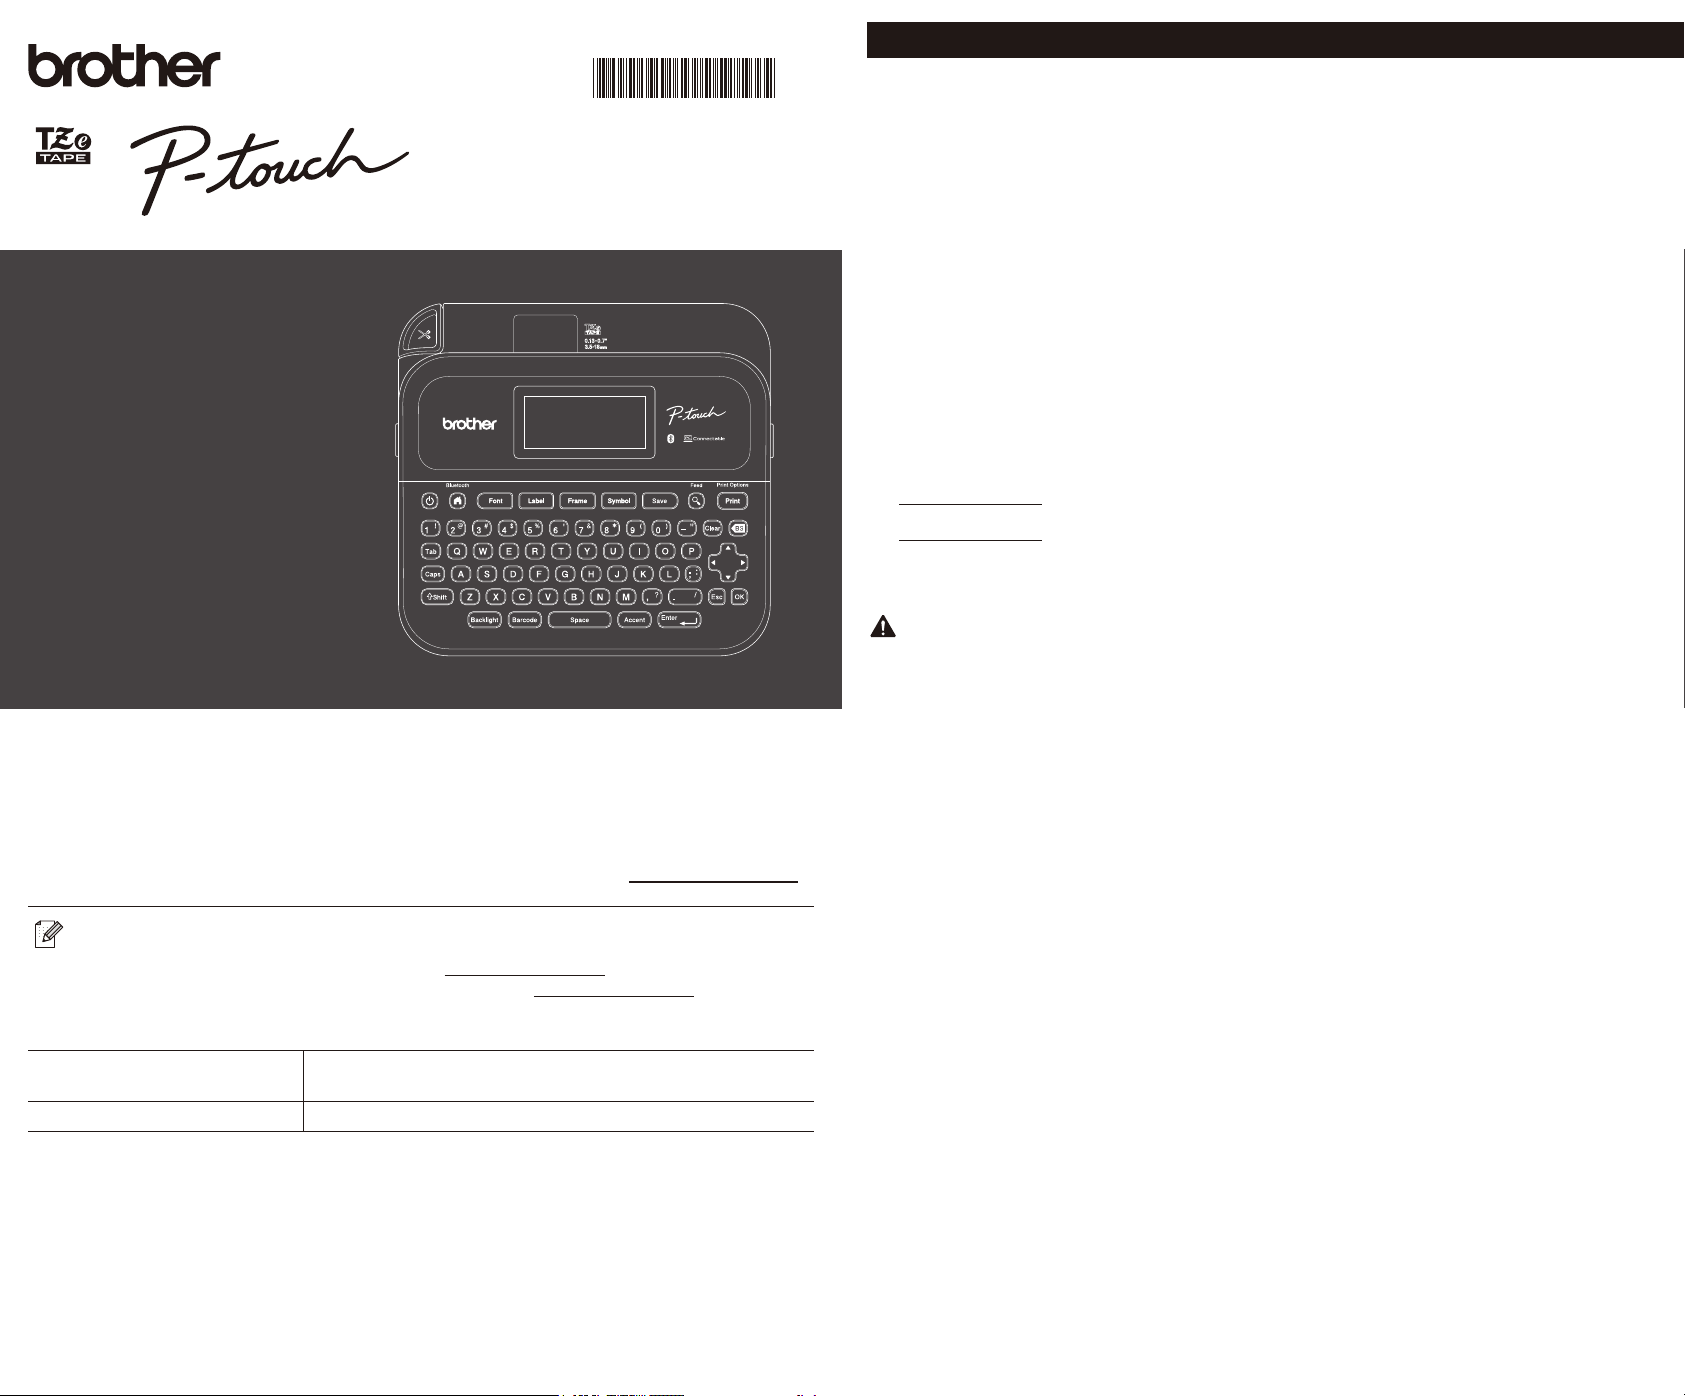
Keep ngers and other body parts away from the Cutter unit.
DO NOT touch the Cutter unit’s blade or insert your ngers inside the
Tape Exit Slot, otherwise ngers and other body parts may be injured.
Use only the specied AA alkaline batteries (LR6).
Be careful when closing the Tape Cassette Compartment Cover. There is a risk of injury if your nger gets
Store the Label Maker on a at, level, and stable surface.
Product Safety Guide
Changes or modications not expressly approved by Brother Industries, Ltd. could void the
development and popularization of energy-efcient ofce equipment. As an ENERGY
guidelines for energy efciency.
D026K8001A
* For more information, see the “Specications” section in your model’s User’s Guide.
the Tape Cassette Compartment Cover. Conrm that the
Remove the protective material (rst use only) before using the Label Maker.
all text and format settings will be cleared. Any text les
barcodes, ofce equipment labels, and folder
4
We assume no responsibility for damages arising from earthquakes, re, other disasters, actions of third
We assume no responsibility for damage (such as losses, loss of business prot, lost prots, business
We assume no responsibility for any damages or lost prot arising from the use of labels created with this
Brother reserves the right to make changes without notice in the specications and materials contained
following locations (otherwise a re, electrical shock, smoke, or damage may occur):
In an extremely hot location, such as near open ames, heaters, or in direct sunlight.
• DO NOT use the Label Maker in special environments, such as near medical equipment. Electromagnetic
waves may cause the medical equipment to malfunction.
• Users with heart pacemakers must move away from the Label Maker if they sense any abnormalities. Then,
immediately seek the advice of a medical professional.
• DO NOT forcibly bend or pull the USB Cable or AC Adapter.
• DO NOT touch the AC Adapter or plug with wet hands, otherwise an electrical shock may occur.
• Use only the specied AC Adapter.
• Use only the AC Adapter and USB Cable included with your Label Maker. Failure to do so may result in an
injury to yourself or others, or damage to the Label Maker, or other property. Brother does not assume any
responsibility for any accident or damage resulting from not using the specied AC Adapter and USB Cable.
• DO NOT connect the included AC Adapter and USB Cable to other products.
• Use the AC Adapter with standard electrical sockets (AC 100 V - 240 V 50/60 Hz).
• Insert the plug rmly into the electrical outlet.
• DO NOT use the batteries if they are damaged or leaking.
• Keep batteries away from infants. If batteries are ingested, contact emergency services immediately.
• DO NOT use sharp objects, such as tweezers or a metallic pen, to remove or replace batteries.
• If liquid (electrolyte) from the batteries gets into eyes, wash them immediately with clean water. Contact
emergency services immediately.
• DO NOT solder connections to the batteries.
• DO NOT use the batteries with the polarity (+) (-) reversed.
• DO NOT connect the + and - terminals with metal objects such as wire.
• DO NOT incinerate the batteries or dispose of them with household waste.
• Keep ngers and other body parts away from the Cutter unit.
• DO NOT touch the Cutter unit’s blade or insert your ngers inside the
Tape Exit Slot, otherwise ngers and other body parts may be injured.
• DO NOT touch any metal parts near the Print Head. The Print Head
becomes very hot during and immediately after use. DO NOT touch it
directly with your hands.
CAUTION
Failure to observe instructions and warnings could result in minor or moderate injuries.
Label Maker, USB Cable, AC Adapter, Alkaline Batteries
• Use only the specied AA alkaline batteries (LR6).
• DO NOT use combinations of old and new batteries or combinations of different types, charging levels,
manufacturers, or models.
• DO NOT drop the Label Maker when removing it from the box or relocating it, otherwise you may get injured.
• Be careful when closing the Tape Cassette Compartment Cover. There is a risk of injury if your nger gets
pinched between the upper and lower parts of the cover.
• When you are not using the Label Maker, store it out of the reach of children. In addition, do not allow
children to put the Label Maker parts or labels in their mouths. If any object has been swallowed, seek
medical attention immediately.
• DO NOT leave the Label Maker or any tape within the reach of babies and children.
• Store the Label Maker on a at, level, and stable surface.
• Remove the batteries and disconnect the AC Adapter if you do not intend to use the printer for an extended
period of time.
• DO NOT press on the Liquid Crystal Display (LCD).
• When disconnecting the AC Adapter from the electrical outlet, always hold the AC Adapter.
• DO NOT overload an electrical circuit with the AC Adapter.
• DO NOT open the Tape Cassette Compartment Cover when operating the Cutter unit.
• DO NOT apply excessive pressure to the Cutter unit.
Regulation
Federal Communications Commission (FCC) Supplier’s Declaration of Conformity (USA)
Responsible Party: Brother International Corporation
200 Crossing Boulevard
Bridgewater, NJ 08807-0911, U.S.A.
TEL: (908) 704-1700
Product Name: Brother Label Maker Electronic Labeling System
Model Number: PT-D460BT
Label Maker complies with Part 15 of the FCC Rules. Operation is subject to the following two
conditions: (1) Label Maker may not cause harmful interference, and (2) Label Maker must
accept any interference received, including interference that may cause undesired operation.
Label Maker has been tested and found to comply with the limits for a Class B digital device,
pursuant to Part 15 of the FCC Rules. These limits are designed to provide reasonable
protection against harmful interference in a residential installation. Label Maker generates,
uses and can radiate radio frequency energy and, if not installed and used in accordance with
the instructions, may cause harmful interference to radio communications. However, there
is no guarantee that interference will not occur in a particular installation. If the Label Maker
does cause harmful interference to radio or television reception, which can be determined
by turning the Label Maker off and on, the user is encouraged to try to correct the interference
by one or more of the following measures:
• Reorient or relocate the receiving antenna.
• Increase the separation between the Label Maker and receiver.
• Connect the Label Maker into an outlet on a circuit different from that to which the receiver
is connected.
• Consult the dealer or an experienced radio/TV technician for help.
• This transmitter must not be co-located or operated in conjunction with any other antenna or
transmitter.
Important
• The enclosed interface cable should be used in order to ensure compliance with the limits
for a Class B digital device.
• Changes or modications not expressly approved by Brother Industries, Ltd. could void the
user’s authority to operate the Label Maker.
RF Exposure Notice (USA)
This equipment complies with FCC radiation exposure limits set forth for an uncontrolled
environment and meets the FCC radio frequency (RF) Exposure Guidelines. This equipment has
very low levels of RF energy that it deemed to comply without maximum permissive exposure
evaluation (MPE). [But it is desirable that it should be installed and operated keeping the radiator
at least 20cm or more away from person’s body.]
CAUTION
RISK OF EXPLOSION IF BATTERIES ARE REPLACED WITH AN INCORRECT TYPE.
DISPOSE OF USED BATTERIES ACCORDING TO THE INSTRUCTIONS.
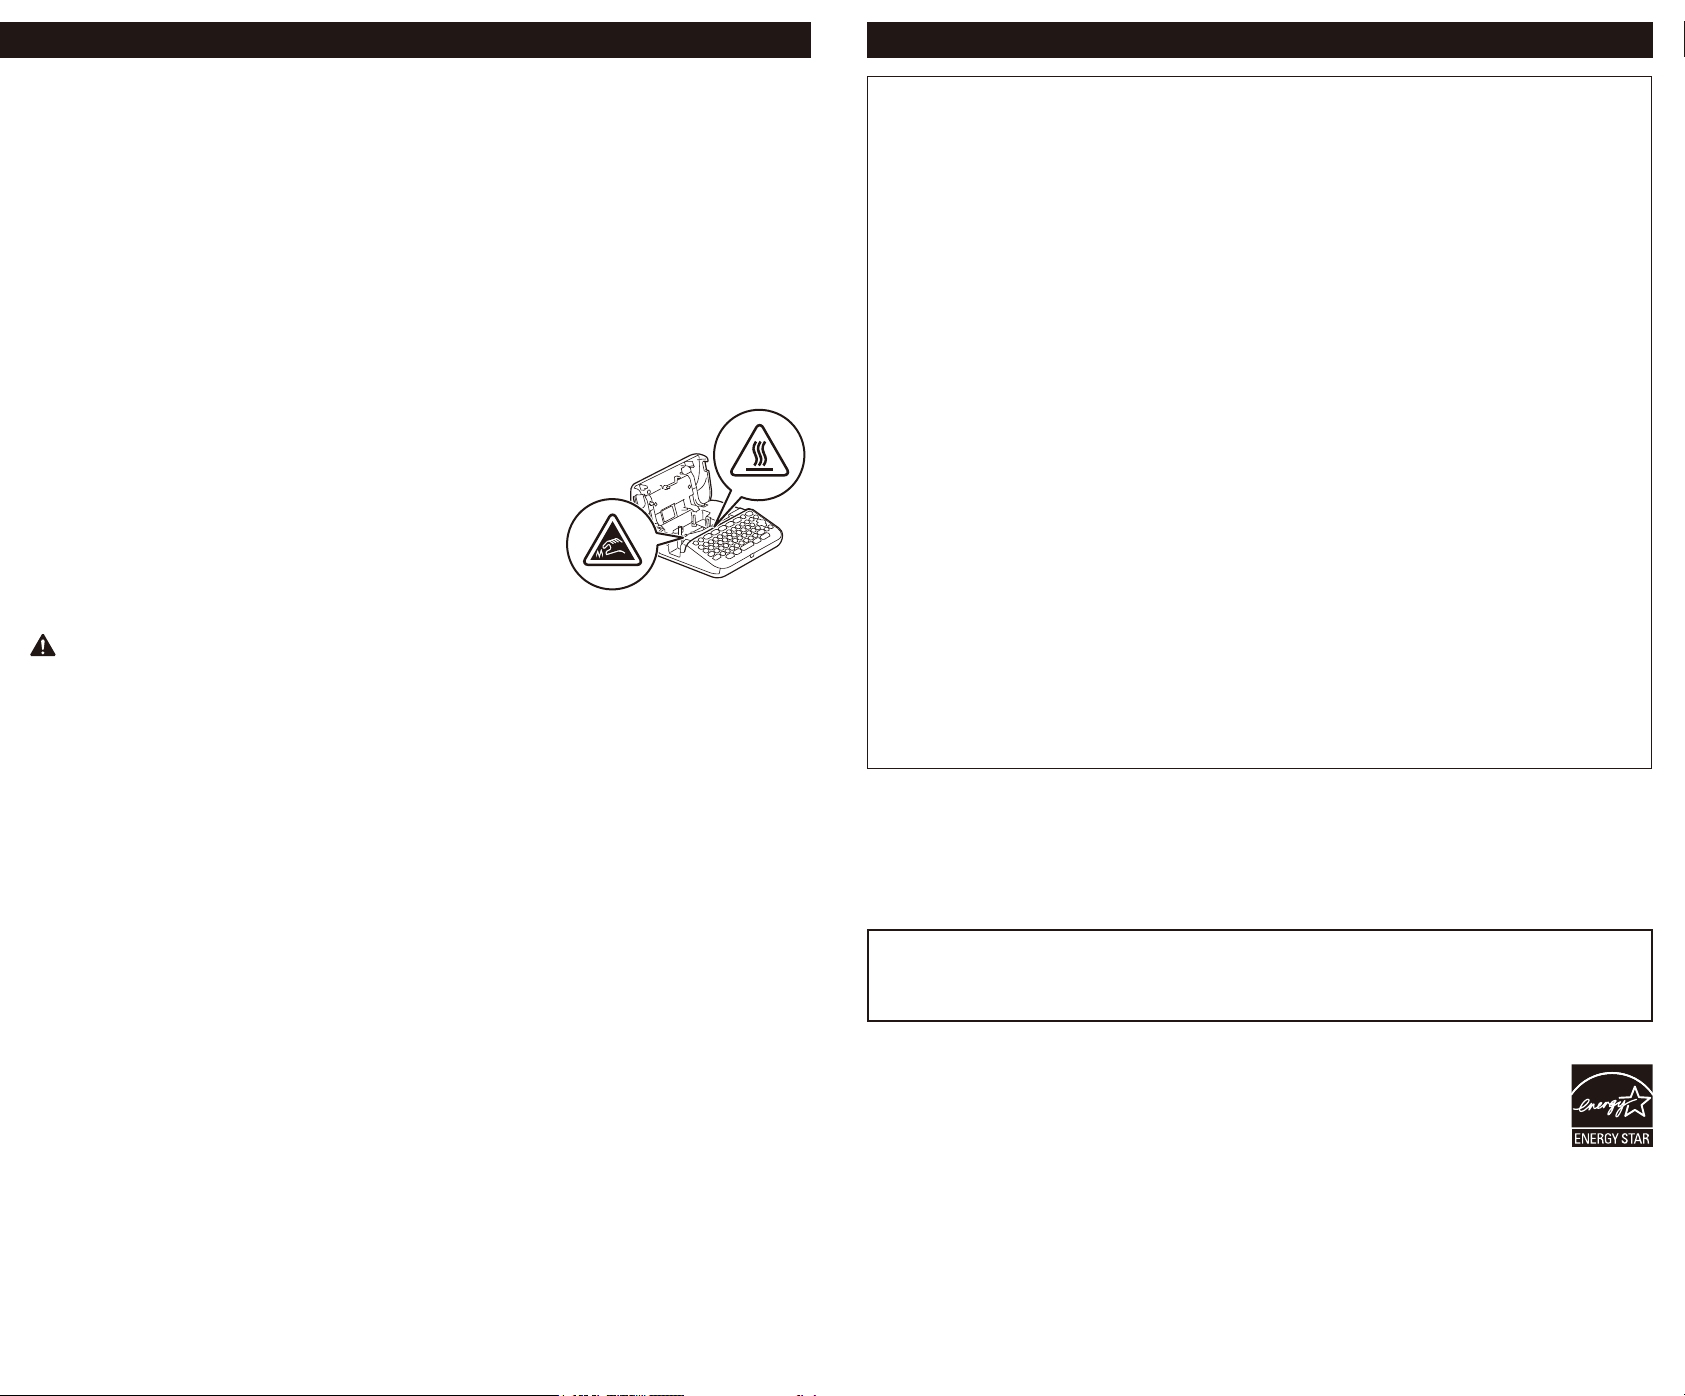
International ENERGY STAR
®
Compliance Statement (US only)
The purpose of the International ENERGY STAR
®
Program is to promote the
development and popularization of energy-efcient ofce equipment. As an ENERGY
STAR
®
Partner, Brother Industries, Ltd. has determined that this product meets the
ENERGY STAR
®
guidelines for energy efciency.
For more information, see the “Specications” section in your model’s
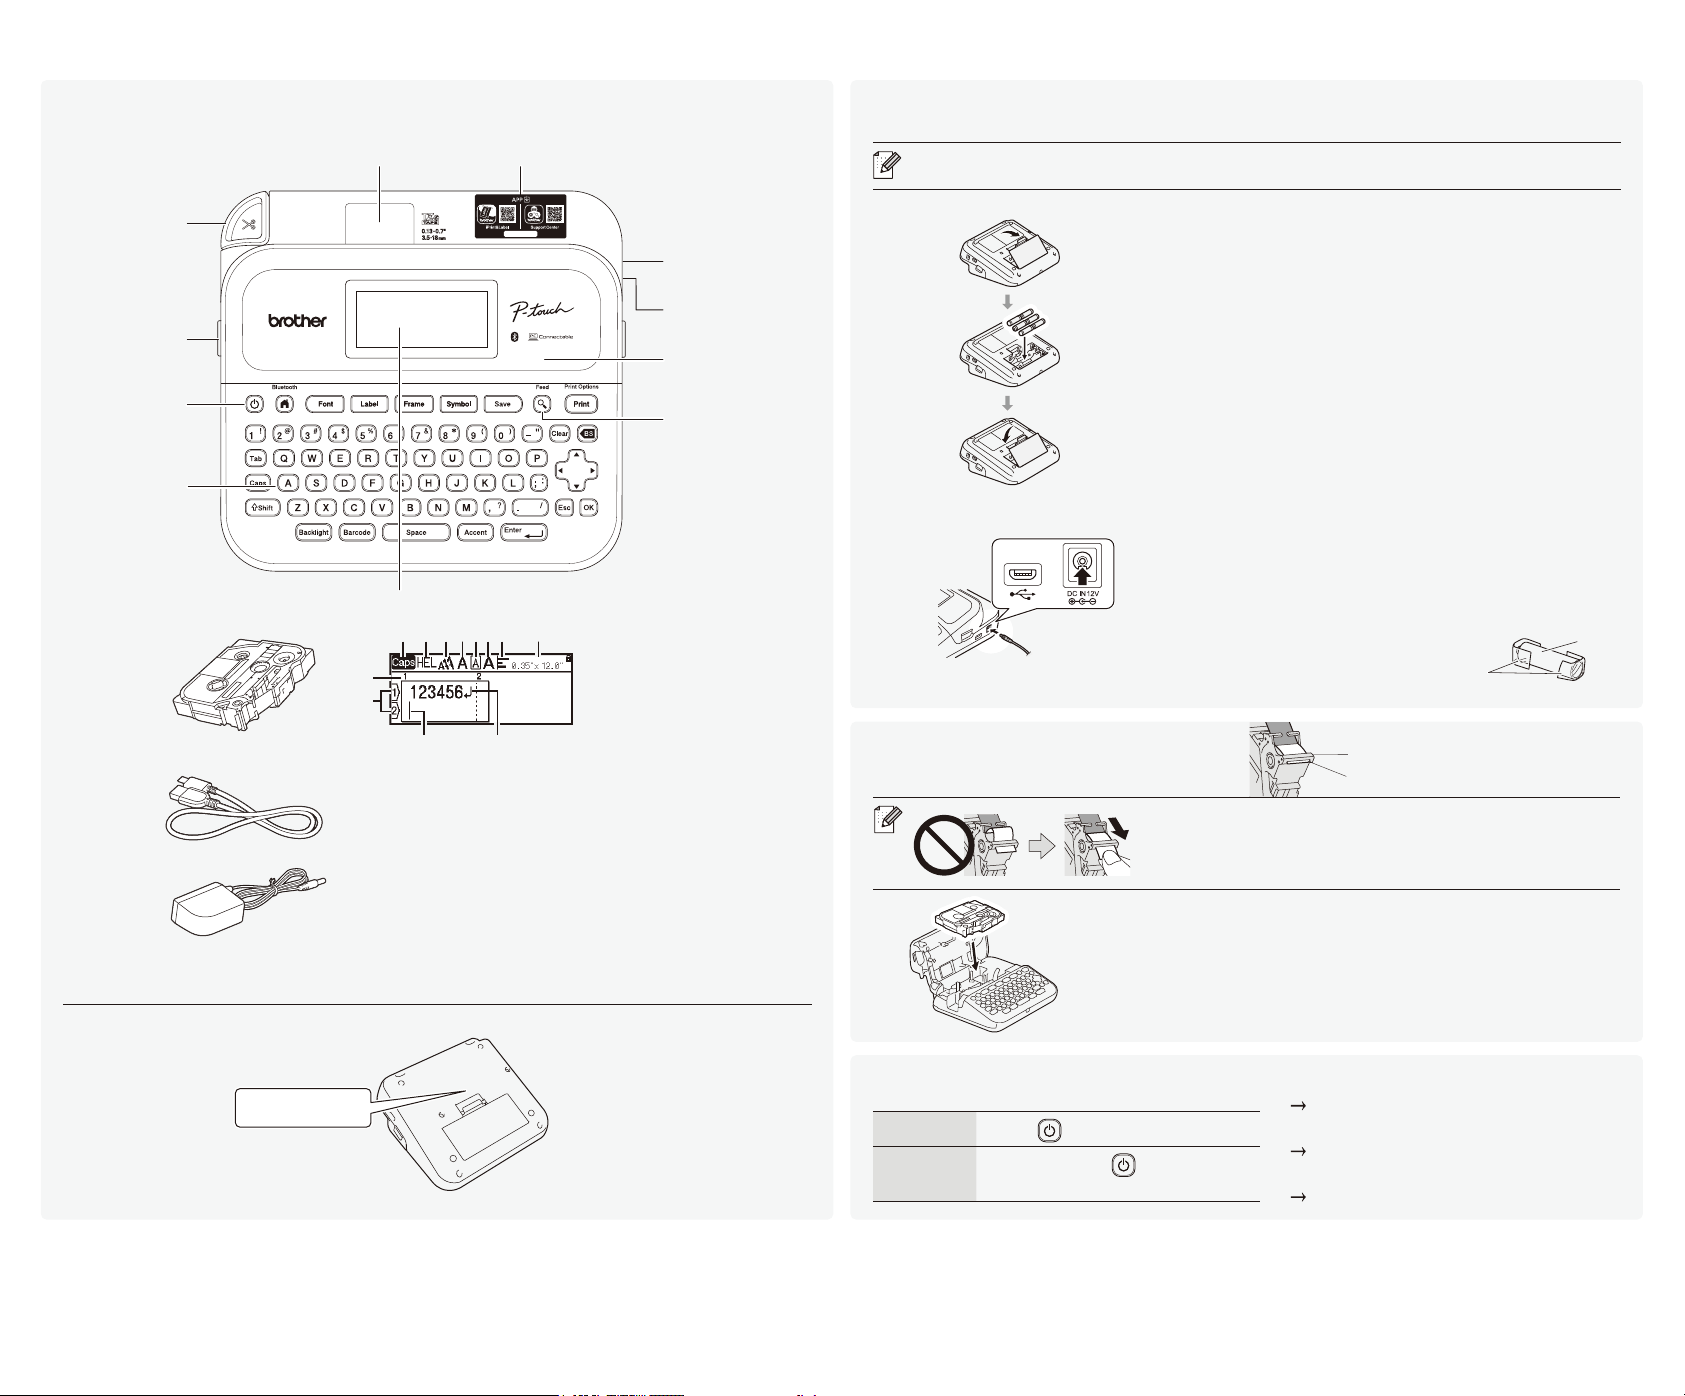
3. Insert the Tape Cassette
• After the tape passes under the Tape Guide, pull the tip
to remove any slack in the tape.
• Make sure the tape is not caught in the Label Maker
when inserting or removing the Tape Cassette.
1. Insert the Tape Cassette following the illustration under
the Tape Cassette Compartment Cover. Conrm that the
tip of the tape is pointed at the Tape Exit Slot.
2. Press the Tape Cassette into the Label Maker until
it locks into place and then close the Tape Cassette
Compartment Cover.
End of tape
Tape Guide
4. Turn the Power ON or OFF
To print from the Label Maker, go to
1. Print from the Label Maker
To print from your computer, go to
2. Print from Your Computer
To print from your mobile device, go to
3. Print from Your Mobile Device
Power on
Press
.
Power off
Press and hold
until the Label
Maker turns off.
2. Install Batteries or Connect the AC Adapter
Remove the protective material (rst use only) before using the Label Maker.
Batteries
AC Adapter
• When using the AC Adapter (AD-E001A):
- Insert the Adapter cord plug into the AC Adapter Jack
on the side of the printer.
- Insert the plug into the nearest standard electrical outlet.
For memory backup, we recommend using AA alkaline
batteries (LR6) together with the AC Adapter.
• To safeguard and back up the Label Maker’s memory,
when the AC Adapter is unplugged, keep AA alkaline
batteries (LR6) installed in the Label Maker.
• When power is disconnected for more than two minutes,
all text and format settings will be cleared. Any text les
stored in the memory will also be cleared.
• Remove the batteries if you do not intend to use the
Label Maker for an extended period of time.
• Dispose of the batteries at an appropriate collection
point, not in the general waste stream. In addition,
be sure to observe all applicable federal, state, and local
regulations.
• When storing or discarding the batteries, wrap them (for
example with cellophane tape), to prevent them from
short-circuiting.
(Battery insulation example)
1. Cellophane tape
2. Alkaline battery
1
2
barcodes, ofce equipment labels, and folder
1. LCD and Keyboard
D460BT
Starter
Tape Cassette
USB Cable
AC Adapter
Tape Viewer
1. Caps mode
2-7. Font Style Icons
8. Label Width x Label Length
9. Block number
10. Line number
11. Cursor
12. Return mark
Tape Cassette
Compartment
Cover
Tape Exit Slot
LCD
Keyboard
Power
Preview
Application Download Label
Tape Cutter
Lever
AC Adapter Jack
USB Port
1
9
10
11 12
2 3 4 5 6 7 8
The components included in the box may differ depending on your country or region.
Serial Number Location
Serial Number
Before Use
We assume no responsibility for damages arising from earthquakes, re, other disasters, actions of third
We assume no responsibility for damage (such as losses, loss of business prot, lost prots, business
We assume no responsibility for any damages or lost prot arising from the use of labels created with this
Brother reserves the right to make changes without notice in the specications and materials contained
following locations (otherwise a re, electrical shock, smoke, or damage may occur):
In an extremely hot location, such as near open ames, heaters, or in direct sunlight.
Use only the specied AC Adapter.
responsibility for any accident or damage resulting from not using the specied AC Adapter and USB Cable.
Insert the plug rmly into the electrical outlet.
Keep ngers and other body parts away from the Cutter unit.
DO NOT touch the Cutter unit’s blade or insert your ngers inside the
Tape Exit Slot, otherwise ngers and other body parts may be injured.
Use only the specied AA alkaline batteries (LR6).
Be careful when closing the Tape Cassette Compartment Cover. There is a risk of injury if your nger gets
Store the Label Maker on a at, level, and stable surface.
Changes or modications not expressly approved by Brother Industries, Ltd. could void the
development and popularization of energy-efcient ofce equipment. As an ENERGY
guidelines for energy efciency.

the Tape Cassette Compartment Cover. Conrm that the
Remove the protective material (rst use only) before using the Label Maker.
all text and format settings will be cleared. Any text les
2. Print from Your Computer
Windows
In your browser’s address bar, type install.brother. Download and
install the Printer Driver and P-touch Editor by following the on-
screen instructions.
Mac
Download P-touch Editor from the App Store to print from your
Mac. You do not need to download and install any drivers.
http://install.brother
• When printing from your computer, you must connect the Label Maker and computer
with the included USB Cable or via Bluetooth connection.
• This Label Maker does not support Wi-Fi connections.
Software Features
Printer Driver
Software required to print from a Label Maker using a Windows
computer.
P-touch Editor
Label creation software for computers. This application comes
with built-in drawing tools that allow you to print a wide variety of
custom labels in complex layouts with text of different fonts and
styles, frames, imported images, barcodes, and more.
3. Print from Your Mobile Device
Application Installation
Download the applications from the App Store or Google Play™:
Brother
iPrint&Label
Create labels for business use, including
barcodes, ofce equipment labels, and folder
tab labels.
Support Center
App
This app provides access to setup
information, product manuals, FAQs, and
troubleshooting tips.
To save tape, apply this setting:
Brother iPrint&Label - Chain Printing: ON
Print your labels and leave the last label in the Label Maker until you are ready to print
a new label.
How to enable or disable Bluetooth
1. Check that the printer is on.
2.
[Settings] / [Bluetooth] /
[Bluetooth (On/Off)]
/ [On]/[Off] /
Pair the Label Maker with Your Mobile Device via Bluetooth
PT-D460BT
1. Go to your mobile device’s settings
menu and enable the Bluetooth
option.
2. Use the pairing number displayed
on the Application Download Label
attached to the front of the Label
Maker.
• If the printer prompts you to enter a PIN, enter “0000”.
• Pairing instructions may differ slightly, depending on your mobile device.
• If your mobile device cannot discover the printer via Bluetooth, check the following:
- Place your mobile device as close as possible to the Label Maker.
- Make sure there are no obstacles or items that emit radio waves, such as
a microwave oven, between the Label Maker and your mobile device.
• If a Bluetooth pass key appears on the Label Maker’s LCD during pairing, make sure
your mobile device displays the same Bluetooth pass key, and then press [OK].
• This Label Maker does not support Wi-Fi connections.
1. Print from the Label Maker
STEP
1
Press OK to select "Create Label"
STEP
2
Type Text
STEP
3
Preview Label
STEP
4
Print Label
3
4
1
2
3
4
1
2
Use the Label Maker
We assume no responsibility for damages arising from earthquakes, re, other disasters, actions of third
We assume no responsibility for damage (such as losses, loss of business prot, lost prots, business
We assume no responsibility for any damages or lost prot arising from the use of labels created with this
Brother reserves the right to make changes without notice in the specications and materials contained
following locations (otherwise a re, electrical shock, smoke, or damage may occur):
In an extremely hot location, such as near open ames, heaters, or in direct sunlight.
Use only the specied AC Adapter.
responsibility for any accident or damage resulting from not using the specied AC Adapter and USB Cable.
Insert the plug rmly into the electrical outlet.
Keep ngers and other body parts away from the Cutter unit.
DO NOT touch the Cutter unit’s blade or insert your ngers inside the
Tape Exit Slot, otherwise ngers and other body parts may be injured.
Use only the specied AA alkaline batteries (LR6).
Be careful when closing the Tape Cassette Compartment Cover. There is a risk of injury if your nger gets
Store the Label Maker on a at, level, and stable surface.
For more information, see the “Specications” section in your model’s
Basic Operations support.brother.com/manuals
Initial Settings
Language
Settings
Set your language.
[Settings] /
[Language] /
Select a language
/
Unit
Settings
Set the unit for various types of
adjustments.
[Settings] /
[Unit] / [inch] /
[mm]
/
LCD
Contrast
Adjust the LCD contrast.
[Settings] /
[Adjustment] /
[LCD Contrast] /
[-2] to [+2]
/
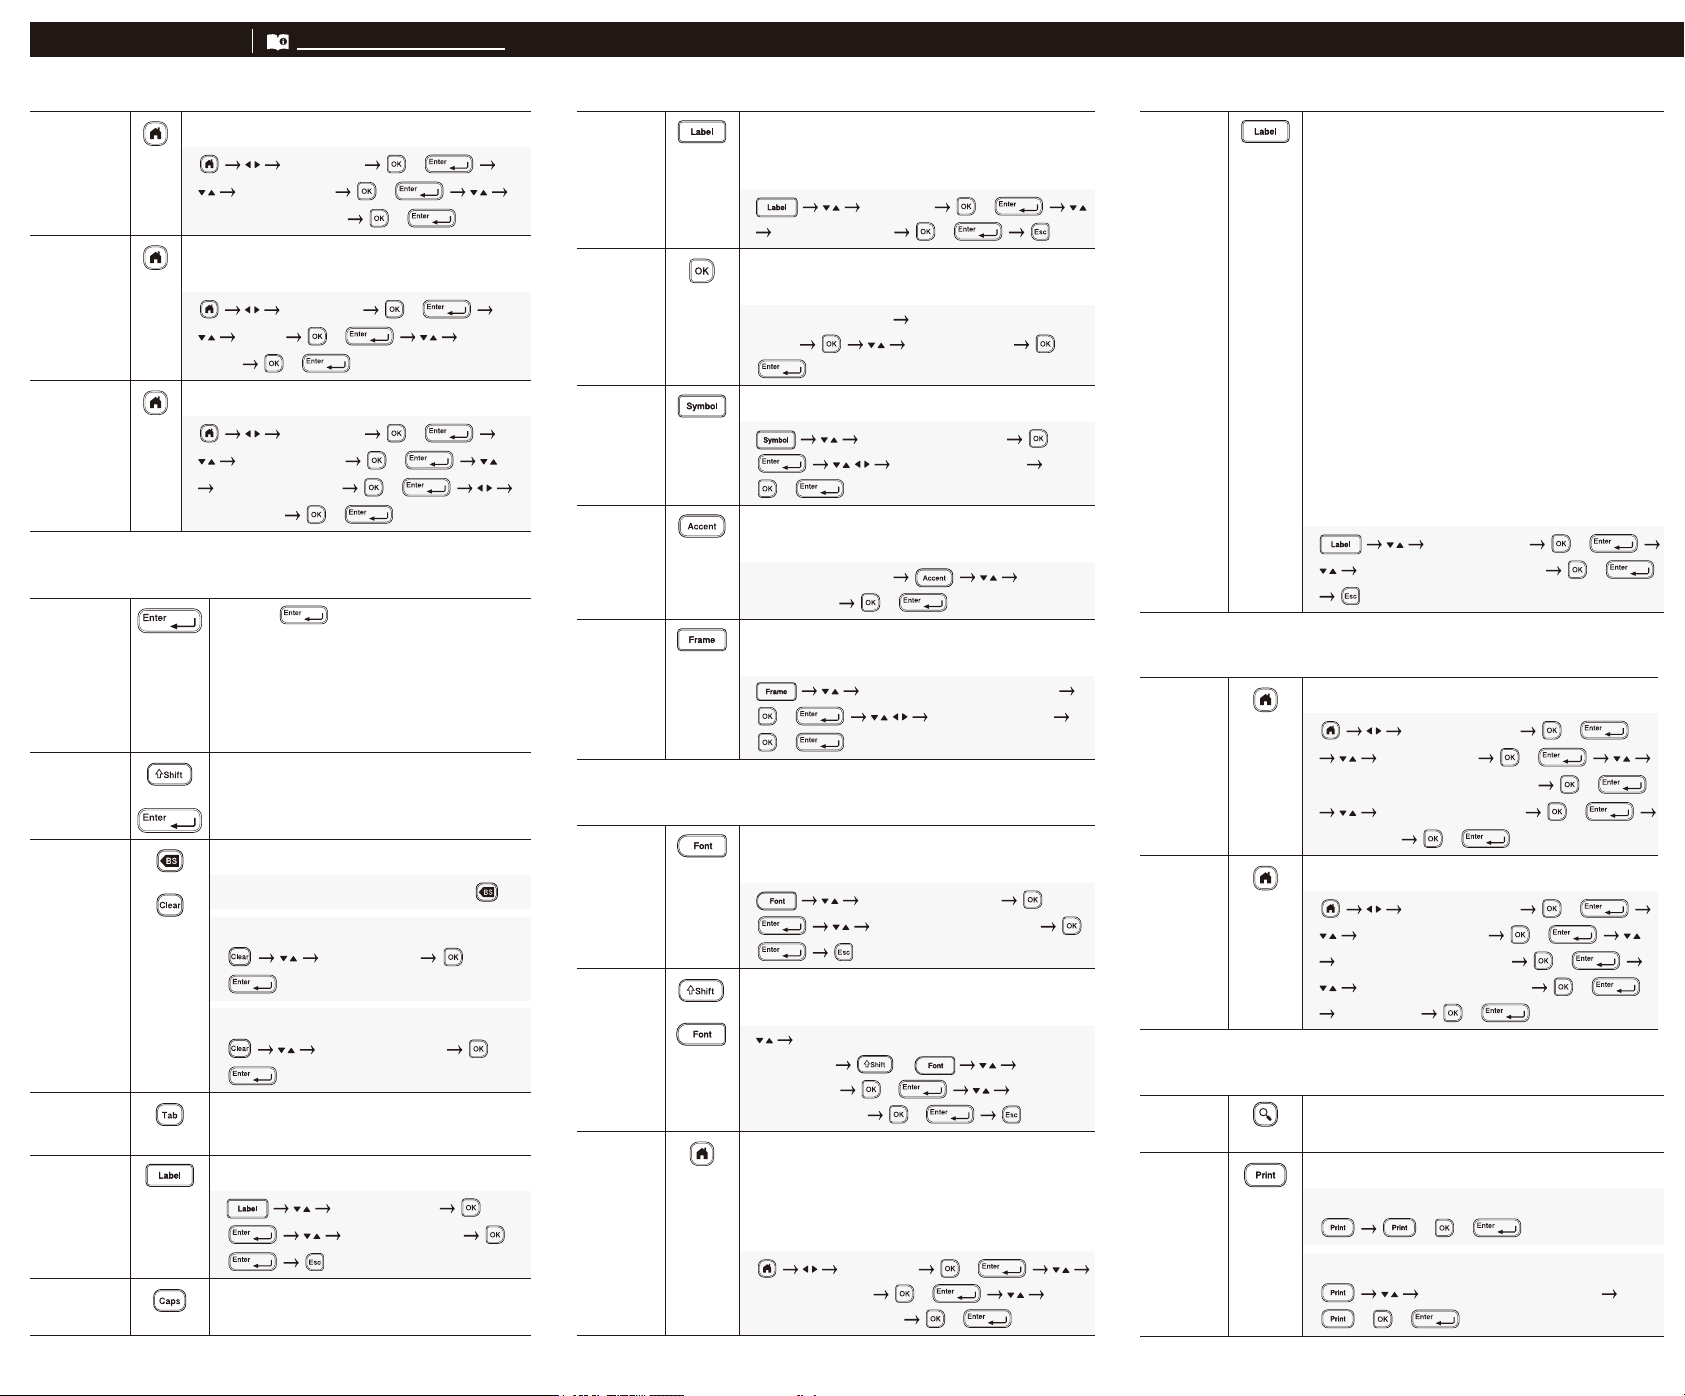
Enter Text
New Line
Press to start a new line.
Maximum number of lines for each
tape width:
0.70” (18 mm): ve lines
0.47” (12 mm): three lines
0.35” (9 mm), 0.23” (6 mm): two lines
0.13” (3.5 mm): one line
Block
+
Use this feature to include multiple
lines or font sizes on a single label.
Maximum: 5 blocks
Delete Text
and Format
or
Delete text and formatting.
Delete one character at a time
Delete all characters
[Text Only] /
Delete all text and formatting.
[Text & Format] /
Tab Insert a tab.
Maximum length: 4” (100 mm)
Tab Length
Set the tab length.
[Tab Length] /
Select a value /
Upper-Case
Lower-Case
Switch between upper-case and
lower-case characters.
Label
Length
Set the label length.
[Auto]: Automatically adjusts the label
length to the length of the text.
[Length] /
Select a value /
Text
Reminder
Saves frequently used text for quick
retrieval.
Enter characters
Shows suggested
text?
Select a text /
Symbol
Characters
Inserts symbols, units, and pictures.
Select a category /
Select a symbol
/
Accented
Characters
Select text you wish to convert to
accented characters.
Enter characters
Select
an accent
/
Frame Select a decorative frame to add to your
label.
Select a frame category
/ Select a frame
/
Change Font
Change
Font
Change the label font, size, width, style,
and alignment.
Select a font type /
Select attribute value /
Change
Font Line
By Line
+
Change the line font, size, width, style,
and alignment.
Move the cursor to the line you want
to change
+ Select
a font type
/ Select
attribute value
/
Auto Fit
Style
Automatically adjust the text size to t the
label length.
[Text Size]: Adjust to the length of the label
[Text Width]: Adjust by condensing the
character width by half
[Settings] /
[Auto Fit Style]
/ [Text
Size] / [Text Width]
/
Set Margins
Set
Margins
Set the margins before and after an
entered character.
[Small Margin]: Initial margin is approx.
0.9” (23 mm), and then 0.08” (2 mm)
margins are inserted before and after the
text of each label.
[Large Margin]: Insert an initial margin of
approx. 0.98” (25 mm) is inserted before
and after the text of each label.
[Chain]: Select this setting when printing
multiple labels. The initial margin is
approx. 0.9” (23 mm), and then 0.08”
(2 mm) margins are inserted before and
after the text of each label.
[No Cut]: Select this setting when printing
multiple parts or when printing on special
tape.
[Special Tape]: Select this setting when
printing on special tape.
[Cut Option] /
Select the margin type /
Set Auto Format Layouts
Template Set specic template designs.
[Auto Format] /
[Templates] /
Select a template category
/
Select a template /
Enter text
/
Block
Layout
Set Block Layout patterns.
[Auto Format] /
[Block Layouts] /
Select the tape width /
Select a block layout /
Enter text /
Print Labels
Preview Use this feature to preview the label
before printing.
Print
Start printing.
When printing a single label:
/ /
When printing multiple labels:
Select a print quantity
/ /
Maximum data: 70 les
Maximum character count per le: 280
Conrmation message
length setting. Edit the text to t within the set length or change the
Conrm that the tape is pointed at the Tape Exit Slot.
Previously saved label les All les saved in the internal memory are deleted if the batteries are
I do not know the rmware Conrm the rmware version by pressing the following keys:
Registering your product will provide purchase conrmation, proof of ownership and,
Select [Chain] to print labels with the narrowest margin width. DO NOT feed the tape until the nal label is printed. When the nal
rmware using the P-touch
Restart the printer and then try to update the rmware again. Do not
press any buttons during the rmware update.
Enter Text (cont.)
0.70” (18 mm): ve lines
Automatically adjust the text size to t the
: Initial margin is approx.
margins are inserted before and after the
: Insert an initial margin of
mm) is inserted before
: Select this setting when printing
mm) margins are inserted before and
: Select this setting when printing
multiple parts or when printing on special
: Select this setting when
Set specic template designs.
Numbering
Print
+
Set this feature when printing consecutive
alphanumeric characters.
Enter alphanumeric characters
+
[Number] /
Set the start position /
Set the end position /
Select a print quantity / /
Mirror
Print
+
Print reversed from left to right.
Print on clear tape and attach it to the
inside of glass to create a label that can
be read from the outside.
Enter text
+ [Mirror]
/ / /
Barcode
Printing
Create a barcode and print it.
Select a setting item
Change the setting content /
Enter barcode data
Select a signal / /
Other
Tape
Feed
+
Feed approx. 0.9” (23 mm) of tape to
remove any slack.
Tape may have some slack when it is
loaded.
+
Save Save your labels and access them later to
edit and print them, as well as overwrite
and save edited data.
Maximum data: 70 les
Maximum character count per le: 280
characters
Create a label
Select a
save destination
/
Reset Reset the internal memory. For example,
to reset the Label Maker or delete any
saved label data.
[Settings] /
[Reset] /
Select a reset method
/
Conrmation message
/
For more information, see the User’s Guide on the Brother
support website at support.brother.com.
Print Labels (cont.)
length setting. Edit the text to t within the set length or change the
Conrm that the tape is pointed at the Tape Exit Slot.
Previously saved label les All les saved in the internal memory are deleted if the batteries are
I do not know the rmware Conrm the rmware version by pressing the following keys:
Registering your product will provide purchase conrmation, proof of ownership and,
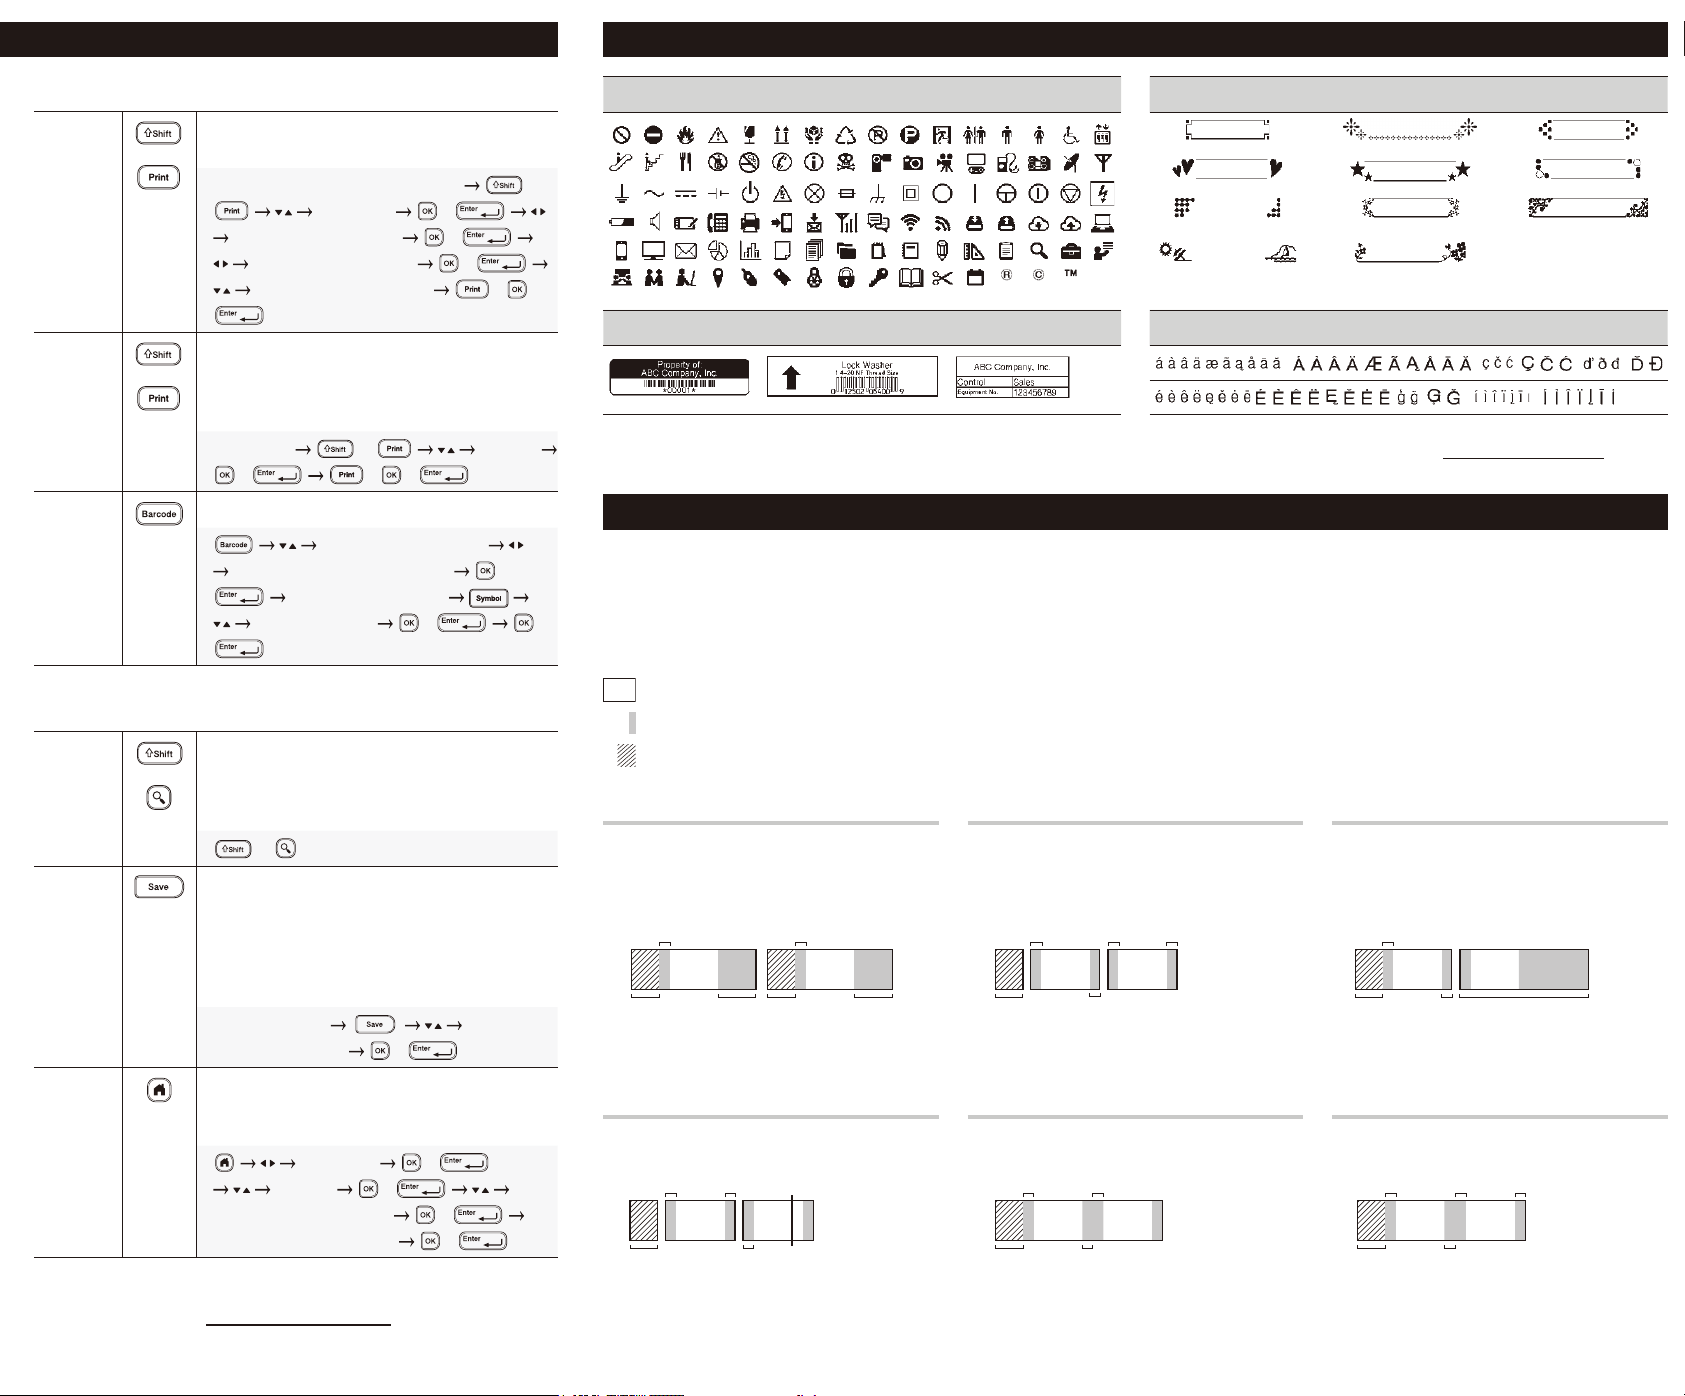
Symbols and Frames
Set Margins
The laminate mechanism creates a margin of approx. 0.9” (23 mm) at the beginning of printing. You can reduce this margin by
printing labels continuously.
You can also change the margin before and after the text for the second and subsequent labels when printing multiple labels.
Select [Chain] to print labels with the narrowest margin width. DO NOT feed the tape until the nal label is printed. When the nal
label prints, feed the tape, and press the Tape Cutter Lever.
Symbol Examples Frame Examples
...
...
Auto Format Layouts Examples Accented Character Examples
...
...
For more information about symbols and frames, see the User’s Guide on the Brother support website at support.brother.com.
Large Margin
ABC ABC
0.08”
(2 mm)
Approx. 0.9”
(23 mm)
Approx. 0.98”
(25 mm)
0.08”
(2 mm)
Approx. 0.9”
(23 mm)
Approx. 0.98”
(25 mm)
ABC
: Print area
: Margin
: Laminate margin
Chain
ABC ABC
0.08”
(2 mm)
0.08 Cut
Position
”
(2 mm)
Approx. 0.9”
(23 mm)
0.08”
(2 mm)
No Cut
ABC ABC
0.08”
(2 mm)
0.08”
(2 mm)
Approx. 0.9”
(23 mm)
0.08”
(2 mm)
Special Tape
ABC ABC
0.08”
(2 mm)
0.08”
(2 mm)
0.08”
(2 mm)
0.08”
(2 mm)
Approx. 0.9”
(23 mm)
Small Margin
When the label length is approx. 0.9”
(23 mm) or more
ABC ABC
Approx. 0.9”
(23 mm)
0.08”
(2 mm)
0.08”
(2 mm)
0.08”
(2 mm)
0.08”
(2 mm)
Small Margin
When the label length is approx. 0.9”
(23 mm) or less
ABC
0.08”
(2 mm)
0.08”
(2 mm)
Approx. 0.9”
(23 mm)
Approx. 0.9”
(23 mm)
ABC
rmware using the P-touch
Restart the printer and then try to update the rmware again. Do not
press any buttons during the rmware update.

0.70” (18 mm): ve lines
Automatically adjust the text size to t the
Set specic template designs.
Maximum data: 70 les
Maximum character count per le: 280
Conrmation message
Error Messages Troubleshooting (cont.)
Troubleshooting
Message Cause/Remedy
Check no. of digits entered The number of digits entered in the barcode data does not match
the number of digits set in the barcode parameters. Enter the correct
number of digits.
Cutter malfunction The Tape Cutter Lever was pressed while trying to print or feed the
tape. If the tape is jammed in the Cutter unit, remove the tape. Turn
the Label Maker off and then on again before continuing.
Label too long The printed label length using the text entered is longer than 39.37”
(999 mm). Edit the text so that the label length is less than 39.37”
(999 mm).
Text too long The printed label length using the text entered is longer than the
length setting. Edit the text to t within the set length or change the
length setting.
System error XX Contact Brother Customer Service.
Problem Solution
The Label Maker does not
print.
(cont.)
• Check that the correct printer driver is installed when printing from
a computer.
• Connect the Label Maker to your computer using the USB Cable
(included) when printing from a computer.
• If the Print Head is dirty, clean it with a cotton swab or with the
optional Print Head Cleaning Cassette (TZeCL4).
• The tape does not feed
correctly.
• The tape gets stuck inside
the Label Maker.
• If the tape is bent, cut off the bent section.
• If the tape is jammed, remove the Tape Cassette, remove the jammed
tape, and then cut any damaged tape.
• Check that the end of the tape exits through the Tape Guide.
• Conrm that the tape is pointed at the Tape Exit Slot.
• Remove the Tape Cassette and insert it again.
An error occurred when
using a mobile app.
Go to your mobile application’s settings menu and select Support page
> FAQs & Troubleshooting.
The screen is locked, or
the Label Maker does not
operate normally.
Refer to the Basic Operations section in this guide and reset the Label
Maker’s internal memory to the factory settings. If resetting the Label
Maker does not solve the problem, disconnect the AC Adapter and
remove the batteries for more than 10 minutes.
The LCD remains blank after
turning on the power.
Check that the batteries are correctly installed or that the AC Adapter
included with your Label Maker is correctly connected.
The LCD messages are
displayed in a foreign
language.
Refer to the Basic Operations section in this guide to select your
desired language.
The Label Maker stops while
printing a label.
• Replace the Tape Cassette if striped tape is visible, as this indicates
that you have reached the end of the tape.
• Replace all batteries or connect the AC Adapter directly to the Label
Maker.
Previously saved label les
are not available.
All les saved in the internal memory are deleted if the batteries are
weak or the AC Adapter is disconnected.
• I cannot install the Printer
Driver even if I follow the
correct procedure.
• I cannot see my printer
listed in P-touch Editor
even though I have
installed the Printer Driver.
If you cannot use your Label Maker even though you have installed the
Printer Driver:
1. Download the Printer Driver Uninstaller from your model’s page at
support.brother.com.
2. Use the Printer Driver Uninstaller to remove the printer information.
3. Run the Printer Driver Installer again and follow the on-screen
instructions to proceed with the installation.
I do not know the rmware Conrm the rmware version by pressing the following keys:
Registering your product will provide purchase conrmation, proof of ownership and,
If you need additional help, visit support.brother.com.
Problem Solution
The Label Maker does not
print.
• Check that the Tape Cassette is inserted correctly.
• If the Tape Cassette is empty, replace it. To order supplies and
accessories, visit www.brother-usa.com.
• Check that the Tape Cassette Compartment Cover is securely closed.
• Check that the Label Maker is on.
• Check that the computer’s or mobile device’s Bluetooth setting is on.
• Check that the Label Maker is connected to the computer or your
mobile device via Bluetooth.
• Check that the Label Maker is selected in the Brother iPrint&Label
app.
• Check that the Label Maker is not paired with another device.
• Make sure the Label Maker and your mobile device or computer
are close enough to communicate.
• Check that the automatic Bluetooth re-connection setting of
another computer or mobile device is not enabled.
• Make sure no devices that emit radio waves (for example,
a microwave oven) are located nearby.
Select [Chain] to print labels with the narrowest margin width. DO NOT feed the tape until the nal label is printed. When the nal
rmware using the P-touch
Restart the printer and then try to update the rmware again. Do not
press any buttons during the rmware update.
0.70” (18 mm): ve lines
Automatically adjust the text size to t the
Set specic template designs.
Maximum data: 70 les
Maximum character count per le: 280
Conrmation message
Contact Information
Troubleshooting (cont.)
length setting. Edit the text to t within the set length or change the
ape Cassette, remove the jammed
Conrm that the tape is pointed at the Tape Exit Slot.
Support page
section in this guide and reset the Label
ape Cassette if striped tape is visible, as this indicates
Adapter directly to the Label
Previously saved label les All les saved in the internal memory are deleted if the batteries are
If you cannot use your Label Maker even though you have installed the
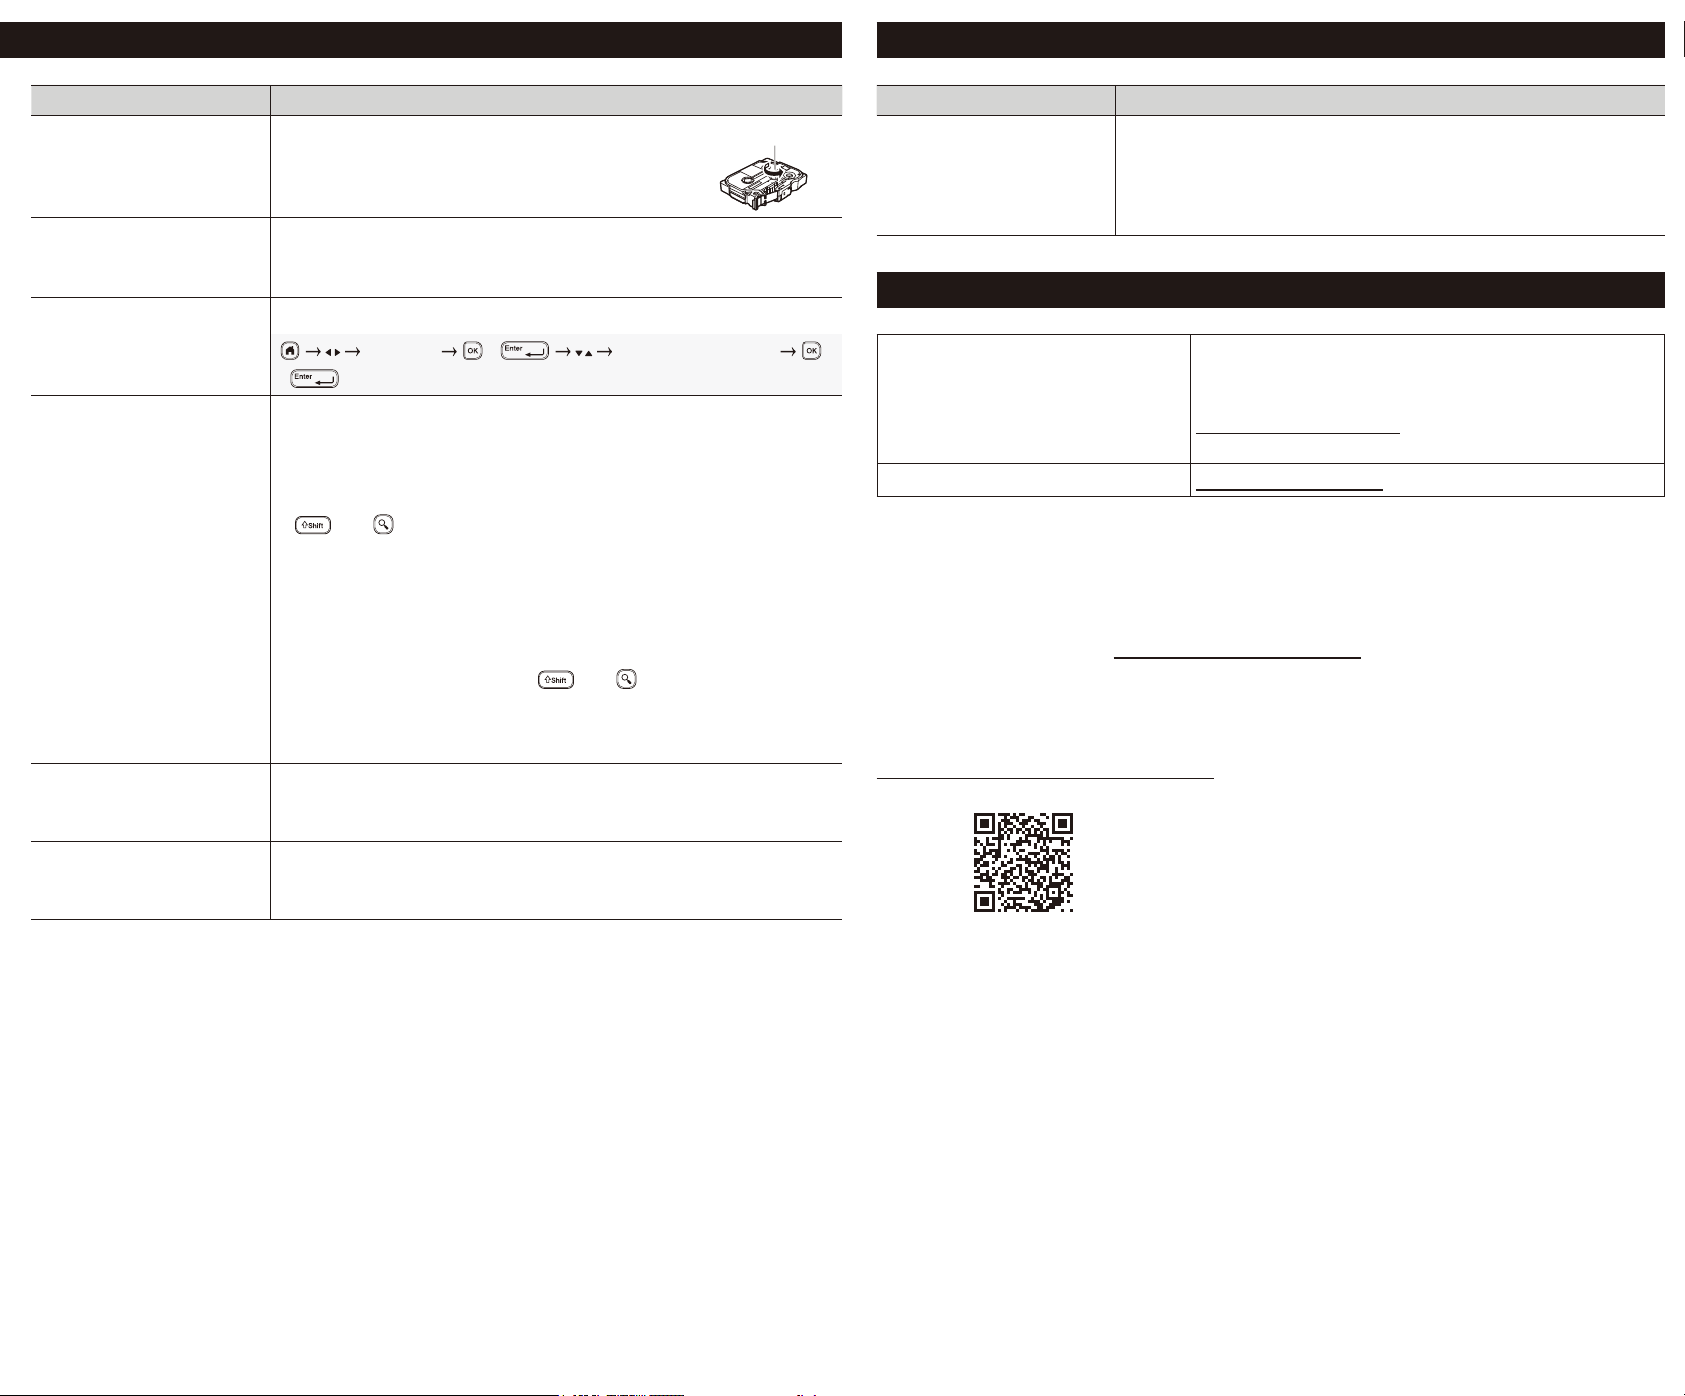
Problem Solution
The ink ribbon is separated
from the ink roller.
If the ink ribbon is broken, replace the Tape Cassette.
If it is not, leave the tape uncut and carefully remove
the Tape Cassette, and then wind the loose ink ribbon
back onto the spool.
Printed barcodes or QR
codes cannot be read.
• Change the tape. (Recommended: Black on white tape)
• Enlarge the barcodes or QR codes using the barcode application,
if possible.
I do not know the rmware
version of the Label Maker.
Conrm the rmware version by pressing the following keys:
[Settings] / [Version Information]
/
When the label is printed,
there is too much margin
(space) on both sides of the
text.
• Refer to the Set Margins section in this guide and select [Small
Margin] [Chain] or [No Cut] for smaller margins.
When you set [Small Margin], the label maker feeds approx. 0.9”
(23 mm) of leader tape before every new label.
To save tape, set the [Chain] setting. After the last label prints, press
and to feed the tape, and then press the Tape Cutter Lever.
• The Label Maker feeds approx. 0.9” (23 mm) of tape before every new
label. When printing multiple labels, you can reduce the blank space
on the second and subsequent labels.
Select the [Chain] setting in the optional print settings. Then, print your
labels and leave the last label in the Label Maker until you are ready
to print a new label.
• After the last label prints, press
and simultaneously to feed
the tape, and then eject and cut the last label. Note that the Label
Maker will feed approx. 0.9” (23 mm) of tape before the next new label
when you use this method.
The font size cannot be
increased.
The font is already the maximum size for the width of the label. Or, the
label length has been set, so there is a limit on the font size to prevent
exceeding the set length.
When multiple labels are
printed, the last label is cut
incorrectly.
When Chain Print is enabled, feed the tape to eject the last printed
label, and then press the Tape Cutter Lever to cut the label manually.
Spool
Customer Service for USA
Phone: 1-877-BROTHER (1-877-276-8437)
Fax: 1-901-379-1210
To order supplies and accessories:
www.brother-usa.com
Phone: 1-877-552-6255
Other countries or regions
support.brother.com
DON’T FORGET TO REGISTER!
Registering your product will provide purchase conrmation, proof of ownership and,
if you choose, allow us to notify you of product enhancements and special offers!
You can register online at: www.registermybrother.com (USA)
LIMITED WARRANTY
Product warranty information can be found online at:
www.brother-usa.com/brother-support (USA)
Select [Chain] to print labels with the narrowest margin width. DO NOT feed the tape until the nal label is printed. When the nal
Problem Solution
I cannot update the printer’s
rmware using the P-touch
Update Software, Transfer
Express, or Mac Update
Tool.
Restart the printer and then try to update the rmware again. Do not
press any buttons during the rmware update.