Loading ...
Loading ...
Loading ...
8 www.dimplex.com
Installation
Do not use cable with aluminum
conductors.
!
NOTE: It is recommended
that all drywall installation and
nishing be completed after
unit is fully installed.
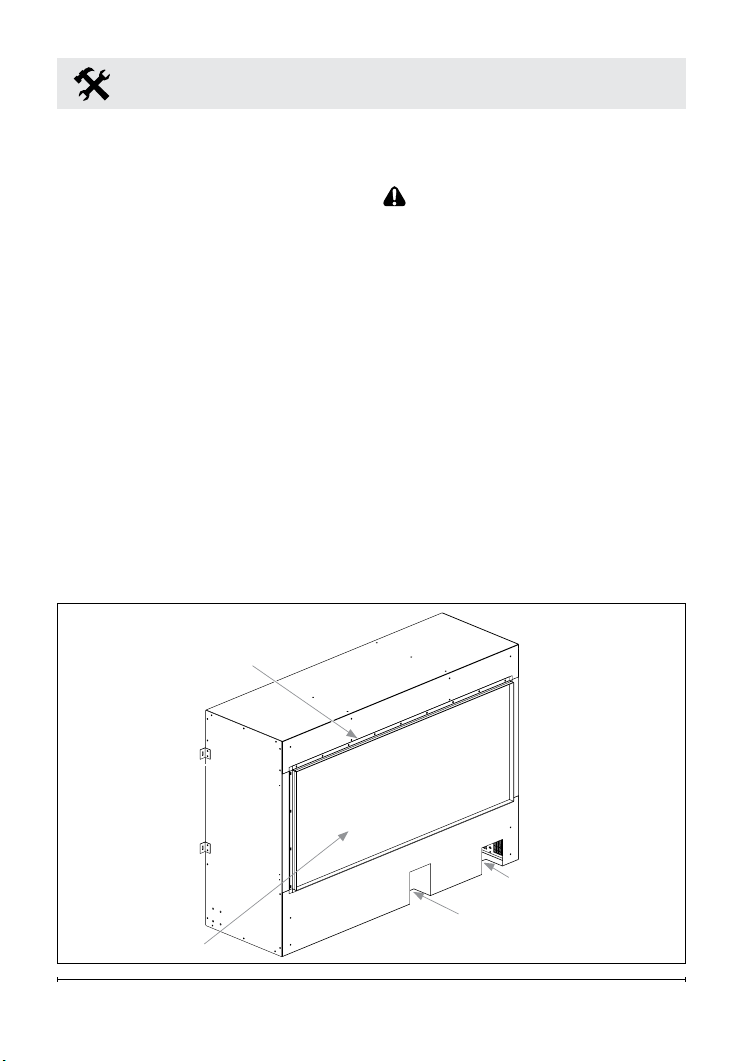
3. The Opti-myst Pro Box Heater
can be installed to be two sided
or one sided. For one sided
installations remove the 4
anges on the back if there is
not enough depth in the framing
for them. Using the same
screws, replace the back panel.
See Figure 2. For two sided
installations, remove anges and
back panel and using the same
screws, replace the anges.
!
NOTE: The heater only exhausts
from one direction. Note this
direction when installing in a 2
sided conguration"
CAUTION: When inserting the
unit take care not to damage or
pinch any of the power cables that
are concealed in the wall.
4. Mount the Opti-myst Pro Box
Heater to the framing with
the mounting brackets using
appropriate screws for the
application (Figure 1).
5. Feed the wire through the
opening on the back left of
the Opti-myst Pro Box Heater.
Remove the outer jacket and
strip the individual conductors ½
in. (1.3 cm) from the end.
6. Do not remove cardboard
backing from the Opti-myst Pro
Flange
Back
Panel
Plumbing
Routing
Wire
Routing
Figure 2
Loading ...
Loading ...
Loading ...