Loading ...
Loading ...
Loading ...
CLEANING THE RANGE OR COOKTOP
Make certain all parts of the range are
cool before cleaning. Be sure to
replace all parts correctly.
Knobs
Pull forward to remove the control
knobs. Wash with warm, soapy
water. Do not use abrasive or harsh
cleansers or scrub with abrasive
materials. Abrasive action will
scratch away the knob markings.
If the knobs become loose on the
valve stem, spread the valve stem
slightly with a small screwdriver.
Stainless Steel
All stainless steel body parts should
be wiped regularly with hot, soapy
water or a liquid cleaner designed
specifically for use with stainless
steel. Solutions stronger than soap
and water are rarely required. Never
use steel wool, abrasive cloths,
abrasive cleansers, or abrasive
powders on stainless steel parts. If it
is necessary to scrape stainless steel
to remove encrusted materials, soak
spot with hot damp cloths to loosen
the material. Then use a wooden or
nylon scraper to lift stuck-on
materials.
NEVER USE METAL KNIVES,
SPATULAS, OR OTHER SHARP
TOOLS TO SCRAPE STAINLESS
STEEL. SCRATCHES ARE
ALMOST IMPOSSIBLE TO
REMOVE.
Do not allow citrus or tomato juice to
remain on a stainless steel surface.
Wipe spills immediately. Citric acid
will permanently discolor stainless
steel.
A light coat of baby oil may be
applied periodically to the stainless
steel surfaces. This will help prevent
moisture from penetrating the
stainless surfaces.
Cooktop Area
Any cooktop spill-overs should be
wiped up as quickly as possible. Use
an oven mitt to protect hands from
heat when removing the grate or
grates.
Open Burners
To clean the cooktop area on your
open burner model, first let the
cooking surface cool. Remove all
burner grates, and lift the fronts of the
burner pans to remove them. Remove
the burner and let it soak in hot, sudsy
water. Most stains will then wipe off,
but if not, scrub with a strong, non-
abrasive cleaning pad or nylon
scrubber. Rinse the burner
thoroughly.
IT IS VERY IMPORTANT THAT
THE BURNER BE DRAINED
AND DRIED BEFORE
REPLACING IT IN THE RANGE.
A wet burner will not allow the gas to
ignite properly. A buildup of gas
could result, potentially creating an
explosion or fire hazard.
If spills have seeped below the burner
pans, remove the porcelain drip trays
and either wash them in hot, soapy
water or place them in the
dishwasher. Dry thoroughly before
replacing beneath the burner. The
burner box bottom may be cleaned
with a damp cloth.
Do not put burner grates in a
dishwasher.
AVOID HARSH CLEANSERS
AROUND ALUMINUM PARTS
Do not use harsh cleaners or
degreasers on or around functional
parts (valves, controls, aluminum
tubing, etc). This will damage or
drastically reduce the life of the parts.
Open Burner Drip Pans
Below each open burner is an
individual porcelain-enameled burner
drip pan. To place or remove the
pans, remove the shipping screws
holding the burners in place (one
center screw per burner at the burner
support). These screws do not need to
be replaced and may be discarded.
Remove the burner to access the drip
pan. Be sure the burner is cool before
handling. These individual burner
drip pans are dishwasher safe for easy
cleaning.
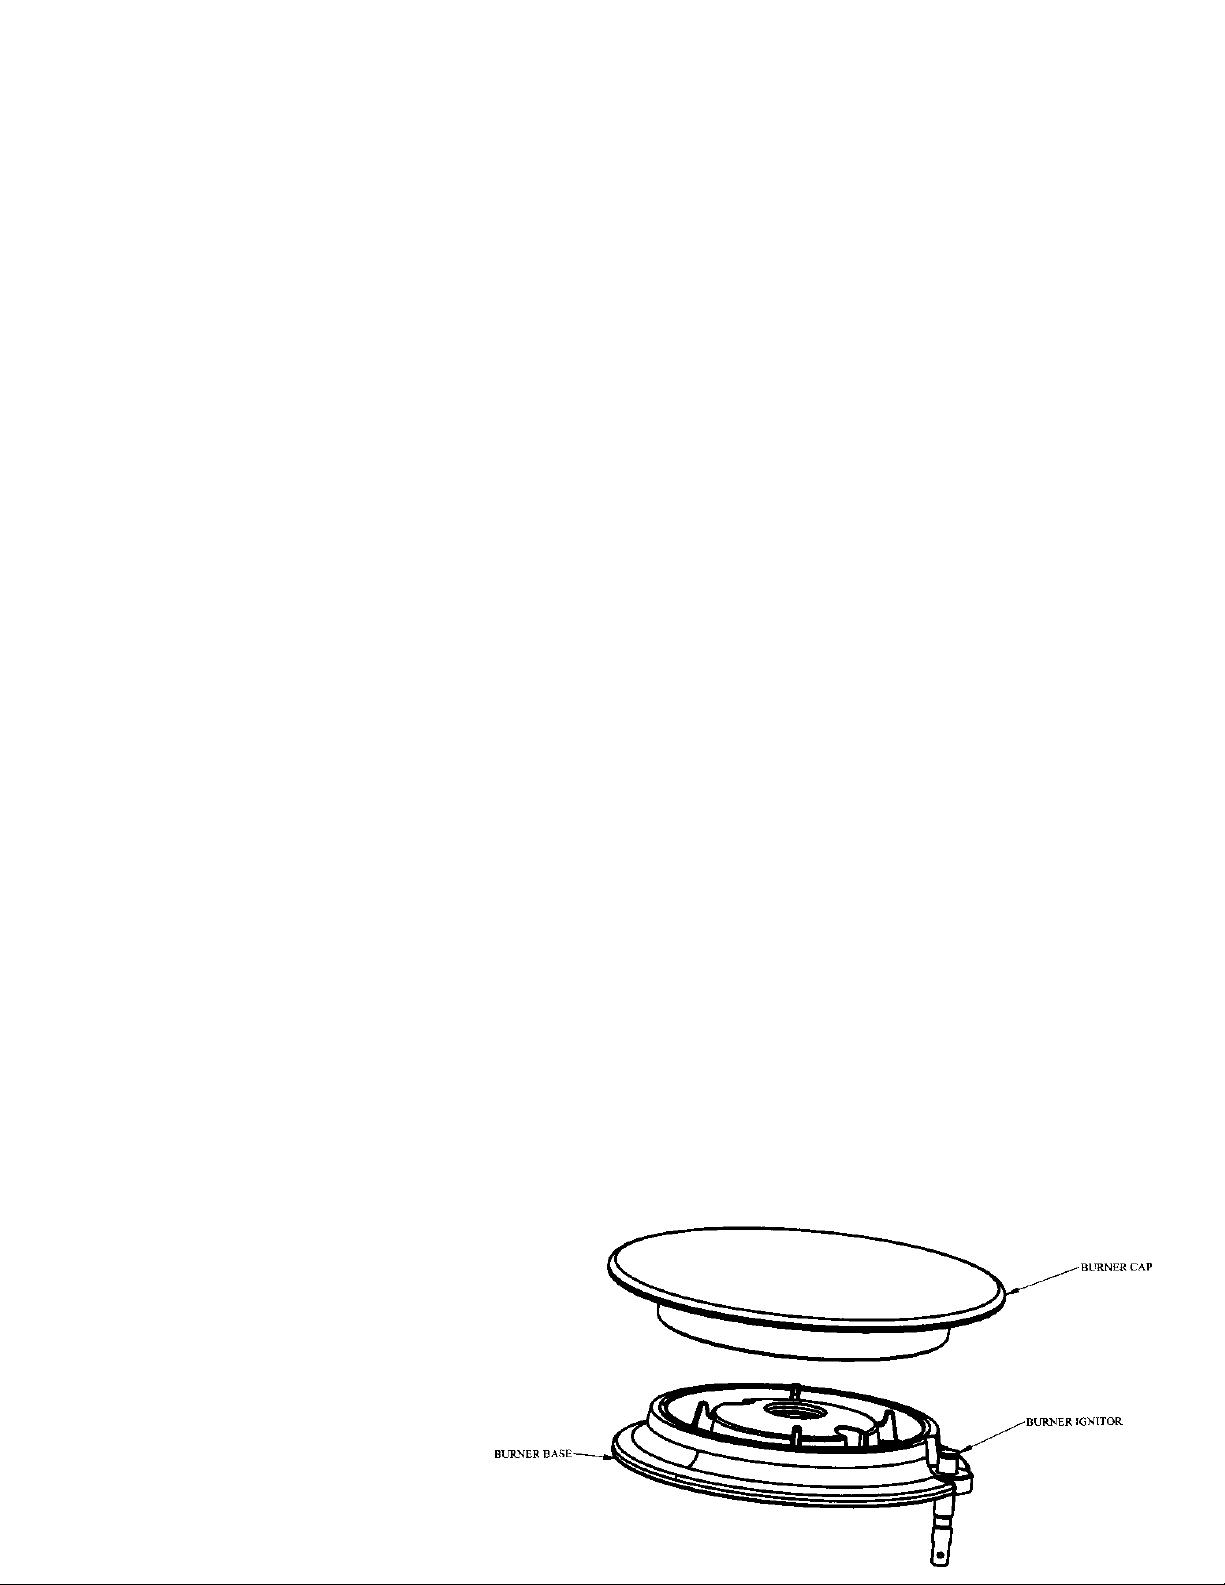
Sealed Burners
To clean the cooktop area on your
sealed burner model, first let the
cooking surface cool. Remove all
burner grates. With a damp, soapy rag
or sponge, wipe the cooktop area
around each burner to remove stuck-
on materials. Remove any food or dirt
particles from the cooktop area.
Remove burner caps for easier
cleaning. Burner caps must be
correctly reseated for proper ignition
and burner performance.
Do not put burner caps or grates in a
dishwasher.
FIG. 18
SEALED BURNER BASE AND CAP
17
Loading ...
Loading ...
Loading ...