Loading ...
Loading ...
Loading ...
, Press on handle in front of
filters to release filters from range
hood canopy. Remove filters and set
aside.
[] Remove the terminal box cover
from the canopy hood. Remove the
power supply cable knockout using a
flat-blade screwdriver. Attach conduit
connector into power supply cable
opening so that conduit connector
clamping screws are inside of canopy
hood.
Excessive Weight Hazard
Use two or more people to move
and install range hood.
Failure to do so can result in back
or other injury.
adi
screw
[] Align the "T" area of the
canopy hood slots with the lower
bracket flanges. Push hood toward
wall. Gently lower the hood making
sure the lower bracket flanges are
fully inserted into the slots. Checkthat
the hood is secure on the lower
bracket. Feedenough power supply
cable through conduit connector to
make electrical connections.
0, Level the hood and adjust
hood height by turning the adjusting
screws.
Electrical
connection
Electrical Shock Hazard
Disconnect power before
making electrical connections.
Connect ground wire to green
ground screw in terminal box.
Failure to do so can result in
death or electrical shock.
1
[]
[]
[]
[]
[]
, Make electrical connection:
Connect the power supply cable to
hood terminal box through the
U.L.- or C.S.A.-listed conduit
connector.
Connect the white wire of the
power supply cable with the white
lead in the hood using a twist-on
connector; connect the black wire
of the power supply cable with the
black lead in the hood using a
twist-on connector.
Connect the power supply green
(green and yellow) ground wire
under the green, ground screw.
Tighten conduit connector screws.
Replace the terminal box cover.
install chimney
sections
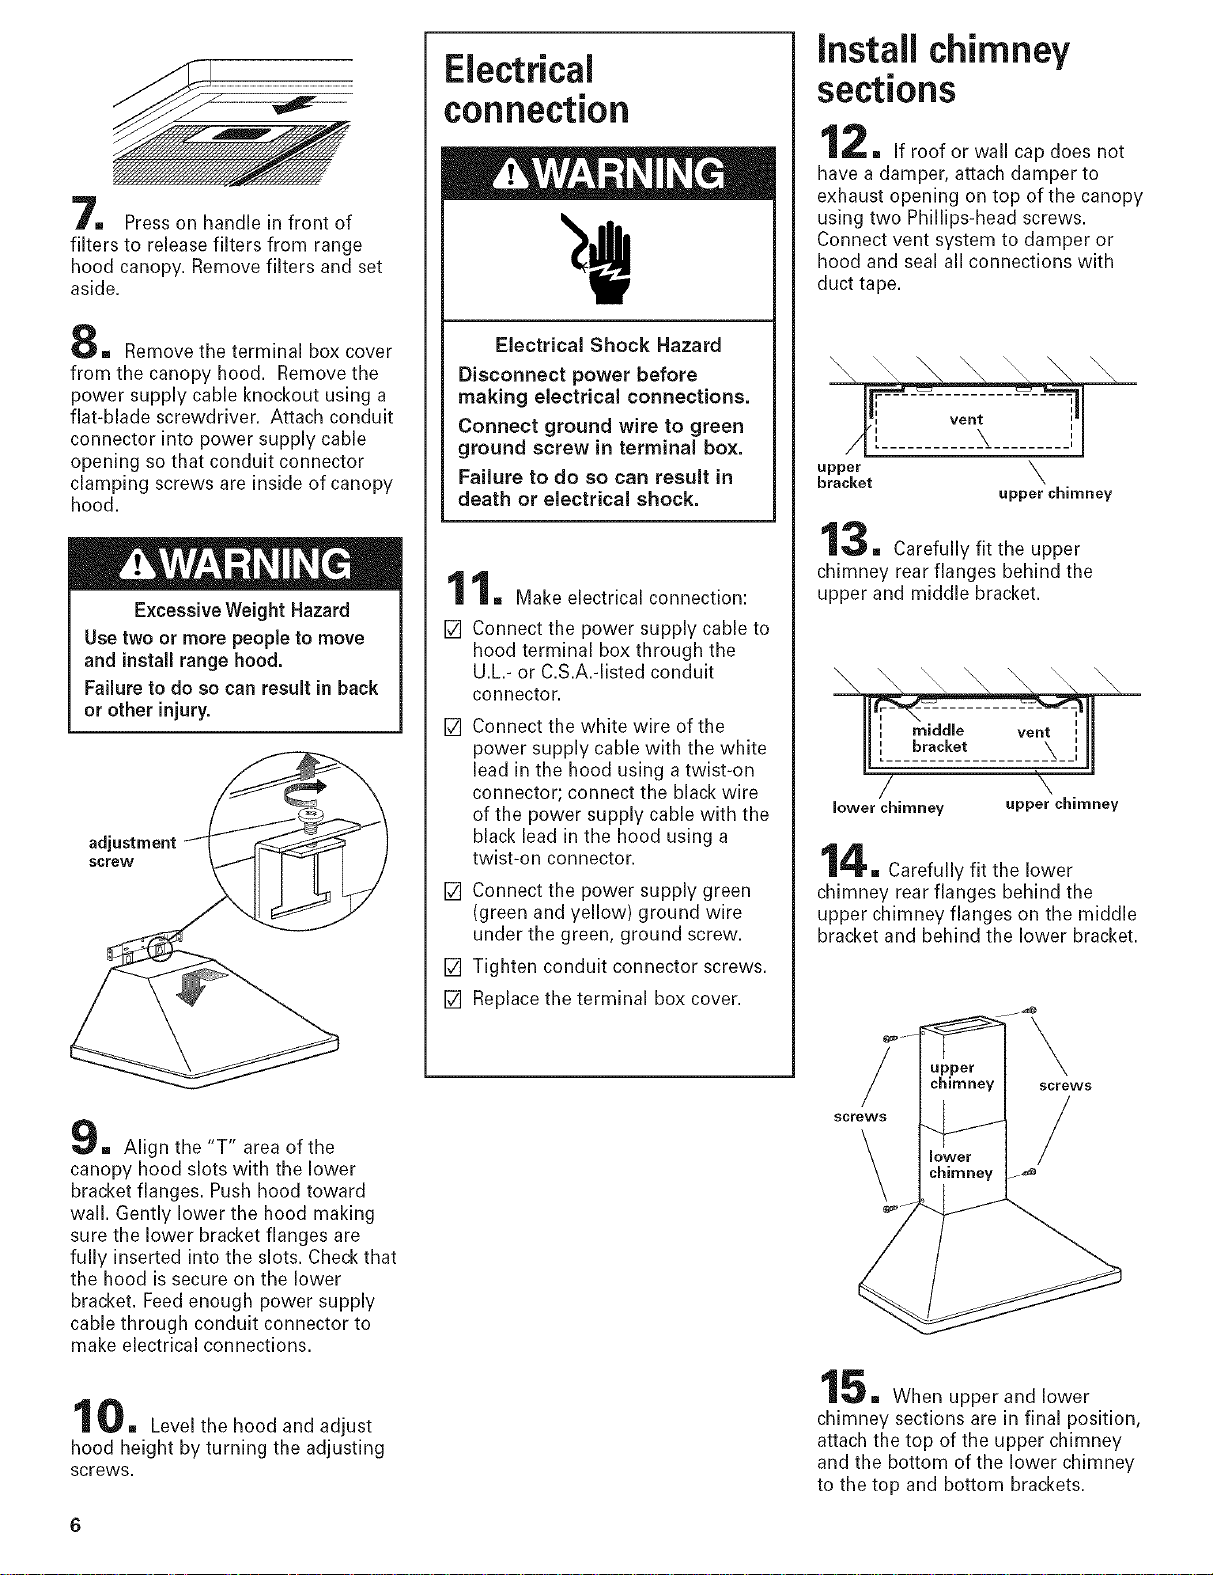
[] If roof or wall cap does not
have a damper, attach damper to
exhaust opening on top of the canopy
using two Phillips-head screws.
Connect vent system to damper or
hood and seal all connections with
duct tape.
\
upper X
bracket
upper chimney
[] Carefully fit the upper
chimney rear flanges behind the
upper and middle bracket.
lower chimney upper chimney
4, Carefully fit the lower
chimney rear flanges behind the
upper chimney flanges on the middle
bracket and behind the lower bracket.
screws
\
upper
chimney
lower
chimney
screws
/
5[] When upperand lower
chimney sections are in final position,
attach the top of the upper chimney
and the bottom of the lower chimney
to the top and bottom brackets.
Loading ...
Loading ...
Loading ...