Loading ...
Loading ...
Loading ...
36 37
36 37
9. If the ruler touches the marked tooth
at the front and rear position, no
adjustment is needed at this time.
If not or the base of the rule is no
longer parallel with the edge of the
miter gauge groove, see adjustment
procedure described in next section.
ADDITIONAL BLADE ADJUSTMENTS
(FIG. NN)
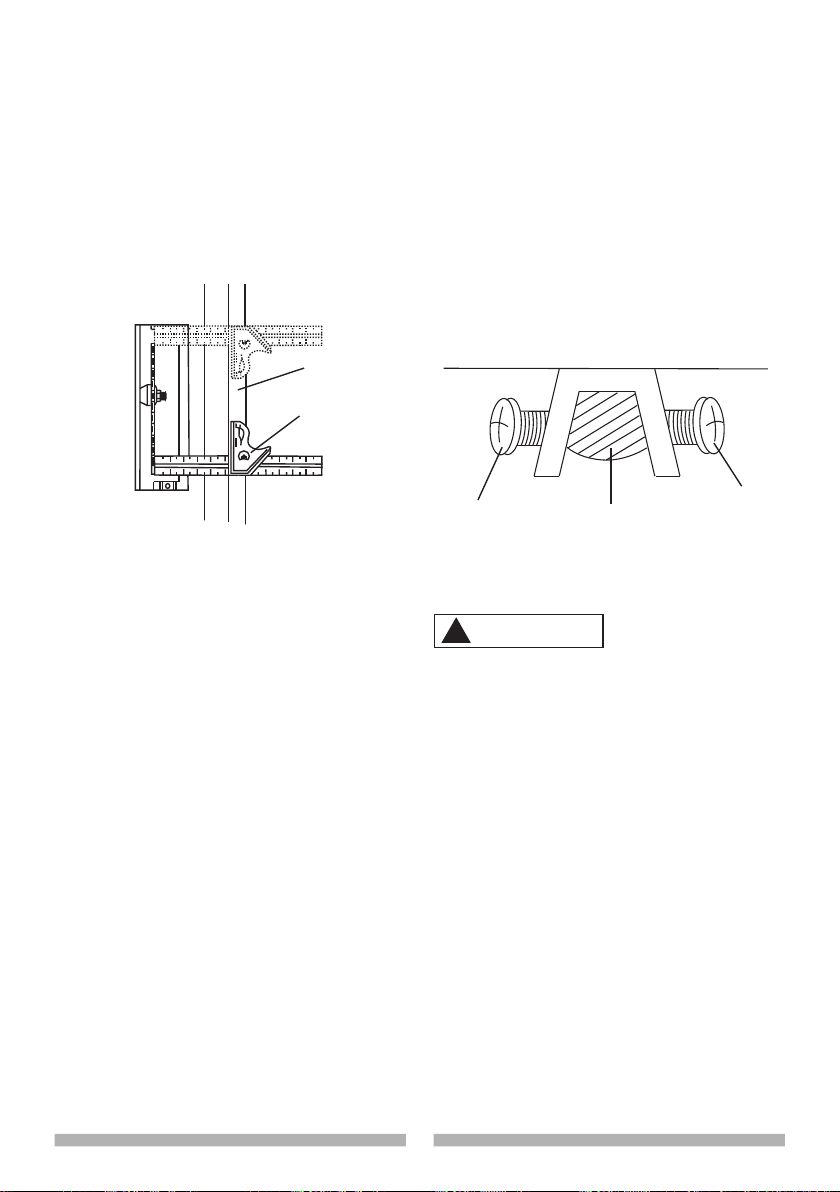
NOTE: The adjusting mechanism is
located above the the blade elevation/
tilting handwheel under the table top.
If the front and rear measurements are
not the same:
If the blade is partial to right side:
1.
Turn the left adjustment screw (1)
counterclockwise and adjust the
right side adjustment screw (2)
clockwise.
2. Remeasure, as described in steps
4 to 9 in the prior section.
3. When alignment is achieved, turn
the left adjustment screw (1) until it
touches the pivot rod (3).
Fig. MM
2
1
If the blade is partial to left side:
1.
Turn the right adjustment screw (2)
counterclockwise and adjust the
left side adjustment screw (1)
clockwise.
2. Remeasure, as described in
steps 4 to 9 in the prior section.
3. When alignment is achieved, turn
the right adjustment screw (2) until
it touches the pivot rod (3).
ALIGNING THE RIVING KNIFE
(FIG. OO)
● To avoid injury from an accidental
start, make sure the switch is in
the OFF position and the plug
is disconnected from the power
source outlet.
● Never operate this tool without
the riving knife in the correct
position.
● Never operate this tool without
the blade guard in place for all
through sawing operations.
● This adjustment was made at the
factory, but it should be rechecked
and adjusted if necessary.
Fig. NN
WARNING
!
3
1
2
Loading ...
Loading ...
Loading ...