Loading ...
Loading ...
Loading ...
EDGINGWITHPILOTCUTTERS/ BITS
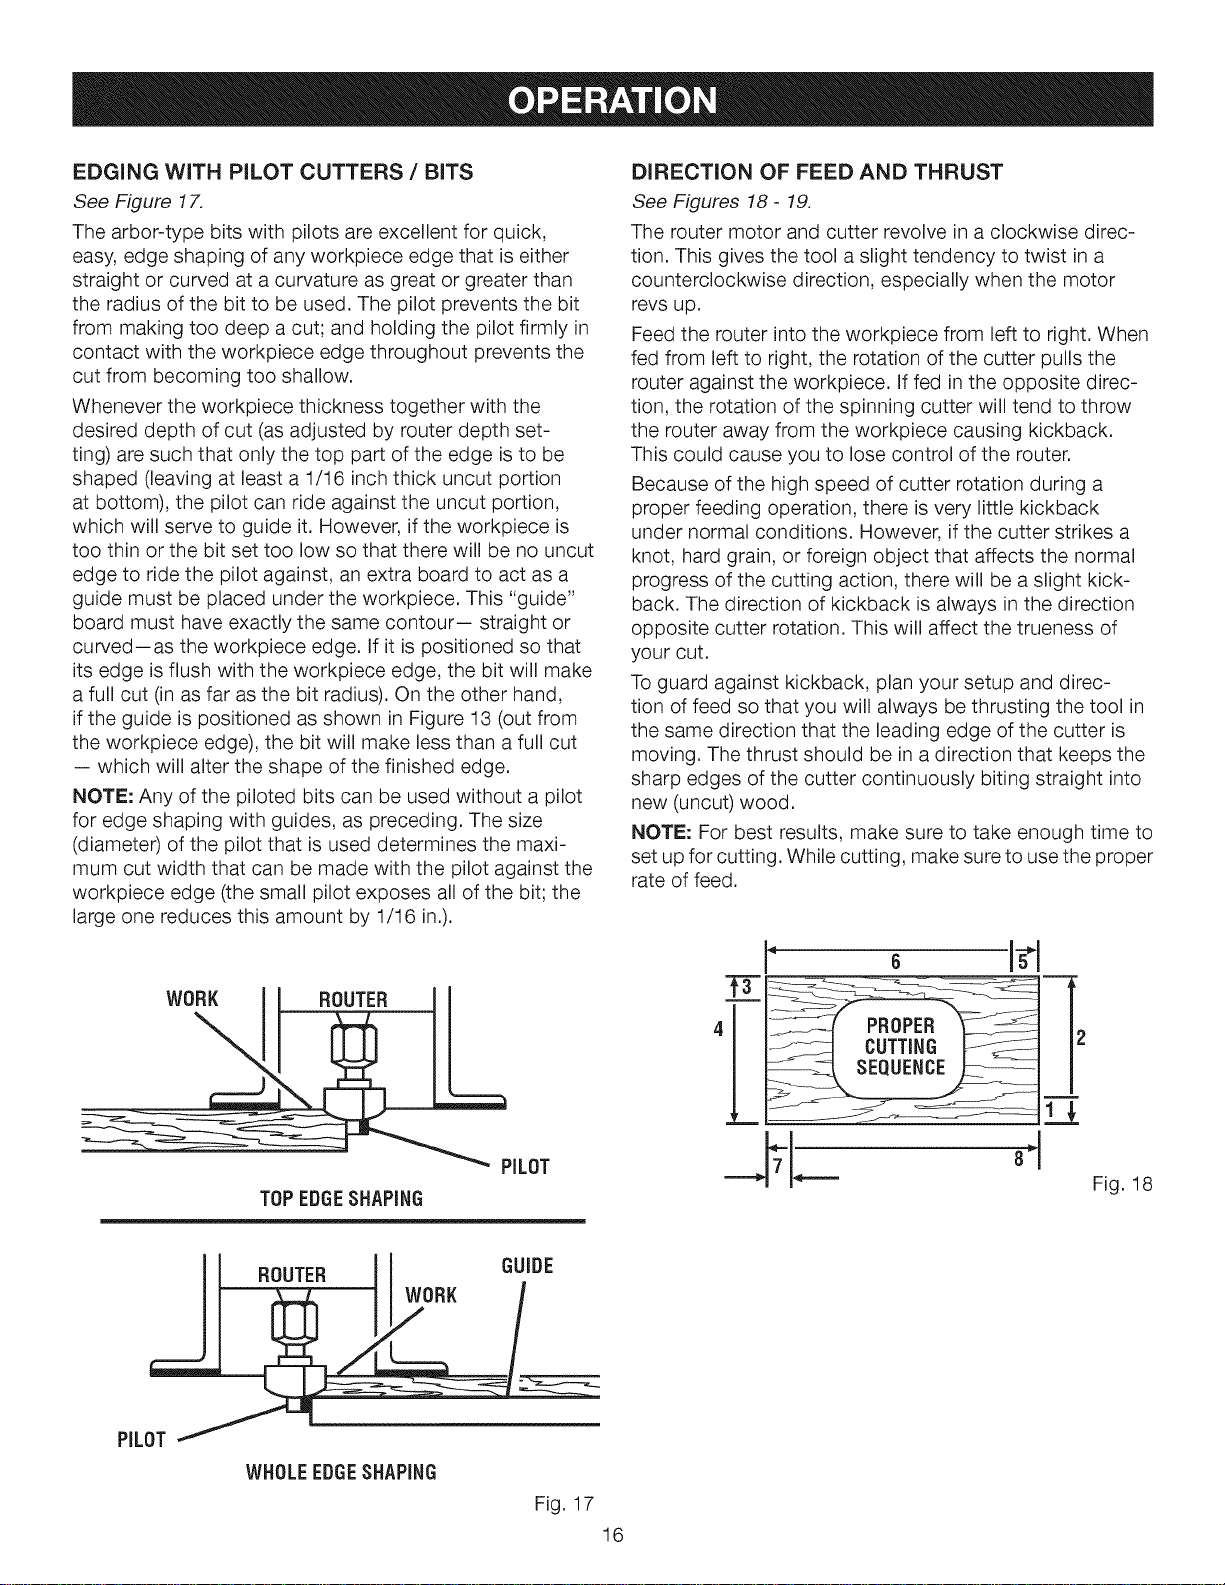
See Figure 17.
The arbor-type bits with pilots are excellent for quick,
easy, edge shaping of any workpiece edge that is either
straight or curved at a curvature as great or greater than
the radius of the bit to be used. The pilot prevents the bit
from making too deep a cut; and holding the pilot firmly in
contact with the workpiece edge throughout prevents the
cut from becoming too shallow.
Whenever the workpiece thickness together with the
desired depth of cut (as adjusted by router depth set-
ting) are such that only the top part of the edge is to be
shaped (leaving at least a 1/16 inch thick uncut portion
at bottom), the pilot can ride against the uncut portion,
which will serve to guide it. However, if the workpiece is
too thin or the bit set too low so that there will be no uncut
edge to ride the pilot against, an extra board to act as a
guide must be placed under the workpiece. This "guide"
board must have exactly the same contour-- straight or
curved--as the workpiece edge. If it is positioned so that
its edge is flush with the workpiece edge, the bit will make
a full cut (in as far as the bit radius). On the other hand,
if the guide is positioned as shown in Figure 13 (out from
the workpiece edge), the bit will make less than a full cut
-- which will alter the shape of the finished edge.
NOTE: Any of the piloted bits can be used without a pilot
for edge shaping with guides, as preceding. The size
(diameter) of the pilot that is used determines the maxi-
mum cut width that can be made with the pilot against the
workpiece edge (the small pilot exposes all of the bit; the
large one reduces this amount by 1/16 in.).
PILOT
TOPEDGESHAPING
II .°°,,. llwo.,
II
PIL
WHOLEEDGESHAPING
Fig. 17
16
DIRECTION OF FEED AND THRUST
See Figures 18- 19.
The router motor and cutter revolve in a clockwise direc-
tion. This gives the tool a slight tendency to twist in a
counterclockwise direction, especially when the motor
revs up.
Feed the router into the workpiece from left to right. When
fed from left to right, the rotation of the cutter pulls the
router against the workpiece. If fed in the opposite direc-
tion, the rotation of the spinning cutter will tend to throw
the router away from the workpiece causing kickback.
This could cause you to lose control of the router.
Because of the high speed of cutter rotation during a
proper feeding operation, there is very little kickback
under normal conditions. However, if the cutter strikes a
knot, hard grain, or foreign object that affects the normal
progress of the cutting action, there will be a slight kick-
back. The direction of kickback is always in the direction
opposite cutter rotation. This will affect the trueness of
your cut.
To guard against kickback, plan your setup and direc-
tion of feed so that you will always be thrusting the tool in
the same direction that the leading edge of the cutter is
moving. The thrust should be in a direction that keeps the
sharp edges of the cutter continuously biting straight into
new (uncut) wood.
NOTE: For best results, make sure to take enough time to
set up for cutting. While cutting, make sure to use the proper
rate of feed.
CUTTING
Fig. 18
Loading ...
Loading ...
Loading ...