Loading ...
Loading ...
Loading ...
21
21
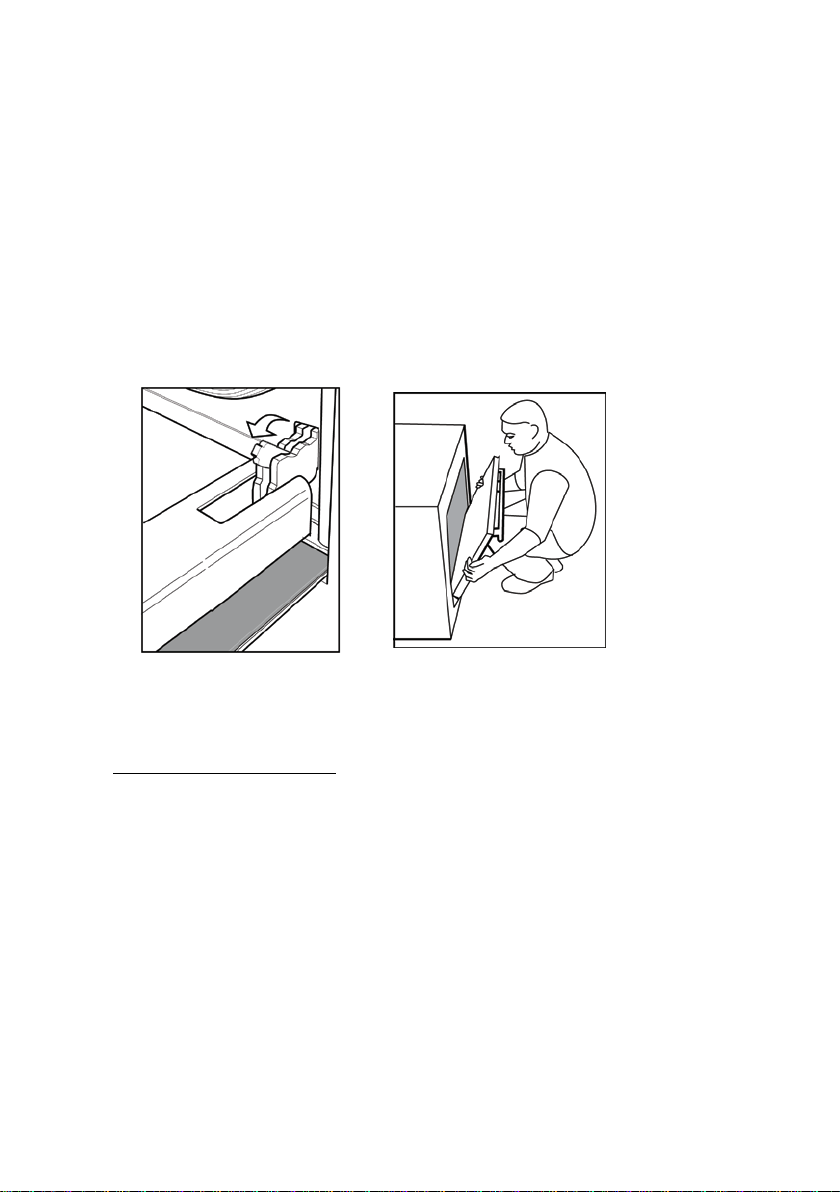
REMOVING THE DOOR
Open the door fully and flip over the locking tabs. Close the door gently
until it stops on the hinge mechanism. Hold the two sides of the door
placing your hands near the hinges. Lift the door upwards, forming an
angle of about 45% and carefully lift it away from the oven.
To reassemble the door insert the hinges making sure they locate in the
groove at the bottom of the hinge. Allow the door to open fully making
sure it stays in the grooves. Flip the locking tabs back over and close the
door. If the door is out of alignment repeat the process.
OVEN INSTALLATION INSTRUCTIONS –
Qualified and licenced technicians only.
POSITIONING THE OVEN
The oven is designed to be built-in to a fixture. The dimensions must be
according to the measurements indicated in Figures 1, 2 and 3. The
top/rear parts of the fixture must have an aperture of at least 80-90mm in
depth as shown in Figure 1.
Screw in the 4 screws, first inserting them into the bushing and then inside
the frame (Figure 1 A/B).
For installation under a work top, ensure that the rear/bottom part of the
fixture has an aperture as shown in Figure 1. (reference C)
Do not use the door as a lever to insert the oven into the fixture.
Do not exert excessive pressure on the open door.
When installing the oven ensure that the supply cable does not kink.
Loading ...
Loading ...
Loading ...