Loading ...
Loading ...
Loading ...
10.9.
HOW TO MAKE YOUR FIRST
SHOT(S) OF ESPRESSO
1. Fill the water tanktothe“MAX”markingwithclean,filteredwater.
2. TurnthecoffeemakerONbyusingthepower switch on the side.
NOTE: The ready indicator light will pulse while the coffeemaker heats
up and will turn solid when the coffeemaker is ready to use.
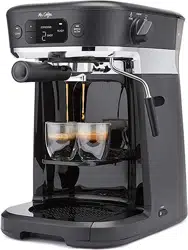
3. Select the filtersize: 1-shotfilter or 2-shotfilter. Make sure the bump
on the filteris aligned with the notch on the espressoportafilter and
place the filterinto the espressoportafilter.
4. Add espresso grounds into the filter.
5. Using the tamper, evenly tamp (press) espresso grounds. Then, wipe
the edges to clear any excess grinds.
6. If using a small cup, lower the height adjustment tray. If using a larger
cup, leave the height adjustment tray in the upright position.
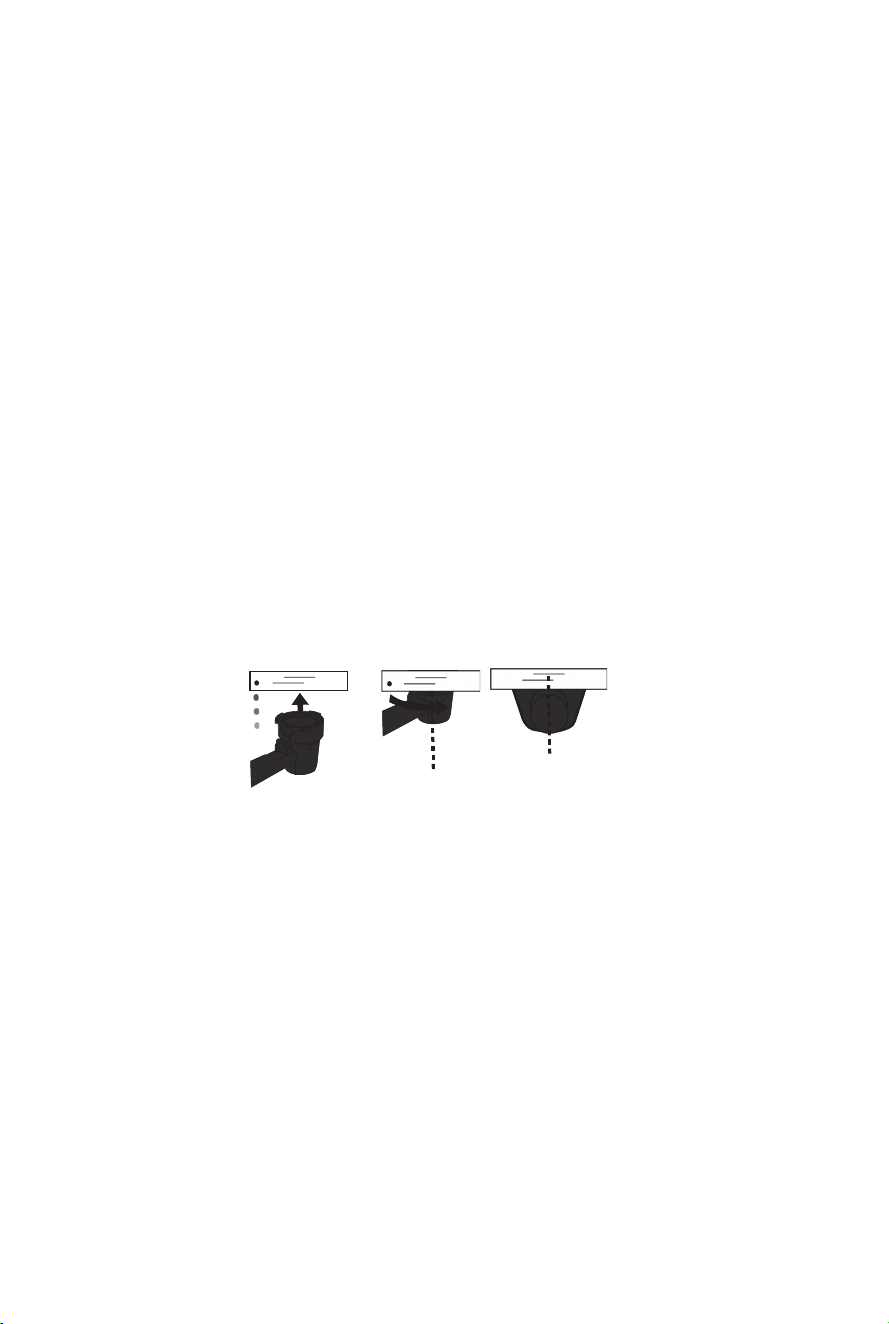
7. Insert the espressoportafilter into the coffeemaker:
a. Keep the espressoportafilterhandleflat.
b. Insert the espressoportafilter at a 45° angle (left).
c. Turn the espressoportafilter handle to a 90° angle. The espresso
portafilter should be in a centered position.
a. b. c.
8. Place the cup underneath the espressoportafilter.
9. Turn the knob to the “brew” position.
10. Use the brew size selector to select 1 shot or 2 shots.
11. Press the brew now button.
12. When the coffeemaker beeps and the brew now indicator light turns
off, turn the knob to the “standby” position.
NOTE:
When the knob is turned to the “standby” position, the
coffeemaker will enter an automatic cool-down cycle and the ready
indicator light will pulse. When the ready indicator light turns solid, the
coffeemaker has cooled down and is ready to use.
13.Enjoy!
HOW TO MAKE YOUR FIRST
SINGLE SERVE COFFEE
1. Fill the water tanktothe“MAX”markingwithclean,filteredwater.
2. TurnthecoffeemakerONbyusingthepower switch on the side.
NOTE:
The ready indicator light will pulse while the coffeemaker
heats up and will turn solid when the coffeemaker is ready to use.
3. Insert a K-Cup® Pod or permanentsingleservefilter inside the single
serveportafilterandpressitdownfirmly.Then,placethesingle
serverportafilter lid over the K-CUP ® Pod or permanent single
serverfilter and insert it into the coffeemaker."
NOTE:
The singleserveportafilterliddoesnotlayflatwhen
a K-Cup® Pod is inserted.
4. If using a small cup, lower the height adjustment tray. If using a larger
cup, leave the height adjustment tray in the upright position.
5. Insert the singleserveportafilter into the coffeemaker:
a. Keep the singleserveportafilterhandleflat.
b. Insert the singleserveportafilter at a 45° angle (left),
ensuring the lid closes during insertion.
c. Turn the singleserveportafilter to a 90° angle. The single
serveportafilter should be in a centered position.
a. b. c.
6. Place the cup underneath the singleserveportafilter.
7. Turn the knob to the “brew” position.
8. Use the brew size selector to select the desired brew size.
9. Press the brew now button.
10. When the coffeemaker beeps and the brew now indicator light turns
off, turn the knob to the “standby” position.
NOTE:
When the knob is turned to the “standby” position, the
coffeemaker will enter an automatic cool-down cycle and the ready
indicator light will pulse. When the ready indicator light turns solid,
the coffeemaker has cooled down and is ready to use.
11.Enjoy!
NOTE:
After brewing, remove the singleserveportafilterfrom the
coffeemaker carefully and dump any remaining water into the sink
before lifting the lid.
1-SHOT
2-SHOT
TURN
TURN
Loading ...
Loading ...
Loading ...