Loading ...
Loading ...
Loading ...
1
2
3
4
5
6
7
8
12
1 2 3
4 5 6
7 8 9
10 11 12
10
9
7
6
11
13
14
1517171819202122
23
23
23
27
29
30
28
26
13
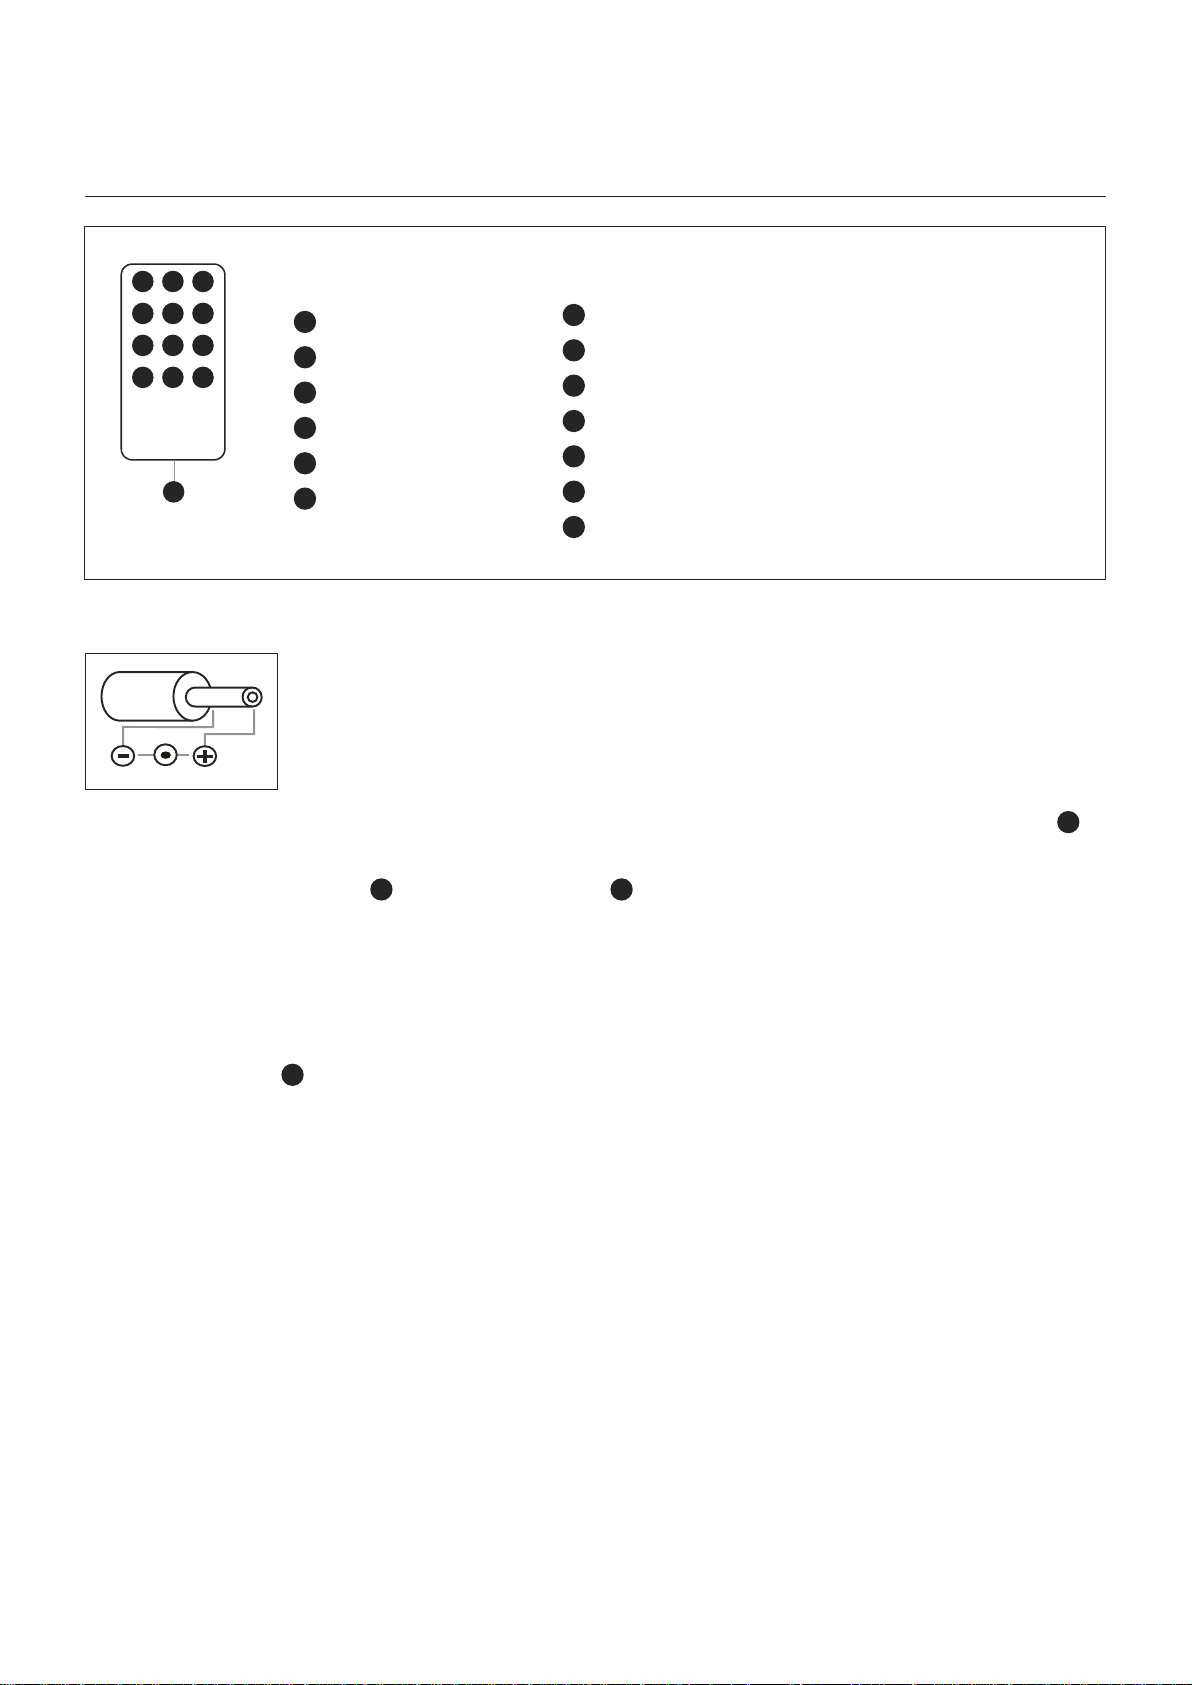
Description
Remote Control
1
Standby / On
2
Eq / Sleep
3
Function
4
Back / Tune –
5
Play / Pause / FM Mode
6
Next / Tune +
7
Alarm On / Off
8
Memory / Recall
9
Volume Up +
10
Snooze
11
Display / Clock Set
12
Volume Down –
13
Battery Compartment
The remote control can be found
in the battery compartment.
Remove (gently pull out) the
plastic ‘tab’ from the battery
compartment at the rear of the
remote control.
Test the remote control
by pressing the
‘Standby / On’ button.
Power supply
This unit is equipped with a ‘DC Jack’ capable of accepting AC adaptors with a rating of
DC = 12V, 2a, Please only use the supplied AC adaptor to operate the unit. Use of other
adaptors may damage the unit.
Make sure the voltage of the AC adaptor operates at the same voltage as your local
household voltage.
Insert the plug of the power cord into a power socket and the tail end of the AC adaptor into the DC Jack socket
24
on the rear of the main unit.
Press the ‘Standby / On’ button
1
on the remote control or
17
on the main unit to switch the unit on.
This unit is designed to operate without ever being totally powered ‘Off’. It will either be ‘On’ or in ‘Standby’ mode.
To save energy unplug the power cord from the power socket.
Batteries
Open the battery door
25
found at the bottom of the unit.
Insert 1 pc cr-2032 lithium cell battery in the battery compartment. This battery is for backup for the ‘Real Time Clock’
and ‘Radio Memory’ preset stations during brief power outages.
-
+
3
Loading ...
Loading ...
Loading ...