Loading ...
Loading ...
Loading ...
English
1-9
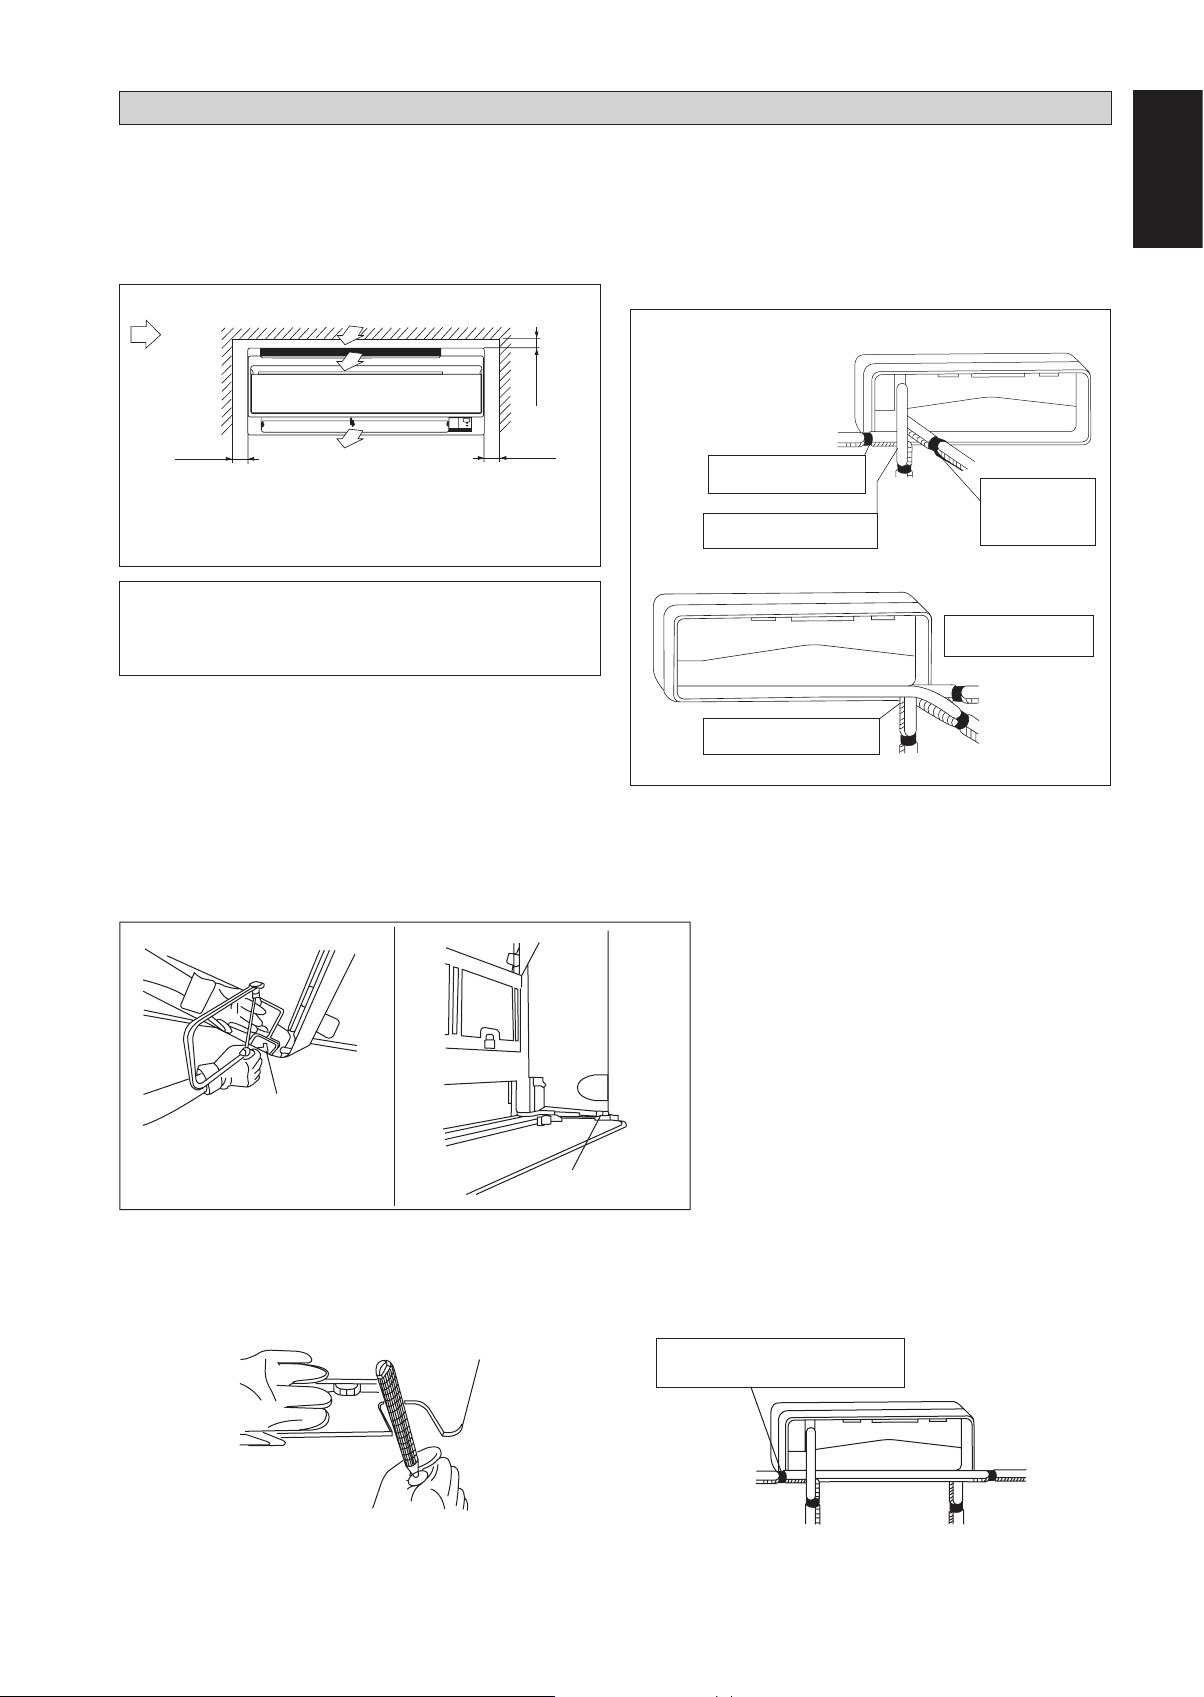
The indoor unit must be installed in such a way so as to prevent
short circuit of the cool discharged air with the hot return air.
Please follow the installation clearance shown in the figure. Do
not place the indoor unit where there could be direct sunlight
shining on it. Also, this location must be suitable for piping
and drainage, and be away from doors or windows.
min. 2" (50)
(Space for
maintenance)
Air flow
(Indoor)
The refrigerant piping can be routed to the unit in a number
of ways (left or right from the back of the unit), by using the
cut-out holes on the casing of the unit. Bend the pipes carefully
to the required position in order to align it with the holes. For
the side and bottom out, hold the bottom of the piping and
then position it to the required direction. The condensation
drain hose can be taped to the pipes.
Right-side, right-back or right-bottom piping
min. 2-3/16" (55)
(Space for
performance)
Required space
Right-back piping
All dimensions are in Inch (mm)
Right-bottom
piping
Right-side piping
Remove pipe port cover
here for right-side piping
Left-back piping
Left-side piping
Left-bottom piping
Left-side, left-back or left-bottom piping
INSTALLATION OF THE INDOOR UNIT
Remove pipe port cover here
for right-bottom piping
Bind coolant pipe
and drain hose
together with
insulating tape.
Remove pipe port cover
here for left-side piping
Remove pipe port cover here
for left-bottom piping
Bottom or side piping
Cut off pipe port cover with a copping saw.
For bottom piping: On the bottom of the front grille
For side piping: On the side cover (front grille side and unit side)
Apply the blade of the copping saw to the notch, and cut off the pipe port cover along the uneven inner surface.
1)
ü
ü
After cutting off the pipe cover, perform filing.
Remove the burrs along the cut section using a half round needle file.
Wrap the inter-unit wire, refrigerant pipes and drain hose together with insulation tape.
Then, insert the drain hose and refrigerant pipes into the wall hole after inserting them into the cut out piping hole
opened.
2)
3)
NOTE
Be careful not to let chips enter the driving section of the arm.
Be careful not to put pressure on the lower front panel.
ü
ü
Left-side
piping
Right-bottom piping
Right-side
piping
Bind refrigerant pipe and drain hose
together with adhesive vinyl tape.
Left-bottom piping
The figure shows the case of left bottom piping
Front grille side
Side cover
(front grille side)
min. 2" (50)
(Space for
maintenance)
! CAUTION
• Must be mounted with the lowest moving parts at
least 8ft (2.4m) above floor or grade level.
Loading ...
Loading ...
Loading ...