Loading ...
Loading ...
Loading ...
6
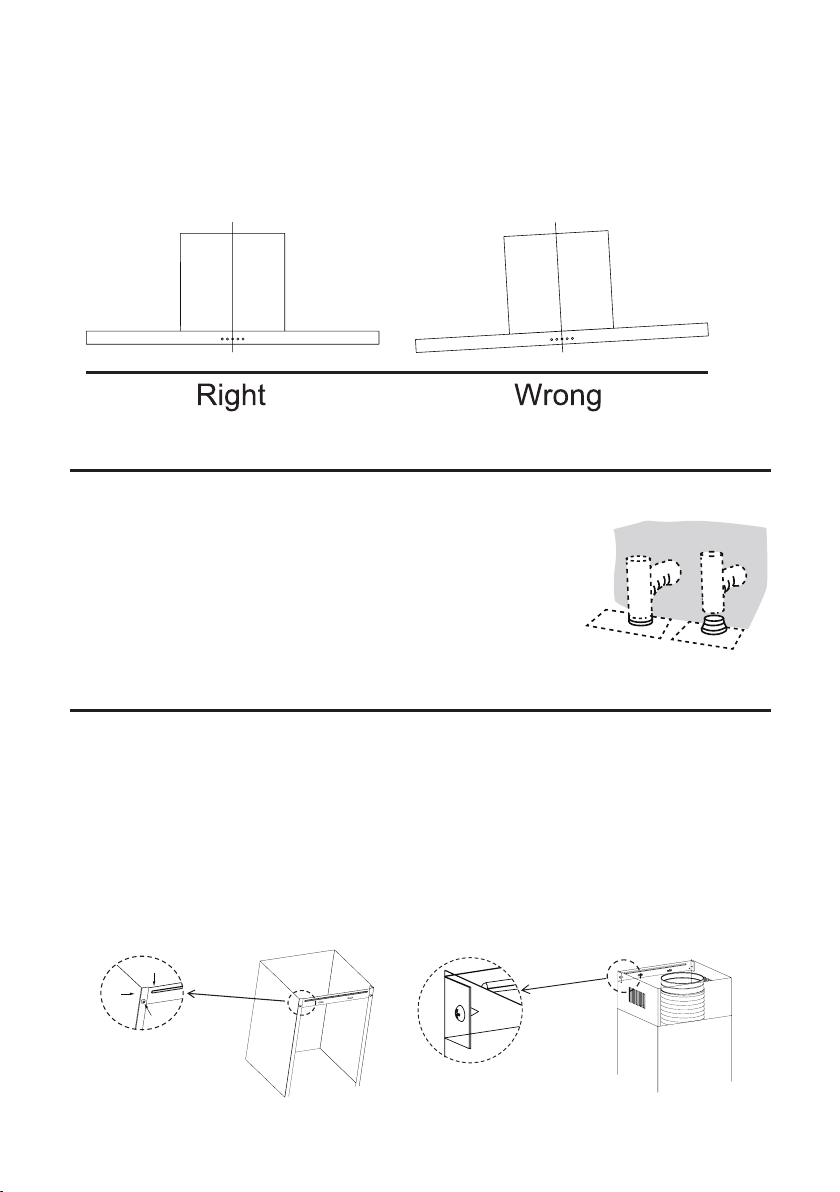
Hook the hood body
● Hook the hood body to the bracket 20.
● Level the hood body itself.
● Lock screws (M5*12) into the hood xing bracket to prevent the hood body from accidentally
sliding off. Remove the lter from the inside of the hood body, and x the screw 10 to wall plug 11
at the point (3) (optional).
When installing the ducted version, connect the hood to the chimney
using either a exible or a rigid pipe of ɸ 150 or ɸ 120 mm, the choice
of which is left to the installer.
● Insert the reducer ange 3 onto the hood body outlet to install a ɸ
120 mm air exhaust connection.
● Fix the pipe 4 in place using sufcient pipe clamps (not supplied).
● Remove possible charcoal lters.
Lower decorative chimney
● Fix the chimney xing bracket 21 onto the lower decorative chimney with 2 screws 12 (4.2 x 9.5)
supplied with the hood.
Upper decorative chimney
● Insert the upper decorative chimney 2.2 into the lower decorative chimney 2.1 and drag it up
to the bracket 21.
● Fix the upper chimney onto the bracket 21 with 2 screws 12 (4.2 x 9.5) supplied with the hood.
CONNECTIONS
CHIMNEY ASSEMBLY
DUCTED VERSION AIR EXHAUST SYSTEM
The chimney can only be installed with an exhausting hood.
21
2.1
12
Loading ...
Loading ...
Loading ...