Loading ...
Loading ...
Loading ...
5
INSTALLATION
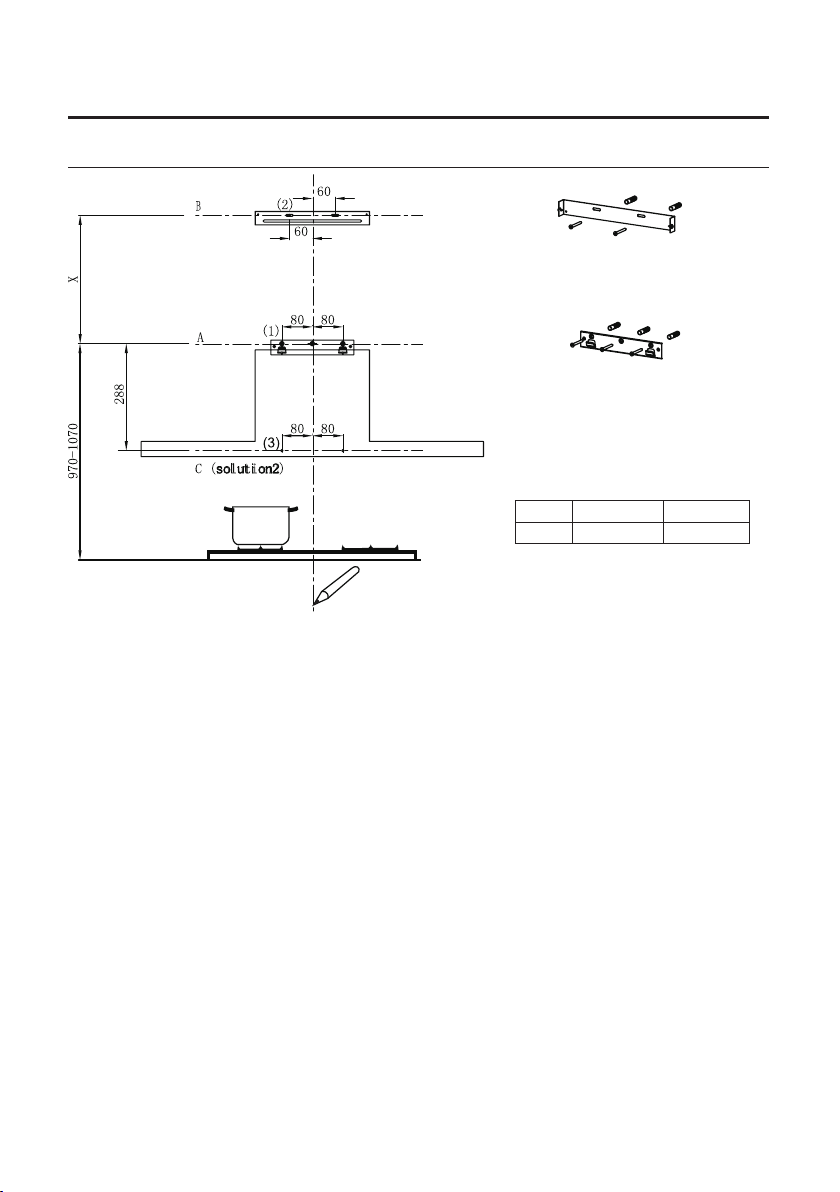
WALL DRILLING AND BRACKET FIXING
As the rst step, proceed with the following drawings:
● A vertical line up to the ceiling or up to the upper limit, at the center of the area in which the
hood is to be tted.
● A horizontal line A at 970 – 1070 mm above the cooker top.
● A horizontal line B at X mm above the horizontal line A.
● A horizontal line C at 288 mm below the horizontal line A.
Mark points:
● Mark a point (1) on the horizontal line A, 80 mm to the vertical reference line.
● Repeat this operation on the other side and on the vertical reference line, checking that the
three marks are on one horizontal line.
● Mark a point (2) on the horizontal line B, 60 mm to the right of the vertical reference line.
● Repeat this operation on the other side, checking that the two marks are on one horizontal line.
● Mark a point (3) on the horizontal line C, 80 mm to the right of the vertical reference line
(solution2).
● Repeat this operation on the other side, checking that the two marks are on one horizontal line.
Fix the brackets:
● Drill at the marked points (1), (2), (3) (solution 2), using a ɸ10 mm drill bit.
● Insert the wall plugs 11 into the holes (1), (2), (3) (solution 2).
● Fix the hood xing bracket 20 with 3 screws 10 (5 x 50) at the horizontal line A,
● Fix the chimney xing bracket 21 with 2 screws 10 (5 x 50) at the horizontal line C.
Option Chimney X
1 400X400 155-500
Loading ...
Loading ...
Loading ...