
T27019
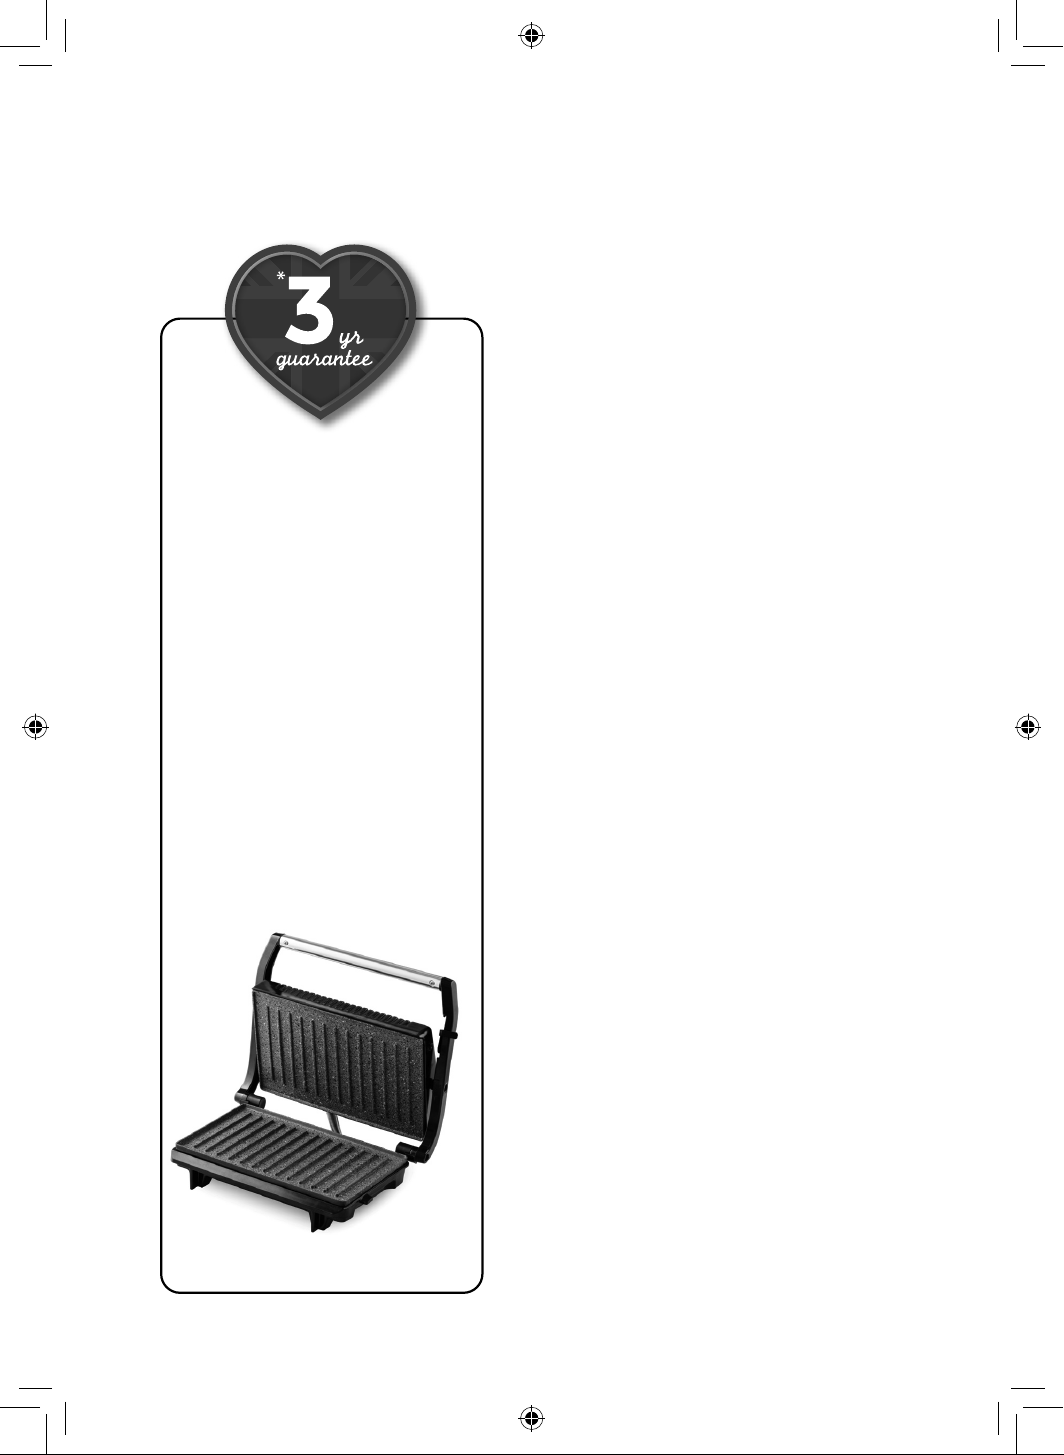
Mini Panini Grill
Safety and Instruction Manual With Recipes
PLEASE READ CAREFULLY
*Subject to registering Your Extended Guarantee online at www.towerhousewares.co.uk.
2
1912 Midland Metal Spinners
was founded by George
Cadman, who was then
65 years old, as a metal
holloware manufacturing
company, in St. Mark’s Street,
Wolverhampton. They later
moved into the Tower and
Fort Works in Pelham Street,
which ultimately gave rise
to the famous Tower brand
name.
1937 Tower exhibited some
of their latest holloware
designs at the British
Industries Fair. As you can
see from the original poster,
their stand No. A410 must
have been a great sight as
it promoted their “Beautiful,
inexpensive, untarnishable
Plate, at prices all can afford
to pay”.
1961 Tower became one of
the largest manufacturers of
aluminium holloware, electric
kettles, tea pots and other
household articles with over
1,000 employees.
1974 Russell Hobbs took
ownership of the expanding
Tower brand.
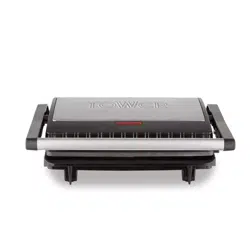
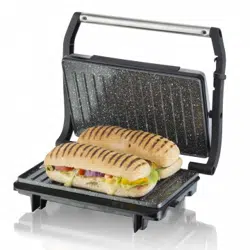
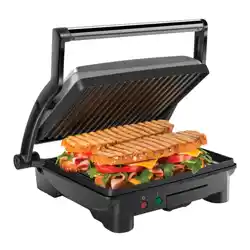
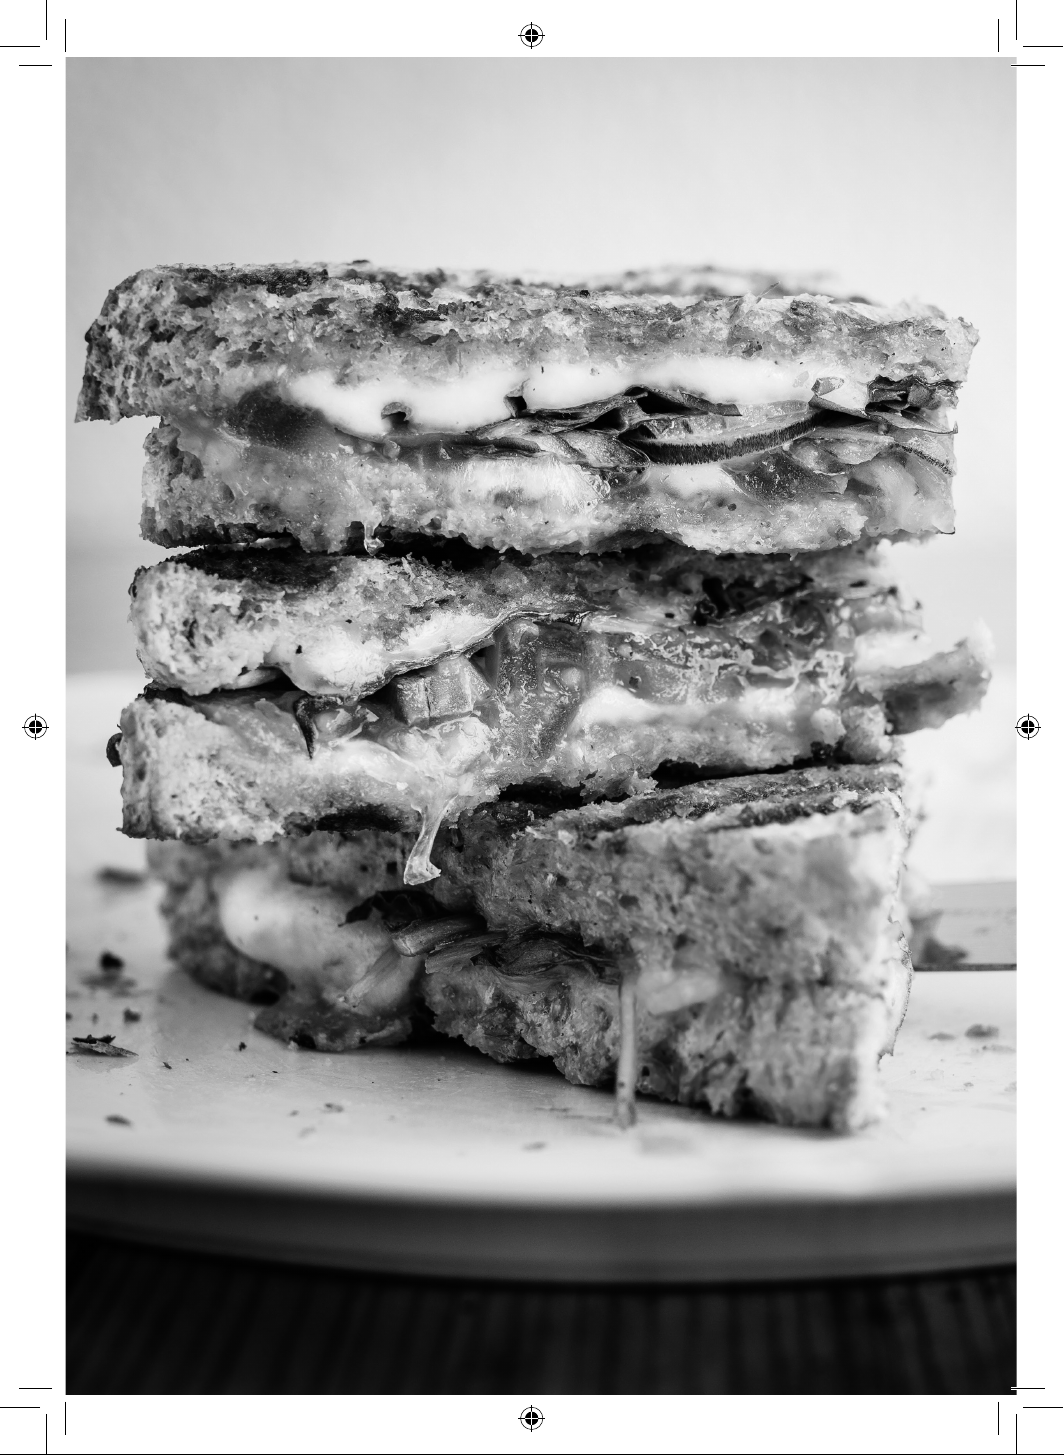
Healthier Grilled Food
The Tower Mini Panini
Grill means you can enjoy
delicious toasted sandwiches,
deli style Panini’s and grilled
food quickly and at any time
of the day or night, without
having to re up the stove.
A large grilling area is perfect
for cooking meals for the
whole family. The non-stick
ceramic stone coated plates
allow you to cook great
tasting food without adding
any oil.

3
Contents:
Please read this Manual carefully BEFORE using the Mini
Panini Grill for your own safety.
Thank you for purchasing this Mini Panini Grill from the
Tower range.
It has been designed to provide many years of trouble-free
cooking. There are many benets to using the Tower Mini
Panini Grill:
There are many benets to using a Mini Panini Grill:
• Perfect for deli style Panini’s at home, grilled meat and
vegetables.
• Non-stick coated plates allow you to cook great tasting
food without adding any oil.
• Specially designed grill rib for perfect grill marks
• Hinged oating lid adjusts according to thickness of
food
• Stainless steel housing with cool touch handle and
non-slip feet.
1. Specications
Components and
structure
2. Technical data
3. Important Safety
Information
4. Before First Use
5. Using your Appliance
6. Weights & Measures
7. Troubleshooting
8. Cleaning & Care
9. Recycling
10. Wiring Safety
11. Warranty Information
12. Your Receipt
13. Recipes
Grilled Vegetable Panini
Bacon, Pear and Brie Panini
Grilled Halloumi Skewers
Prosciutto Wrapped
Asparagus
See back page for Customer
Service Information.
4
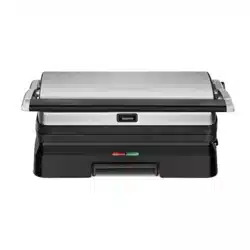
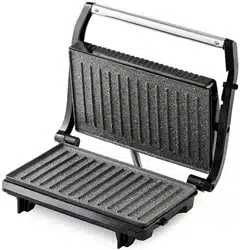
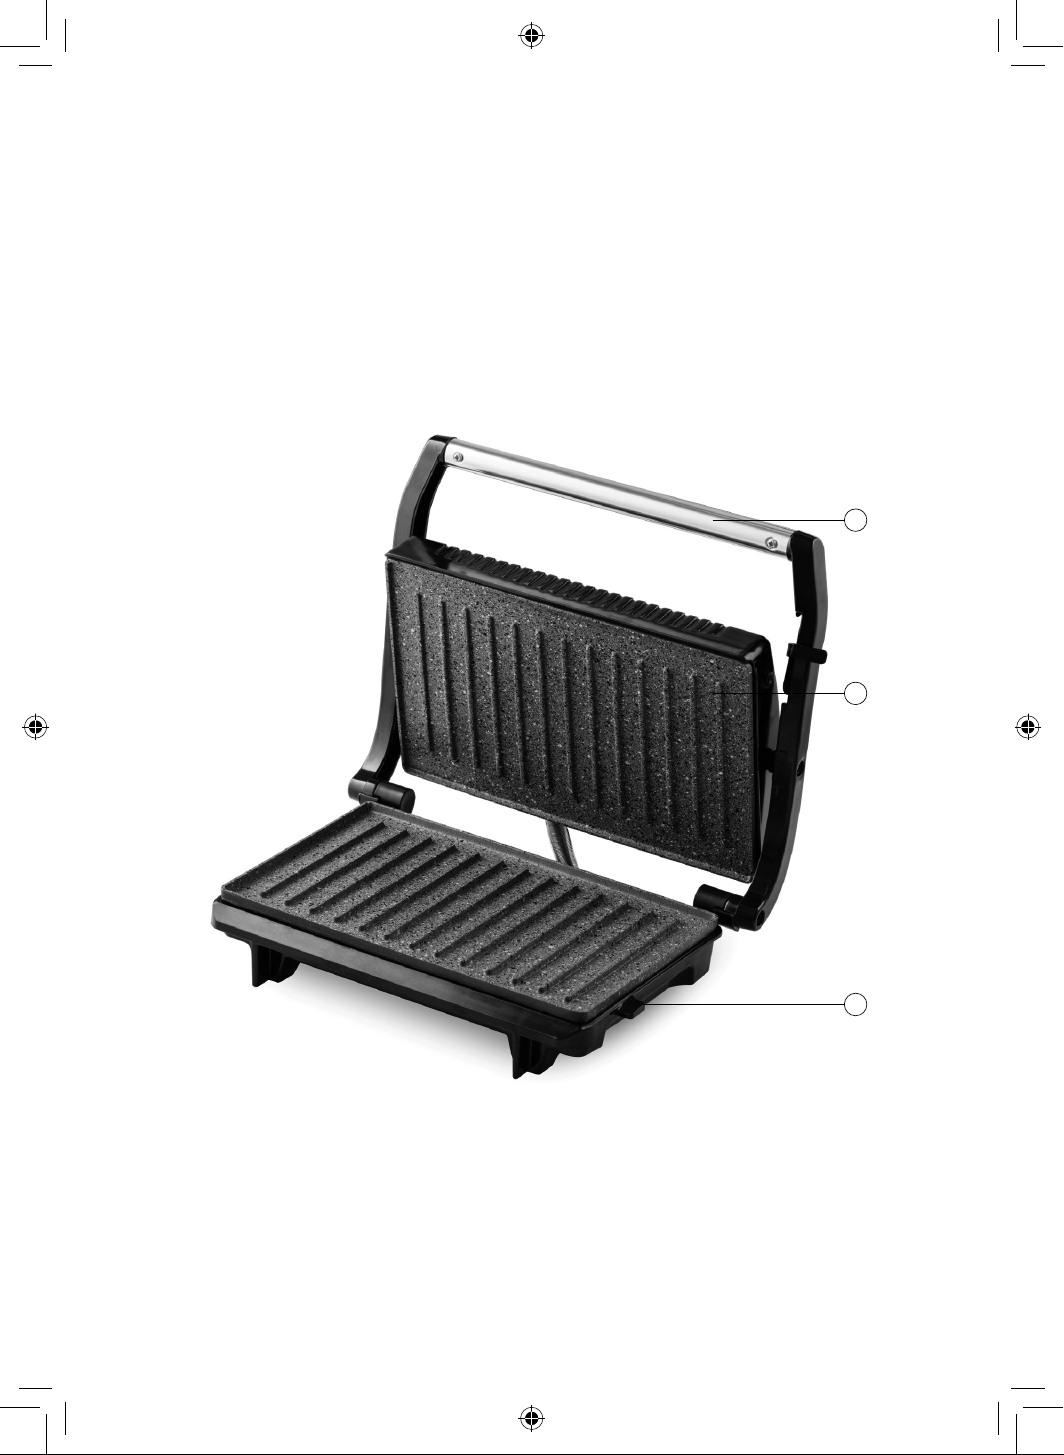
1. Handle
2. Grilling plates
3. Lock
1 - Specications:
Structure of your appliance:
1
2
3

5
Description: Mini Panini Grill
Model: T27019
Rated Voltage: 220-240V
Frequency: ~50Hz
Power Consumption: 700W
Cooking Surface Dimensions: 15cm x 24cm plates
Documentation
We declare that this product conforms to the following product legislation in
accordance with the following directive(s):
2014/108/EU Electromagnetic Compatibility Directive.
2014/95/EU Low Voltage Directive.
2011/65/EU Restriction of Hazardous Substances Directive.
1935/2004/EC Materials & Articles in Contact With Food
(LFGB section 30 & 31).
2009/125/EC Eco-Design of Energy Related Products.
RKW Quality Assurance, United Kingdom.
2 - Technical Data:
Should you encounter problems or require a replacement part, contact the Tower
Customer Support Team: +44 (0) 333 220 6066.
Some spare parts may be ordered from the Tower website.
Your warranty becomes void should you decide to use non Tower spare parts.
Spare parts can be purchased from www.towerhousewares.co.uk
Guarantee for spare parts:
The spares and accessories are guaranteed for 1 year from date of purchase.
The main body and housing are guaranteed for the extended free warranty subject
to registration.
If any defect arises due to faulty materials of workmanship, the faulty products must
be returned to the place of purchase within 12 months from the date of purchase.
Refund or replacement is at the discretion of the retailer.

6
• Check that the voltage
of the main circuit
corresponds with the
rating of the appliance
before operating.
• Please ensure that the
appliance is used on a
stable, level, and heat
resistant surface.
• DO NOT immerse cords,
plugs or any part of the
appliance in water or any
other liquid.
• DO NOT leave the
appliance unattended
while it is operating.
• Close supervision is
necessary when any
appliance is used by or
near children or pets.
• This appliance can be
used by children aged
from 8 years and above
and persons with reduced
physical, sensory or
mental capabilities or
lack of experience and
knowledge if they have
been given supervision or
instruction concerning use
of the appliance in a safe
way and understand the
hazards involved.
• Children shall not play
with the appliance.
• Cleaning and user
maintenance shall not be
made by children without
supervision.
• Switch off at the wall
socket then remove the
plug from the socket
when not in use or before
cleaning.
• If the supply cord or
appliance is damaged,
stop using the appliance
immediately and
seek advice from the
manufacturer or its service
agent or a similarly
qualied person.
• DO NOT let the cord hang
over the edge of a table
or counter or let it come
into contact with any hot
surfaces.
• The use of accessory
attachments is not
recommended by the
appliance manufacturer
apart from those supplied
with this product. DO
NOT use extension cords
with the appliance.
Please read these notes carefully BEFORE using your
Tower appliance
3 - Important Safety Information:

7
• DO NOT pull the plug out
by the cord as this may
damage the plug and/or
the cable.
• DO NOT use this product
for anything other than its
intended use.
• This appliance is for
household use only.
• DO NOT carry the
appliance by the power
cord.
• DO NOT use the
appliance outdoors.
• Never position the unit
close to or on hot surfaces
or open ames.
• DO NOT spill liquid
onto the base unit. If
this happens switch off
and unplug from the
mains, mop up the liquid
and seek advice from a
qualied technician.
• High temperatures are
present during operation.
Only touch the handles on
the unit.
• This appliance is not
intended for commercial
use.
• DO NOT site the product
under cupboards or near
hanging fabric.
• This appliance can
produce steam as part
of the cooking process.
Avoid contact with
steam escaping from the
appliance.
• The appliance is not
intended to be operated
by means of an external
timer or separate remote
control system.
• Extreme caution must be
used when moving an
appliance that produces
hot oil or other hot liquids
from the cooking process.
• DO NOT use the
appliance outdoors. In
the unlikely event the
appliance develops a fault,
stop using it immediately
and seek advice from the
service department:
+44 (0) 333 220 6066

8
Read all instructions carefully and keep them for future reference.
Remove all packaging
Clean the Cooking Plates by wiping a sponge or cloth dampened in warm water.
DO NOT IMMERSE THE UNIT AND DO NOT RUN WATER DIRECTLY ON THE COOKING
SURFACES.
Dry with a cloth or paper towel.
For best results, lightly coat the cooking plates with a little cooking oil or cooking spray.
Note: When your Mini Panini Grill is heated for the rst time, it may emit a slight smoke or odour.
This is normal with many heating appliances. This does not affect the safety of your appliance.
1. Place your Mini Panini Grill on a clean, at surface.
2. Connect the appliance to the electrical supply. Make sure that the plug is connected
properly. The indicator light will illuminate, indicating that the Mini Panini Grill has begun
heating.
3. When the Mini Panini Grill has reached the correct temperature for cooking, the indicator
light will go off. It will take approximately 5 minutes to preheat. During this time, prepare
the foods to be cooked.
4. Open the Mini Panini Grill and place your Panini on the bottom cooking plate.
5. Close the Mini Panini Grill. Close the top cooking plate. The top cooking plate has a oating
hinge that is designed to evenly press down on food. The top plate must be fully lowered
to achieve grill marks on the selected foods. The ready indicator light will come on again.
6. Cook between 5 to 8 minutes, until the ready light turns off or the bread is golden brown.
It is recommended to check throughout so that you adjust the time to your own taste.
7. When the food is grilled, use the handle to open the grill and raise the top cooking plate.
Remove food with the help of a heat-resistant spatula. Never use metal tongs or a knife
as these can cause damage to the non-stick coating.
Grilling Tips:
Bread
The grill is ideal for toasting most types of bread (white, wholemeal, kibbled wheat, wholegrain
etc), as well as artisan breads (Focaccia, Panini, Turkish bread, baguettes, bread rolls etc). Raisin
bread, brioche or other sweet breads which contain high sugar content will tend to brown quicker.
Fillings
Try to use canned or pre-cooked fruit as fresh fruit may give off excessive juices when heated. Be
careful when biting into Paninis and sandwiches containing llings such as cheese and tomato
or jam as they retain heat and can burn if eaten too quickly.
4 - Before First Use
5 - Using Your Appliance

9
Toasting Bread
The Mini Panini Grill is ideal for toasting plain breads and Turkish bread, without any llings
or spreads.
Try toasting Turkish bread with jams for a great alternative to standard breads at breakfast.
Fat Free Snacks
Due to the non-stick cooking plates, it is not necessary to use any butter or margarine on the
outside of your toasted snacks.
Grilling Vegetables
Vegetables can be cooked on skewers, or straight on to the grill.
If you are using bamboo skewers, be sure to soak them in water rst.
Wash and dry vegetables that you wish to use.
Vegetables such as mushrooms and asparagus can be cooked whole on the grill pan.
Grill vegetables until they are tender and lightly charred all over.
Parboil potatoes, carrots and beets before grilling. Dry them off and brush with oil, then grill.
Vegetables such as courgette and aubergine need to be brushed lightly with oil before grilling.
Bell peppers don’t require any oil.
10
Check these charts for basic imperial to metric conversions
of weights.
Food Allergies
Important Note: Some of the recipes contained in this document may contain nuts and/
or other allergens. Please be careful when making any of our sample recipes that you ARE
NOT allergic to any of the ingredients. For more information on allergies, please visit the
Food Standards Agency’s website at: www.food.gov.uk
6 - Weights & Measures
Metric Imperial US cups
250ml 8 oz 1 cup
180ml 6 oz 3/4 cup
150ml 5 oz 2/3 cup
120ml 4 oz 1/2 cup
75ml 2 1/2 oz 1/3 cup
60ml 2 oz 1/4 cup
30ml 1 oz 1/8 cup
15ml 1/2 oz 1 tablespoon
Imperial Metric
1/2 oz 15g
1 oz 30g
2 oz 60g
3 oz 90g
4 oz 110g
5 oz 140g
6 oz 170g
7 oz 200g
8 oz 225g
9 oz 255g
10 oz 280g
11 oz 310g
12 oz 340g
13 oz 370g
14 oz 400g
15 oz 425g
1 lb 450g

11
What do I do if food
gets stuck to the
cooking plates?
If food gets stuck to the cooking plates do not use metal utensils, as this
can damage the non-stick cooking surface. Gently remove the food using
wooden or heat resistant utensils instead.
Does it need
preheating?
Yes. Always preheat the Mini Panini Grill for best results. Preheat with the lid
closed for approximately 5 minutes.
Do I need to use oil
when cooking?
Some non-fatty meats and veg may require the addition of a small amount
of oil to assist the non-stick surface.
Why are my sandwich
llings spilling over
during cooking?
You may have added too many llings to your sandwiches. Ensure that no
llings are ‘overowing’ when you add the sandwich to the Mini Panini Grill.
Fillings such as cheese and jam reach very high temperatures when heated
and can spill over.
Do the indicator lights
show when my food is
done?
No. The indicator lights only indicate power, and that the sandwich maker
has reached the correct temperature. Ensure you do not leave the Mini
Panini Grill unattended during use.
My frozen chicken
breasts are still pink
inside but look cooked
outside.
To make sure that meats and poultry are safely cooked through, be sure to
thaw them before grilling.
Do I need to place my
food in the middle of
the grill for it to cook?
No, the grill plate is heated consistently along its length, so you don’t need
to worry about some food getting more heat than others.
7 - Troubleshooting

12
DISPOSAL OF THE UNIT
Appliances bearing the symbol shown here may not be disposed of in domestic rubbish.
You are required to dispose of old electrical and electronic appliances like this separately.
Please visit www.recycle-more.co.uk or www.recyclenow.co.uk for access to information
about the recycling of electrical items.
Please visit www.weeeireland.ie for access to information about the recycling of
electrical items purchased in Ireland.
The WEEE directive, introduced in August 2006, states that all electrical items must be
recycled, rather than taken to landll.
Please arrange to take this appliance to your local Civic Amenity site for
recycling, once it has reached the end of its life.
1. Before cleaning, switch the product off and remove the power plug from the power outlet.
2. Allow your Mini Panini Grill to cool before cleaning. The grill is easier to clean when
slightly warm.
3. Always clean your Mini Panini Grill after each use to prevent a build-up of baked-on foods.
4. Wipe cooking plates with a soft cloth to remove food residue.
5. For baked-on food residue squeeze some warm water mixed with detergent over the food
residue then clean with a non-abrasive plastic scouring pad.
IMPORTANT!
Allow to dry fully after cleaning before using again.
Do not use the appliance if damp. Ensure the appliance is completely clean and dry before
storing.
Durable Non-stick Coating
Cooking on a non-stick surface minimizes the need for oil, food does not stick and cleaning
is easier. Any discolouration that may occur will only detract from the appearance of the grill
and will not affect the cooking performance. When cleaning the non-stick coating, do not use
metal (or other abrasive) scourers. Wash with warm soapy water. Remove stubborn residue with
a non-abrasive plastic scouring pad or nylon washing brush.
Storage
1. Unplug power cord from the power outlet.
2. Allow the grill to fully cool.
3. Close the Mini Panini Grill so that the top and bottom cooking plates are together and
push down the locking mechanism at the side of the grill to lock together.
4. Wrap the power cord in the cord storage area below the grill.
5. Store on a at, dry level surface.
8 - Cleaning & Care
9 - Recycling

13
10 - Wiring Safety for UK Use Only
IMPORTANT
As the colours in the mains lead of this
appliance may not correspond with the
coloured markings identifying the terminals
in your plug, please proceed as follows:
The wires in the mains lead are labelled in
accordance with the following code:
Blue neutral [N] Brown live [L]
Green/Yellow [EARTH]
Plug Fitting Details (Where Applicable). The
wire labelled blue is the neutral and must be
connected to the terminal marked [N].
The wire labelled brown is the live wire and
must be connected to the terminal marked
[L].
The wire labelled green/yellow must be
connected to the terminal marked with the
letter [E].
On no account must either the brown or
the blue wire be connected to the [EARTH]
terminal.
Always ensure that the cord grip is fastened
correctly.
The plug must be tted with a fuse of the
same rating already tted and conforming to
BS 1362 and be ASTA approved.
If in doubt consult a qualied electrician who
will be pleased to do this for you.
Non-Rewireable Mains Plug
If your appliance is supplied with a non-
rewireable plug tted to the mains lead and
should the fuse need replacing, you must
use an ASTA approved one (conforming to
BS 1362 of the same rating).
If in doubt, consult a qualied electrician
who will be pleased to do this for you.
If you need to remove the plug - disconnect
it from the mains - then cut it off of the mains
lead and immediately dispose of it in a safe
manner. Never attempt to reuse the plug
or insert it into a socket outlet as there is a
danger of an electric shock.
FUSE
Earth
(Green/Yellow)
Fuse
Neutral
(Blue)
Live
(Brown)
WARNING:
This appliance MUST be earthed!
14
This product is guaranteed for 12 months from
the date of original purchase.
If any defect arises due to faulty materials of
workmanship, the faulty products must be
returned to the place of purchase.
Refund or replacement is at the discretion of the
retailer.
The Following Conditions Apply:
• The product must be returned to the
retailer with proof of purchase.
• The product must be installed and
used in accordance with the instructions
contained in this instruction guide.
• It must be used only for domestic
purposes.
• It does not cover wear and tear, damage,
misuse or consumable parts.
• Tower has limited liability for incidental
or consequential loss or damage.
This guarantee is valid in the UK and Eire Only.
The standard one year guarantee is only
extended to the maximum available for each
particular product upon registration of the
product within 28 days of purchase. If you
do not register the product with us within the
28 day period, your product is guaranteed for 1
year only.
To validate your extended warranty, please visit
www.towerhousewares.co.uk and register with
us online.
Please note that length of extended warranty
offered is dependent on product type and that
each qualifying product needs to be registered
individually in order to extend its warranty past
the standard 1 year.
Extended warranty is only valid with proof of
purchase.
As a thank you for purchasing
one of our fantastic products,
we are offering you an extra
2 years peace of mind in
addition to your 1 year
guarantee.
To receive your extra 2 year
guarantee, register your
appliance online within 28
days of purchase by visiting
www.towerhousewares.co.uk
11 - Warranty

15
Afx your store receipt to
this page for safe keeping.
12 - Your Receipt

16
NOTES

17
NOTES

18
NOTES

19
For more great recipes and inspiration from the
Tower Kitchen, visit
www.towerhousewares.co.uk/blog
Recipes
Recipes for use with the T27019 Mini Panini Grill.

20
Ingredients
2 panini rolls, cut in half horizontally
2 red bell peppers, sliced
1 medium red onion, thinly sliced
Tomato, thinly sliced
Mozzarella, sliced
Pesto
Grilled Vegetable Panini
Method
1. Assemble your Mini Panini Grill to use as an open grill.
2. Brush the slices of courgette, and bell pepper with olive oil.
3. Grill on your Mini Panini Grill. See the grilling guide for
recommended times.
4. Whilst the vegetables are on the grill, spread pesto on one cut
side of each roll.
5. Remove the vegetables when lightly charred.
6. Close the Mini Panini Grill and preheat.
7. Top the slices with the vegetables and a few slices of mozzarella
on each.
8. Top with the remaining bread.
9. Grill for 4 – 8 minutes until the bread is golden brown and the
cheese is melted.
10. Cut in half and serve.
21

22
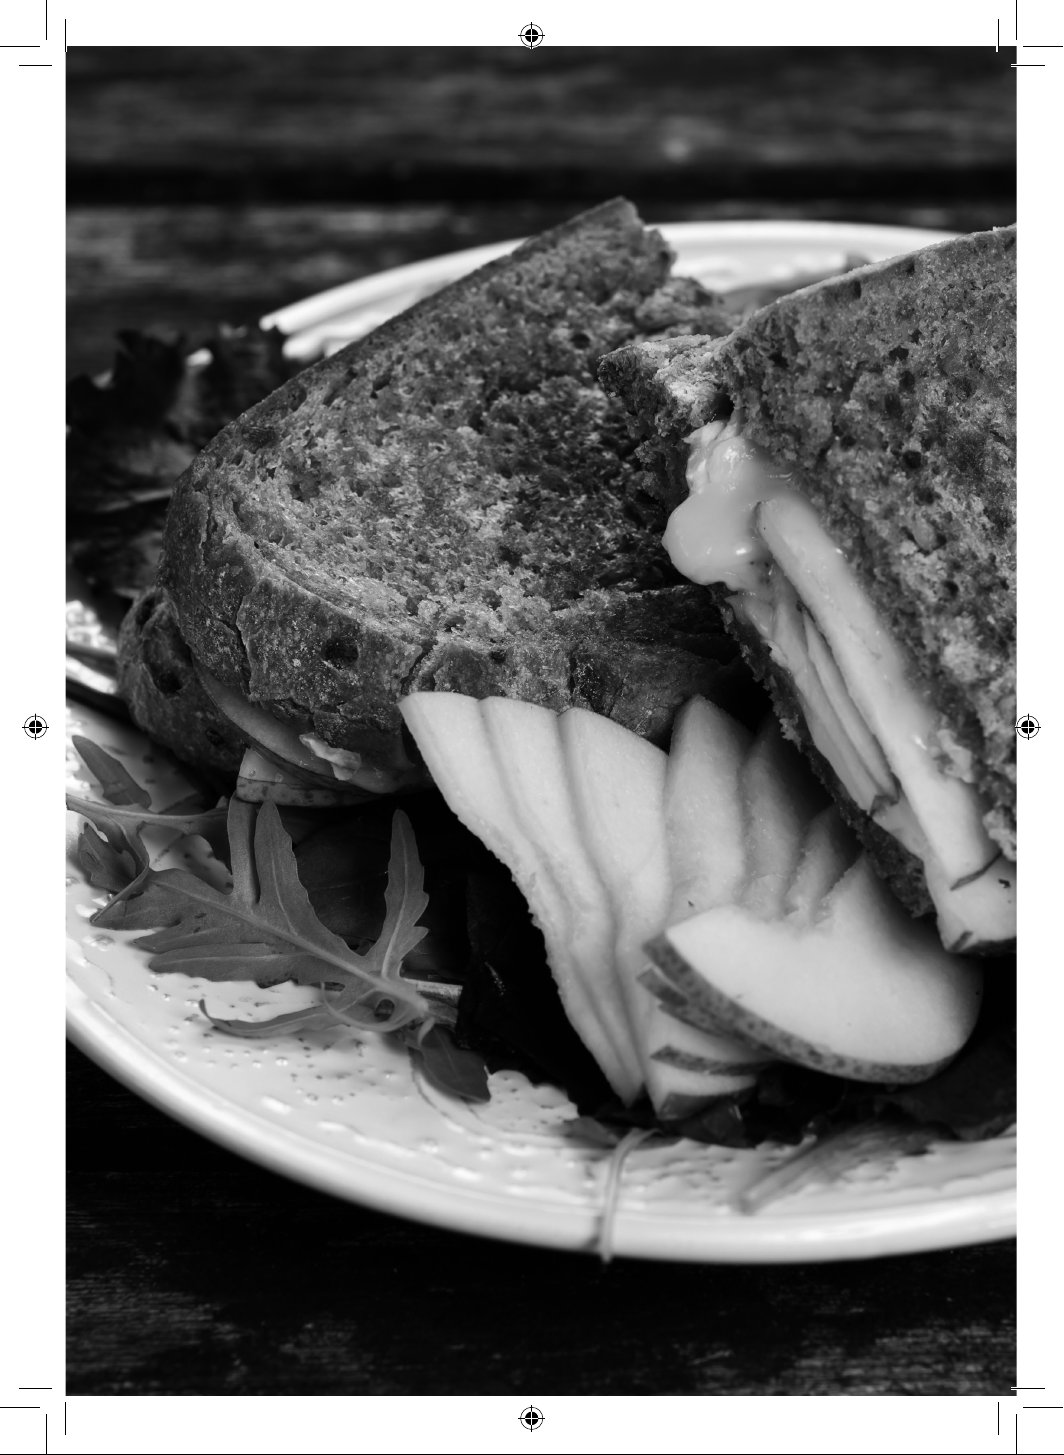
Ingredients
4 slices bread
1 pear, sliced
6 slices brie
4-6 slices cooked bacon
Bacon, Pear and Brie Panini
Method
1. Grill or fry the bacon to your desired doneness and set aside,
2. Preheat the Mini Panini Grill.
3. Cut the pear into thin slices and place on the Panini Grill. Cook
on each side for around 1 minute.
4. Remove pear slices and set aside.
5. Butter the bread and add the cooked pear, 2-3 strips of cooked
bacon and some slices of brie to make a sandwich.
6. Place the sandwich on the Mini Panini Grill and grill until the
bread is golden brown and the brie is melted.
23

24
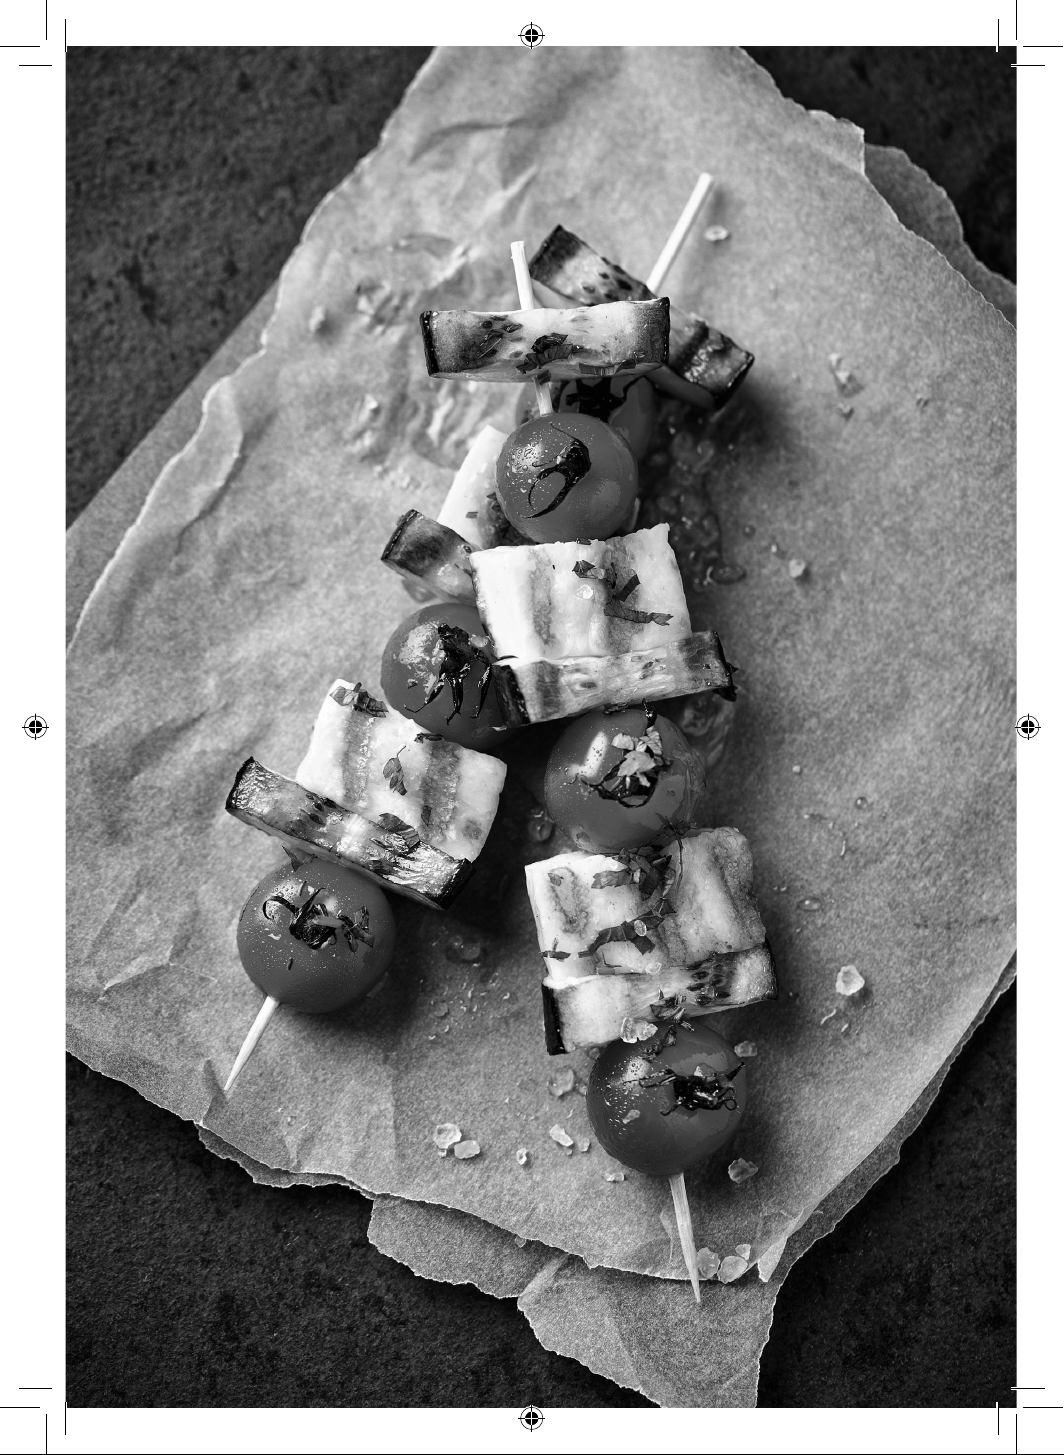
Ingredients
2 courgette, chopped.
225g halloumi cheese, cubed
10-15 cherry tomatoes
Zest and juice of 1 lemon
Handful of mint, chopped
½ tsp. chilli powder
2 tbsp. extra-virgin olive oil
Method
1. Mix lemon zest and juice, chilli, oil and half of the mint together.
Add the courgettes, halloumi and cherry tomatoes and leave to
marinate for 30 minutes.
2. Soak the wooden skewers for 20 minutes.
3. Brush the chopped courgette lightly with oil before threading the
courgette, tomatoes and halloumi onto the skewers.
4. Cook on the Mini Panini Grill for 7-8 minutes, turning half way
through and basting with any remaining marinade.
5. When the skewers are cooked, sprinkle with the remaining mint.
Grilled Halloumi Skewers
25

26
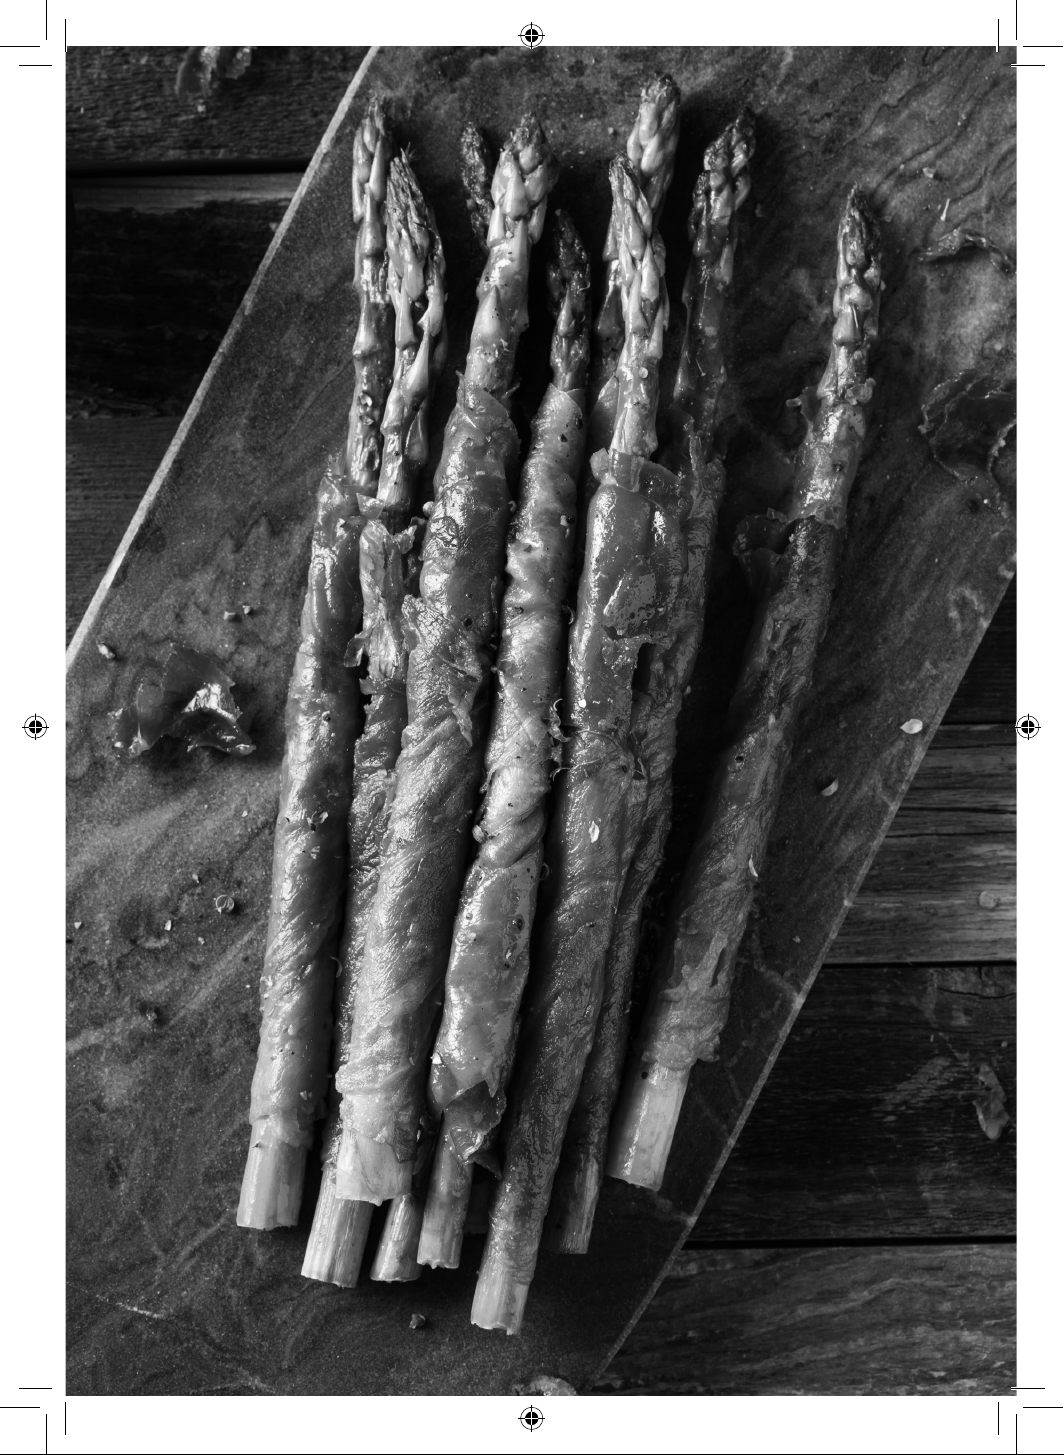
Ingredients
1 tbsp. olive oil
10 spears fresh asparagus,
trimmed
5 slices prosciutto ham (1/2
piece per spear)
Method
1. Preheat the Mini Panini Grill.
2. Rinse asparagus with water and leave to dry on a paper towel.
3. Remove any excess water from the asparagus before drizzling
with olive oil and adding a few pinches of salt and pepper.
4. Wrap the prosciutto around the asparagus spears, starting at the
bottom and spiralling up to the tip.
5. Cook the asparagus in batches on the Mini Panini Grill, for about
3 minutes or until grill marks show on the asparagus.
6. Serve as a side dish or starter, with a squeeze of lemon.
Prosciutto Wrapped Asparagus
27

thank you!
We hope you enjoy your appliance for
many years. As a thank you for purchasing
one of our fantastic products, we are
giving you an extra 2 years peace of mind.
*To receive your extra 2 years guarantee,
register your appliance online by visiting:
www.towerhousewares.co.uk
Should you have a problem with your
appliance, or need any spare parts,
please call our Service Department on:
+44 (0) 333 220 6066
great british design, innovation and excellence since 1912
0120.V4
Your warranty becomes void should you decide
to use non Tower spare parts. Spare parts can be
purchased from www.towerhousewares.co.uk