

IHSTRUCTIOHMAHUAL
LE750 TYPE 2 & 3
• USEOFACCESSORIESAND ATTACHMENTS.Theuseofany accessoryor attachmentnot recommendedfor usewith
thisappliancecouldbe hazardous Note: Refertotile accessorysectionofthismnanua[for furtherdetails
IF YOU SHOULD EXPERIENCE A PROBLEMC
WITH YOUR BLACK & DECKER PRODUCT,
CALL 1-800-54-HOW-TO (544-6986). Z
BEFORE YOU CALL, HAVE THE FOLLOWING iNFORMATION C
AVAILABLE, CATALOG NO TYPE NO AND DATE CODE Z
IN M@ST CASES, A SLACK & DECKER REPRESENTATIVE CAN D
RESOLVE YOUR PROBLEM OVER THE PHONE IF YOU HAVE A C
SUGGESTION OR COMMENT, GIVE US A CALL YOUR FEEDBACK C
tS VITAL TO THE SUCCESS OF BLACK & DECKER
KEYINFORMATION YOU SHOULDKNOW:
• Youredger isdesignedto ejectclippings and other debris forward, away from theoperaton
• Inspectand thoroughly cleanyour edger at thestart of each edging season.
• Theblade on thistool isnot intended to be sharp. Do not sharpen itin any way.
• Make sureedging area (100 fl.) isclear of other personsor pets prior to starting operation.
SAVETHISMARUALFORFUTUREREFEREHCE
CatNo. LE750Type2 &3 FormNo.243420-O2Rev.4 SEPT.'02
Copyright@2002 Black& Decker Printedin Mexico
WARNING: Important SafelyWar,ningsand Instructions
Z_ WARNING: When usingelectric_ardening appliances, basic safetyprecautionsshould always be [allowedto
reduce riskof fire electricshock,and personalinjury, includingthe following
Z_WARNING: Somedustcreate_ by this product containscbernicalsknown to theStateof California to cause
cancer,birth defectsor otherreproductiveharm Someexamplesof thesechemicalsare:
• compoundsinfertilizers
• compoundsin insecticides,herbicidesand pesticides
• arsenicand chromiumkom che`ngcallytreatedlumber
Toreduceyour exposuretothesecbemids, wear approved safelyequipment suchas dust masksthatare specially
designed to filter outmicroscopicfxlrticles
WARNING: Thisprduct containschemicals,including lead, known to theStateof California to causecancer,
and birth defectsor other reproductiveharm Wash handsafter handling.
Z_CAUTION: Wear appropriate personalhearing protectionduring use Undersomeconditions andduration of
use,noisefrom thisproduct may contributeto hearing loss
READALLINSTRUCTIONS
TO REDUCERISKOF INJURY:
• Beforeany use,besureeveryoneusingthistool _eadsand understandsall safely instructionsaed otherin[armnation
contained inthis manual
• Savetheseinstructionsand reviewfrequentlyprior to useand in instructingothers
1 Keep
2 Keef aclean
DANGER:Riskof injury Keephandsand feetaway fromblade and cuttingarea
Important Warning
wrlen usingtheedger stones piecesof metaland otherobjectscan bethrown outat high speedby theblade The
tool andguard are designedto reducethe danger However,thefollowing specialprecautionsshouldbe taken:
1 Wear safetXglassesor other eye protection,qloves, long pantsand substantialfootwear
2 Make surethat otherpersonsand petsare atTeast 100 feetaway
3 Always standto left sideof main handle
4 BeforeLandscapingor Trenching,checkfor buried electricalcables
5 Toreduce theriskof rebound(ricochet)injury, workgoing away from any nearby solid objectsuchas a wall
steps,large stone,tree,etc Usegreat carewhenworking closeto solid objectsor into thewind, and, where
necessary,do edging or trimnmingby hand
SAVE THESE IHSTRUCTIOHS
®
0
O
0
Toreducetheriskofelectricshock,thisequipmenthasa polarized plug (oneblade iswider iBantheother) This
equipmentmustbe usedwith a suitablepolarized 2wireor 3wire extensioncord. Polarizedconnectionswill fit
togeiBeronlyoneway Make surethatthereceptacleendof theextensioncordhaslarge and smallbladeslotwidths If
theplug doesnot fit fblly intotheextensioncord, rever_etheplug Ifit stilldoesnotfit Obtaina suitableextensioncord
Iftheextensioncorddoesnotfit fully intotheouter contacta qualifiedelectricianto installtheproper outlet Do not
mdify the applancepug or extensioncord in any way
THISTOOLCANBEDANGEROUS.Followall warningsand S'lfetyInstructionsin thismanual Theoperatoris
responsiblefor following warningsand instructionsin thismanualandon unit Restrictuseofthispower toolto persons
who reed,understandandfollowwarnings and instructionsin thismanualand onunit.
• AVOIDDANGEROUSENVIRONMENT.Don'tuseappliancesindamp or wetlocationsDon't useappliancesintherain
• KEEPCHILDRENAWAY.All otherpersonsand petsshouldbekeptata safedistoncekom work area
• STOREIDLEAPPLIANCESINDOORS.Appliancesshouldbest_ediedoorsindry,securedarea-outofreachof children
• DON'T FORCEAPPLIANCE.Itwilldothejobbetterandwithlesslikdihoodofariskofinjuryattberate[arwhichit
wasdesigned
• USERIGHTAPPLIANCE.Donotusetheappliance[ar anyjobexceptthatforwhich itis intended
• DRESSPROPERLY.DOnotwear bosechilling or jeweky Theycanbecaughtin movingparis Rubbergbves,
long pantsand substantial,non-skld[aolwearare recom`n_endedwhenworking outdoors Donotgo barefoot
orwear sandals Wearprotectivehaircoveringto containlong bein
• USESAFBYGLASSESANDOTHERSAFELYEQUIPMENT,Usesafetygoggbs or safetyglasseswith sideshidds
complyin_with applicable safetystandardsand,whenneeded,a lace shidd Alsouse[ace or dustmaskif operation
isdust,/T]lis appliestoall personsin thework area Also usea hard hat,hearingprotection,gloves,safetyshoesand
dustcollectionsystemswhenspecifiedor required Safetyglassesor thelikeare availableatextra costatyour local
dealeror Black& DeckerServiceCenter
• DON'TABUSECORD.Nevercam/appliance by cordor yank gtodisconnectfrom receptacle Keepcordfrom
heat,oil, and sharpedges
• DON'TOVERREACH.Keepproper [actingandbalanceat aJJtimes.
• MAINTAINAPPLIANCEWITHCARE.Keepcuttingedge cleanfor bestperformanceandto reducetheriskof injur7
Followinstructionsfor lubricating andchangingaccessories.Inspectappliancecord periodicallyand if damaged,
haveit repairedby authorizedservicefacility Inspectextensioncordsperidically and replaceifdamaged Keep
handlescry, clean,andfreefromoil and grease
• DISCONNEa APPUANCES.DisconnecttheappliancefronHhe pewersupplywhennotin use,beforeservicing,and
whenchangingaccessoriessuchasbladesandiBelike
• AVOIDUNINTENTIONALSTARTING.Don'tcarry plugged-inappliancewifll finger onswitch Besureswgchis
offwhen plugging in
• EXTENSIONCORDS.Makesureyour extensioncord isin goodcondition Cord insulationmustbe intactwith nocracksor
deterioration PlugconnectorsmustbeundamagedWhen usinganextensioncord, be sureto useoneheavyenoughto
carrythecurrentyour productwilldraw A,_undersizedextensioncordwill causea dropin linevoltageresultingin]oss
of powerandoverheating,,,dJichcanshortenthelifeofthemotor.Thetableshowsthe correctsizetousedependingon
cordlenr4thandnameplateampererating Ifindoubt, usethenextheaviergage
Thesmd]erthegege number,theheavierthecord Thetableshowsthecorrect sizetousedependingoncord length
andnameplateampererating Ifindoubt,usethenextheaviergage ThesmalleriBegagenumber,iBeheavierthecord
Minimum Gage for Cord Sets
Volts TotalLengthof Cord in Feet
120V 0-25 26-50 51-100 101-150
240V 0-50 51-100 101-200 201-300
Ampere Rating
More Not more American Wire Gage
Than Than
0 6 18 16 16 14
6 10 18 16 14 12
10 12 16 16 14 12
12 16 14 12 Not Recommended
• [] indicatesthe EdgerisDOUBLEINSULATED"
• OUTDOORUSEEXTENSIONCORDS/_\WARNING:Toreducetheriskofelectricshock,useonlywith an extension
cora intenaearot outdoor use,suchas anextensioncord oftype SW-A, SOW-A, STW-A, STOW-A,SJW-A,
SJOW-A, SJT_vV-A,or SJTQW-A
• GROUNDFAULTCIRCUITINTERRUPTER(GFCI)protectionshould beprovidedon thecircuitsor outletsto beusedfor
file gardening appliance Receptaclesareavailable having built in GFClprotectionand may be usedfor this
measureof safety
• STAYALERT'Watchwhaty°uared°ingUsec°mm°nsenseD°n°t°perateapphancewbeny°uaretired iJJor
underthein uenceo any drugsor acobe
• CHECKDAMAGEDPARTS.Beforefurther useof theappliance,a guard or otherpart thatisdamaged shouldbe
carefullycheckedto determinethat it will operateproperlyand perform itsintendedfunction Checkfor alignmentof
movingparts,binding of movingparts, breakageof parts mounbeq,andany other conditionsthatmayattect its
operation A guard or otherpart thatis damagedshould_eproperly repairedor replacedby an authorizedservice
centerunlessotherwiseindicatedelsewhereinthismanual
• REPAIRSAND SERVICE.Repairs,maintenanceand any adjustmentsnotspecifiedin thismanual shouldbeperformed
by Black& Deckerauthorizedservicecentersor otherqualified serviceorganizations,always usingidentical
replacementparts
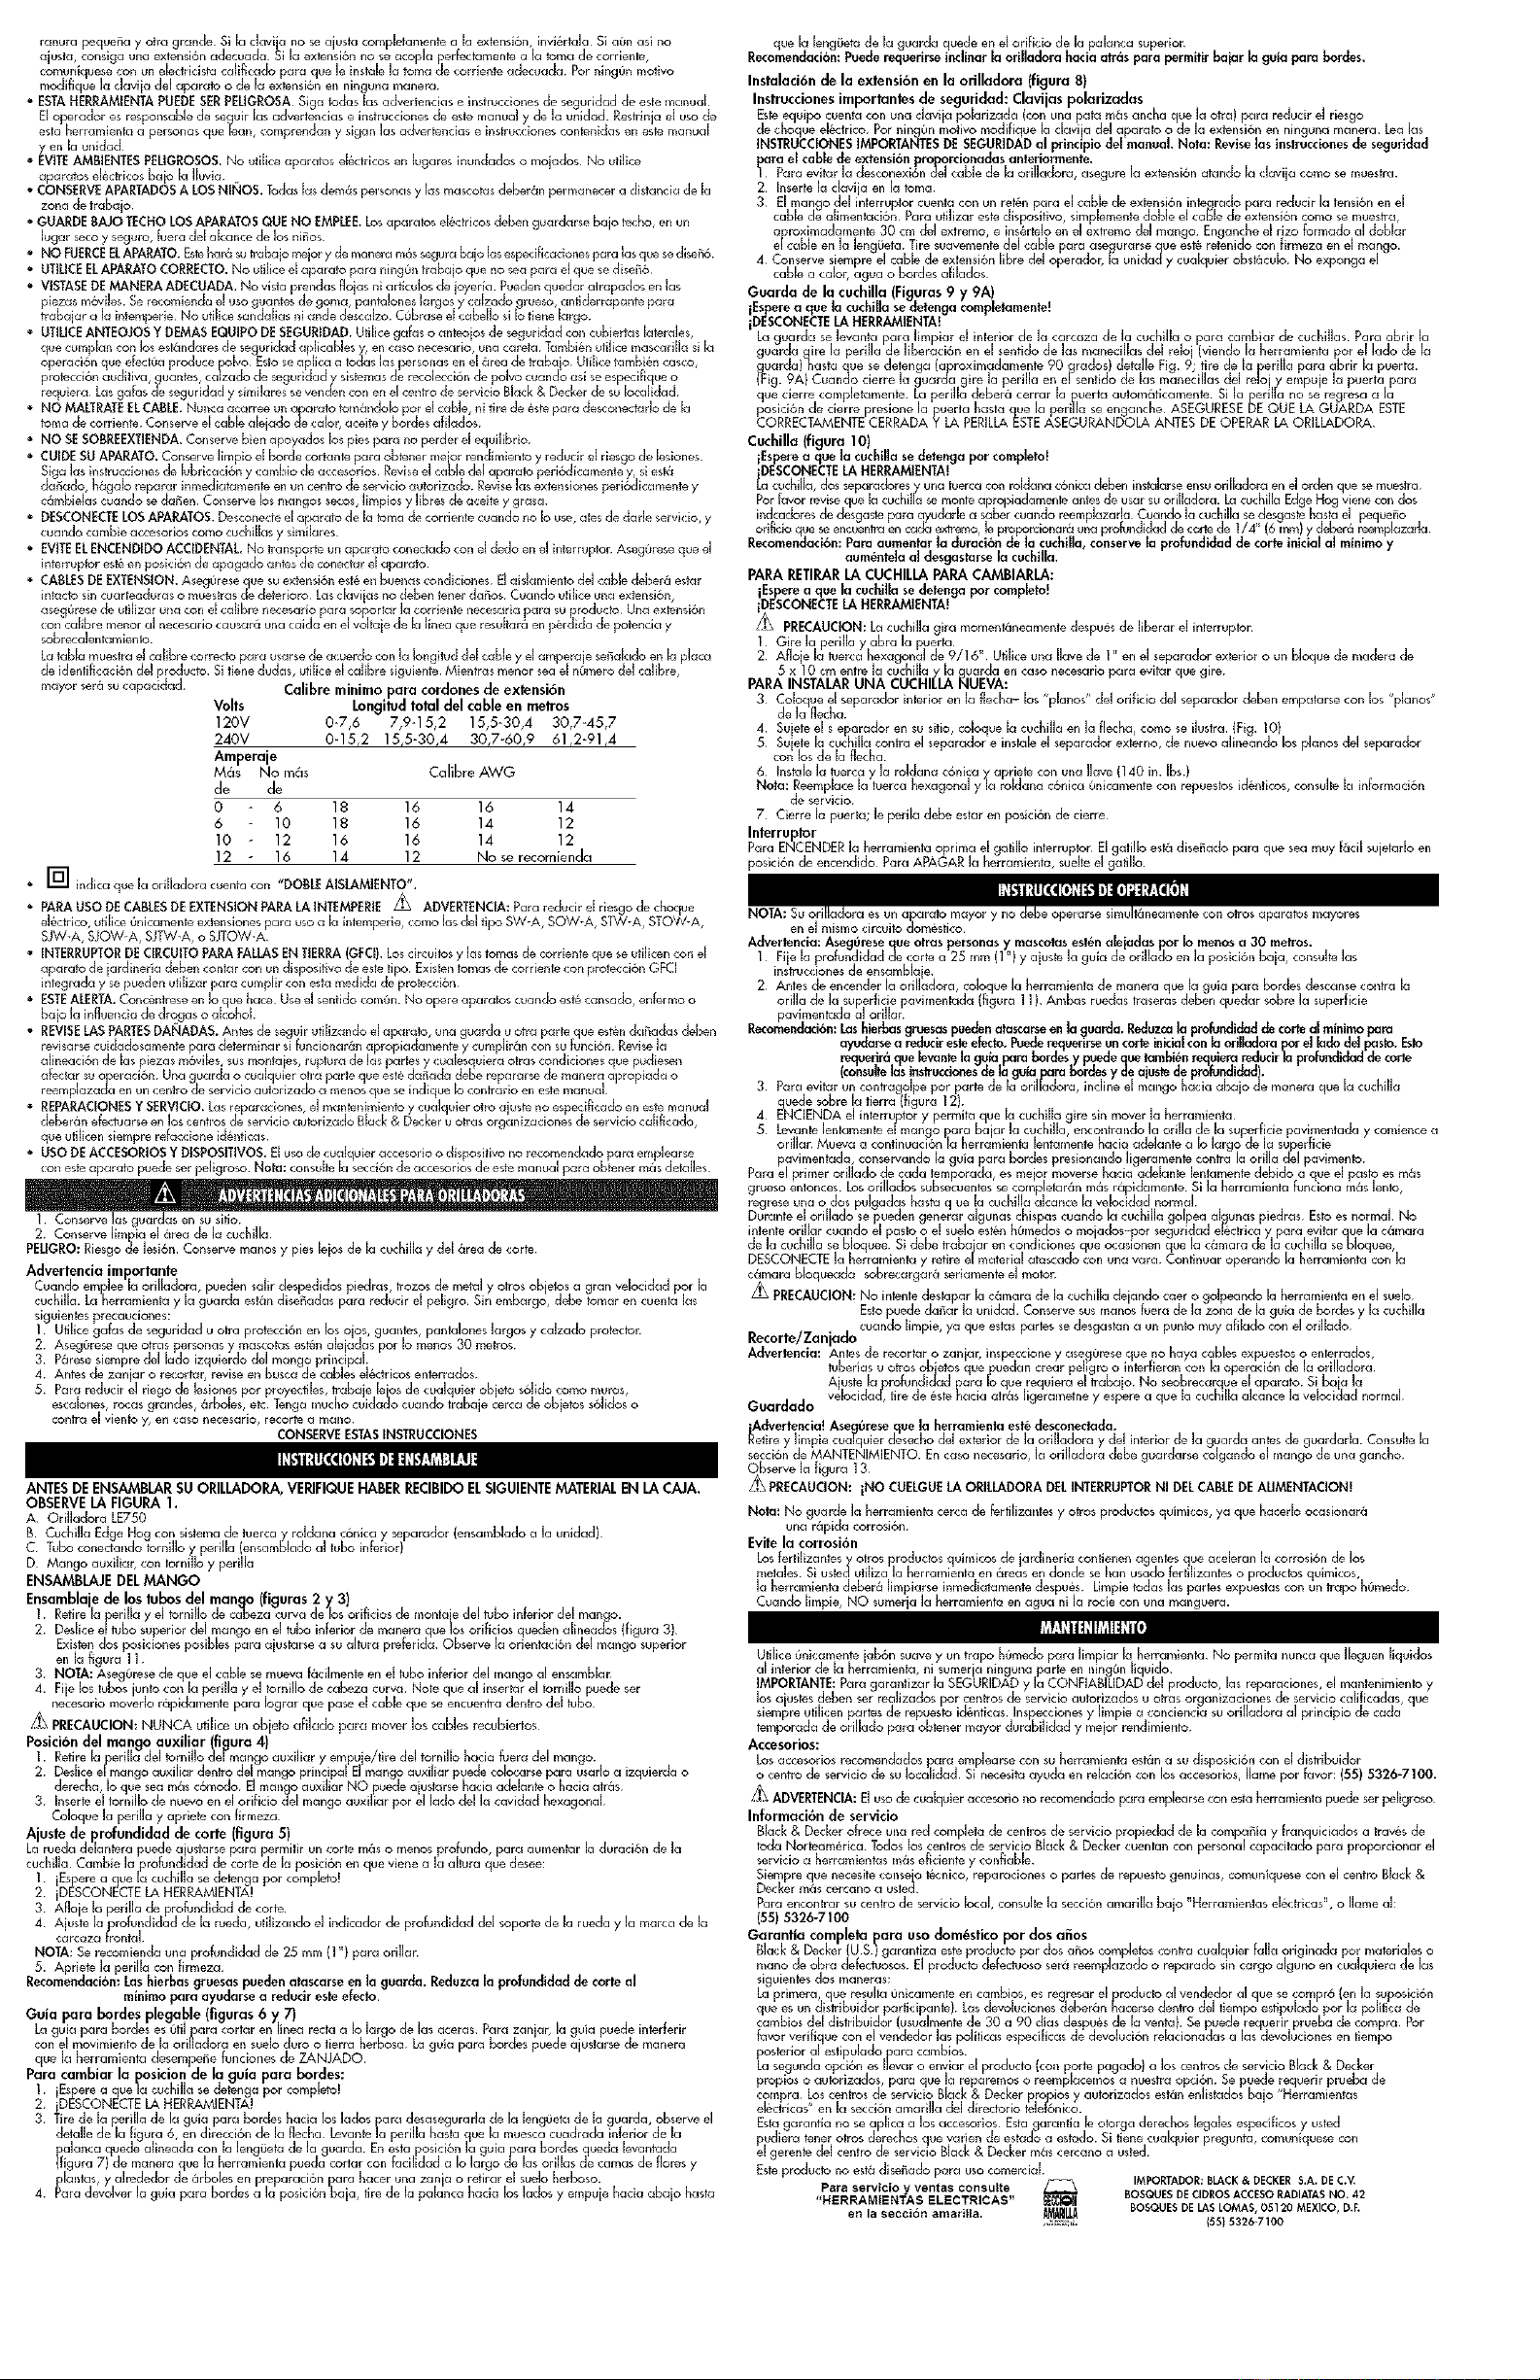
He,_ nut _ilh conid v,_s]_er
ECrOU]_xagarLdfr_ur_id_e ro_ddb a_ique
Tuerca hexagonal con rokJana conlca
@
BEFOREASSEMBLINGYOUR EDGER,CHECKTHATYOU HAVERECEIVEDTHEFOLLOWINGIN THESHIPPING
CARTON.
SEEFIGURE1.
A LE750Landscape/Edger
B. EdgeHog blade with nut,conicalwasherand spacersystem(assembledto unit)
C Tubeconnectingbolt and knob(assembledto lowertube)
D Auxiliary Handle,with Boltand knob
ASSEMBLINGTHEHANDLE
Assemble Handle TubesFigure 2 and 3)
1 Removeknob and cu_ve_head bot ror'n ower haede tubemountinghoes
2 slide upperhandle tube down into lower handle tube sothat holeswill line up (Figure3) Thereare two
positionsavailable for adjustmentto your preferred height setting SeeFigure 11 for upper handle orientation
3 NOTE:Ensurethewire cable movessmoothlydown into file lower handletubewhile assembling
4 Fastenhandletubestogether with the knob andcurved head bolt Note that whenyou first insertthebolt
it may be necessaryto wiggle itcarefully to get it pastfile jacketedwire insidethe tube
z_ CAUTION: NEVERusea sharpobjecttomovejacketedwiresoutof theway
Position Auxiliary Handle (Figure 4)
1 Undofile knobfrom thebolt in theauxiliary handle and pesh/pull file bolt out of file handle
2. slide the auxiliary handleonto themain handle. Theauxiliary handlecan be positionedfor either leftor
right-hand operation whicheveris more com[artabb Theauxiliary handle is NOTadjustable forward/back
3 Insertthebolt back intotheauxiliar7 handleholeon thesidewith thehex recess,attechtbeknoband fully tighten
CutDepth Adjustment (Figure 5)
Thefrontwheelcan beadjustedtoallow a deeperor shallowercut,and toincreasetileli_eof tile blade Change the
cutdepth ftorntheshippingpositiontoyour desireddepthby:
1 Wait [ar bladetocometocon_pletestop!
2. UNPLUGTOOL!
3. LoosentheCutDepthKnob
4 Adjust wheeldepth, usingthedepth indicator onthewheelbracketand themarkingonthefronthousing
Note:Recommend1"depth for edging.
5 TightenKnobfirml_
Tip:Thickovergrowth may drag on the guard. Reducecut depthto minimum to help reducethis effect.
Pull-Up Edge Guide (Figure 6, 7)
Theedgeguide isusefulfor cutbega straightpath along sidewalks Forlandscapingor trenchingin theyard theedge
guide can interferewith movingtheedgerthroughhardsoiJ or sod Theedgeguide canbeadjustedsothat thetool
wiJJalsoperform TRENCHINGand LANDSCAPINGoperations
ToChange PositionOf TheEdgeGuide
1 Wait for blade tocometo completestop!
2 UNPLUGTOOL!
3. PullEdgeGuide Knobsidewaysto unlockfromtheguard tab, seeFigure6 detail, in directionof smallarrow Lift
file knob upuntilthelower squarenotchin file leverlinesupwith thetabon theguard Inthisposition theedge
guide is liftedup (Figure7) sothetool can easilycutalong theedgesof flower and shrubberybeds and around
treesin preparation or trenchingor sodremora
4 Toreturnedgeguideto lowerposition,pullleversidewaysandpushdown untilguard tabfitsintoupperleverhole
Tip:Youmay needto tilt edgerback to allowedgeguide to bemovedinto down position.
Attaching ExtensionCord ToEdger(Figure 8)
Important Safety Instructions:PolarizedPlugs
Toreducefile riskofeleciricshock,thisequipmenthasa polarized plug (onebladeis wider thantheother) Do not
medleytheappliance plug orextensioncord inany way ReadIMPORTANTSAFELYINSTRUCTIONSat beginningof
manual. Note:Checktheextensioncord safely instructionsprovided earlier.
1 Topreventdisconnectionof edgercord,secureextensioncord by tyingtile power plug asshown
2 Insertplug intocordsocket
3 An extensioncordretainer isbuilt intotheswitchhandleto reducestrainon thepower cord Tousethisfeature,
simplydoubletheextensioncord as shown,abouta footfromthe end,and insertit into theendof thehandle Hook

theloopformedbydoublingthecord overthetab Gentlytugonthecordtoensurethatit isfirmlyretainedinthehandle.
4 Keepextensioncord dear of operator,unit,and anyobstaclesatall times.Donatexposethecordtobeat,oil,
water,or sharp edges
BladeGuard (Figure9 & 9A)
Wait for bladetocometo completestop!
UNPLUGTOOL!
Theguardswingsopen for cleaning insideof blade housingor for changing blades Tooponguard turnfile guard
rebase knob clockwise(focin_1blade guard sideof tool)untilit stops(a turn ofabout 90°)fig 9 detail;pull file knob
to openthedoor (fig 9A) Wften closingtheguard turntheknob clockwise90° (fig 9 detoil) andpushthedoor
completelyclosed Theknob shouldautomaticallylockthedoor Iftheknobdoesn't returntothelocked positionpress
thedoor untiltheknob engages BESUREGUARD ISPROPERLYCLOSEDAND KNOB ISLOCKINGITBEFORE
OPERATINGEDGER
Blade (Figure 10)
Wait for blade tocometo completestop!
UNPLUGTOOU
Theblade,two spqcersand hexhead nutwith conicalwasher shouldbe attachedtoyour edgerin theorder shown
Pleasecheckthat theblade hasbeenproperly mountedbeforeusingyour edger TheEdgeHogblade hastwo wear
indicatorsthatshow whenblade needsto be replaced Wben theblade wears tothesmallholeat eachend of the
blade itwill give only 1/4" depth of cutand shouldbereplaced.
Tip: Toincreaseblade life, keep initial cuffingdepthat minimumand increasedepthsettingasbladewears.
TOREMOVETHEBLADEFOR REPLACEMENT:
Wait for blade tocometo completestop!
UNPLUGTOOL!
Z_ CAUTION:Blnderotatesmomentarilyafter theswitchis rde_sed
1 Turnknob and open door
2 Loosenthehex headnut 9/16") Usea 1"wrenchon theouter specer,or a 2" x 4" wood block betweenthe
bade and guard i necessaryto bed the bade rom turning.
TOATTACHNEW BLADE:
3 Ensureinnersprlcer is on sbeft--"flats" in spacer hole mustengoge with "flats" on shaft
4 Holding thespacerin place,putfile blade ontheshaft,as shown(Figure10)
5 Hold thebfode against the spacerand installtheouter spacer,again aligning the flatsin thespacerwith
the flatsonthe shaft
6 Installthe hex headnutand conicalwasher,thentighten with a wrench (140 in pounds).
Note: Replacebex head nutand conicalwasheronly with identicalreplacementport, see ServiceInformation
7 Closedoor; knob mustbe in lockingposition
Switch
ToturntoolON, squeezethetriggerswitch Thetrigger hasbeendesignedso thatit isvery easyto hold infile
ON position. Toturn tool OFF,releasethetrigger
the same
Warning: Make surethat otherpersonsand petsare at least 100 feet away
1 Setcut depthat 1" and setedge guide tothe down position refer toAssemblyInstructions
2 Beforestartingthe edger hneupflle tool so theedge guide restsagainst file edgeof thepaved sudace
(Figure 11) Both rearwt_eelsshouldbe on thepaved surfacewhen edging
Tip: When there isheavy overgrowth of grass over the paved surface it may drag on the guard. An initial cut
may be required with the edgeron thegrass side,Thiswill require liftingupthe edgeguide and may
require redudngthe depthof cut (seeEdgeGuideand DepthAdjustment instructions).
3 Toavoid kickbackof edger,tilt thehandle down sothe blade is abovetheground (Figure12)
4 TurnswitchON and allow blade to spin without movingtool.
5 Slowly lift thehandle to lowerthe blade finding theedge of the pavedsurfaceand start edging Thenmove
tool forward slowly along edge of paved surface,keeping theedge guide pressedlightly against the
pavementedge
Forfile first edging each se'lson,it is bestto moveforward dowJyBecausegrass is thickestthen Subsequent
edging wiJJbe completedmorerapidly Ifthetool slawsdown, back it up an inch or two until theblade comesup
tonormal speed Duringedging somesparksmay begenerated from hitting stones Thisis normal Donotattempt to
edgewhen thegrassor solJiswetor moist--for electricalsafetyand to preventdogging of theblade chamber gyou
mustedge underconditions thatcausetheblade chamberto becomedogged, releasetrigger,wait for blade to come
tocompletestop! UNPLUGTOOL!open door and removeclogged materialwith a stick Tocontinueto operatethe
tool ina cloggedcondition will seriouslyoverload thematon
CAUTION: Donotattempt toundog theblade chamber bydropping or tappingthetool on theground
Thiscan damage theunit Keephandsclear of edgeguide andblade whendeaning as these
wear toa very sharp point during edging
Landscaping/Trenching
Warning: BeforeLandscapingor Trenching,inspedand ensurethereare noexposedor buriedcables,pipesor other
objectsthatmaycreatea hazard o_interferewith operatingtheedgenSetdepthtoonlythatrequiredforiBe
jot_ Do natoverload Iftool slows,pullbc,:kslightlyandwaituntilBladecomesupto normal speed
Storage
Warning! Besurethe toolisunplugged.
Removeand dean any debris floratheoutsideof theedgerand insideof guard beforestorage.See
MAINTENANCEsection.Ifnecessary,theedger may bestoredby hangingon a hookby itsbendJe SeeFigure13
Z_ CAUTION: DO NOT HANG EDGERON THESWITCHTRIGGERORPOWERCORD!
Note:Do not storethetoolon or adjacent tofertilizersor chemicals Suchstoragecan causerapid corrosion.
PreventingCorrosion
Fertihzersandothergarden chemicalscontainagentsthatgreatlyaccderate thecorrosionof metals Ifyou usethe
tool inareas wherefertilizersor chemicalshaveBeenused,thetool shouldbecleaned immediatelyafterwards
Wipe all exposedpartswith a dampcloth Youmay lubricateonlymetalPertswith a light petroleumL'_lsedoil
Wben cleaning, DONOT immersetool in wateror squirtit with a hose.
Useonly mildsoap anddamp clothtocleanthetool Never letany liquidget insidethetool;neverimmerseany part
of file tool intoa liquid
IMPORTANT:ToassureproductSAFETYand RELiABILiTYrepairs,maintenanceandadjustmentshouldbeperformedby
authorizedservicecentersor otherqua i led serviceorganizations Useony identica repacementports
Inspectand thoroughlycleanyouredgeratthebeginningofeachedgingseasonfor longerlifeand betterperformance
Accessories:
Recommendedaccessoriesfor usewithyour toolare available fromyour localdealeror authorizedservicecenter If
you needassistanceregarding accessories,pleasecall: 1-B00-54-HOW-TO
WARNING: Theuseofany accessorynotrecommended for usewith thistool couldBe hazardous.
Service InformaRon
Black& Deckeroffersa _ulJnetworkofcompany-ownedand authorized servicelocationsthroughoutNorth America
All Black& DeckerServiceCentersare staffedwith trained personnd toprovide customerswith efficientand reliable
power tool service
Whether you needtechnicaladvice, repair,or genuinefactory replacementparts,contacttheBlack& Deckerlocation
nearest you
Tofind yourlocalservicelocation,refertothe yellowpage directoryunder"Tools--Electric"or call: 1-BOO-S4-HOW-TO.
Full Two-Year Home UseWarranly
Black& Decker US) Inc warrantsthisproduct for twoyears againstany defectsin materialor workmanship The
deectiveproduct wl berep acedor repaired atno charge ineithero two ways:
Thefirst,whichwill resultinexchangesonly,isto returnfileproduct tothe retailer fromwhom itwas purchased
(provided thatthestoreisa Perticipatingretailer).Returnsshouldbenlade within thetimeperiod of theretailer's
Pelicyfor exchanges(usually30 to 90 daysafterthesale) Proofof purchasemay berequired Pleasecheckwith the
retailer for their specihcreturn policy regardingreturnsthatare beyondthe time setfor exchanges
Thesecondoption isto takeor sendtheproduct (prepaid)to a Black& Deckerowned or authorizedServiceCenter
for repeir or replacementat ouroption Proofof purchasemaybe required Black& Deckerownedand authorized
servicecentersare listedunder "Tools-Ebctric"in theyellow pagesofthephone directory
Thiswarranty doesnotapply to accessoriesThiswarranty givesyou specificlegalrights andyou may haveother
rightswhich vary from stateto state Shouldyou haveanyquestions,contactthemanagerofyour nearest
Black& DeckerServiceCenter
Thisproductis notintendedfor cornn_ercialuse
Imported by
Black & Decker (U.B.) Inc.,
701 E..Ioppa Rd.
Towson, MD 21286 U.S.A.
See 'Tools-Etectrte'
- Yellow Pages -
for Service & Sales
GUIDED'UTILISATION
MODELE LE750 TYPE 2 El"3
RENSEIGNEMENTSIMPORTANTS
• Lecoupe-bordure estcon?u pour 6jecter lesbrins d'herbe et autres d_bris vers I'avant, loin de I'utilisateun
• Inspecteret bien nettoyer le coupe-bordure au d_butde chaque saison de coupe.
• Lalame du produit ne dog pas 6tre tranchante. Ne I'affgter enaucun cas.
• S'assurerqu'il n'y a ni Personnesni animaux dansla zone decoupe (30 m (100 pi))avant ledbbut des travaux
CONSERVERLEPRESENTGUIDE._TITREDERffERENCE.
Z_AVERTISSEMENT: Importantesmesuresde securlt&
_ AVERTISSEMENT: Afin deIeduire lesrisquesd'incendie,de secousses_lectriquesoude blessuresIorsqu'onutilisedes
outilsdejardinage61ectriques,iJtauttaujoursrespecterlesmesuresde sbeurit6suivantes.
_AVERTISSEMENT: Lepreduit gBnBrede Japoussi&equi peut renfermerdespreduits chimiques Selon1'Bratde la
Cahfornie,cesproduitschimiquespeuventcauserJecancerainsi quedes malfom_ations
cong_nitales,et ib pr&entent d'autresdangersau syst&nerepreductifhumain Voici des
exemplesde telsproctuitschingques:
• lescomposBsd'engrais;
• JescomposBsd'insecticides,d'herbicides etde pesticides
• J'arsenicet Jechromeprovenant debois trait6
Ahn de minimiserJesrisques porter de I'_quipomentde s_curiteapprouv_ commedes masquesantipoussi&es
spBciaementconcupour i trer es parbeues microscopiques
_AVERTISSEMENT: Lepreduit renformedesproduitschingques,dont du plomb SelanJ'Btotde JaCalifornie, ce
produit chingquepeutcauserle cancerainsi que desmdformaRonscong_nitdes, et iJ
prBsented'autresdangersau systBmereproductifhumain Se laverJesmainsapr& J'utiJisation
_MISE EN GARDE: Porterun dislx_sitifappropri6 de protectionde J'oui'eIorsde I'utilisaRondu produit Dons
certainesconditionset durBesd'uRlisation,le produit peut_mettreunniveaude bruit
provoquantJapertede beu'ie.
LIRETOUTESLESDIRECTIVES.
AFIN DEREDUIRELESRISQUESDEBLESSURES:
• Avant touteutilisaRon s'assurerquetousceuxqui seserventdeI'outil lisentetcomprennenttouteslesmesuresde
s_curit6et toutautre renseignementcontenudans eprbsentguide.
• ConservercesmesuresetJesrelirekbquemmentavant d'utiJiserJ'outiletd'en expliquer Jefonctionnementa d'autres
personnes.
PIECESDERECHANGE: Lorsdestravauxd'er_trefien,utiliserseulementdespi&es derechangeBlack& Deckeridentiques
Leprodugestmuni d'une fichepqlaris_e une Janlepluslarge queJ'auffe afin de minimiserlesrisquesde
secousses61ecffiquesLepreduit doit alorsBtreutili4 avec uncordon de rdlonge bihlaire outrihlaire appropri6 Ce
genrede fichen'entre qued'uneto€on dans uneprisepolarisBe. S'assurergeela douillede la rallongeposs_deune
tentepluslame que I'autre Lorsqu'onnepout insBrerla fiche& fond dans larallonge, iJfourtenterde le foire aprBs
avoir invers_]eslamesde c6te Sila fichen'entre toujourspas dans larallange, iJfour seprocurerunerdlonge
appropriBe Lorsqu'onnepeat ins&er JafichedeJardlange 6 fonddans Japrise, iJtoutcommuniqueravecun
_[ectricienqertifi_pour qu'il installeune priseappropri_e IIne toutpas modifier la fichede I'outil ni la rallange
L'OUTILPRESENTEDESRISQUES.Res[_ectertousles avertbeen_entset mesuresde sBcurg6du prBsentguide et
ceux indiqu& surI'outil; I'uRlisateura la responsabilit@de s'y conformer Seuleslespersonnesqui ont lu et
compris cesavertissementsetmesuresde sBcuritB,etqui ont I'intentionde s'y conformerpouventse servirde
I'outil de jardinoge 6lectrique
• TENIRCOMPTEDUMILIEUDETRAVAIL.Ne pasutiliserI'outildans unendroit mouill_ou humide Neposseservir
I'ouRIsousla pluie
• ROIGNERLESENFANTS.TousbsvisiteursetbsanimauxdomestiquesdoiventBt_etenusa J'&artdeJ'airedetravail
• RANGERLESOUTILSINUTILISESA L'INTERIEUR.IJtoutrangerJesoutilsdansunendroitsecetsOBhorsde Japorteedes
enfonts
• NEJAMAISFORCERL'OUTILAfind'obtenir unrenden_entefficaceetavecn_oinsderisquesdebbssures,utiJiserJ'outiJ
sonrendementnominal
• UTILISERL'OUTILAPPROPRIE.SeservirdeI'outilsalonJ'usogeprBvu
• POR11_RDESV'_.TEMENTSAPPROPRIJ_SEviterdepetterdesvBternentsampJesetdesbijouxquipeuventBt_ehapf_spar Jes
pi&esenmouvementPorterdesgantsdecaoutchouc,despontabnsetdescbeussuresrobustesa semdbantidBrapante
peurtravailbral'extBrieur.Nepasseservirdel'oufilpiedsnusouensanddes. PratBgerlachevduresidleestlongee.
• PORTERDESLUNETTESDESECURITEETAUTREEQUIPEMENTDESECURITE.Porterdeslunettesdeprotectionoude
s&urit66 &tans latBrauxconform&nentaux normesdesbeurit6appropri_eset au besoinun_cran facial. Porter
_galementunmasquerespiratoiresiJetravaildecoupepreduit dela Peussi&e Lapr&ente mesurevaut[_ourteute
personnedansJazonedetravd IJtout&gdementporter uncasque,desprot_ge-tympons,desgantsetdeschaussures
de sBcurit6ainsiqu'uRliserdessystBmesdedepoussi&ogelarsquespBcifi_ouexig6 Leslunettesdes&urit_etautre
mat&id sernbJabbsontvendussBpor&nentchezJesdBtaiJJantsetdansJescentresdeserviceBlack& Decker
• NEPASMANIPULERLECORDONDEFACONABUSIVE,Nepas transporterI'outil par lecordon nitirersurce dernier
pourledebrancherdelaprise ElaigeerJecordondessourcesdechaleur,desflaquesd'huileetdesarbtestrancbentes
• NEPASDEPASSERSA PORTEE.Toujoursdemeurerdansunepositionstableetgarder sonBquilibre
• PRENDRESOINDESOUTILS.S'assurerquele rebordtranchantestpropreafin d'optimiserle rendementdebeutiletde
minimiserlesrisquesde blessuresSuivreJesdirectivesconcernantJaJuprificationetJeremplacementdesaccessoires
InspecterrBguJiBrementJecordondeJ'outiletJefoire rBporeraubesoina unatelierd'entretienautoris_ Inspecter
rBguli&ementlescordonsde rallan_eetlesremplacerIorsqu'ilssontendommog& S'assurerquelespoignBessont
toujourspropres, s&hes etlibresdetou!eteched'huile ou degraisse.
• DEBRANCHERLESOUTILSNON UTILISES.Respectercettemesurelarsqu'on nesesertposde I'oatil,ou qu'on dogle
rearer ou enchanger unaccessoire
• EVITERLESDEMARRAGESACCIDENTELS.Ne poslaisserJedoigt surI'interrupteurlarsqu'ontransporte J'outiJ.
S'assurerque J'interrupteurest&la positionbers circuitlarsqu'on branche I'outiJ
• CORDONSDERALLONGE.S'assurerquelecordon deralfon_e estenbon 6tet. L'isolationdu cordon dolt Btre
intocte,sansfissuresni usure Lesconnecteursde la fichenedoivent pastttreendommagBs Lorsqu'onseserfd'un
cordon de rdlonge, s'assurerqu'il estdecalibre appropri6 pour late'nsionnBcessairea_ fonction_]ernentdeI'outil
L'utilisationd'un cordon de calibre inf&ieur occasionneuneBeissedetensionentralnant unepertede puissanceetla
surchauffe;cequi pout rBduirela durBedu moteur
Letableau suivantindique le calibre approgri6 salon JaIongueurdu cordon et lesmentionsde la plaque
signalBtiquede I'outil Encasde doute utiliserun cordon de calibre sup&ieur Lechiffre indiquant le calibreest
inversementproportionne au ca ibre ducordon.
Calibre minimal descordons de rallonge
Longueurtotale du cordon en pieds
0-25 26-50 51-100 101-150
0-50 51-100 101_200 201-300
Tension
120V
240 V
Intensit_(A)
Au Au Calibre moyen de fil (AWG)
moins plus
0 6 1B 16 16 14
6 10 18 16 14 12
10 - 12 16 16 14 12
12 - 16 14 12 Non recommand8
• Lesymbole [] indiqueque I'outil comporteunedoubleisolation.
• Z_ AVERTISSEMENTRELATIFA L'UTIUSATIONDERALLONGES._,L'EXTERIEUR: Afin de reduirelesrisquesde
secousses6Jectriques,utiliserseulementuncordon derdlonge concupour I'extBrieuretportant unedes mentions
suivantes:SW-A, SOW-A, STW-A,STOW-A,SJW-A,SJOW-A, SJTW-Aou SJTOW-A
• UN DISJONCTEURDIFFJ_RENTIELdevrait6treinstall6surJesprisesou Jescircuitsutilis& pour dimenter lesoutib de
jardinage IIexistedesprisespourvuesdedisjoncteursdiff6rentids intbgr& qui peuventservir 6cet effet
DEMEURERVIGILANT.Travailleravecvigilance etfoire preuvedebon sens Ne passe servirde I'outil Iorsqu'onest
fotigu_ ouaprBsavoir ingBr6des droguesoude I'alcod
VI_RIFIERLESPIECESENDOMMAGJ_ES.Avant d'utiliser de nouveauJ'outil,bien v&ifier unprotecteurendommog_
ou touteautrepiBcedefoctueuseafin dedeterminersidie fonctionneradefa¢on appropri_e etsielJeremphra Ja
fonction pr_vue V&iber I'ahgeementet lesattachesdespi&es mobiles,Jedegr6 d'usuredespi&es etbur montage,
ainsi quetout autrefacteur susceptiblede nuire aubon fonctionnementde I'outil FairerBporerou remplacertout
protecteurou touteautrepibeeendommogBedans uncentredeserviceautorisB,saulsi Jepr&ent guide foit menRon
d'un avis contraire
• RJ_PARATIONETENTRETIEN.Lesr@araRons,I'entretienetlesrBglagesnon d&rits dansle pr&ent guide devraient
Btreconfi& au Personndd'un centrede serviceBlack& Deckeroua'un atelierd'entretienautoris6n'utiJisantquedes
pi_cesderecbeogeidentiques
• ACCESSOIRES.Latilisationdetout accessoirenonrecommandepour Jepreduitpout6tredangereuse
Note: Pourobtenir de plusamplesrenseignemente,consulterla rubrique<<Accessoires>>du pr&ent guide

1 Laisser [esprotecteurs en place
2 S'assurer que la zone aulour de la lame esl propre
DANGER : Risque de blessures Eloigner lesmdns et [espieds de [alame e! de la zone de coupe
Avertissement Important
La lame de coupe-berdure en service pout Becter avec force des pierres, des pi&es de m6bl ou d'auhes objuts. C'est
pourqud I'ou il e leprotec eur son conqusde mani6re 6 fimiter les risques de blessures IIconvien ou efais de prendre les
pr&auBons su_vanles
1 Porter des [uneltesde sBcurB_,des ganls, des ponlalons e!des chaussures robesles
2 S'assurerqu'i[ n'y a pos d'antelaux domesfiques ni personne dons un rayon d'au mains 30 metres{1O0plods)
3 Touioursse tenir 6 gauche de la poign_e principale
4 Avant de coupor une berdure ou une regale,v&ifier s'il y a des fiJs_lectriques sousterre
5 Afte de roduire lesrisquesde b[essuresoccasionn_es par un rebond de [_outil,bujours travai[[eren s_elaignanldes
do etssolides tds que tours, marches d_escalier)grossesrocbes etarbres. Faire preuve de vigilance [orsqUon travai[[e
6 proximB6 de cesBillets ou ace au venRau besoin, e ectuer e travai 6 a main
CONSERVER CES MESURES.
Ill [.'j| _|l[q |[I] ,_[.'1_|_1E!I_j kvl_']l:lllL'i[I] l | t:_[_]_
AVANT D'ASSEMBIFR IF COUPE-BORDURE, S'ASSURERQUE L'EMBALLAGERENFERMETOUTESIFS PIECESSUIVANIES,
VOIR LA FIGURE 1.
A Un coupe-bordure pour ['am_nagement poysager, modeb LE750
B Une lame Edge Hog avec u & ou, une ro del[e conique etun jeu de cabs (assenbE& 6 [outil
C. Un beufan et un bouton pour tube de poign_e (assembl& au tube du ch&ssis).
DUne poignee auxifiaire avec un boufan et un bouton.
ASSEMBLAGE DE LA POIGNEE
Assemblage des tubes de la poign_.e (fig. 2 et 3)
1 Retirer le beulon et lebeulon 6 l&teb,ombee des trous de montage de tebe in[6rieur de la poignee.
2 Faireg[isserle_Jb,esup6rieurdansbtubeinf6rieurdela_;on6ena[ignerbstrous(fig3) I[yadeuxpositionsdemontegeafin
de rLN]erI'oufl[6 la hauteurvoulue Voir [afigure 11 pour I'orienl_on de tube SuF_rieur
3 NOTE : Sassu e que le fil descend librement dons [elube infe ieu Io sdun onbge
4. Fixer les tebes 6 I'aide du boubn et du boulan 6 t_te bombee. II pout _tre n&essake de faire jouer b boufan doucement
pour qu'il passe lefil dons letube
z_ MISE EN GARDE : NE JAMAIS uflliser un objet pointu pour deplacer lesfib
Installation de la Poign_e auxiliaire (Fig. 4)
1. D_bcber leboubn du boulan de la poign_e auxiliaire et laire jouer le boulon pour le sorBr de la poignee
2. Fake glisser la poign_;_eauxiliah'_ sur la poign_e pfincipde Lapoign6e auxiliaire Peut _tre inste[[_e6 droite ou 6
gauche afin de rendre I'uti[imfion des plus confartebbs La poign_ auxi[iaire NE PeutPASser@er vers I'avant ou I'arri_re
3 Ins&er [e boulan de nouveau dons le trou avec un creux hexagonal qui se trouve sur lec6t_ de [a poignee auxifiaire,
fixer leboubn et bien serrer.
R_glage de la profondeur de coupe (Fig. 5)
La roue avaut se r_g[e afin de modifier la profandeur de coupe et de prolonger la dur6e de la lame Foire ce qui suit
pour modifier ler_glage de la profondeur de coupe larsqu'on retire I'ouBI de I%mballage
I Atbndre ['immobilisaBon compl4te de la lame!
2. DEBRANCHER L'OUTIL!
3 Desserrer [e bouton de rL_glagede la profandeur
4 RL@erla hauteur de la roue en uti[isanll'indkateur de profandeur qui se trouvesur [esupport de [a roue et [es
mentions sur le bo_Beravant
Note :Une profondeur de 2,5 cm (I Po) esl re¢ommand_e pour ¢ouper une bordure.
5 Bten resserr_r leboulon
Consell : LorsqueI'herbe est haute, cela peut offdr uner_slslance au protecteur. R_delre la profondeur de coupe au
minlmum afin de €Butter cet effel.
Guide de rebord (Fig. 6 et 7)
Leguide de reberd estpratique pour coupor une figne droBe le long destrotteirs Lorsqu'on veut effectuer des travaux
d'am6nagement poysager ou eouper des rEgalesdons la tour, Jeguide de reberd pout nuire Iors de travaux dons de la
terre baffue ou des moltes de gazon On pout r_gJer[eguide afin de pouvoir faire des RIGOLE ou des travaux
d'AMENAGEMENT PAYSAGER
Pour modifier la position du guide de rebord, faire ce qui suit.
1 Affeodre I'immobifisaBon complete de la lame!
2 DEBRANCHER L'OUTIL!
3 Tirer le boulon du guide de rebord de facon lot&ale (dons le sensde la petite fl&be) afin de le d_ager de la parle du
protecteur {debil, fig 6). Soubver b beuton usqu'6 ce que I'encocbe carrie inf&ieure du [evier s'digne sur la porte du
Rrotecteur Dons cutte position, leguide estsouleve (fig 7) de fa_on 6 pouvoir couper aistenent [ebng de plates-bendes,
d'arf_ustesou d'arbres pour fake des rigobs ou coupor des tootles de gazon.
4. Pour abaisser [eguide, tirer [e[evier de facon [aterde el [ abaisse ju qu'6 ce que Japolte de protecteu s_ins&'_
dons le trou sup_rieur du brier.
Conseil : II Pout Blre n_cessaired'incliner b ¢oupe-bordure vers I'arribre afin d'abaisser la guide.
Fixation de la rallonge au coupe-bordure (Fig. B)
Impodantes mesures de s_¢urilr_: FichePolads_e
Afin de minimiser [esrisques de secousseselectriques, le produit esl muni d_unefiche polaris_ (unelame plus large
que I autre) Ne pos modifie la rid e de Ibutil nile co don de rallonge Ure les IMPORTANTESMESURESDE 5ECURITEau
d_but du pl_seut guide. Note : Consuher las mesuresde s_cudl_relatives au cordon de rallonge pr6cil_,es.
1 Afin de pr6venir le d_branchement du cordon, fixer ceJuFd de la mani&_ illustree
2. Ins&er la fiche dons la douille du cordon
3 La £oign_e de I_interrupteur comporte un disposgif de retenue do cordon intagr_ mintegsant les contraintes sur la
rallonge. Pour den servir, i[ suffit de plier la rdlonge de [afa¢on illustree, 6 environ 30 cm (1 pi) de son extr&nite,
etd_ins&er la boucle au bout de la poign_e. Fixe_la boucle ainsi farmee par la rallonge sur I'ergo!. Tirer
doucement sur la rdlange afin de s_assurerqUdJe est beenfix_e dons la poign_e do coupe-bordure
4 Elaigner la raJfange de ['uBfisateur, de ['ouBIet de tout autre obstecb en touttemps EJoigner [ecordon des
sourcesde cbeleur, des flaques d'beib, de I'eau ou d'ar@testranchantes
Protedeur (Fig. 9 & 9A)
A!teodre I'immoblfisatlon complete de la lame!
DEBRANCHERLOUTIU
Le protecteur s'ouvre en basculant pour netteyer [e [agemenl de [a lame ou pour permetlre [eremplacement de [a bene
Pour I'ouvrir, faire burner le bouton de d_gagement du protecteur dons [e sens horaire {en regardont [e c&te du protecteur)
jusqu'6 ce qu'il s'arr6te (environ 90 °) (fig 9 detail) Tirer sur b bouton pour BurrEr la porte (fig 9A) Lorsqu'on ferme le
protecteur, faire tourner [e bouton dons [esens horaire sur 90 ° (fig 9 debi[) et rdermer compJ_tement [a porte en la
poussant Lebouton verrouille automatiquement [oporte Lorsque le boubn ne reburne pos 6 la position verrouiJlee,
pousse sur!o pote jusqu'a ce que le boubn s'endencbe S ASSURERQUE LEPROTECTEURESTBIEN FERMEET
VERROUILLEAVANT D UTIUSEREOUTIL
Lame (Fig. 10)
Attendre I'immoblfisation compl_le de la lame!
DEgRANCHERLOUTIL!
Fixer [a lame, [esdeux tales, ['&rou 6 tete hexagonab et la rondelb conique dons ['ordre ilJustr_ Pri_re de v&ifier
I'instdlaBon de la lame avant d'utiJiser ['outi[ La lame de coupo-berdure comporte deux iodicateurs d'usur_ din de
savoir quaod remplacer la lame Lorsque la lame est us& usqu'au petit trou 6 chaque extr&nite de celle-ci, die procure
unecoupe d'une profondour de 6 mm (1/4 po) et il faut la remplacen
Conseil : Afin de prolonger la dor_e de la lame, r_lar la profondeur de coupe au minimum Pour la premiere
coupe el augmenter le r6_lage de la profoodeur 6 rnesure que la lame s'use,
FAIRE CE QUI SUIT POUR REMPLACER LA LAME.
Attendre I'immoblfisation complete de la lame!
DEgRANCHERLOUTIL!
Z_ MISE EN GARDE : La lame continue de burner pendant quelques instants apr& avoir rel_ch_ I'interrupteur
1 Fake tourner [ebouton et ouvrir [a porte.
2 Desserrer [%crou 6 tete bexagonale (9/16 po) Se server d'une cb de 1 po contre la rondeJJeexterieure ou d'une
pi&e de bois de 2 po sur 4 po, au besoin, entre le protecteur et la lame pour emp&her cetie derni&e de bouger
INSTALLATION DE LA NOUVELLE LAME
3 Installer la cab interne sur I'arfi_re; [es<<plats >>du trou de la cab doivent s'ins&er sur ceux de I'orbre
4 Touten retenant la cole en place, placer la lame sur I'a rbre de [afa¢on illustr_e (fig 10)
5 Retenirla lame eontre la cab et installer la de ext&ieure, toujours enalignanl [es<_plats _>de la ode sur ceux de ['arbre
6 Installer I_&rou 6 tete hexagonde el la rondelle conique, Peis les serrer B Ioide dune cl_ (couple de 140 Ib-po)
Note :Remplacer [ &rou 6 tete bexa_onaJe et la rondeJJeconique seulement par des pieces de rechange
idenBques, voir [a rubrique relative 6 I'entretien
7 Fermer la porte; le bouton dolt setrouver en position verroui[be
Interrupleur
METTRE[OUTIL EN MARCHE en appuyant sur I'interrupteur 6 detente CduFci est con?u pour _tre tenu sans
peine en posBion de marche POURARRETEREOUTIL, il suffit de rel6cher I'interrupteur
de cc_per une premk_refoesavecle coupe-tx_dure sur la pebuse. II lout alars soulaverb guide de rebord el roduire
la profandeur de coupe (consulter les rubrktues relatives au guide de reberd el 6 la profondeur de coupe).
3 Afin d'eviter [esrisques de rebond, abaisser [a poignee de sorte que [a lame se trouve au-dessus du sol (fig 12)
4. Meltre ['outi[ en marcbe et laisserla lame toumer sans bouger I'outil.
5 Soulever doucemenlla poignee afin d'abaisser la lame, de trouver Ie reberd de la surface payee el de
commencer [acoupe Qn pout ensuite dep[acer ['outi[ [entement vers ['avant [elong de la surface payee en
laissant [eguide reposer kbg&ernent canine [e rebord de pov_
Lorsde la premiere coupe au d6but de la saison, iJesl pr6_&able d_avancer [entement car dest le momeut aO [egazon esl
le plus long Par la suite, on pourra effectuer [e travail plus rapidemenl Lorsque [emoteur rdentiB reculer de un pouce
ou deux afin de Permuttre 6 la lame de reprendre sa vitesse normale Lors de [a coupe, il Peuty avoir formation
d'etincelles [orsque I'outi[ _rappe des rocbes; i[ s'agit d'une situaBon normole Ne pos utiliser ['ouB[ [orsc_uele sol est
humide ou mouil[_ afin d_6viter [es risques de secousses6laclriqu?s ainsi que [_obstruction du [agemeut de [a lame Dons
ce dernier cos, altendre ['immat_ilisaBon complete de [a lame! DEBRANCHER EQUTIU Ouvrir [a porte et degager
I_obslruction 6 Paide d'un b6ton LorsqUon continue de se server d'un outil blaqu_, on surcharge le moteur
Z_ MISE EN GARDE : Ne pas tenter de netteyer le lagemenl de la lame en _rappont I'outi[ contr_vle sol ou risque de
I'eodommager. Elaigner [es mains du guide et de la lame pendant [esira aux de nelbyage car
ces comFosantes deviennenl trancbentesB ['usure
Am_nagement paysager/Rigoles
Aver tis_menl : Avanld_effectuer des travoux dram&_agement R4_ysagerou de couper des rigo[es, sassurer qui[ n'y a
pas de fils, de tuyaux ou tout autre able! b decouvert ni sous terre qui pourraient pr&enter des risques ou
nuire au fondionnement de Ioutil RL_gler&Ja profoodeur de coupe n&essaire uniquemenl Ne pas
su charger [ ouBI Lorsque ce[ui-ci dentit, ecubr Jeg&ement et utbnd e que [a lame toume 6 son
r&gime normal
Rangement
Avertissemenl! S'assurerque I'outil est d_branch&
Enlever tout debris de dessous du coupo-k,ordure el de ['teterieur de protecteur, puis netbyer ces parties avont de ranger
IouB[ Consulter la rubrique relative 6 I'entreBen Lecos &h_anR [e coupe-bordure paul 6tre rang_ en [esuspendont par
saFoign_ (fig13)
MISE EN GARDE : NE PASSUSPENDREL'OUTILSURL'INTERRUPTEURA DETENTENI SUR L_CORDON!
Note : Ne pos ran_er Irouti[ sur des tartilisants ou des produits chimiques, ni pr6s de ceux-d au risque de causer [a
corrosion rapide de [_ouB[
Prevention de la corrosion
Des ferti]isantsetautres produils chimiques de jardinage renfermenl desagents qui peuvent grondement accel&er la corrosion
desmetaux Lorsquon taiJJe[a bordure 16og on o utilis_des feriflisantsou d_autresproduiis chimiques, iJfaut ne_oyerJbuti[
comme suit immodiatement apr& den _tre serve Netloyer teutes[espi&es h _ouverl h ['aide d'un chiffon humide On Peut
lubrifier lespi&es melalliquesseulement&I'aide d%uib de i_trde bge_ [.orsdeneJtoyage,NE PASimmerger ['outilni I_arroser&
I'aide d'un bayou.
Utiliser seulement du saran doux et un chiffon humide pour nutloyer I'outil Ne laisser aucun liquido s'infiltrer dons
['ouB[ et ne iamais immerger ce dernier
IMPORTANT : Pour assurer [a SECURITED'EMPLOI et la FIABIUTEde [%util, n'en conber la reparation, [esrajustements e
la mise au poinl qu 6 un cent e de service ou 6 un alefie d_ent etien BUlb ise n'uBlisant que de pieces de echange
identiques Inspecter et beennelbyer ['ouBI au debut de cbeque saison de coupe afin d'en prolonger fa duree el d'en
optimiser le rendement
Ac_essoJres
On Peutsep _u e [esaccessoires ecommandes pou [outil cbez [esd@ai[[antsou ou centrede se vicede la
r_gion. Pour trouver un accessoir_, composer le num&o suivant : 1 (BOO)544-6986.
AVERTISSEMENT: Lutilisation de tout accessoire non recommande pou I'outi[ peut _t e dongereuse
Renseignementsrelatersauservice
Black & Decker expJoite un reseau campier de centres de service etd_ateliers d_entretien autoris& par route J_Am6riquede
Nard Leporsonnd de bus les centres de service Black & Decker a re_u la formation voulue pour assurer I%nlretien
efficace etfiabb des outils _lect4ques.
Pour obtenir des renseignemenls d'ordre technique des consei[s relaBfs aux r_paraBons ou des _i&es de recbenge
d'origine, communiquer avec [e centre de service Black & Decker de la r6gion On peut trouver _;adressedu centre de
service de la raglan dons [ annualre des PagesJaunes @la rubnque <_Outi]seledrNues>> ou en composant le numero
suivont : 1 (800) 544-6986.
Garantie complete de deux ans pour utilisation domestique
Black & Decker garantit ]eprduil pour une p&iode de deux ans contre tout vice de maB&e ou de fabrication Leproduit
defacteeux sera r@are ou remplac_ sans frais en vertu de ['alternative suivante
Lepremier cbeix ne donne draft qu'a un &hange; il s'agit de reiourner [eproduB cbez [ed6taillant d'o0 i[ _rovient (si
celuFci parBcipe au programme d &hange) IJfaut alors retourner [eproduit dons [e delai Bnporti par [ed_tai[lant
(habituellement, entre 30 et 90 fours de [a date d_achat) Ledetei[[ant peut exiger une preuve d'achat Pri&e de v&ifier
avec Jede a[la quan 6 sa pal que elai_veaux re ous au-dela des d6la saccord& pou I &hange
Lesecond choix consiste 6 retourner [e produit (port pay6) 6 un centre de service Black & Decker oOil sera r6par6 ou
remp[ace 6 notre gr_. Une preuve d acbet pout _tre exigee. Lescoordonn6es des ceni_esde service Black & Decker se
trouvent 6 a rubrique <<OuBse ectriques_>des Pagesjaunes
Lo pr&ente goranBe ne couvre pas[es accessoires Les modafetesde ]a pr&ente garanBe donnent des droits I_, aux
sp&_hques. Uut_fisateurpout se pr_vaber d_autresdrafts salon J_etatou Japrovince quhl beb_te. Pour obtemr de plus
amples renseignements, communiquer avec [edirecteur du centre de service Black & De<:kerde la r_gion
Lep oduil n esl pas oncu pou u e uBfisaBon coin ne ciale
lmporlepear
Nack& Decker _anada Inc.
IOO Central Ave.
Br0ckvi]le (Ontario) K6V 5W6
Voir la rubrique "OutJls *_lectriques"
des Pages jaunes
pour 10 servbe el {es ventes=
MANUALDEINSTRUCCIONES
LE750 TIPO 2 Y 3
INFORMACION CLAVE QUE DEBE SABER:
• Su orillaclora est6 diseBada para expulsar recortes y desperdicios hacia adelante, lejos del operador.
• Revise y limpie su orillaclora a conciencia al comienzo de cada temporada de orillado.
• La cuchilla de esta herramienta no est6 disefiada para tener filo. No afile de ninguna manera
• Aseg0rese que el area de orillado (30 m) est6 libre de otras personas y de mascaras antes de iniciar la operaci6n.
CONSERVE ESTE MANUAL PARA REFERENCIAS FUTURAS
_ ADVERTENCIA: Adver tencias e inslrucciones imporbntes de seguridad.
/_ ADVERTENCIA: Cuanda uBfice oporatos el&tricos de iardineria, debe seguir cierbs precauciones b&sicas de
seguridad pora evitar riesgos de inceodio, cfioque e[&trico y lesiones porsondes, entre [asque se
encuenlran los siguientes
_ ADVERTENCIA: Parle del polvo originado par este prducb conBene qulmicos queen el Estodo de Ca[ifarnia se
consideran coma causantes de c6ncer, ddectos cong&_ibs u olros dofios reprcductivos A[gunos
ejemplos de esbs quimicos son:
• compuestos en larti[izantes
• compuesbs en tesedicidas, berbicidos y pestiddos
• arsenico y cromo de madera trabdo quimicamente
Para roducir su exposid6n a esbs qu_micos utilice equipo de seguridod aprobedo coma m6scaras contra polvo dis-
efiados especi icamente para i trar porBcu as mkrosc6picas
Z_ ADVERTENCIA: Esteproducto contiene quimicos, inc[uyendopIomo, que en el Estodo de Ca[ifarnia se consideron coma
causantes de c6ncer y defecbs cong6nilos u altos doi%s r_produdivos Lave susmanos despu& de
.......iodo
RRECAUCION: Emp[ee la protecci6n personal y audiBva adecuado durante el usa de este producto Baio cterlas
condiciones y durad6n de usa, el ruido producido par este producto puode contribuir a la p&dido
audiBva LEATODAS [AS INSTRUCCIONES
PAPA REDUCIR EL RIESGO DE LESIONES:
• Antes de coda usa, aseg0rese que toda persona que utilice esta herranlienla lea y compreoda tdas los instrucdones de
seguridod y dem6s infarmaci6n contenido en este manual
• Conserve estes instrucdones y rep6selas con frecuenda antes de usar [a berramienta y de instruir a terceros
NOI_ : Lecc_pe-berdure estun apparel[ 6[edrique 6nergivore etil ne doll pos_tre utilise simultan_ nent avecd'autres
appareib _bcifiques _nergivore surle m&ne circuil
Aver tissement : S'assurer que les observateurs et los animaux domestiques se trouvent 6 au mains 30 m (100 pi) de I'outil
1. R&:g[erla prdondeur de coupe & 2,5 cm(1 po) el abaisser leguide (consulter [esinstrudions relativeau montage)
2 Avant de metlre ['outi[ en marche [eplacer de sarte que [eguide de rebord refuse contre [eberd de la surface
payee { ig 11) Lesdeux rouesarri&e doivent setrouver sur a surfacepevee orsqu'on coupe a bordure
Conseil: Lorsquede I'herbe a pouss_surla surfaceFav_e, cela peutofffir une r6sistance au protecteur.II Feut _tre n6cessaire
PARTESDE REPUESTO:Cuando efact0e servicio utifice 0nicamente refacciones Black & Decker idonticas
Esteequipo cuente con una c[avija polarizoda (con una pota m6s ancha que [a olra) pora roducir el riesgo de
cfiague d&lrico Esteequipo debe usarse con una extensi6n polarizada odecuoda de 2 o 3 hdes Las conexiones
polarizadas se acoplar6n de una solo manera AsegBrese que el [ado del recept6culo de la extensi6n tenga una
ranurapequei_ayotragrandeSilaclavijanoseajustacompbtamentealaextensi6n,invi&tala51aOnasino
ajusta,consigaunaextensi6nadecuadaSi[aextensi6nnoseacopJaperf_tamentea[atomadecorriente,
comuMqueseconuneledricistacaJificadoparaqueJeinstaleJatomadecorrienteadecuadaPorningOnmoBvo
mdifiqueJadavijadelaparabodelaextensi6nenMogunamanera
oESTAHERRAMIENTAPUEDESERPEUGROSA Siga ldas [as advertencias e instrucdones de seguridod de este manual
El operador es responsable de soguk [as advertencias e instruccionesde este manual y de la unidad Reshinja d uso de
esta herramienta a personas que lean, comprendan y sigan las advertencMs e instrucciones contenidas en este manual
yen la unidad
EV1TEAMBIENTE5 PEUGROBO5. No utilice aparatos d_tricos en bgares inundados o mojados No utilice
aparatos eJ&tHcos Baio la Huvia
CON5ERVEAPARTADO5 A LO5 NINOS. Todas losdem6s personas y [as mascotas deber6n permanecer a distancM de la
zona de trabajo
GUARDE BAJO TECHO LOSAPARATOS QUE NO EMPLEE.Losoperates d&tricos deben guardarse Bale tecba, en un
Iogar secoy seguro, fuera do[ a[cance de los nii_os
* NO FUERCEELAPARATO Esi_har6 sutrabaio me[or y de mane_a m6s sogura Bajo las especificacionesparalas q_ sedisef'6
o UTIUCEELAPARATO CORRECTO.No utilic÷ el aparato para ninggn trabajo qu÷ no sea pare el que se diseB6
o VISTASEDE MANERA ADECUADA. No vista prendas floias ni arBdos de ioyeria Puden quedar atrapados en las
piezas rn6viJes Se recomienda eJusa guantes de game, pantdones largos y cdzado grueso, antiderrapante pare
trabajar a[a intemperie No utilice sanddias ni ande descalzo CObrase d cabeJJosi Io tiene largo
UTIUCEANTEOJOS Y DEMAS EQUIPO DESEGURIDAD. Utilice gafas o anteojos de seguridad con cubiertas latemles,
que cumplan con losestOndores de soguridd aplicables y en case necesario, una careta Tarnbi&_ utilice rnascarilla sila
operaci6n que efe_tOaprduce polvo Esto seaplica a todas [aspersonas en el 6rea de trabajo Uti[ice tambi_n caste,
protecci6n audgiva,_uantes, cdzado de seguridad _ sistemas de recoJer'd6n de _oJvocuando asl se espedfique o
requiera Los gafas de soguridad y simiJares sevenden con en eJcenlro de servido Black & Decker de su Iocalidad
NO MALTRATEELCABLE. Nunca acarree un operate tom_mdolo per el cane, ni tire de _ste pare desconectarJo de la
tome de corriente Consen'e eJcobb de[ado de crier, aceite y Bardes aft[odes
NO SESOBREEXTIENDA.Conserve bien apayados los pies pare no perder eJequilibria
* CUIDE SUAPARATO. Conserve limpio eJBarde ear,ante pare obtener me{or rendhniento y reducir eJriesgo de Jesiones
Siga Jasinstrucciones de bbricaci6n y cambio de accesorios Reviseel <:ablede[ operate peri6dicarnente y, siest@
dahado, h6gab reparar inmediatamente en un cen_'o de servicio autorizado Revise [asextensiones peri6dicarnente y
carnbieJas cuando sedanen Conserve Losmaogos s_:os, ]impios y ]ibres de aceite y grasa
* DESCONECTELOSAPARATOS. Desconecte d qxlrato de Jatome de corriente cuando no Jouse, ales de darJeservido, y
cuando cambie ao:'esarios come cuchillas y sirnilares
* EVITEELENCENDIDO ACCIDENTAL, No Ilansporle un apqrato conectada con el dedo en el interrupter AsegOreseque el
interruplor est_ en posM6n de apagado antes de conectar eloperate
CABLES DEEXTENSION. Asogurese gue su exfensi6n esle en Baenas condidones EJaidamiento de[ cane deber6 ester
intacto sincuarleaduras o muestras de deterioro Los davijas no deben tener deices Cuando uBJiceuna extensi6n,
aseg0rese de utilizer una con el calibre necesario pare soportar Jacorrienl÷ necesaria pare su producto Una extensi6n
ten'calibre rnenor aJ necesario causer@ una caida en eJre[tale de JaJlnea que resuffar6 en p&dida de potencia y
sobre_aJentamiento
La table muestra el calibre corredo pare usarse de acuerdo con JaJongitud de[ cable y el arnperaje seflddo en laplace
de identificad6n del prducto Si Benedudes, utiJiceeJcalibre siguiente Mientras menor sea eJnOmero del cahbre,
mayor ser6 su capaddad Calibre minirno pare cordones de extensi6n
Volts Longilud total del cable en metros
120V 0-7,6 7,9-15,2 15,5-30,4 30,7-45,7
240V 0-15,2 15,5-30,4 30,7-60,9 61,2-91,4
Amperaje
M6s No m&s Calibre AWG
de de
0 6 18 16 16 14
6 10 18 16 14 12
10 - 12 16 16 14 12
12 - 16 14 12 No se recomienda
[]
* nd a que Jao [Idoa cuen a con DOB_ AISIAMIENTO .
* PARAUSODECABLESDEEXTEN51ONPARALAINTEMPERIE Z_ ADVERTENCIA:Parareducirelriesgodechoque
eJ6c co, u I e O careen e ex ens ones paa use ala nlemlmr e, o o Jasdel po SW-A, SOW-A, S]W'-A, STO,'V-A,
SJW-A, SJeW-A, 5JTW-A, o SJTOW-A
* INTERRUPTERDECJRCUITOPARA FAL[ASEN TIERRA(GFCI) Losdrcuibs y las tomes de carriente que se utilicen con el
operate de iardineHa deben center con un disposiBvo de este tipo Existen tomes de corriente con protecci6n GFCI
integrada y sepueden utilizer pare cumplir con esta rnedida de protecd6n
ESTBALERTA.Conc6ntrese en Joque hate Use eJsenBdo camEra No opere aparatos cuando est_ cansado, enfermo o
baio la influenda de drogas o alcohol
o REVISELABPARTESDANADAS. Antes de seguir utiJizando d aixlralo, una guarda u otra parle que estendaBadas deben
revisarse cuidadosamente pare determh_ar si rundonar6n apropiadamente y curnpJir6n con su fund6n ReviseJa
alineaci6n de los piezas m6vibs, susmanta es, rupture de los partes y cudesquiera otras condiciones que pudiesen
afectar su operad6n Una guarda o cue[quiet aim parte que est@dai]ado debe repararse de manera apropiada o
reemplazada en un cenlro de servicio autarizado a menos clue se indique Io contrario en este manual
REPARACIONE5Y SERVICIO. Los reparaciones, el mantenimienlo y cualquier otro ajuste no espedficado en este manual
deber6n efect0arse en los centros de servicio autorizado Black & Decker u otras organizaciones de servido cdfficado,
que utiJicen siempre refacdone identicas
* use DEACCESORiOS Y DISPOSITIVOS. El use de cuaJquier accesorio o disposiBvo no r_omendado pare empJearse
con esteaparato puede ser pdigroso Note: candle Jasecd6n de accesorios de este manual f×lra obtener m6s detdJes
1. Conserve [as guardos en su sitio
2 Conserve lirnpia el 6tea de la cuchiJJa
PELIGRO:Riesgo de lesi6n. Conserve manes y pies bias de la cuchilla y dol 6rea de carte
Advertenda irnRortante
Cuando emplee la orilladora, puden sdir despedidos pidras, trozos de metal y aires objetos a gran velocidod per la
cuchilla. La herramienta y la guarda est6n dise_adas pare reducir el peligro. Sin emerge, deba tamer en cuenta los
siguientes precaudones
1 Utilice gafas de soguridad u olra protecci6n en los olo% guantes, pantalones largos y calzado protector.
2 AsegOrese que arras personas y mascaras esten de[odes per Io menos 30 metros
3 P6rese siempre del lade izquierdo del mango principal
4 Antes de zanier o r_:ortar, revise en busca de cables el&trices enterrados
5 Pare reducir el riogo de lesiones per proyecfiles, trabaje leios de cualquier oh[eta s6lido come inures,
escalones, rocas grandes, 6rbales, etc Tenga touche cuidado cuando trabaie cerca de oh[eros s6Jidos o
conh'a el viento y, en caso necesario, recorte a mano
CONSERVE ESTASIN5TRUCCIONES
ANTES DE ENSAMBLAR SU ORILLADORA, VERIFIQUE HABER RECIBIDO EL SIGUIENTE MATERIAL EN LA CAJA.
OBSERVE LA FIGURA 1.
A Orilldora LE750
B. CuchiJJaEdge Hog con sistema de luerca y roldana c6nica y separador (ensamblado ala unidad)
C Tuba conectando tornillo y periJJa (ensarnblado al tuba inferior)
D Mango auxiliar, con tornillo y perilJa
ENSAMBLAJE DELMANGO
Ensamblaje de los Lobes del mango figuras 2 y 3
1 Retire la perilJa y el tornillo de caloeza curve de losorificios de manta e del tuba inferior de[ mango.
2 Des[ice ehuba superior de[ mango en el luBa inferior de manera gue los orificios queden aJineados (figure 3)
Existen dos posiciones posibbs para ajustarse a su altura preferida Observe Jaorientaci6n dd mango superior
en la figure 11
3 NOTA: AsogOrese de que el cable se mueva f6cihnenle en el luba inferior del mango aJensamblar
4. File los tubas junto con la perilla y el tornillo de cabeza curva. Note que al inserter el torniJJopuede ser
necesario movedo rhpidamente pare Iograr que pose el cable que se encuentm dentro del tuba
PRECAUCION: NUNCA utilice un objeto afiiado pare mover los cables recubiertos
Posici6n del mango auxiliar (figure4
1. Retire la perilla del torniilo deFmango auxiliar y empuie/tire del tornilla hacia [uera dd mango
2 Deslice el mango auxiliar denlro del mango principal Elmango auxiJiar puede colocarse pare usarlo a izquierdo o
derecha, Joque sea m6s c6mdo El man_o auxiJiar NO puede ajuslarse hacia addante o hada atr6s
3 Inserte el torniJJode nuevo en el orifido del mango auxiliar per el lade dol la cavidad hexagonal
Caloque la periJJay apriete con firrneza
Ajuste de profundidad de carte (figure 5)
La rueda ddantera puede ajustarse pare permitir un eerie m6s o rnenos prdundo, pare aumentar la duraci6n de la
cuchiJla Cambie la pro[undidod de carte de la posici6n en que viene ala allure que desee:
1 iEspere a que [a cu&iJla se delenga per complete!
DESCONECTE LA HERRAMIENTA!
Atloje la perilla de profJndidad de carte.
4 Ajuste Japrofundided de Ja ruda, uBlizando eJ indicador de pro[undidad de[ soporte de la rueda y Ja marco de la
carcaza trontd
NOTA: 5e recomienda una profundidod de 25 mm (1) pare oriJJar
5. Apriete la perilla con firrneza
Recomendaci6m Lashierbas gruesas Foeden atascarse en la guarda. Reduzca la profundidad de carte al
minima Fore ayudarse a redudr esteefecto.
Guia para bordes plegable (figures 6 y 7)
La gula pare Bardes es OtiJpare carter en llnea recta a Jolargo de las aceras Pare zanier, Jaguia puede inter_erir
con el movimiento de JaoriJJadora en suelo duro o tierm herbasa La guia pare bardes puede aiustarse de manera
que Ja herramienta desempeSe funciones de ZANJADO
Pare cambiar la positionde la guia pare hordes:
1 iEspere a quela cuchilla se deteoga per complete!
2 iDE5CONECTE LA HERRAMIENTA!
3 Tire de la perilla de la gula pare bardes hacia los lades pare desasogurarla de la lengOeta de la guarda, observe el
detdJe de la figure 6, en direcci6n de la flecha Levante Ja periJla haste que Ja muesca cuadrado inferior de Ja
palanca quede alineada con la Jeng0eta de Ja guardo En esta posid6n la gulapara Bardes guedo levantada
(figure 7} de manera que la herramienta puede carter con fadJidod a Io largo de los orilJas de comas de _loresy
pJantas, y ah'_dedor de 6rbales en preparaci6n pare hater una zanja o retirar el sudo herbaso.
4 Pare devolver la guia pare Bardes ala posici6n Bale, tire de la paJanca hada los lades y empuje hacia abajo haste
que la leog0eta de la guarda quede en elorifido de la palanca superior
Recomendoci6n: Pude requerirse i_li_ar [a orilladora hada atr6s Fora permiRrbaler la gula Fora bardes.
Instalad6n de la extensi6n en la orilladora (figure 8)
Instrucciones irnportantes de seguridad: Clavi as polarizadas
Esteequipo cuenta con una davija polarizada (con una pale m6s ancha que la otra) pare reducir el riesgo
de cheque el&trice Per ningOn motive modifique la clavija del operate o de la extensi6n en ninguna manera Lea los
INSTRUCCIONES IMPO_ANTES DE SEGURIDADal pri_dpio del manual. Nora: Revise los inslrucciones de seguridod
fmra el cable de extensi6n propor¢ionados anlerlormente.
1 Pare eviler la desconexi6n del cable de la orilladora, asegure la exlensi6n alando la davija como se muestra
2 Inserte la davija en la tome
3 EJmango de[ interrupter cuenta con un ret_n pare d cable de extensi6n inte;lrado pare reducir Jatensi6n en eJ
cable de alimentaci6n Pare utilizer este dispositivo, simplemente doble eJcable de extensi6n come se muestm,
aproximdamente 30 cm dd extreme, e ins&trio end extreme de[ mango Enganche el rizo formado aJ dobJar
d cable en Ja Jeng0eta Tire suavemente del cable pare ase_urarse que est_ retenido con firmeza end mango.
4 Conserve siempre eJcable de exlensi6n libre del operador la unided y cudquier obsl6culo No exFonga eJ
cab e a ca or, ague o Bardes a i dos
Guarda de la cuchilla Figuras 9 y 9A
iEspere a que a cu¢hi a se _e enga temple amen e!
iDESCONECTELAHERRAMIENTA!
La guardo se levanta pare hmpiar el interior de la carcaza de la cuchiJJao pare cambiar de cuchillas Pare abar la
guarda gire la perilla de liberad6n en el sentido de las maneciJJas dd relo (viendo la herramienta per el lade de la
guarda) haste que se detenga (aproximadamente 90 _rados) detaJJeFig. 9; tire de la perilla pare abrir la puerto.
(Fig. 9A) Cuando cierre Ja guarda gire Ja perilia en ersentido de las manecillas dol rdoj y empuje la puerta pare
que cierre completamenle La perilla debar6 terror la puerla autom6Bcamente Sila periHa no se rogresa ala
posici6n de cierre presione la puerto haste clue la periJla se enganche ASEGURESE DE QUE LA GUARDA ESTE
CORRECTAMENTE CERRADA Y LA PERILLAESTE ASEGURANDOLA ANTES DE OPERAR LA ORILLADORA
Cuchilla figura 10
iEspere a que a cuchi a sedotenga FOr camp eta!
'DESCONECTELA HERRAMIENTA!
[a cuchilJa,dos separadores y una tuerca con roldana c6nica deben instalarse ensuorilladora en el arden que semueslra
Perfavor revise que la cuchil[a se monte apropidarnenb antes de usar su oriHadora. LacuchilJaEdge Hog viene con dos
indcadores de desgaste pare ayudade a saber cuando reemplazarla Cuando la cuchilla sedesgaste hasta el pequeho
orifido que seencuenlra en cac_ ext:eme JeproForcionar6 una pro[undided de ca4e de 1/4" (6 rnm)y deber6 reemplazarJa
Recomendaci6n: Pare aumentar a doraci6n de a cuchi a, conserve a profundidod de carte inkia a minima y
aum_ntela al desgastarse la cuchil[a.
PARA RETIRAR LA CUCHILLA PARA CAMBIARLA:
iEspere a que la cucbil[a se detenga For complete!
iDESCONBCTELAHBRRAMIBNTA!
_'x PRECAUCION: La cuchdla g_ra moment6neamente dospu& de hberar e[ mterruptor.
1 Oire la perilla y abra la puerto
2 Afloie la luerca hexagonal de 9/16' Ufllice una [lave de 1" en el separador exterior o un blogue de madera de
5 x 10 cm entre la cuchilla y la guardo en case necesario pare eviler que gire
PARA INSTALAR UNA CUCHILLA NUEVA:
3 Coleque el separador interior en [a fie&a- los "pianos" dol orificio del separador deben ernpatarse con Los"pianos"
de la flecha
4 Sujete el s eparador en su sitio, co[oque [a cuchilla en [a flecba come se iluslra. (Fig. 10)
5 Sujete [a cuchiJJacentre el separador e instaJeel separador externo de nuevo alineando [as pianos del separador
con osde a echo
6 Instab la luerca y la roldena c6nica y apriete can una Ilave (140 in. [bs
Note: Reemplace la luerca hexagonal yla roldona c6nica Onicarnente con repuestos identicos, consuhe la in_orn_aci6n
de servicio
7 Cierre [a puerto; [e peri[a deBa ester en posici6n de cierre
Interruptar
Pare ENCENDER Ja herramienla optima el gatillo interrupter El gatiJJoest6 diseimdo pare que sea rnuy f6cil sujetado en
posid6n de encendido Pare APAGAR la herramienta, suehe el gorilla.
iparato mayor y no c 6neamente con otros aparatos mayores
en el mismo circuito domestico
Advertenda: AsegOreseque aires personas y mascaras esl6n a[ejadas FOr [o menos a 30 metros.
1 File la prdundidad de <ortea 25 mm (1') y ajuste la guia de orillado en [a Fosk i6n Baja, consulte los
instrucdones de ensamblaie
2 Antes de encender JaoriJJadera, coloque Jaherrarnienta de manera que la guia pare Bardes descanse centre [a
orilla de la superficie pavimentado (figure 11 ) Ambas rudas traseras deben quedor sabre la superfide
pavimentada al orillar
Recomendoci6n:[as hierbasgruesas puedenalascarseen ]a guarda. Reduzca la profu_ided de carte al minima Fora
ayudorsea _edecir este ek_cto.P_ede requerlrse un carte inkial con la orillodora per el [ado dd paste. Esto
mqu_r6 clue bvante la gula para Bardes y p_e que tambi_n requiem tedecir _a pro[u_didod de o_rle
(consuhe_asinstrucciones de la guia para _[es y de a ustede prd_Jndidod).
3 Pare eviler un conlragoJpe per parle de la oril[adora, incline el maogo hada aba o de manera que [a cuchilJa
qude sabre la tierra figure 12
4 ENCIENDA eJ interrupter y permita que la cuchilla gire sin mover la herramienta
5 Levante ]entamente eLmango para bajar la cuchiJla, encontrando ]a orilJa de [a sup_rficie pavimentada y comience a
oriJJar Mueva a continuaci6n la herrarnienta Jentamente hada adeJante a Io largo de Ja superfide
pavimenlada, canservando [a gula pare Bardes presionando ligeramente conlra [a orilla del pavimento
Pare eJprimer orilJado de coda temporada, es me[or moverse hacia adelante lentamente debido a que d paste es m6s
grueso ententes. Los orillados subsecuentes se compbtar6n m6s r6pidamente Si Ja herramienta _undona m6s lento,
rogrese una o dos puJgadas hasta q ue Jacuchilla dcance la velocidad normal
Durante el orillado se pueden generar dgunas chispas cuando Jacuchilla golpea algunas pie&as Estoes normal No
intente orillar cuando el pasta o el sudo esten hOmedos a rnajadosq_or soguridod eledrica y pare evitar que Jac6mara
de la cuchilla se bloguee Si debe _raba ar en condidones que ocasionen que la c6mara de la cucMla sebloguee
DESCONECTE la herrarnienta y retire el material atas_ado con una vara Continuer operando Ja herramienta con la
c_ara bloqueada sobrecargar6 seriamente eJmotor
PRECAUCION: No intente destapar la c6mara de la cuchilla dejando caer o golpeando [a herramienta en el suelo
Estopuede dai_ar Jaunidad. Conserve susmanes _uera de Jazone de la gula de bardes y JacuchiJJa
Recorte/Zanjadocuando [impie, ya que estas partes se desgastan a un punto muy aft[ado con el oril[ado
Advertenda: Anles de retorter o zanier, inspeccione y asog0rese que no haya cabbs expuestos o enlerrados,
luberias u arras objetos que puedan crear peligro o interfieran con la operaci6n de [a orilladora
Aiuste la profundidod para Io que requiera el ttabajo No seobrecarque el aparato Si Baja la
Guardado vdocidad, tire de &re Bacia atr6s hgerametne y espere a que la cuchilla dcance Javelocidad nornmJ
_Adverlen¢ia! Ase_0rese Flue la herramienla est_ dosconectado.
etire y limpie cua[quier desecho del exterior de la ori[ladora y del interior de la guardo antes de guardoda Consu[te [a
secci6n de MANTENIMIENTO. En case necesario, Jaorilladora debe guardarse coJgando el maogo de una gancho
Observe la figure 13
PRBCAUCION: INO CUELGUBLAORILLADORA DELINTERRUPTER NI DELCABLEDE AUMENTACION!
Note: No guarde la herramienta cerca de ferti[izanles y arras prdudos qulmicos, ya que hacerlo ocasionar6
una r6pida corrosi6n
Evite la corrosi6n
LosferBlizantes_ otros prductos quimicos de jardinerk_ contienen agentes que aderan la corrosi6n de los
metales Si usteduBliza la herramienla en 6reas en donde se hen usado ferfilizantes o precludes quimicos
Jaherramienla deber6 Jimpiarse inmdiatamente despu& Limpie bdos los partes expuestas con un lrapo h0rnedo
Cuando limpie, NO sumeria Ja herramienta en ogua ni Ja retie con una manguera.
| rillii_,ll d11:li|l['l
Uti[ice 6nicamente laban suave y un trope h0mdo pare Jimpiar la herramienta No permita nunca que I[oguen liquidos
aJinterior de la herramienla, ni sumerja ninguna parle en ning0n Jiquido
IMPORTANTE: Pare garantizar la 5EGURJDAD y JaCONFIABILIDAD dol producfo, [as reparaciones, el mantenimiento y
los a ustes deben ser reolizados FOr centros de servido autorizados u arras organizadones de servido ca[ificados que
siempre utilicen partes de repuesto identicas. Inspecdones y limpie a conciencia su ori[[adora al principio de coda
temporado de ori][ado pare obtener mayor durabiJidad y me[or rendimiento
Accesorios:
Losaccesorios recomendedos pare empbarse con su herramienta est6n a su disposid6n con el distribuidor
o centre de servicio de su Iota[ideal Si necesita ayudo en re[aci6n con los accesorios, [[arne For favor: (55) 5326-7100,
ADVERTENCIA:El use de cua[quier accesorio no recomendado pare empbarse con esta herramienta pude ser pdigroso
Informaci6nde servicio
BLack& Decker ofrece una rd complete de cenlros de servicio propidad de [a compaBia y franquiciados a troves de
toda Norteam&ica Todos loscentros de servicio Black & Decker cuentan con personal capadtado pare proporcionar el
servicio a herramientas m6s eficiente y confiabJe
Siempre que necesite consejo t&nico, rogaraciones o partes de repuesto genuinas, comunlquese con eJcentre Black &
Decker m6s cercano austed
Pare encontra su cent o de serviio local consulte la secci6n a nariHa Bale 'He ran ientas eL&trices', o Lienea[
(55) 5326-7100
Garantia complete pare use dom&tico For dos aries
Black & Decker (U S}garantiza este prducto per dos ahos complelos contra cudquier [aLia otiginada For materiales o
mane de obra defectuosos El prducto ddeduoso ser6 reemp[azado o reparado sin cargo alguno en cualquiera de los
siguientes dos maneras:
La primera que resuJla unicamente en eatables, es regresar el producto aJvendedor d que se compr6 (en Ja suFosid6n
que es un disifibuider partidpante) Los devoluciones _d_er6n hacerse donlro dd tiernpo estipulado per Ja politico de
eatables de[ dislribuidor usualmente de 30 a 90 dlas despu& de la venla Se Ruede requerir prueba de compra Per
favor verifique con el venddor los Foliticas especificas de devoluci6n re[acionadas a los devoluciones en fiemFo
posterior al estipulado pare eatables.
La sogunda opci6n es I[evaro enviar eL producto (con porte pagoda) a los centros de servicio Black & Decker
propios o autorizdos, pare que la reparemos o reemplacemos a nuestra opci6n Se puedo requerir prueba de
compra Los centros de servido BLack& Decker propios y autorizados est6n enlistados Bao "Herramientas
ebctricas" en [a secci6n amarillo del directorio telef6nico.
Estagarantia no se ap[ica a los accesorios Esta garantla leotorga derechos Iogalesespecificos y usted
pudiera tener aires der_cbas que varlen de estado a estado. Si tiene cudquier pregunta comunlquese con
e gerente de centre de servicio Back & Decker m6s cercano austed.
Esteproducto no est6 disei_ado pare use comerciaJ
Pare servicJo y vent,s consulte _ IMPORTADOR:BLACK& DECKERS.A.DEC._
BASQUESDECIDROSACCESORADIATASNO.42
HERRAM[_NTAS ELECTRICAS _C_
en lasecci6n amarillo. _ BASQUESDELASLAMAS,05120 MEXICO,D.F.
,._ '=,_._ {55} 5326-7100

