®
INSTRUCTIONMANUAL
STIO00
IF YOU SHOULD EXPERIENCE A PROBLEM
WITH YOUR BLACK & DECKER PRODUCT,
CALL 1-800-54-HOW-TO (544-6986).
BEFORE YOU CALL, HAVE THE FOLLOWING INFORMATION
AVAILABLE, CATALOG NO., TYPE NO., AND DATE CODE (e.g. 0130M).
IN MOST CASES, A BLACK & DECKER REPRESENTATIVE CAN RESOLVE
YOUR PROBLEM OVER THE PHONE. IF YOU HAVEA SUGGESTION OR
COMMENT, GIVE US A CALL. YOUR FEEDBACK IS VITAL T0 THE
SUCCESS OF BLACK & DECKER'S QUALITY IMPROVEMENT PROGRAM.
SAVETHISMANUALFORFUTUREREFERERENCE.
VEAELESPANOLENLACONTRAPORTADA.
INSTRUCTIVO DEOPERACION, CENTROS DESERVICIOY P©LIZA DEGARANTJA.
ADVERTENClA: LEASEESTEINSTRUCTIVOANTES DE USAR ELPRODUCTO.
Catalog Series ST1000 FORM NO. 264162-03 REV. 3 PRINTED IN MEXICO AUG. '02
WARNING:When using electric tools, basic safety precautions should always be followed to
reduce risk of fire, electric shock and personal injury, including the following :
WARNING:Some dust created by this product contains chemicals known to the State of
California to cause cancer, birth defects or other reproductive harm. Some examples of these
chemicals are: • compounds in fertilizers
• compounds in insecticides, herbicides and pesticides
• arsenic and chromium from chemically treated lumber
To reduce your exposure to these chemicals, wear approved safety equipment such as dust masks that
are specially designed to filter out microscopic particles.
WARNING:This product contains chemicals, including lead, known to the State of California
to cause cancer, and birth defects or other reproductive harm. Wash hands after handling.
Z_ CAUTION: Wear appropriate personal hearing protection during use. Under some conditions and
duration of use, noise from this product may contribute to hearing loss.
READ ALL INSTRUCTIONS
1. SAFETY SPECTACLES OR GOGGLES -- Wear at all times when trimming.
2. GUARD -- Do not use trimmer without guard attached.
3. NYLON LINE -- Keep face, hands and feet clear of rotating nylon line at all times. Do not extend
beyond length specified in this manual. Wear long pants to protect your legs.
4. KEEP ALL BY-STANDERS AWAY -- at a safe distance from work area, especially children.
5. AVOID ACCIDENTAL STARTING -- don't carry plugged-in tool with finger on trigger.
6. DO NOT FORCE THE TOOL -- at a rate faster than the rate at which it is able to cut effectively.
7. USE THE RIGHT TOOL -- Do not use this tool for any job except that for which it is intended.
8. DON'T OVERREACH-- Keep proper footing and balance at all times.
9. WARNING -- To prevent electric shock hazard, use only with an extension cord suitable for outdoor
use. Always connect extension cords to a fused line or one protected by a circuit breaker.
10. DON'T ABUSE CORD -- Don't yank cord from receptacle. Keep cord from heat, oil and sharp edges.
11. EXTENSION CORDS -- to prevent disconnection of extension cord during operation, use extension
cord retainer as described in this manual.
12. DAMAGE TO UNIT -- If you strike or become entangled with a foreign object, stop trimmer
immediately, unplug, check for damage and have any damage repaired before further operation is
attempted. Do not operate with a broken hub or spool.
13. DAMAGE TO CORD -- Keep power cord away from rotating line. Ifyou damage the extension cord,
unplug it at the electrical outlet before moving the trimmer or examining the damage. If there is
damage to the extension cord, replace cord before further use.
14. DISCONNECT TOOL -- When not in use, when replacing line, or prior to cleaning hub.
15. DRESS PROPERLY -- Don't operate the tool when barefoot or wearing open sandals. Always wear
substantial footwear. Use of rubber gloves and substantial rubber soled footwear is recommended
when working outdoors.
16. AVOID DANGEROUS ENVIRONMENTAL CONDITIONS -- Do not use electric tools in damp orwet
locations. Follow all instructions in this instruction manual for proper operation of your trimmer.
17. DON'T USE THE TRIMMER IN THE RAIN.
18. DO NOT OPERATE portable electric tools in gaseous or explosive atmospheres. Motors in these tools
normally spark, and the sparks might ignite fumes.
19. STORE IDLE TOOLS INDOORS -- When not in use, tools should be stored indoors in dry, locked-up
placed--out of reach of children.
20. THE ROTATING LINE PERFORMS A CUTTING FUNCTION -- Use care when trimming around
screens and desirable plantings.
21. USE ONLY RECOMMENDED REPLACEMENT LINE -- Do not use heavier line or other line
materials, eg. metal wire, fishing line or similar materials.
SAVETHESEINSTRUCTIONS
DoubleInsulation
AN IMPORTANT CONSUMER FEATURE
Your tool is double insulated to give you added safety. This means that it is constructed throughout with
two separate "layers" of electrical insulation or one double thickness of insulation between you and the
tool's electrical system.
Tools built with this insulation system are not intended to be grounded. As a result, the extension cord
used with your tool can be plugged into any conventional 120 volt electrical outlet without concern for
maintaining a ground connection.
NOTE: Double insulation does not take the place of normal safety precautions when operating this tool.
The insulation system is for added protection against injury resulting from a possible electrical insulation
failure within the tool.
CAUTION: When servicing double insulated tools, USE ONLY IDENTICAL REPLACEMENT PARTS.
Replace or repair damaged cords.
FIG. 3
Printing
FIG. 1
Plug
HOLD HERE!
@ o @ @
FIG. 2
NYLON
LiNE
(10 ° TO 30 °)
,_l_RELEASE
TAB
FIG. 5
GAP
FIG. 7
SMALL
HOLE
FIG. 6 _ I
]
I
SPOOL "_
HUB
PolarizedPlug
This product is supplied with a polarized plug (one
blade is wider than the other ). This plug will fit
into a polarized outlet (receptacle) only one way. If
the plug does not fit fully into your outlet, reverse
the plug. If it still does not fit, contact a qualified
electrician to install a proper polarized outlet. Do
not modify or change this plug in any way.
ExtensionCords
Make sure your extension cord is in good
condition. When using an extension cord, be sure
to use one heavy enough to carry the current your
product will draw. An undersized extension cord
will cause a drop in line voltage resulting in loss of
power and overheating. The table shows the
correct size to use depending on cord length and
nameplate ampere rating. If in doubt, use the next
heavier gage. The smaller the gage number, the
heavier the cord.
AssemblyInstructions
MINIMUM GAUGE FOR CORD SETS
120 Volts TOTAL LENGTH OF CORD IN FEET
RATING-AMPS 25ft. I 50ft. I 100ft. I 150ft.
More Not A.W.G.
than more than
0 - 6 18 16 16 14
6 - 10 18 16 14 12
10 - 12 16 16 14 12
12 - 16 14 12 NOTRECOMMENDED
Layout sections as shown. (See illustration on page 4)
Hold middle section at printing while assembling each end.
Push sections together firmly.
Install screws and nuts. Screws cannot be tightened if parts are assembled incorrectly.
HowToUseYourBlack&DeckerYardTrimmer
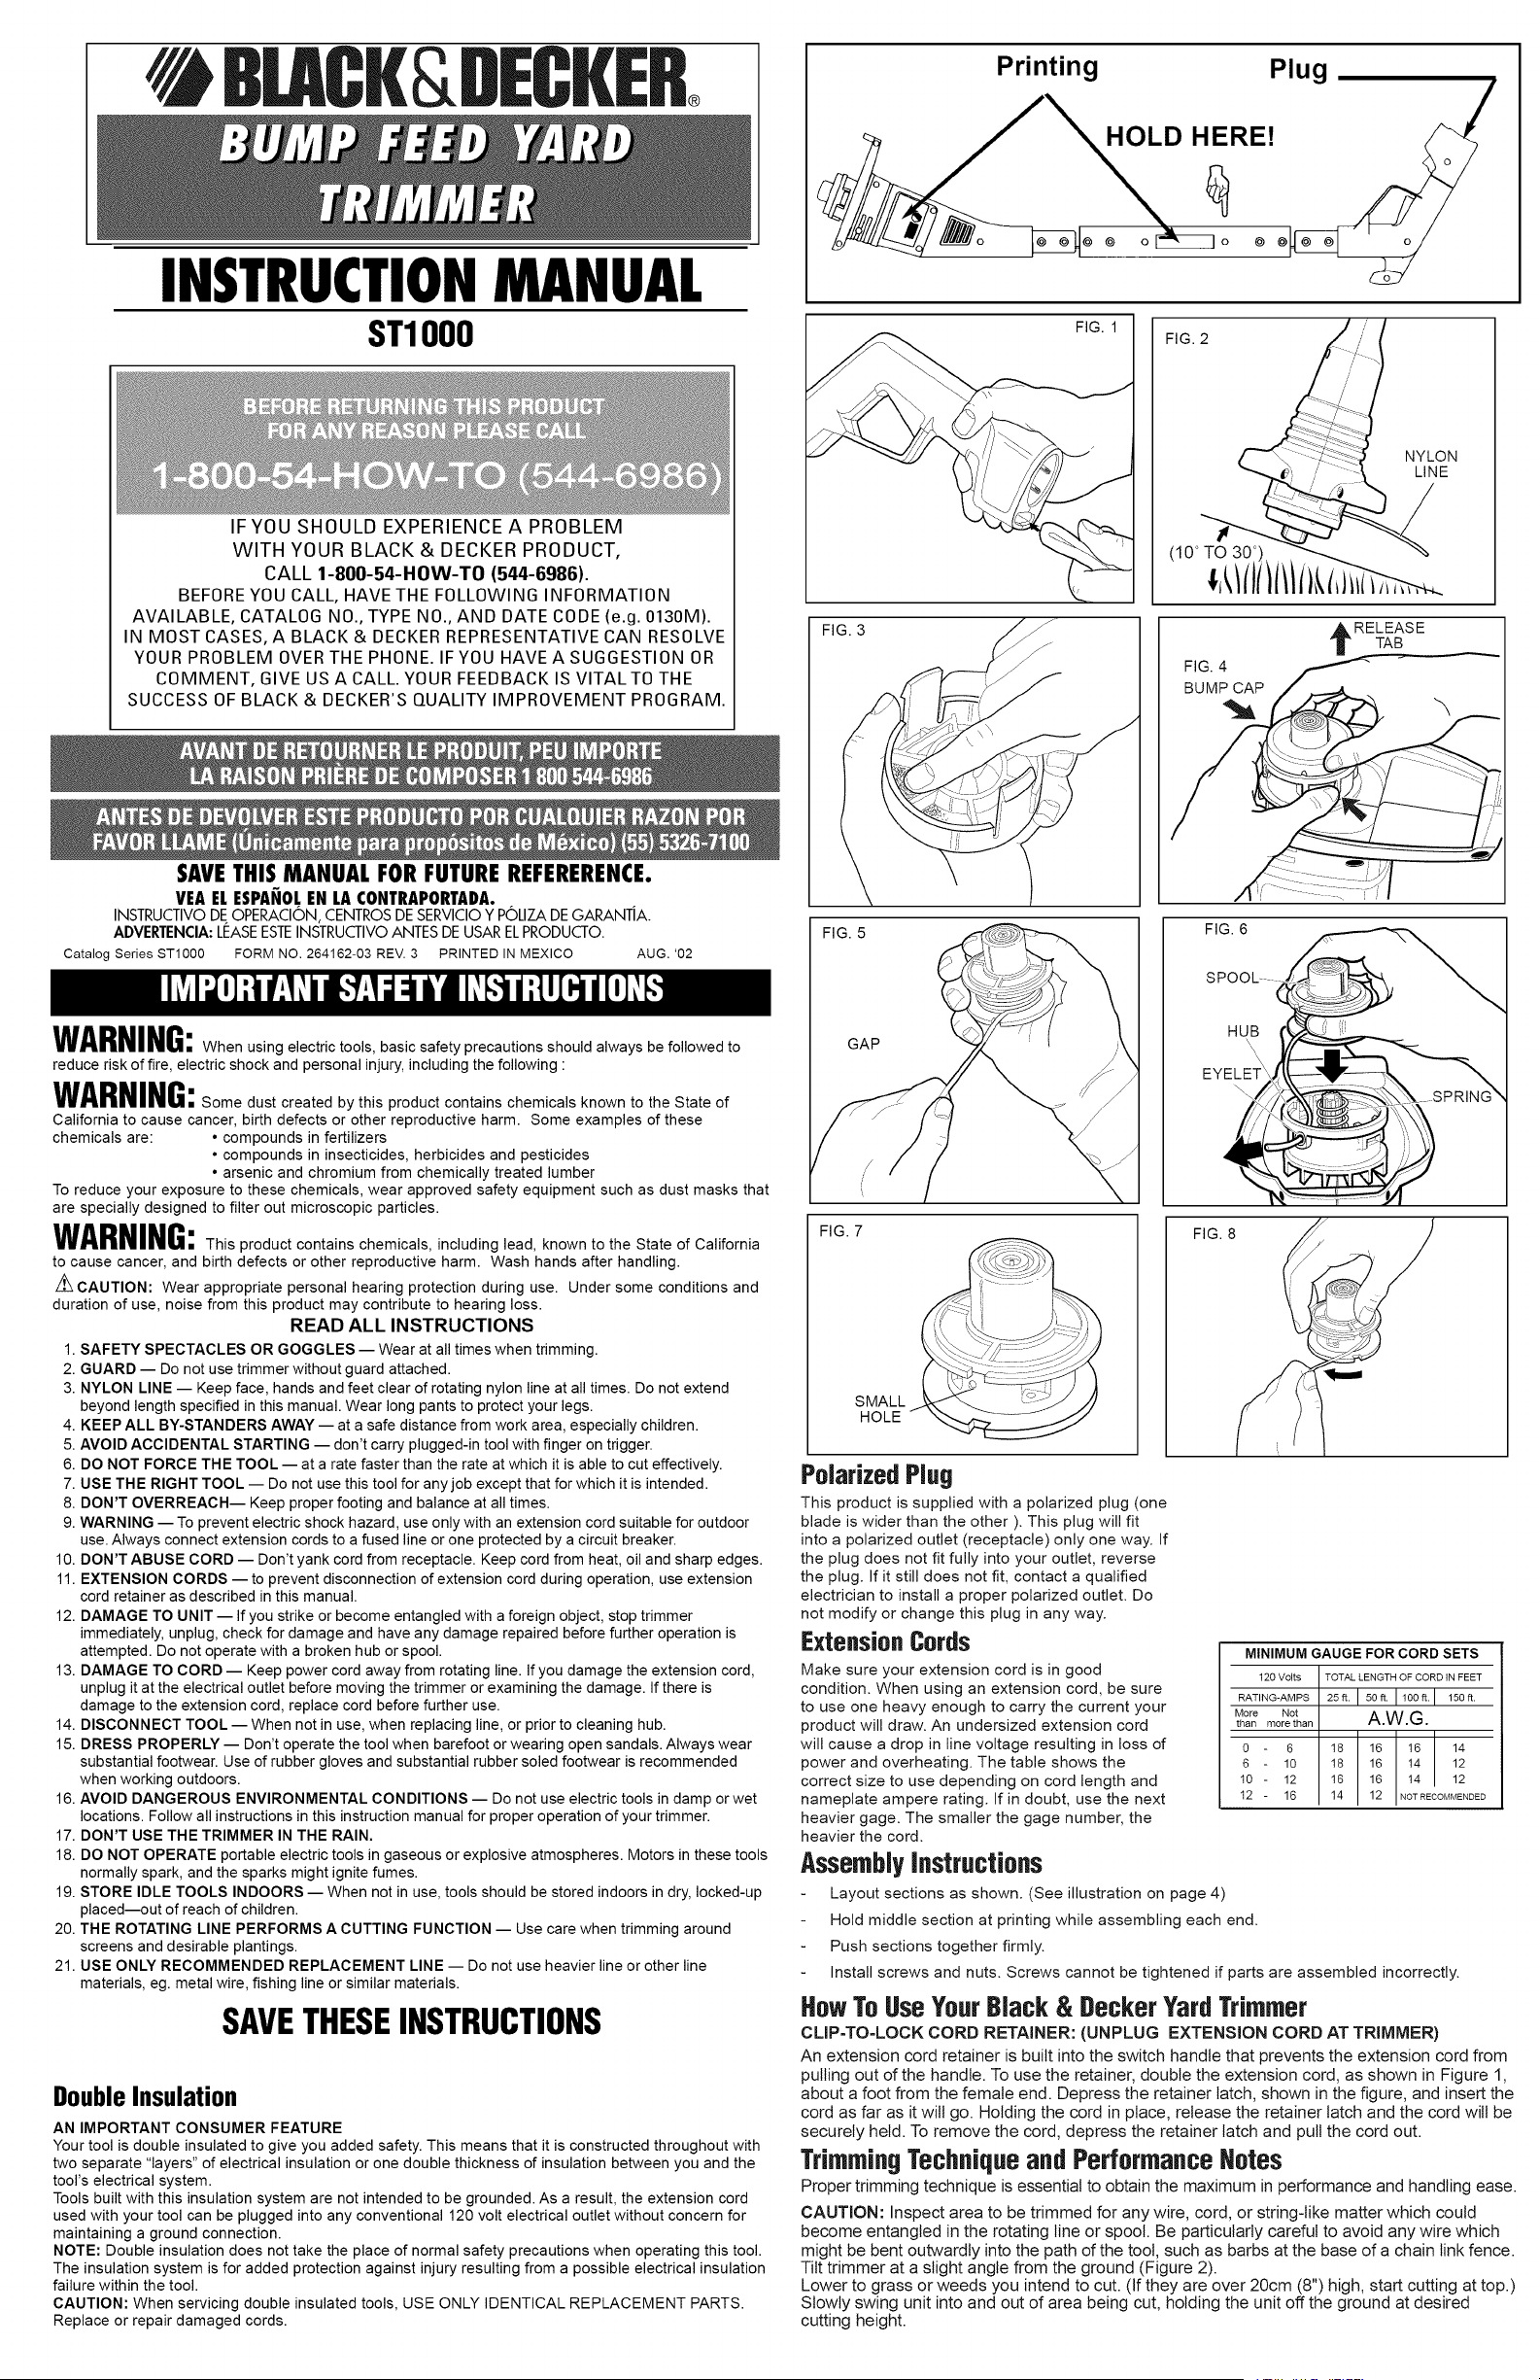
CLIP-TO-LOCK CORD RETAINER: (UNPLUG EXTENSION CORD AT TRIMMER)
An extension cord retainer is built into the switch handle that prevents the extension cord from
pulling out of the handle. To use the retainer, double the extension cord, as shown in Figure 1,
about a foot from the female end. Depress the retainer latch, shown in the figure, and insert the
cord as far as it will go. Holding the cord in place, release the retainer latch and the cord will be
securely held. To remove the cord, depress the retainer latch and pull the cord out.
TrimmingTechniqueandPerformanceNotes
Proper trimming technique is essential to obtain the maximum in performance and handling ease.
CAUTION: Inspect area to be trimmed for any wire, cord, or string-like matter which could
become entangled in the rotating line or spool. Be particularly careful to avoid any wire which
might be bent outwardly into the path of the tool, such as barbs at the base of a chain link fence.
Tilt trimmer at a slight angle from the ground (Figure 2).
Lower to grass or weeds you intend to cut. (If they are over 20cm (8") high, start cutting at top.)
Slowly swing unit into and out of area being cut, holding the unit off the ground at desired
cutting height.

IMPORTANT-- forthebestcuttingactionagainstwalls,fencesandinhighgrass,move
trimmerslowlysograssiscutWITHTHETIPofthehighspeednylonline.
1.Avoidrunningtrimmerwithhubincontactwithground.
2.Trimonlywhengrassand weeds are dry.
3. The life of your nylon line is dependent upon following the above trimming techniques, as
welt as what is being cut, and where the cutting is being done.
EXAMPLE: Line will wear faster when run against afoundation walt as compared to
trimming around a tree. Some line breakage wilt occur from feeding unit too fast, from
entanglement with foreign matter, from normal line fatigue, and from attempting to cut thick,
stalky weeds in excess of unit's capability.
NOTE: As the weather becomes cooler, the tendency for the nylon line to break becomes
greater.
DO NOT USE UNIT WHEN TEMPERATURE IS BELOW 50° F
4. For best performance, as the line wears, lengthen as indicated in Line Feeding Procedure.
5. Periodically unplug extension cord at trimmer and remove the accumulation of grass
or cutting debris from the inside of the bump cap shroud as shown in Figure 3.
LineFeedingProcedure
Inorder to feed a length of cutting line, strike the bump cap on the lawn while the trimmer is
running. This will automatically feed a new length of line and trim it to the correct length. A firm
but gentle motion should be used to strike the bump cap. The unit should be angled slightly
forward to prevent the guard from contacting the ground. This process may be repeated as
often as necessary. If unit fails to feed, unplug extension cord at trimmer and clean out the
bump cap (See Figure 3).
SpoolReplacementandRecoveryof LineBrokenOffInsideSpool
1. Unplug extension cord at trimmer.
2. Remove the bump cap by pulling up while depressing the two release tabs on the sides of
the hub at the points shown in Figure 4.
NOTE: It may be necessary to pull up on the cap while depressing the release tabs one
side at a time.
NOTE: The cutting line is quite springy and can be awkward to handle.
3. Remove any broken cutting line, wrap the remaining line tight and reinsert spool into hub as
follows.
a.Wind the line tight enough so that it is all below the edges of the flanges on the spool. If it
extends past the flanges, it won't fit into the hub.
b. Place the loose end of the cutting line through the gap in the spool flange as shown in
Figure 6. (Either gap wilt do but try to leave yourself about 3 or 4 inches of line to work
with as shown in the figure 5)
c. Holding the line in the gap, insert the end through the eyelet in the hub and slip the spool
into the hub, as shown in Figure 6.
Make sure the spring is still in place in the hub. If the spool does not slip into the hub easily,
press gently and pull straight out on the cutting line that protrudes through the eyelet.
4. Once the spool drops into the hub, align the release tabs on the shroud with the slots in
the hub and press the shroud into place. Be sure that both release tabs snap into place.
5. To replace the line on a spool, follow the steps below
a. Locate, on the empty spool, one of the two small holes shown in Figure 7.
b. Insert the end of the line no more than 1/8" into the hole and begin winding the line
around the spool. Be sure to wind the line in the direction of the arrow in Figure 8.
c. Perform steps 4 and 5.
Maintenance-UnplugExtensionCordat Trimmer
MAINTAIN TOOL WITH CARE
1. Keep the air intake slots clean to avoid overheating which wilt damage trimmer. For this
cleaning, use a dry brush or cloth to remove grass, sap or other debris.
2. Plastic parts may be cleaned by using a mild soap and a rag dampened with hot water.
Avoid all other types of detergents, cleaners or solvents which might contain chemicals that
could seriously damage the plastic. Do not spray the trimmer with water.
3. Self lubricating bearings are used in the toot and periodic relubrication is not required.
However, it is recommended that after two or three seasons of use, you take or send the
trimmer to a Black & Decker service center or authorized service station (see TOOLS,
ELECTRIC in yellow pages) for a thorough cleaning, inspection and relubrication. If the tool
is being used professionally, the above should be accomplished after each trimming season.
4. If trimmer fails to operate, disconnect extension cord from power source first, then from
trimmer. Make sure extension cord is undamaged and that house fuses are not blown or
circuit breakers tripped. If trimmer still fails to operate, take or send it to your local B&D
service center or authorized service station for repair. Do not attempt to repair it yourself.
IMPORTANT
To assure product SAFETY and RELIABILITY, repairs, maintenance and adjustment
(including brush inspection and replacement) should be performed by Black & Decker
service centers or other qualified service organizations, always using Black & Decker
replacement parts. When servicing use ONLY IDENTICAL REPLACEMENT PARTS.
Accessories
Replacement line and safety spectacles are available from your local dealer, or a Black &
Decker service center.If you need assistance in locating any accessory, please contact:
Black & Decker (U.S.) Inc., Consumer Service Department,
626 Hanover Pike, RO. Box 618, Hampstead, MD 21074-0618.
Recommended accessories for your trimmer are shown in this manual. The use of any other
accessory or attachment might be hazardous.
Cat. No. RS-136, (82-136-02) Replacement Spool with 20 feet of Nylon Line.
Cat. No. BL-065, (82-602) Hank of bulk .065- dia. Nylon Line (50 feet)
Cat. No. 82-611 One pound .065"°dia. Nylon Line.
CAUTION: Use only recommended accessories with your yard trimmer. The use of any other
attachment or accessory might be hazardous. Use only specially treated .065" diameter
Black & Decker monofitament nylon line with your yard trimmer.
NOTE: Always include date code numbers on all correspondence. This 4 or 5 digit number is
printed on the nameplate label located on the motor housing.
ServiceInformation
Black & Decker offers a full network of company-owned and authorized service locations throughout North
America. All Black & Decker Service Centers are staffed with trained personnel to provide customers with
efficient and reliable power tool service.
Whether you need technical advice, repair, or genuine factory replacement parts, contact the Black &
Decker location nearest you.
Tofind your local service location, refer to the yellow page directory under "Tools--Electric" or call:
1-800-54-HOW-TO.
FullTwo-YearHomeUseWarranty
Black & Decker (U.S.) Inc. warrants this product for two years against any defects in material or
workmanship. The defective product will be replaced or repaired at no charge in either of two ways:
The first, which will result in exchanges only, is to return the product to the retailer from whom itwas
purchased (provided that the store is a participating retailer). Returns should be made within the time period
of the retailer's policy for exchanges (usually 30 to 90 days after the sale). Proof of purchase may be
required. Please check with the retailer for their specific return policy regarding returns that are beyond the
time set for exchanges.
The second option is to take or send the product (prepaid) to a Black & Decker owned or authorized
Service Center for repair or replacement at our option. Proof of purchase may be required. Black & Decker
owned and authorized service centers are listed under "Tools-Electric" in the yellow pages of the phone
directory.
This warranty does not apply to accessories. This warranty gives you specific legal rights and you may
have other rights which vary from state to state. Should you have any questions, contact the manager of
your nearest Black & Decker Service Center.
This product is not intended for commercial use.
Black & Decker (U.S.) Inc.,
701 E. Joppa Rd.
Towson, MD 21286 U.S.A.
See 'Tools-Electric'
- Yellow Pages -
for Service & Sales
AVERTISSEMENT: Afin de reduire ,es risques d'incendie, de secousses electriques ou de
blessures Iorsqu'on utilise des outils electriques, il faut toujours respecter les mesures de securite suivantes.
AVERTISSEMENT -" Le produit gen6re de la poussi6re qui peut renfermer des produits
chimiques. Selon I'etat de la Californie, ces produits chimiques peuvent causer le cancer ainsi que des
malformations congenitales, et ils presentent d'autres dangers au syst6me reproductif humain. Voici
des exemples de tels produits chimiques :
• les composes d'engrais;
• les composes d'insecticides, d'herbicides et de pesticides;
• I'arsenic et le chrome provenant de bois trait&
Afin de minimiser les risques, porter de I'equipement de securite approuve comme des masques
antipoussi6res specialement con9u pour filtrer les particules microscopiques.
AVERTISSEMENT: Le produit renferme des produits chimiques, dont du plomb. Selon
I'etat de la Californie, ce produit chimique peut causer le cancer ainsi que des malformations
congenitales, et il presente d'autres dangers au syst6me reproductif humain. Se laver les mains apr6s
I'utilisation.
/_ MISE EN GARDE : Porter un dispositif approprie de protection de I'ouie Iors de I'utilisation du
produit. Dans certaines conditions et durees d'utilisation, le produit peut emettre un niveau de bruit
provoquant la perte de I'ouie.
LIRE TOUTES LES DIRECTIVES.
1. Toujours porter des LUNETTES DE SI_CURITI_. Les porter tant et aussi Iongtemps que I'appareil est
branch&
2. Ne pas utiliser I'outil sans le PROTECTEUR en place.
3. Eloigner en tout temps le visage, les mains et les pieds du FIL DE NYLON qui tourne. Ne pas le regler
une Iongueur depassant celle qui est specifiee dans le present guide. Porter des pantalons afin de se
p.roteger les jambes.
4. ELOIGNER LES SPECTATEURS, surtout les enfants.
5. I_VITER LES DI_MARRAGES ACClDENTELS. Ne pas laisser le doigt sur I'interrupteur Iorsqu'on
transporte un outil branch&
6. NE JAMAIS FORCER L'OUTIL Afin d'obtenir un rendement sQr et efficace, utiliser I'outil a son
rendement nominal.
7. UTILISER L'OUTIL APPROPRII_. Se servir de I'outil selon I'usage prevu.
8. NE PAS DI_PASSER SA PORTI_E. Toujours demeurer dans une position stable et garder son equilibre.
9. AVERTISSEMENT :Afin d'eviter les risques de secousses electriques, utiliser I'outil seulement avec un
cordon de rallonge congu pour I'exterieur. Toujours brancher le cordon de rallonge sur une ligne pourvue
de fusibles ou protegee par un disjoncteur.
10. NE PAS MANIPULER LE CORDON DE FA(_ON ABUSIVE. Ne pas tirer sur le cordon pour ledebrancher
de la prise. Tenir le cordon loin des sources de chaleur, des flaques d'huile et des ar6tes tranchantes.
11.Afin d'eviter le debranchement accidentel du CORDON DE RALLONGE pendant I'utilisation, se servir du
dispositif de retenue du cordon de la fagon decrite dans le present guide.
12. POUR I_VITER D'ENDOMMAGER L'OUTIL, I'arr6ter immediatement Iorsqu'il frappe un objet ou qu'il
s'enchev6tre dans un corps etranger. Debrancher I'outil, verifier s'il est endommage et le faire reparer
avant de s'en servir de nouveau. Ne pas s'en servir Iorsque la bobine ou le moyeu sont endommages.
13. POUR I_VITER D'ENDOMMAGER LE CORDON, I'eloigner du fil qui tourne. En cas de dommage,
debrancher le cordon de la prise avant de deplacer I'outil ou d'examiner I'etendue des dommages.
Remplacer le cordon endommag&
14. DI_BRANCHER L'OUTIL Iorsqu'il ne sert pas et avant de remplacer la bobine ou de nettoyer le moyeu.
15. PORTER DES V#TEMENTS APPROPRIES. Ne jamais utiliser I'outil Iorsqu'on est pieds nus ou que I'on
porte des sandales. Toujours porter des chaussures fermees. II est recommande de porter des gants
de caoutchouc et des chaussures a semelle antiderapante pour travailler a I'exterieur.
16. I_VITER LES MILIEUX DE TRAVAIL DANGEREUX. Ne pas utiliser I'outil dans des endroits humides ou
mouilles. Suivre les directives du present guide quant au bon fonctionnement de I'outil.
17. NE PAS UTILISER LE COUPE-BORDURE SOUS LA PLUIE.
18. NE PAS UTILISER les outils portatifs electriques dans des endroits oQI'atmosphere contient des vapeurs
combustibles ou explosives. Les etincelles que produit le moteur en marche pourraient enflammer ces
produits.
19. RANGER LES OUTILS INUTILISI_S ,&,L'INTI_RIEUR dans un endroit sec, ferme a cl& hors de la portee
des enfants.
20. LE FIL ROTATIF COUPE. S'en servir avec prudence a proximite de moustiquaires et des plantes qu'on
veut garder.
21. UTILISER SEULEMENT LE FIL DE RECHANGE RECOMMANDI_. Ne pas utiliser de fil de plus gros
calibre ni toute autre type de fil (comme du fil metallique, du fil a p6che ou tout autre materiau du genre).
CONSERVERCESMESURES.
Doubleisolation
CARACTI_RISTIQUE AVANTAGEUSE
L'outil est dote d'une double isolation afin d'assurer une securite accrue. En effet, il comporte
deux couches distinctes d'isolant electrique ou une double epaisseur d'isolant qui protegent
I'utilisateur contre les risques de blessures provenant du systeme electrique de I'outil.
Ce systeme de double isolation elimine le besoin de mettre les outils a la terre. En effet, I'outil
est muni d'une fiche a deux broches, ce qui permet de le brancher dans une prise standard de
120 volts sans avoir a se soucier d'assurer la mise a la terre.
NOTE : Cette double isolation ne dispense pas des mesures de securite normales Iors de
I'utilisation de I'outil. Elle vise a procurer une protection supplementaire contre les blessures que
peut entrafner une defectuosite de I'isolant electrique a I'interieur de I'outil.
MISE EN GARDE : Pour reparer tout outil a double isolation, N'UTILISER QUE DES PI#CES DE
RECHANGE IDENTIQUES. Reparer ou remplacer les cordons endommages.
Fichepolaris6e
L'outil est muni d'une fiche polarisee (une lame plus large que I'autre). Ce genre de fiche n'entre
que d'une fa£on dans une prise polarisee. Lorsqu'on ne peut inserer la fiche a fond dans la
prise, il faut tenter de le faire apres avoir inverse les lames de c6t& Si la fiche n'entre toujours
pas dans la prise, il faut demander a un electricien certifie d'installer une prise polarisee
appropriee. II ne faut en aucun cas neutraliser ce dispositif de securit&
Cordonde rallonge
S'assurer que le cordon de rallonge est en bon
etat. Lorsqu'on se sert d'un cordon de rallonge,
s'assurer qu'il est de calibre approprie pour la
tension necessaire au fonctionnement de I'outil.
L'utilisation d'un cordon de calibre inferieur
occasionne une baisse de tension entrafnant une
perte de puissance et la surchauffe. Le tableau
suivant indique le calibre approprie selon la
Iongueur du cordon et les mentions de la plaque
signaletique de I'outil. En cas de doute, utiliser un
cordon de calibre superieur. Le chiffre indiquant le
calibre est inversement proportionnel au calibre du cordon.
CALIBREMINIMALDE8CORDONSDERALLONGE
120Voits
tNTENSITE
Au Au
morns plus
0 6
6 10
10 - 12
12 - 16
LONGUEURTOTALEDUCORDONENPIEDS
25ft. 50ft. 100ft. 150ft.
CALIBREAMERICAtNDEFIL(AWG)
18 16 16 14
18 16 14 12
16 16 14 12
14 12 NONRECOMMANDE
Fonctionnementducoupe-bordureBlack& Decker
DISPOSITIF DE RETENUE DU CORDON (DI_BRANCHER LE CORDON
DU COUPE-BORDURE.)
La poignee de I'outil est munie d'un dispositif de retenue du cordon de rallonge qui emp6che
celui-ci de se debrancher accidentellement. Pour s'en servir, il suffit de faire une boucle dans le
cordon a environ un pied de la prise femelle, comme le montre la figure 1. Appuyer ensuite sur
le Ioquet de retenue (voir la figure) et inserer a fond le cordon. Maintenir le cordon en place et
rel_cher le Ioquet de retenue. Pour enlever le cordon, appuyer sur le Ioquet de retenue et tirer
le cordon.
Directivesrelativesau montage
Placer les sections de la fa_on illustree.
Saisir la partie imprimee de la section centrale tout en montant chacune des extremites.
Pousser fermement les sections I'une dans I'autre.
Installer les vis et les ecrous. On ne peut serrer les vis si les composantes ne sont pas bien
montees.
Techniquesde coupeet rendement
II est essentiel d'utiliser des techniques de coupe appropriees afin d'optimiser le rendement de
I'outil et d'en faciliter la manipulation.
MISE EN GARDE : Avant de commencer a travailler, inspecter le secteur et enlever tout objet
(comme des cordes et des ills de fer) qui risque de se coincer dans la ficelle ou la bobine. Porter
une attention particuliere aux bouts de fil de fer (p. ex., la base d'une cl6ture a mailles en
Iosange) qui pourraient 6tre plies et se trouver sur le passage de I'outil. Pencher legerement
I'appareil par rapport a la surface a couper (figure 2). Lorsque I'herbe depasse 20 cm (8 pc) de
haut, la couper progressivement en commengant par la pointe.
Couper lentement dans un mouvement de va-et-vient lateral tout en maintenant le
coupe-bordure au-dessus du sol a la hauteur de coupe voulue.
IMPORTANT : Afin d'optimiser le rendement de I'outil le long des murs et des cl6tures ainsi
que dans les hautes herbes, le deplacer lentement afin que I'herbe soit coupee PAR LE BOUT
de la ficelle de nylon.
1. Eviter de laisser le moyeu entrer en contact avec le sol Iors de la coupe.
2. N'utiliser I'appareil que Iorsque I'herbe est s_che.
3. La duree de la ficelle depend de la technique de coupe, de la sorte d'herbe que I'on coupe et
de I'endroit oQ I'on travaille.
PAR EXEMPLE, la ficelle s'use plus vite Iorsqu'on coupe I'herbe autour des fondations de la
maison ou autour des arbres. Elle peut aussi se casser pour diverses raisons : alimentation
trop rapide de I'outil, enchev6trement autour d'un objet, usure normale ou coupe de
mauvaises herbes trop epaisses pour la capacite de I'appareil.
NOTE : Les risques de bris de ficelle augmentent a mesure que la temperature devient plus
fraTche.
leVITER D'UTILISER L'OUTIL A DES TEMPleRATURES INFleRIEURES A 10 °C (50 °F).
4. Pour obtenir le meilleur rendement de I'outil, alimenter la ficelle a mesure qu'elle s'use confor-
mement a la methode indiquee plus loin.
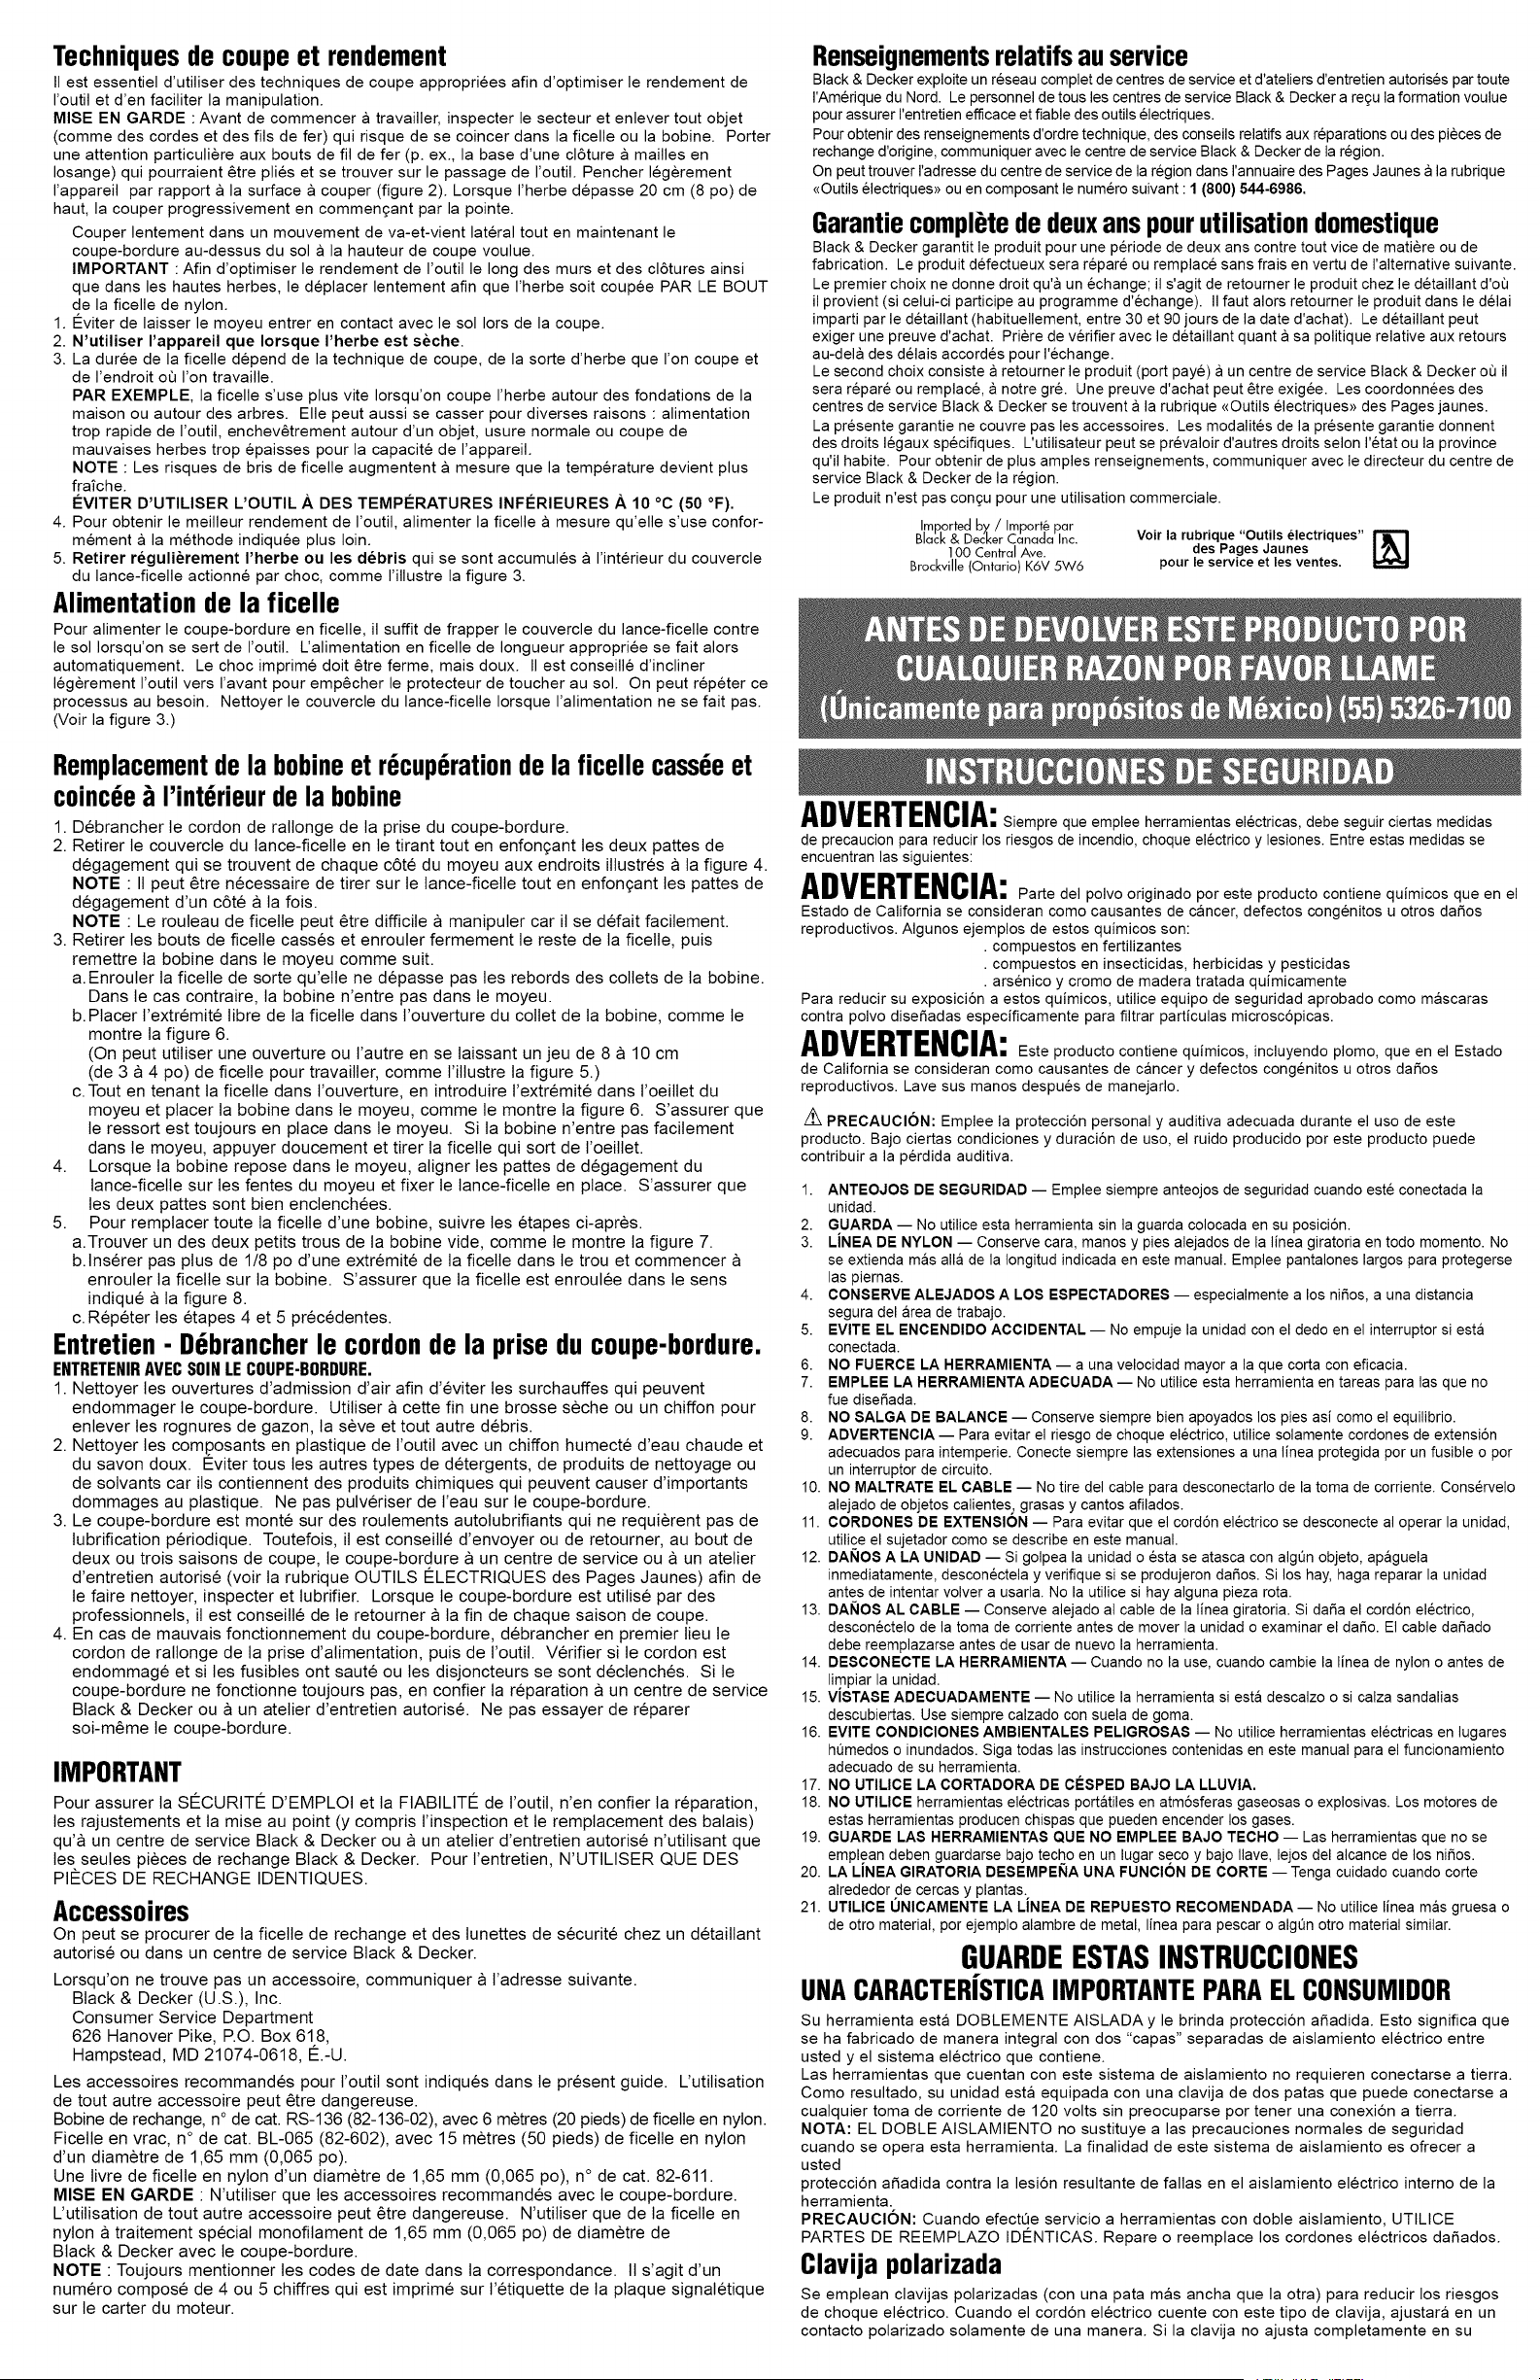
5. Retirer reguli_rement I'herbe ou les debris qui se sont accumules a I'interieur du couvercle
du lance-ficelle actionne par choc, comme I'illustre la figure 3.
Alimentationde la ficelle
Pour alimenter le coupe-bordure en ficelle, il suffit de frapper le couvercle du lance-ficelle contre
le sol Iorsqu'on se sert de I'outil. L'alimentation en ficelle de Iongueur appropriee se fait alors
automatiquement. Le choc imprime dolt 6tre ferme, mais doux. 11est conseille d'incliner
legerement I'outil vers I'avant pour emp6cher le protecteur de toucher au sol. On peut repeter ce
processus au besoin. Nettoyer le couvercle du lance-ficelle Iorsque I'alimentation ne se fait pas.
(Voir la figure 3.)
Renseignementsrelatifsauservice
Black & Decker exploite un reseau complet de centres de service et d'ateliers d'entretien autorises par toute
rAmerique du Nord. Le personnel de tousles centres de service Black & Decker a regu la formation voulue
pour assurer rentretien efficace et fiable des outils electriques.
Pour obtenir des renseignements d'ordre technique, des conseils relatifs aux reparations ou des pi_ces de
rechange d'origine, communiquer avec le centre de service Black & Decker de la region.
On peut trouver I'adresse du centre de service de la region dans I'annuaire des Pages Jaunes a la rubrique
<<Outilselectriques>>ou en composant le numero suivant : 1 (800) 544-6986.
Garantiecompletededeuxanspourutilisationdomestique
Black & Decker garantit le produit pour une periode de deux ans contre tout vice de mati_re ou de
fabrication• Le produit defectueux sera repare ou remplace sans frais en vertu de I'alternative suivante.
Le premier choix ne donne droit qu'a un echange; il s'agit de retourner le produit chez le detaillant d'oQ
il provient (si celui-ci participe au programme d'echange). IIfaut alors retourner le produit dans le delai
imparti par le detaillant (habituellement, entre 30 et 90 jours de la date d'achat). Le detaillant peut
exiger une preuve d'achat. Pri_re de verifier avec le detaillant quanta sa politique relative aux retours
au-dela des delais accordes pour I'echange.
Le second choix consiste a retourner le produit (port paye) a un centre de service Black & Decker oQ il
sera repare ou remplace, a notre gr& Une preuve d'achat peut 6tre exigee. Les coordonnees des
centres de service Black & Decker se trouvent a la rubrique <<Outilselectriques>> des Pages jaunes.
La presente garantie ne couvre pas les accessoires. Les modalites de la presente garantie donnent
des droits legaux specifiques. L'utilisateur peut se prevaloir d'autres droits selon I'etat ou la province
qu'il habite. Pour obtenir de plus amples renseignements, communiquer avec le directeur du centre de
service Black & Decker de la region.
Le produit n'est pas con9u pour une utilisation commerciale.
ImRorted by, / Import_ par
Black & Decker Canada Inc.
1O0 Central Ave.
BrockvilJe (Ontario) K6V 5W6
Voir la rubrique "Outils _lectriques"
des Pages Jaunes
pour le service et les ventes,
Remplacementdela bobineetr cup rationdela ficellecass eet
coinc e I'int rieurdelabobine
1. Debrancher te cordon de rallonge de la prise du coupe-bordure.
2. Retirer le couvercte du lance-ficelle en le tirant tout en enfongant tes deux pattes de
degagement qui se trouvent de chaque c6te du moyeu aux endroits ittustres & ta figure 4.
NOTE : It peut etre necessaire de tirer sur le lance-ficelle tout en enfongant les pattes de
degagement d'un c6te & la fois.
NOTE : Le rouleau de ficelle peut etre difficile & manipuler car it se defait facilement.
3. Retirer les bouts de ficelle casses et enrouler fermement le reste de la ficelle, puis
remettre la bobine dans te moyeu comme suit.
a. Enrouler la ficelle de sorte qu'elte ne depasse pas les rebords des collets de la bobine.
Dans te cas contraire, la bobine n'entre pas dans te moyeu.
b. Placer l'extremite tibre de la ficelle dans l'ouverture du collet de la bobine, comme le
montre ta figure 6.
(On peut utitiser une ouverture ou l'autre en se taissant un jeu de 8 & 10 cm
(de 3 & 4 pc) de ficelle pour travaitler, comme t'ittustre la figure 5.)
c. Tout en tenant la ficelte dans t'ouverture, en introduire t'extremite dans t'oeittet du
moyeu et placer ta bobine dans le moyeu, comme te montre la figure 6. S'assurer que
le ressort est toujours en place dans le moyeu. Si la bobine n'entre pas facilement
dans te moyeu, appuyer doucement et tirer ta ficelle qui sort de t'oeittet.
4. Lorsque la bobine repose dans te moyeu, aligner tes pattes de degagement du
tance-ficelte sur tes fentes du moyeu et fixer le lance-ficelle en place• S'assurer que
les deux pattes sont bien enclenchees.
5. Pour remplacer toute ta ficelle d'une bobine, suivre les etapes ci-apres.
a.Trouver un des deux petits trous de la bobine vide, comme te montre la figure 7.
b.lnserer pas plus de 1/8 pc d'une extremite de ta ficelle dans te trou et commencer &
enrouler la ficelte sur la bobine. S'assurer que la ficelle est enroulee dans le sens
indique & la figure 8.
c. Repeter les etapes 4 et 5 precedentes.
Entretien- D brancher le cordonde la priseducoupe-bordure.
ENTRETENIR AVEC SOIN LE COUPE-BORDURE.
1. Nettoyer tes ouvertures d'admission d'air afin d'eviter tes surchauffes qui peuvent
endommager le coupe-bordure. Utitiser & cette fin une brosse seche ou un chiffon pour
enlever tes rognures de gazon, ta seve et tout autre debris.
2. Nettoyer tes com.posants en ptastique de t'outil avec un chiffon humecte d'eau chaude et
du savon doux. Eviter tous tes autres types de detergents, de produits de nettoyage ou
de solvants car its contiennent des produits chimiques qui peuvent causer d'importants
dommages au plastique. Ne pas pulveriser de l'eau sur te coupe-bordure.
3. Le coupe-bordure est monte sur des roulements autolubrifiants qui ne requierent pas de
lubrification periodique. Toutefois, il est conseille d'envoyer ou de retourner, au bout de
deux ou trois saisons de coupe, te coupe-bordure & un centre de service ou & un atelier
d'entretien autorise (voir ta rubrique OUTILS €:LECTRIQUES des Pages Jaunes) afin de
le faire nettoyer, inspecter et tubrifier. Lorsque le coupe-bordure est utitise par des
professionnels, it est conseitte de le retourner & ta fin de chaque saison de coupe•
4. En cas de mauvais fonctionnement du coupe-bordure, debrancher en premier lieu le
cordon de raltonge de ta prise d'alimentation, puis de t'outit. Verifier si le cordon est
endommage et si tes fusibles ont saute ou les disjoncteurs se sont declenches. Site
coupe-bordure ne fonctionne toujours pas, en confier ta reparation & un centre de service
Black & Decker ou & un atelier d'entretien autoris& Ne pas essayer de reparer
soi-meme le coupe-bordure.
IMPORTANT
Pour assurer la S¢:CURIT¢: D'EMPLOI et ta FIABILIT¢: de t'outil, n'en confier la reparation,
les rajustements et ta mise au point (y compris t'inspection et te remplacement des balais)
qu'& un centre de service Black & Decker ou & un atelier d'entretien autorise n'utilisant que
les seules pieces de rechange Black & Decker• Pour l'entretien, N'UTILISER QUE DES
PIC:CES DE RECHANGE IDENTIQUES.
Accessoires
On peut se procurer de ta ficelte de rechange et des lunettes de securite chez un detaillant
autorise ou dans un centre de service Black & Decker•
Lorsqu'on ne trouve pas un accessoire, communiquer a l'adresse suivante.
Black & Decker (U.S.), Inc.
Consumer Service Department
626 Hanover Pike, RO. Box 618,
Hampstead, MD 21074-0618, €:.-U.
Les accessoires recommandes pour t'outit sont indiques dans le present guide• L'utilisation
de tout autre accessoire peut etre dangereuse.
Bobine de rechange, n° de cat. RS-136 (82-136-02), avec 6 metres (20 pieds) de ficelle en nylon•
Ficelle en vrac, n° de cat. BL-065 (82-602), avec 15 metres (50 pieds) de ficelle en nylon
d'un diametre de 1,65 mm (0,065 pc).
Une livre de ficelte en nylon d'un diametre de 1,65 mm (0,065 pc), n° de cat. 82-611.
MISE EN GARDE : N'utiliser que tes accessoires recommandes avec te coupe-bordure.
L'utilisation de tout autre accessoire peut etre dangereuse. N'utitiser que de la ficelle en
nylon & traitement special monofitament de 1,65 mm (0,065 pc) de diametre de
Black & Decker avec te coupe-bordure.
NOTE : Toujours mentionner les codes de date dans ta correspondance. It s'agit d'un
numero compose de 4 ou 5 chiffres qui est imprime sur l'etiquette de la plaque signaletique
sur le carter du moteur.
ADVERTENCIA:Siempre que emplee herramientas electricas, debe seguir ciertas medidas
de precaucion para reducir los riesgos de incendio, choque electrico y lesiones. Entre estas medidas se
encuentran las siguientes:
ADVERTENCIA:Parte eel polvo originado por este producto contiene quimicos qua an el
Estado de California se consideran como causantes de cancer, defectos congenitos u otros da_os
reproductivos. Algunos ejemplos de estos quimicos son:
• compuestos en fertilizantes
• compuestos en insecticidas, herbicidas y pesticidas
• arsenico y cromo de madera tratada quimicamente
Para reducir su exposici6n a estos quimicos, utilice equipo de seguridad aprobado como mascaras
contra polvo dise_adas especificamente para filtrar particulas microsc6picas.
ADVERTENCIA:Este producto contiene quimicos, incluyendo plomo, qua an el Estado
de California se consideran como causantes de cancer y defectos congenitos u otros da_os
reproductivos. Lave sus manos despues de manejarlo.
Z_ PRECAUClON: Emplee la protecci6n personal y auditiva adecuada durante el uso de este
producto. Bajo ciertas condiciones y duraci6n de uso, el ruido producido por este producto puede
contribuir a la perdida auditiva.
1. ANTEOJOS DE SEGURIDAD -- Emplee siempre anteojos de seguridad cuando este conectada la
unidad.
2. GUARDA -- No utilice esta herramienta sin la guarda colocada en su posici6n.
3. LJNEADE NYLON -- Conserve car& manos y pies alejados de la linea giratoria en todo momento. No
se extienda mas alia de la Iongitud indicada en este manual. Emplee pantalones largos para protegerse
las piernas.
4. CONSERVE ALEJADOS A LOS ESPECTADORES -- especialmente a los niSos, a una distancia
segura del area de trabajo.
5. EVITE EL ENCENDIDO ACCIDENTAL -- No empuje la unidad con el dedo en el interruptor siesta
conectada.
6. NO FUERCE LA HERRAMIENTA -- a una velocidad mayor a la que corta con eficacia.
7. EMPLEE LA HERRAMIENTA ADECUADA -- No utilice esta herramienta en tareas para las que no
fue diser_ada.
8. NO SALGA DE BALANCE -- Conserve siempre bien apoyados los pies asi como el equilibrio.
9. ADVERTENClA -- Para evitar el riesgo de choque electrico, utilice solamente cordones de extensi6n
adecuados para intemperie. Conecte siempre las extensiones a una linea protegida por un fusible o por
un interruptor de circuito.
10. NO MALTRATE EL CABLE -- No tire del cable para desconectarlo de la toma de corriente. Conservelo
alejado de objetos calientes; grasas y cantos afilados.
11. CORDONES DE EXTENSION -- Para evitar que el cord6n electrico se desconecte al operar la unidad,
utilice el sujetador como se describe en este manual.
12. DANOS A LA UNIDAD -- Si golpea la unidad o esta se atasca con algen objeto, apaguela
inmediatamente, desconectela y verifique si se produjeron daSos. Si los hay, haga reparar la unidad
antes de intentar volver a usarla. No la utilice si hay alguna pieza rota.
13. DANOS AL CABLE -- Conserve alejado al cable de la linea giratoria. Si dar_ael cordSn electrico,
desconectelo de la toma de corriente antes de mover la unidad o examinar el daSo. El cable daSado
debe reemplazarse antes de usar de nuevo la herramienta.
14. DESCONECTE LA HERRAMIENTA -- Cuando no la use, cuando cambie la linea de nylon o antes de
limpiar la unidad.
15. VlSTASE ADECUADAMENTE -- No utilice la herramienta siesta descalzo o si calza sandalias
descubiertas. Use siempre calzado con suela de goma.
16. EVlTE CONDICIONES AMBIENTALES PELIGROSAS -- No utilice herramientas electricas en lugares
hOmedos o inundados. Siga todas las instrucciones contenidas en este manual para el funcionamiento
adecuado de su herramienta.
17. NO UTILICE LA CORTADORA DE CI-SPED BAJO LA LLUVIA.
18. NO UTILICE herramientas electricas portatiles en atm6sferas gaseosas o explosivas. Los motores de
estas herramientas producen chispas que pueden encender los gases.
19. GUARDE LAS HERRAMIENTAS QUE NO EMPLEE BAJO TECHO -- Las herramientas que no se
emplean deben guardarse bajo techo en un lugar seco y bajo Ilave, lejos del alcance de los niSos.
20. LA LINEA GIRATORIA DESEMPENA UNA FUNCION DE CORTE -- Tenga cuidado cuando corte
alrededor de cercas y plantas..
21. UTILICE UNICAMENTE LA LINEA DE REPUESTO RECOMENDADA -- No utilice linea mas gruesa o
de otro material, por ejemplo alambre de metal, linea para pescar o algOn otro material similar.
GUARDEESTASINSTRUCCIONES
Clavijapolarizada
Se emplean clavijas polarizadas (con una pata mas ancha que la otra) para reducir los riesgos
de choque electrico. Cuando el cord6n electrico cuente con este tipo de clavija, ajustara en un
contacto polarizado solamente de una manera. Si la clavija no ajusta completamente en su
Su herramienta esta DOBLEMENTE AISLADA y le brinda proteccion a5adida. Esto significa que
se ha fabricado de manera integral con dos "capas" separadas de aislamiento electrico entre
usted y el sistema electrico que contiene.
Las herramientas que cuentan con este sistema de aislamiento no requieren conectarse a tierra.
Como resultado, su unidad esta equipada con una clavija de dos patas que puede conectarse a
cualquier toma de corriente de 120 volts sin preocuparse por tener una conexion a tierra.
NOTA: EL DOBLE AtSLAMIENTO no sustituye a las precauciones normales de seguridad
cuando se opera esta herramienta. La finalidad de este sistema de aislamiento es ofrecer a
usted
protecci6n a_adida contra la lesion resultante de fallas en el aislamiento electrico interno de la
herramienta.
PRECAUClON: Cuando efectQe servicio a herramientas con doble aislamiento, UTILICE
PARTES DE REEMPLAZO tD¢:NTICAS. Repare o reemplace los cordones electricos da5ados.
UNACARACTER|STICAIMPORTANTEPARAELCONSUMIDOR
contacto, inviertala. Si aOn asi no ajusta, Ilame a un electricista calificado para que le instale un
contacto polarizado apropiado. No modifique o haga cambios en la clavija per ningQn motive.
CordonesdeextensiGn
AsegQrese que su cord6n de extension este en
buenas condiciones. Cuando emplee una
extension asegQrese que tenga el calibre
adecuado por seguridad y para evitar perdidas de
potencia y sobrecalentamiento. La tabla
muestra el calibre correcto que debe utilizarse de
acuerdo con la Iongitud y el amperaje indicado en
la placa de identificaci6n de la herramienta. Si
tiene dudas, utilice el calibre siguiente. Mientras
mas peque5o sea el nQmero del calibre, mayor
sera este.
Instrucciones de Ensamblaje
Coloque las secciones come se muestra.
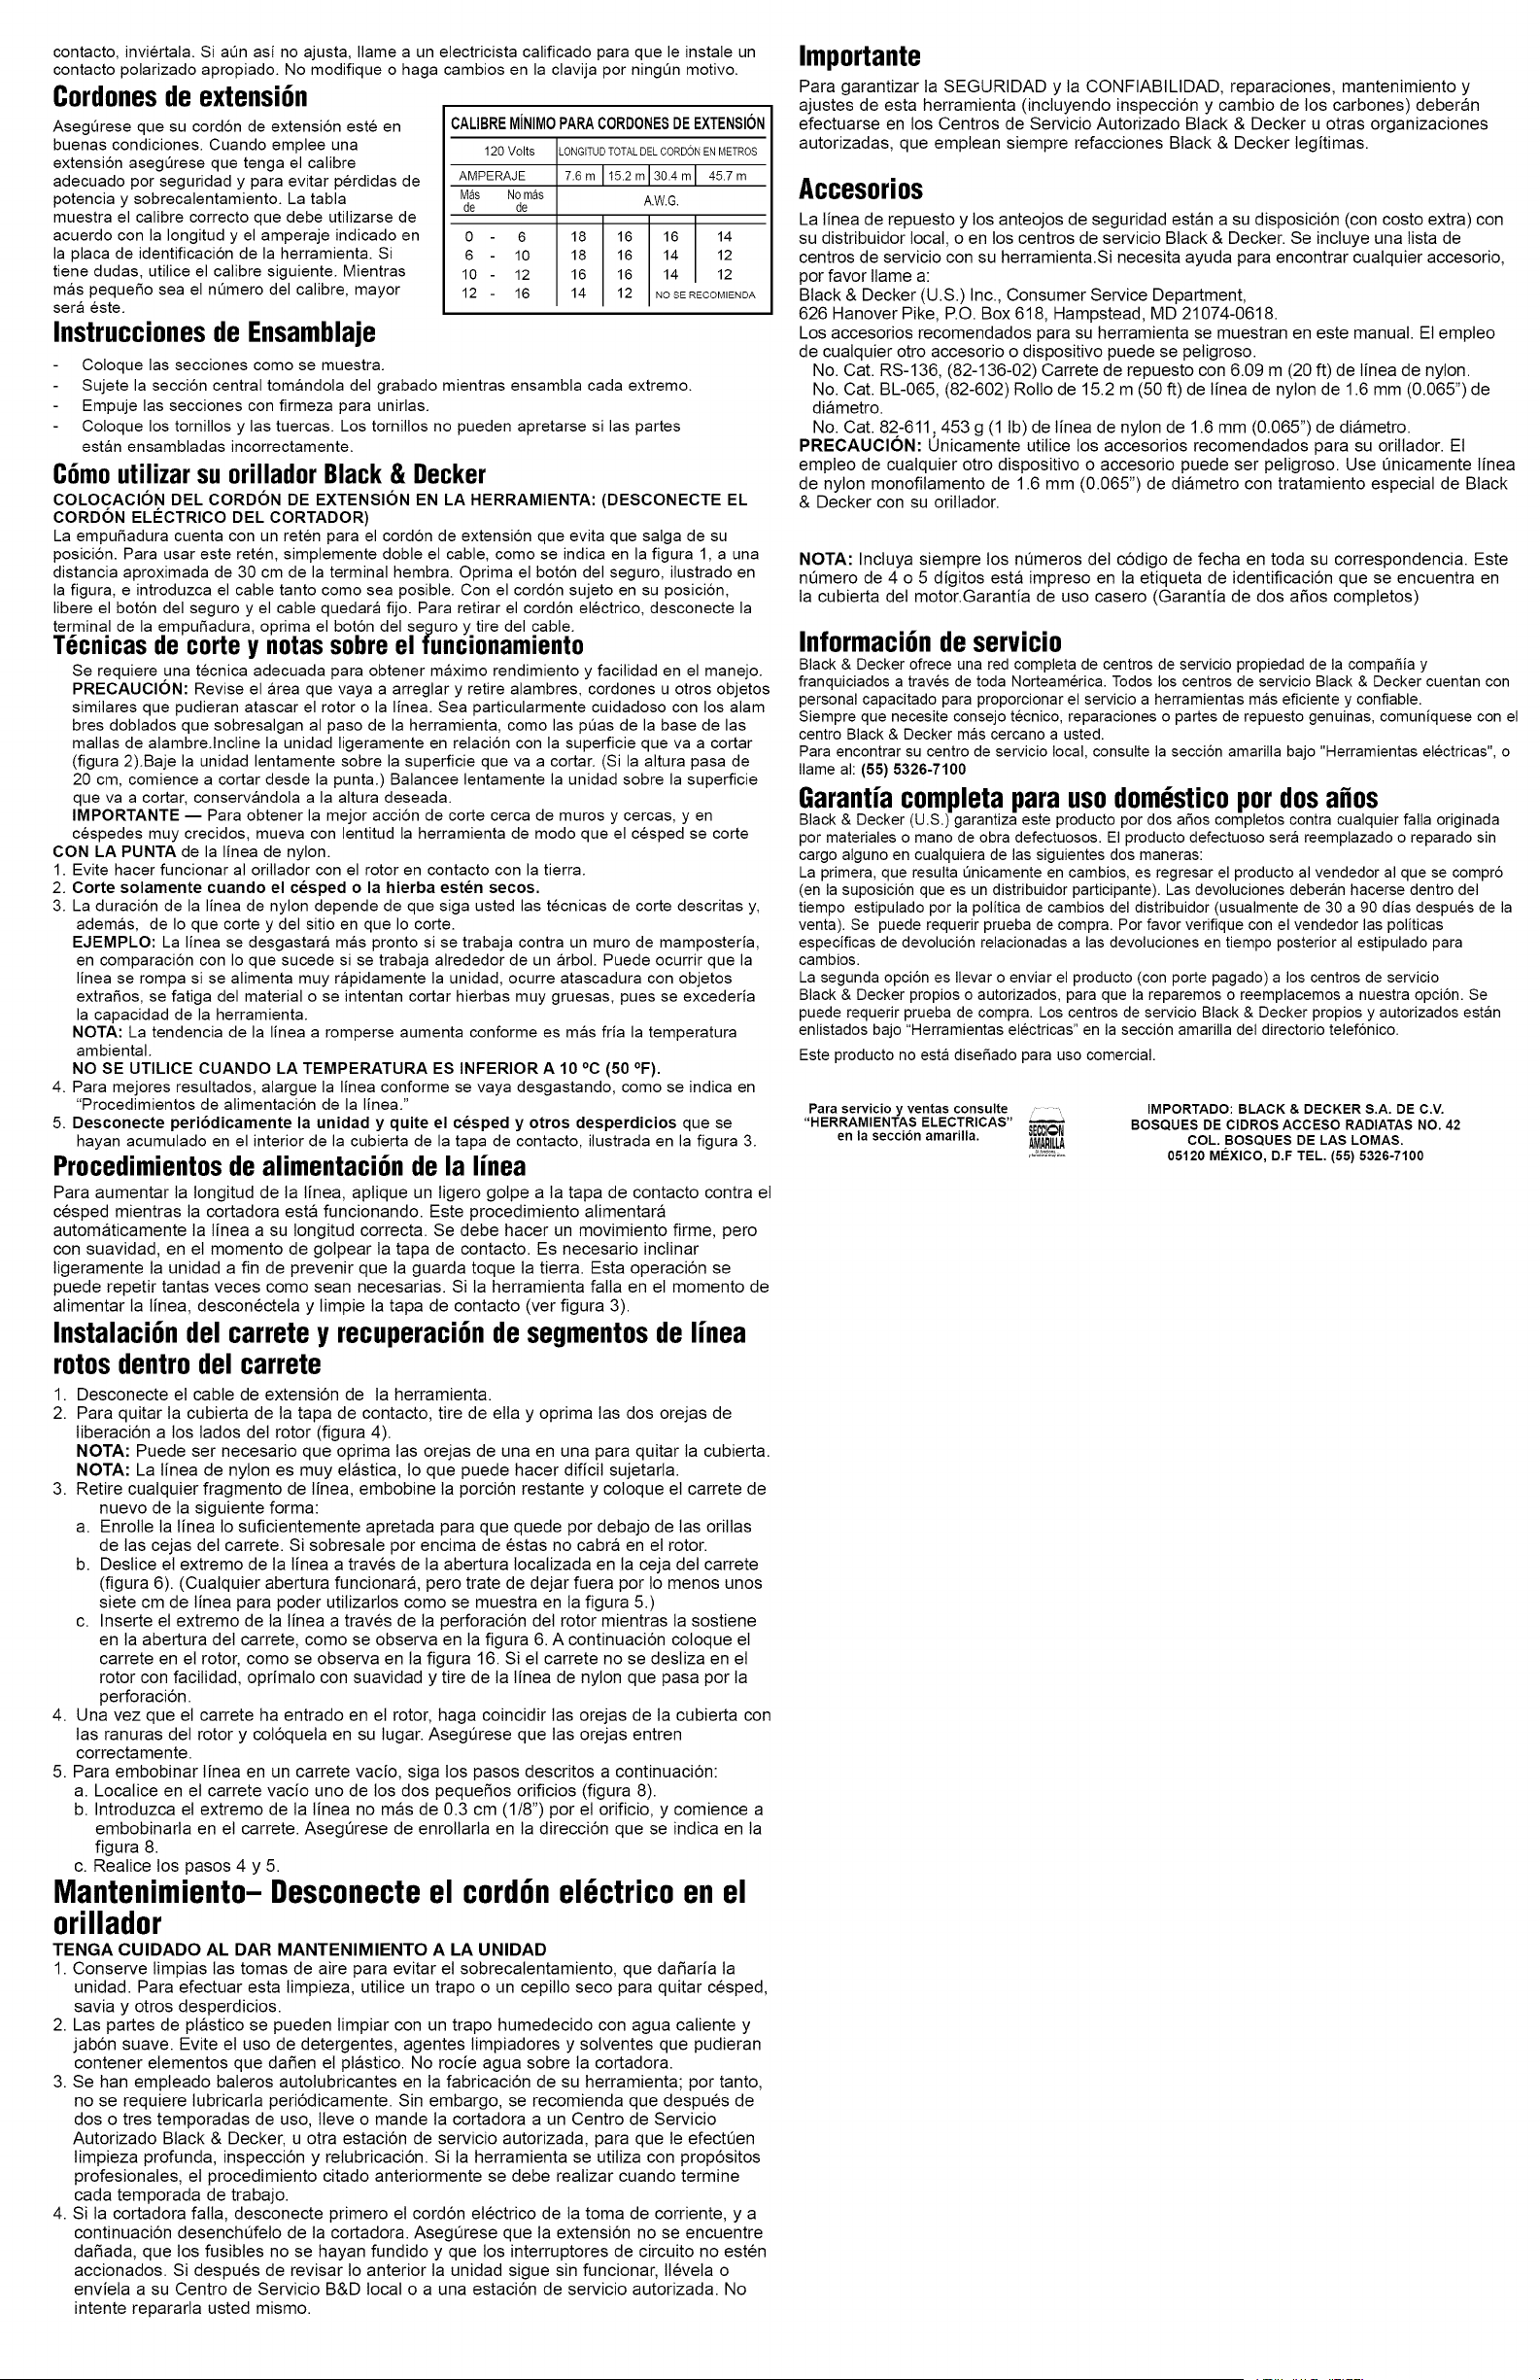
CALIBREMiNIMOPARACORDONESDE EXTENSION
120 Volts
AMPERAJE
Mas Nomas
de de
0 6
6 10
10 - 12
12 - 16
_ONGITUDTOTALDELCORDONENMETROS
7.6m 152m 30.4m 45.7m
A,W.G.
18 16 16 14
18 16 14 12
16 16 14 12
14 12 NOSERECOMIENDA
Sujete la seccion central tomandola del grabado mientras ensambla cada extremo.
Empuje las secciones con firmeza para unirlas.
Coloque los tornillos y las tuercas. Los tornillos no pueden apretarse si las partes
estan ensambladas incorrectamente.
CGmoutilizar su orillador Black & Decker
COLOCACION DEL CORDON DE EXTENSION EN LA HERRAMIENTA: (DESCONECTE EL
CORDON ELC:CTRICO DEL CORTADOR)
La empu5adura cuenta con un reten para el cord6n de extension que evita que salga de su
posici6n. Para usar este reten, simplemente doble el cable, come se indica en la figura 1, a una
distancia aproximada de 30 cm de la terminal hembra. Optima el bot6n del seguro, ilustrado en
la figura, e introduzca el cable tanto come sea posible. Con el cord6n sujeto en su posicion,
libere el bot6n del seguro y el cable quedara fijo. Para retirar el cordon electrico, desconecte la
terminal de la empu5adura, optima el bot6n del seguro y tire del cable.
TGcnicas de carte y notas sabre el funcionamiento
Se requiere una tecnica adecuada para obtener maximo rendimiento y facilidad en el manejo.
PRECAUClON: Revise el area que vaya a arreglar y retire alambres, cordones u otros objetos
similares que pudieran atascar el rotor o la linea. Sea particularmente cuidadoso con los alam
bres doblados que sobresalgan al paso de la herramienta, como las pQas de la base de las
mallas de alambre.lncline la unidad ligeramente en relacion con la superficie que va a cortar
(figura 2).Baje la unidad lentamente sobre la superficie que va a cortar. (Si la altura pasa de
20 cm, comience a cortar desde la punta.) Balancee lentamente la unidad sobre la superficie
que va a cortar, conservandola a la altura deseada.
IMPORTANTE -- Para obtener la mejor accion de corte cerca de muros y cercas, yen
cespedes muy crecidos, mueva con lentitud la herramienta de mode que el cesped se corte
CON LA PUNTA de la linea de nylon.
1. Evite hacer funcionar al orillador con el rotor en contacto con la tierra.
2. Corte solamente cuando el cesped o la hierba esten secos.
3. La duracion de la linea de nylon depende de que siga usted las tecnicas de corte descritas y,
ademas, de Io que corte y del sitio en que Io corte.
EJEMPLO: La linea se desgastara mas pronto si se trabaja contra un muro de mamposteria,
en comparacion con Ioque sucede si se trabaja alrededor de un arbol. Puede ocurrir que la
linea se rompa si se alimenta muy rapidamente la unidad, ocurre atascadura con objetos
extra5os, se fatiga del material o se intentan cortar hierbas muy gruesas, pues se excederia
la capacidad de la herramienta.
NOTA: La tendencia de la linea a romperse aumenta conforme es mas fria la temperatura
ambiental.
NO SE UTILICE CUANDO LA TEMPERATURA ES INFERIOR A 10 °C (50 °F).
4. Para mejores resultados, alargue la linea conforme se vaya desgastando, come se indica en
"Procedimientos de alimentacion de la linea."
5. Desconecte periodicamente la unidad y quite el cesped y otros desperdicios que se
hayan acumulado en el interior de la cubierta de la tapa de contacto, ilustrada en la figura 3.
Procedimientosde alimentaciGnde la linea
Para aumentar ta longitud de la linea, aplique un ligero golpe a la tapa de contacto contra el
cesped mientras la cortadora esta funcionando. Este procedimiento alimentara
automaticamente la linea a su longitud correcta. Se debe hacer un movimiento firme, pero
con suavidad, en el momento de golpear ta tapa de contacto. Es necesario inctinar
ligeramente la unidad a fin de prevenir que la guarda toque ta tierra. Esta operaci6n se
puede repetir tantas veces como sean necesarias. Si la herramienta falla en el momento de
alimentar ta linea, desconectela y timpie ta tapa de contacto (ver figura 3).
InstalaciGn del carrete y recuperaciGn de segmentos de linea
rotos dentro del carrete
1. Desconecte el cable de extensi6n de ta herramienta.
2. Para quitar la cubierta de la tapa de contacto, tire de ella y oprima las dos orejas de
liberaci6n a los tados del rotor (figura 4).
NOTA: Puede ser necesario que oprima las orejas de una en una para quitar la cubierta.
NOTA: La tinea de nylon es muy elastica, to que puede hacer dificil sujetarta.
3. Retire cualquier fragmento de tinea, embobine ta porci6n restante y coloque el carrete de
nuevo de la siguiente forma:
a. Enrolte la linea lo suficientemente apretada para que quede por debajo de tas orillas
de tas cejas del carrete. Si sobresale por encima de estas no cabra en el rotor.
b. Destice el extremo de ta linea a traves de la abertura localizada en la ceja del carrete
(figura 6). (Cualquier abertura funcionar& pero trate de dejar fuera por to menos unos
siete cm de linea para poder utilizartos como se muestra en la figura 5.)
c. Inserte el extremo de ta linea a traves de ta perforaci6n del rotor mientras ta sostiene
en la abertura del carrete, como se observa en la figura 6. A continuaci6n cotoque el
carrete en el rotor, como se observa en la figura 16. Si el carrete no se desliza en el
rotor con facilidad, oprimalo con suavidad y tire de la linea de nylon que pasa por la
perforaci6n.
4. Una vez que el carrete ha entrado en el rotor, haga coincidir tas orejas de ta cubierta con
las ranuras del rotor y col6quela en su lugar. Asegt_rese que las orejas entren
correctamente.
5. Para embobinar linea en un carrete vacio, siga los pasos descritos a continuaci6n:
a. Localice en el carrete vacio uno de los dos pequefios orificios (figura 8).
b. Introduzca el extremo de ta linea no mas de 0.3 cm (1/8") por el orificio, y comience a
embobinarla en el carrete. Asegt_rese de enrollarla en la direcci6n que se indica en la
figura 8.
c. Realice los pasos 4 y 5.
Mantenimiento- Desconecte el cordGnel ctrico en el
orillador
TENGA CUIDADO AL DAR MANTENIMIENTO A LA UNIDAD
1. Conserve timpias tas tomas de aire para evitar el sobrecalentamiento, que dafiaria la
unidad. Para efectuar esta limpieza, utilice un trapo o un cepillo seco para quitar cesped,
savia y otros desperdicios.
2. Las partes de plastico se pueden limpiar con un trapo humedecido con agua caliente y
jab6n suave. Evite el uso de detergentes, agentes timpiadores y solventes que pudieran
contener elementos que darien el plastico. No rocie agua sobre ta cortadora.
3. Se han empteado baleros autolubricantes en ta fabricaci6n de su herramienta; por tanto,
no se requiere tubricarta peri6dicamente. Sin embargo, se recomienda que despues de
dos o tres temporadas de uso, tteve o mande ta cortadora a un Centro de Servicio
Autorizado Black & Decker, u otra estaci6n de servicio autorizada, para que le efectQen
limpieza profunda, inspecci6n y relubricaci6n. Si la herramienta se utitiza con prop6sitos
profesionales, el procedimiento citado anteriormente se debe realizar cuando termine
cada temporada de trabajo.
4. Si la cortadora falta, desconecte primero el cord6n electrico de la toma de corriente, y a
continuaci6n desenchL_felo de la cortadora. AsegL_rese que la extensi6n no se encuentre
dafiada, que los fusibles no se hayan fundido y que los interruptores de circuito no esten
accionados. Si despues de revisar to anterior ta unidad sigue sin funcionar, ttevela o
enviela a su Centro de Servicio B&D local o a una estaci6n de servicio autorizada. No
intente repararla usted mismo.
Importante
Para garantizar la SEGURIDAD y ta CONFIABILIDAD, reparaciones, mantenimiento y
ajustes de esta herramienta (incluyendo inspecci6n y cambio de los carbones) deberan
efectuarse en los Centros de Servicio Autorizado Black & Decker u otras organizaciones
autorizadas, que emplean siempre refacciones Black & Decker legitimas.
Accesorios
La linea de repuesto y los anteojos de seguridad estan a su disposici6n (con costo extra) con
su distribuidor local, o en los centros de servicio Black & Decker. Se inctuye una lista de
centros de servicio con su herramienta.Si necesita ayuda para encontrar cualquier accesorio,
por favor flame a:
Black & Decker (U.S.) Inc., Consumer Service Department,
626 Hanover Pike, RO. Box 618, Hampstead, MD 21074-0618.
Los accesorios recomendados para su herramienta se muestran en este manual. El empteo
de cualquier otro accesorio o dispositivo puede se peligroso.
No. Cat. RS-136, (82-136-02) Carrete de repuesto con 6.09 m (20 ft) de linea de nylon.
No. Cat. BL-065, (82-602) Rollo de 15.2 m (50 ft) de linea de nylon de 1.6 mm (0.065") de
diametro.
No. Cat. 82-611_ 453 g (1 tb) de linea de nylon de 1.6 mm (0.065") de diametro.
PRECAUClON: Unicamente utitice los accesorios recomendados para su orittador. El
empleo de cualquier otro dispositivo o accesorio puede ser peligroso. Use Qnicamente linea
de nylon monofitamento de 1.6 mm (0.065") de diametro con tratamiento especial de Black
& Decker con su orillador.
NOTA: Incluya siempre los nQmeros del c6digo de fecha en toda su correspondencia. Este
nQmero de 4 o 5 digitos esta impreso en la etiqueta de identificaci6n que se encuentra en
la cubierta del motor.Garantia de uso casero (Garantia de dos afios completos)
InformaciGnde servicio
Black& Decker ofrece una redcompleta de centrosde servicio propiedadde la compafiia y
franquiciados a traves de toda Norteamerica.Todos los centros de servicio Black& Decker cuentan con
personalcapacitado para proporcionar el servicio a herramientasmas eficiente y confiable.
Siempreque necesite consejotecnico, reparaciones o partes de repuesto genuinas,comuniquese con el
centro Black & Decker mas cercano a usted.
Para encontrarsu centro de servicio local, consulte la secci6n amarilla bajo "Herramientaselectricas", o
Ilameal: (55) 5326-7100
Garantia completa para use domGsticoper dos aries
Black& Decker (U.S.)garantiza este producto pordos afios completos contra cualquierfalla originada
por materialeso mano de obra defectuosos. El productodefectuoso sera reemplazadoo reparado sin
cargo alguno en cualquiera de las siguientesdos maneras:
La primera,que resulta Qnicamenteen cambios, es regresar el productoal vendedor al que secompr6
(en la suposici6n quees un distribuidor participante). Lasdevoluciones deberanhacerse dentro del
tiempo estipulado por la politica de cambios del distribuidor (usualmente de 30 a 90 dias despues de la
venta). Se puederequerir prueba de compra. Porfavor verifique con elvendedor las politicas
especificas de devoluci6n relacionadasalas devoluciones en tiempo posterior al estipuladopara
cambios.
La segundaopci6n es Ilevaro enviar el producto (conporte pagado)a los centros de servicio
Black& Decker propios oautorizados, para que la reparemos o reemplacemos a nuestraopci6n. Se
puede requerir prueba de compra. Los centrosde servicio Black& Decker propios y autorizados estan
enlistados bajo "Herramientaselectricas" en la secci6n amarilla deldirectorio telef6nico.
Este productono esta disefiado para uso comercial.
Para servicio y ventas consulte ..... ,
"HERRAMIENTAS ELECTRICAS"
en la seccibn amarilla. SEC_l@rt
_M_R!_L_
IMPORTADO: BLACK & DECKER S.A. DE C.V.
BOSQUES DE ClDROS ACCESO RADIATAS NO. 42
COL. BOSQUES DE LAS LOMAS.
05120 MI_XICO, D.F TEL. (55) 5326-7100