Loading ...
ANTI -TIP INSTALLATION
FOR DROP- IN ONLY
Attachment
Anchored to
Wall Stud Is
Required
Anti-Tip
Bracket
Attachment
To Engage
Bracket By 1/2" Min.
Position #5
1-1/2"
10 - 3/8"
Attachment
*
Wire
Cover
Wall
Stud
Glass Maintop
Interior Wall
Countertop
Surface
Installation Instructions
Installation for Drop-In Range
B
B1
B2
B3
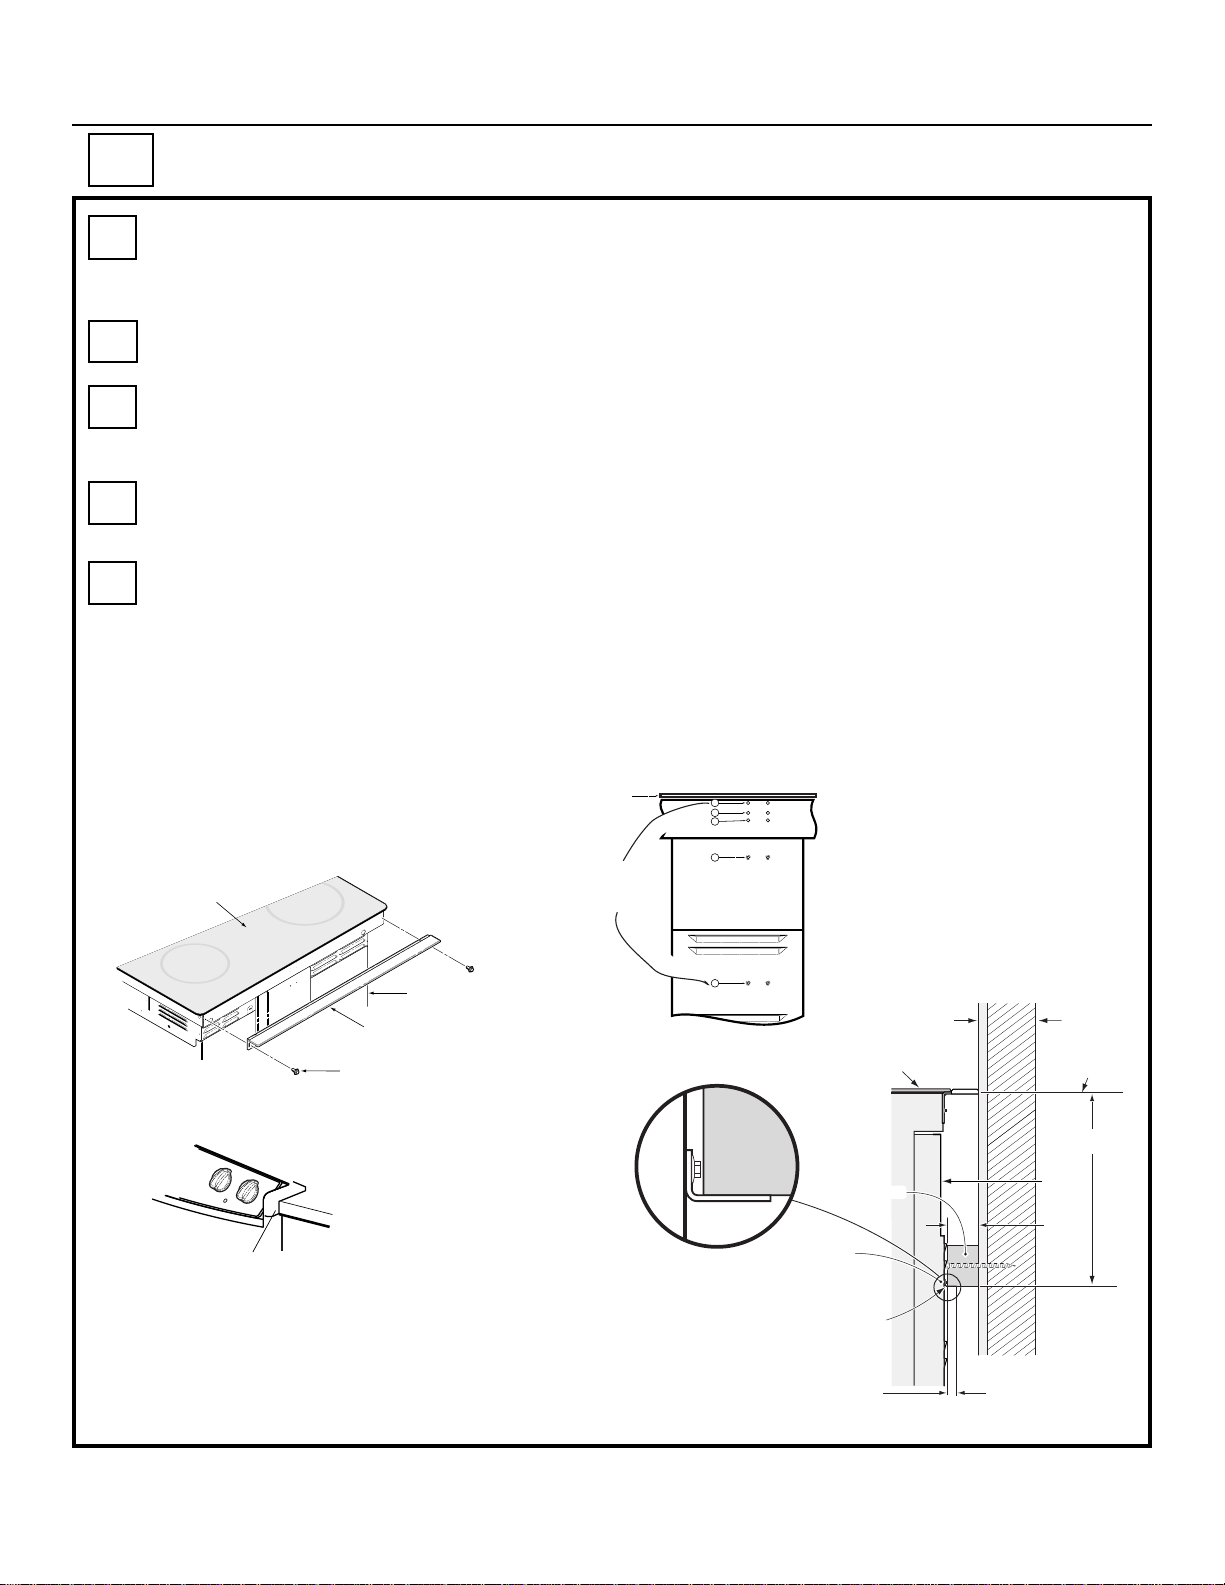
When the filler is being attached to the Drop-In Range, the anti tip bracket must be moved to the
lower location No. 5 and proper attachments to the wall must be made to assure that the anti tip
bracket engages below the attachment. See Figure 2 below. (Attachment must withstand
200lbs.of force at the engagement point)
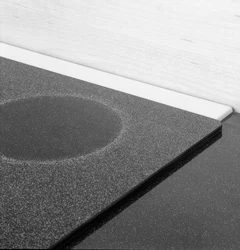
Prior to installing the range, place the metal filler piece to the back of the range as shown in
Figure 1.
Start the 2 screws through the slots in the trim, into the upper holes at the outside rear of the
range above the louvers. Hold the filler piece centered on the glass cooktop and push upward to
close the gap between the bottom of the glass and the filler trim.
When the trim is set in the proper position, tighten the 2 mounting screws.
The top of the trim should be located below the top surface of the glass to prevent pots, pans
and skillets from damaging the painted part.
B4
B5
Refer to the Drop-In Installation Instruction to complete the installation of the range in the cutout
area.
Pub. No. 31-10453
229C4053P433
Note: When the range is installed the filler bracket should fill the gap completely. If a small gap occurs,
the front of the countertop may be cut back slightly in the control panel area to close the gap. The filler
panel is 30” wide to fit between an upswept countertop and does not match the outside edge of the
glass. The dimension between the end of the rear filler panel and the edge of the glass is approx. 5/8”
on each side.
Maintop Filler
Range
Cooktop
(
2
)
#8 Screws
FIG. 1
Countertop
Make sure the edge
of the countertop fits flush
against the end of the
Front Control Panel
1
2
3
4
5
Anti-Tip Bracket Location
( Rear of Range )
Glass Cooktop
Move
Anti-Tip bracket
from Position 1
(as supplied)
to Position 5
FIG. 2