Loading ...
Loading ...
Loading ...
38
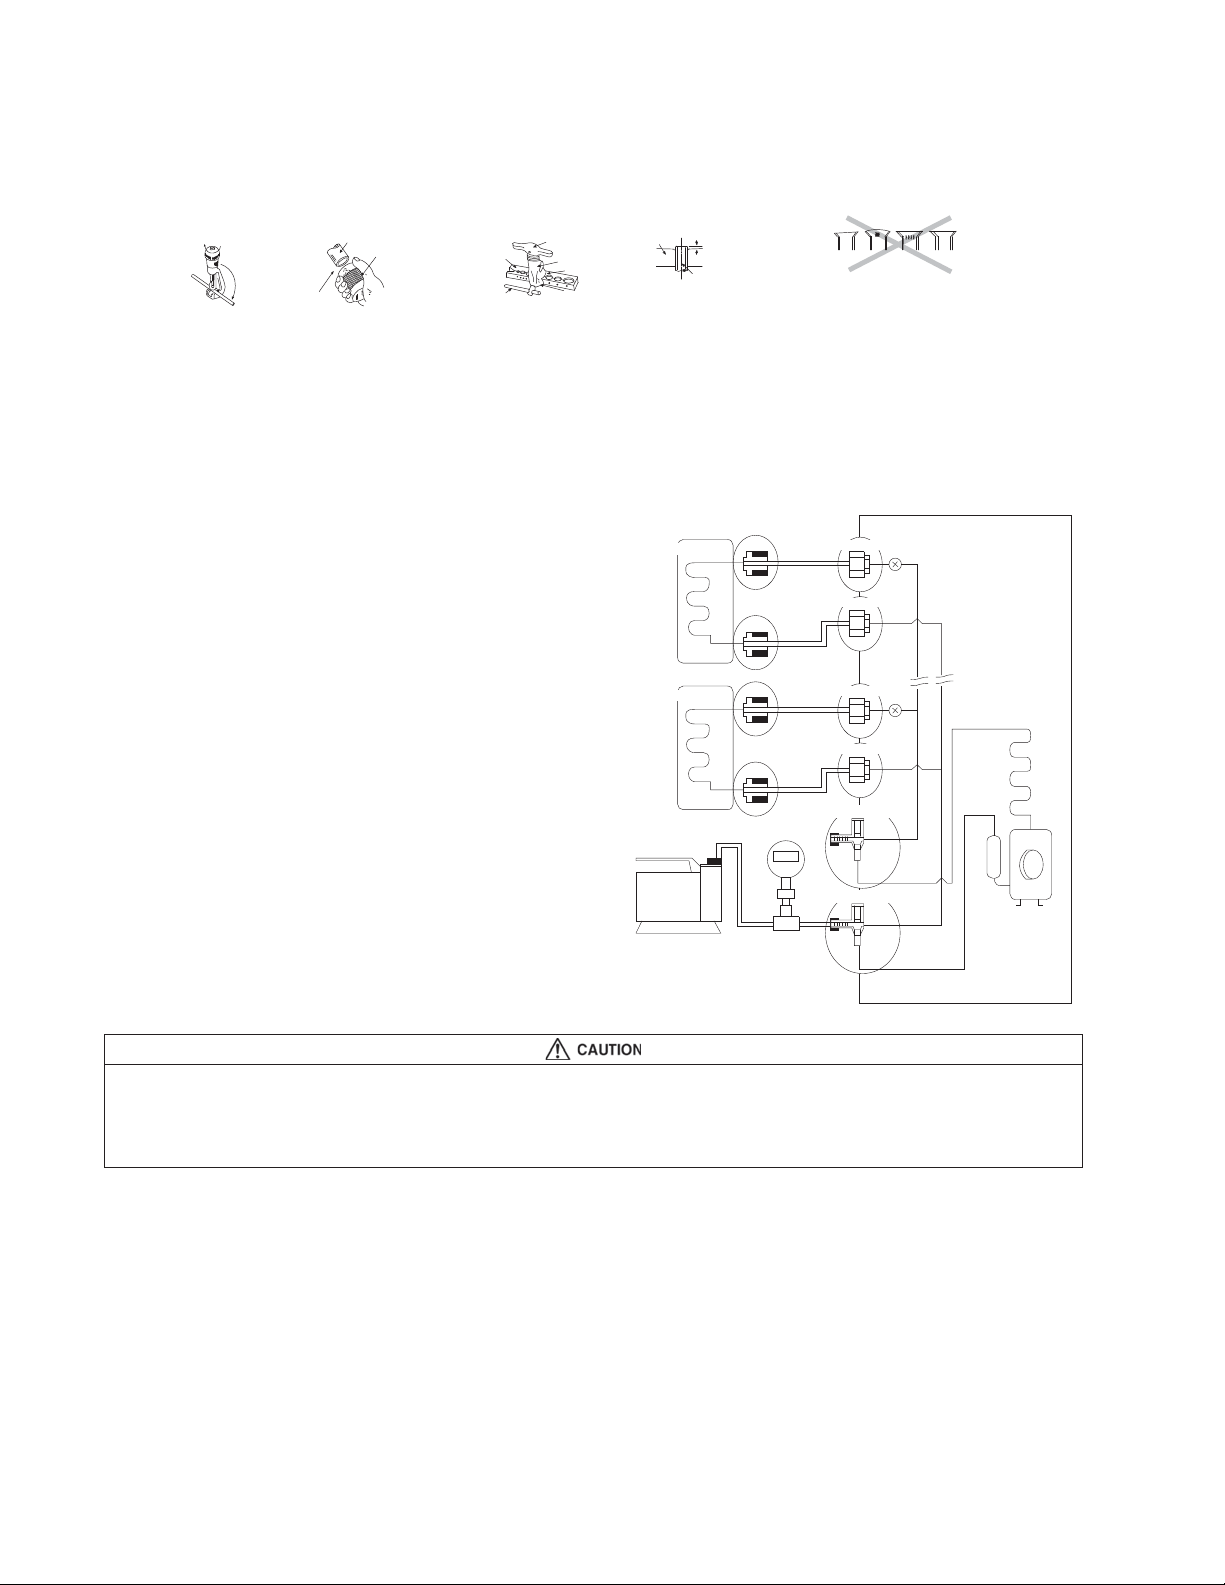
CUTTING AND FLARING THE PIPING
1.
Please cut using pipe cutter and then remove the burrs.
2. Remove the burrs by using a reamer. If burrs are not removed, gas leakage may occur.
Turn the piping end down to avoid the metal powder entering the pi
pe.
3.
Please make flare after inserting the flare nut onto the copper pipe
s.
10.2.4 Evacuation Of The Equipment
WHEN INSTALLING AN AIR CONDITIONER, BE SURE TO EVACUATE THE AIR INSIDE THE INDOOR UNIT AND
PIPES in the following procedure.
1.
Connect a charging hose with a push pi
n to
the Low
side of a charging set and the
service
port of the ga
s side
3-way valve.
2.
Connect the micron gauge between
vacuum
pump an
d service port of outdoor units.
3.
Turn on the power switch of the vacuum
pump
and ma
ke sure to conn
ect the digital micron
gaug
e and to lower to a value of 500 micron
s.
4.
Make sure micron gauge indicates a value of
500 micro
ns and close the low side
valve of
the cha
rging set and turn off the vacuum
pump.
5.
Disconnect the vacuum pump house from
the
servi
ce port of the 3-way valve.
6.
Tighten the service port caps of gas side
3-way valve at a torque of 13.3 Ibf•ft (18 N•m)
with a torque wrench.
7.
Remove the valve caps of both the 2-wa
y
valve and 3-way valve. Position both of the
valves to “Op
en” using a hexagonal wren
ch
(5/32" (4 mm)).
8.
Mount valve caps onto the 2-way valve and
3-
way valve.
o
Be sure to check for gas leakage.
If micron gauge value does not descend 500 microns, take the following measures:
-
If the leak stops when the piping connections are tightened further, continue working from step e
.
-
If the leak does not stop when the connections are retightened, re
pair location of leak.
-
Do not release refrigerant during piping work for installation and reinstallation.
- Be careful when handling the liquid refrigerant, it may cause frostbite.
Reamer
2. To remove burrs
Point down
Pipe
1. To cut
Bar
0–
1
/
32
"
(0-0.5 mm)
ŶI
m
p
r
o
p
e
r
fl
a
r
in
g
Ŷ
Copper pipe
Inclined Surface
damaged
Cracked Uneven
thickness
3. To flare
Bar
Red arrow mark
Handle
Core
Yo ke
Clamp handle
When properly flared, the internal
surface of the flare will shine evenly
and be of even thickness. Since the
flared part comes into contact with
the connections, carefully check the
fl
a
r
e
d
finish.
Outdoor unit
Liquid side
Gas
side
Vacuum
pump
Liquid side 3-way valve
Gas side 3-way valve
Liquid side
Gas
side
Tube connector
Tube connector
Tube connector
Tube connector
Close
Close
Indoor Unit
Indoor Unit
Loading ...
Loading ...