Loading ...
Loading ...
Loading ...
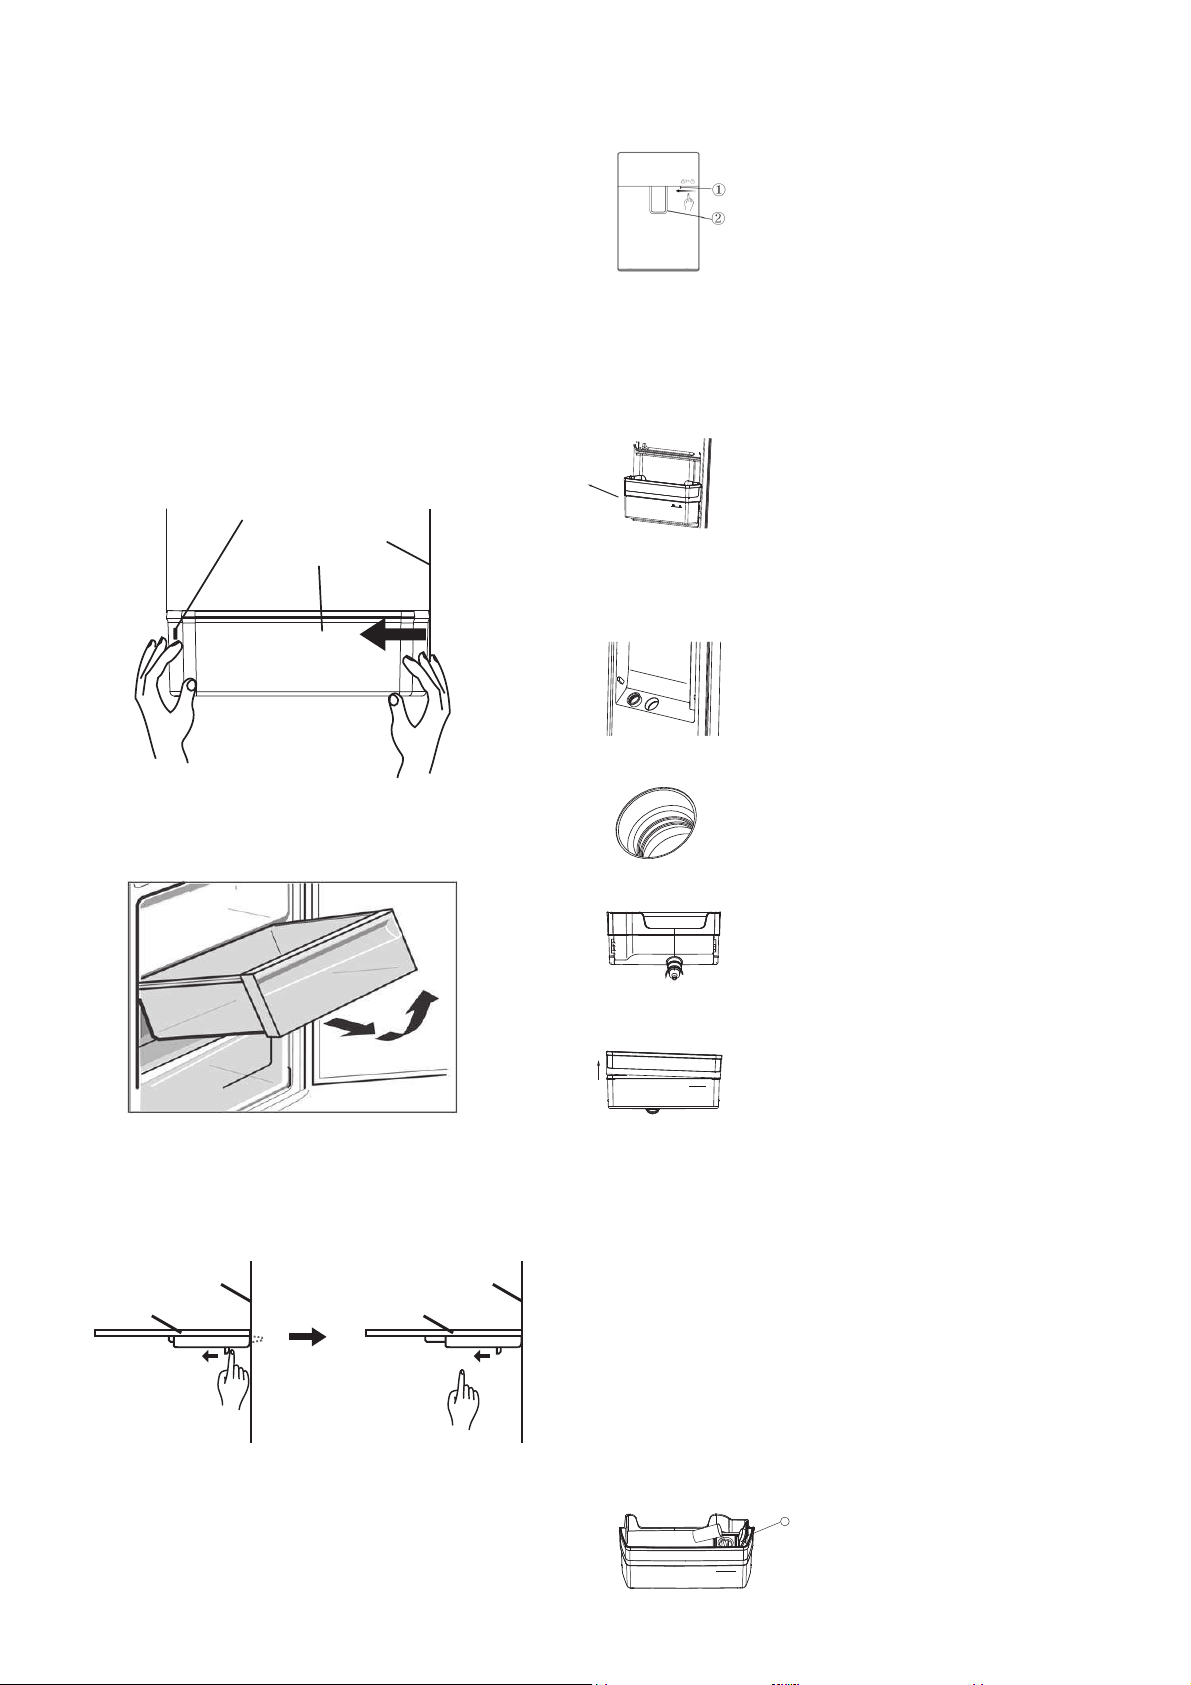
Crisper Bin
You can use the crisper bin to store vegetables, fruit
or smallgoods. To remove, pull it forward then up and
out.
Glass Shelves
When removing the glass shelf, please press the movable
pin under the shelf with both hands and push inward at the
same time. Then the glass shelf will be removed.
10 Features of your refrigerator
Features of your refrigerator
This section tells you how to make the most of the many
useful features and how to clean them.
Door storage bins
Disassembly: Hold both sides of the bottle shelf with both
hands. Push it from the side without the boss and push it
inward as the direction of the arrow. When pushing hard,
please note that the buckle on the edge of bottle shelf is
separated from the groove of the liner. Then bottle shelf
can be removed.
Installation :Hold both sides of the bottle shelf with both
hands. Install the buckle of the boss side at first. Then push
the other side inward slightly, the buckle can be fixed.
Gl
ass shelve
liner of cabinet
Glass shelve
liner of cabinet
Here is a boss on the liner
liner of door bottle
shelf
Instructions for child lock lever
Press the child's lock lever with your thumb as the direction as
below ① and the water lever ② will be locked to prevent children
from taking any water.
Press in the opposite direction to unlock and take water
Instructions for water tank assembly
MAX
2L
1.Hold both sides of the tank with hands and pull
the tank assembly off the door slightly in the
direc
tion indicated as below.
Notes: The transparent silicone parts of the
sealed water valve could be brought out
meantime when removing the water tank. If so,
remove them, and re-install them according to
the following steps.
1-1.Align the sealed part with the hole in the door
and place it in it.
1-2.It will be completed when the step of sealed
part can be fitted to the step in the hole.
2.Rotate counterclockwise to remove the water
valve assembly from the water tank for
cleaning.
3.Pinch the flange of the water tank cover
slightly upwards, and the water tank cover can
be separated from the water tank. Remove
the other side with the same method .The tank
and its cover can
be cleaned after disassembly.
4.Install the water valve by rotating it clockwise
after cleaning. When installing the tank cover,
install the one side at first (do not press it all the
way), then install the other side. Press firmly on
edges of the tank cover to fit the tank. Re-install
the entire water tank assembly at 45° to the
door. Press the outer edge of the water tank
slightly downwards to make it fit into the door.
Fill the tank with pure drink water( * )
1
MAX
2L
Open the inlet cover of water tank①.
Slowly fill the tank with pure drinking
water up to the maximum fill line marked
with “2L”. Then close the inlet cover①.
To prevent any spills, please use a
narrow-bore container to charge water.
*
Only direct drinking water or mineral water can
be stored in the water tank
LED lighting
Your refrigerator is fitted with long life LED lighting.
In the unlikely event the LED lights should fail, then the LED
lights should be serviced by the manufacturer, its service
agent or similarly qualifi ed technician. Refer to the
warranty page for contact details.
Loading ...
Loading ...
Loading ...