
PLEASE READ INSTRUCTIO
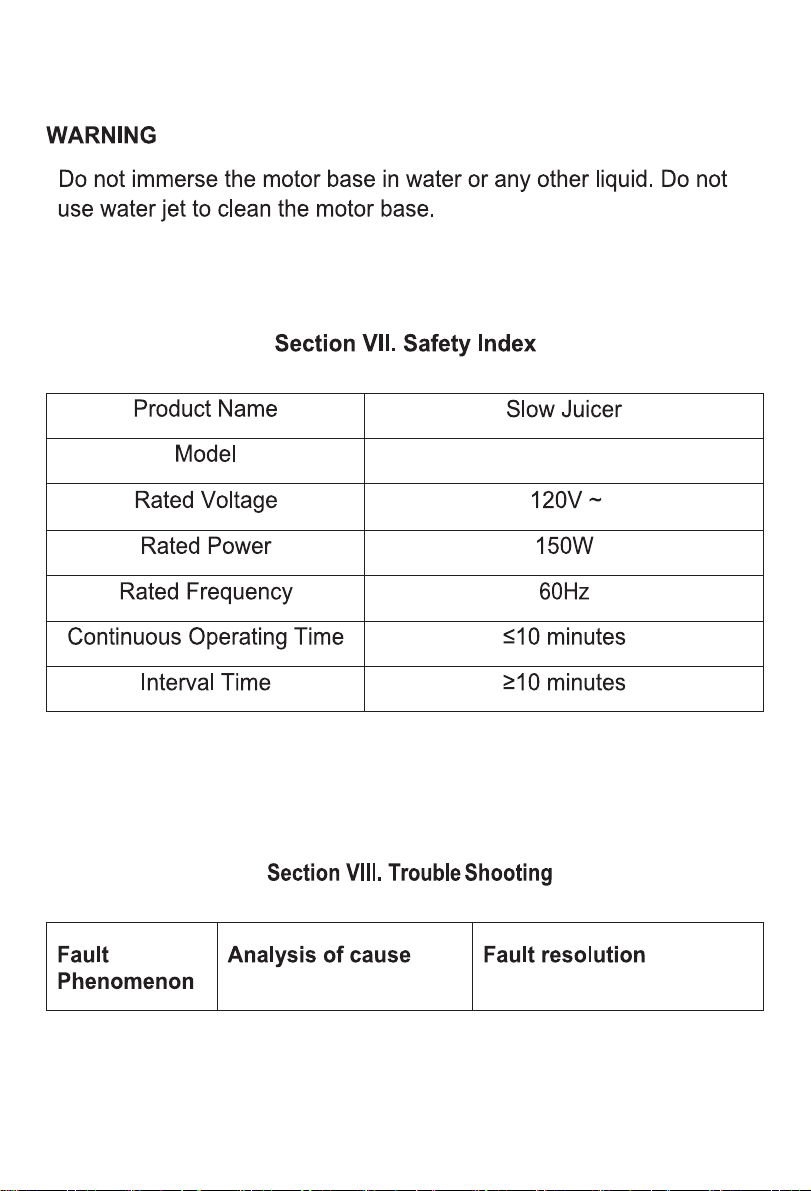
ZM1507
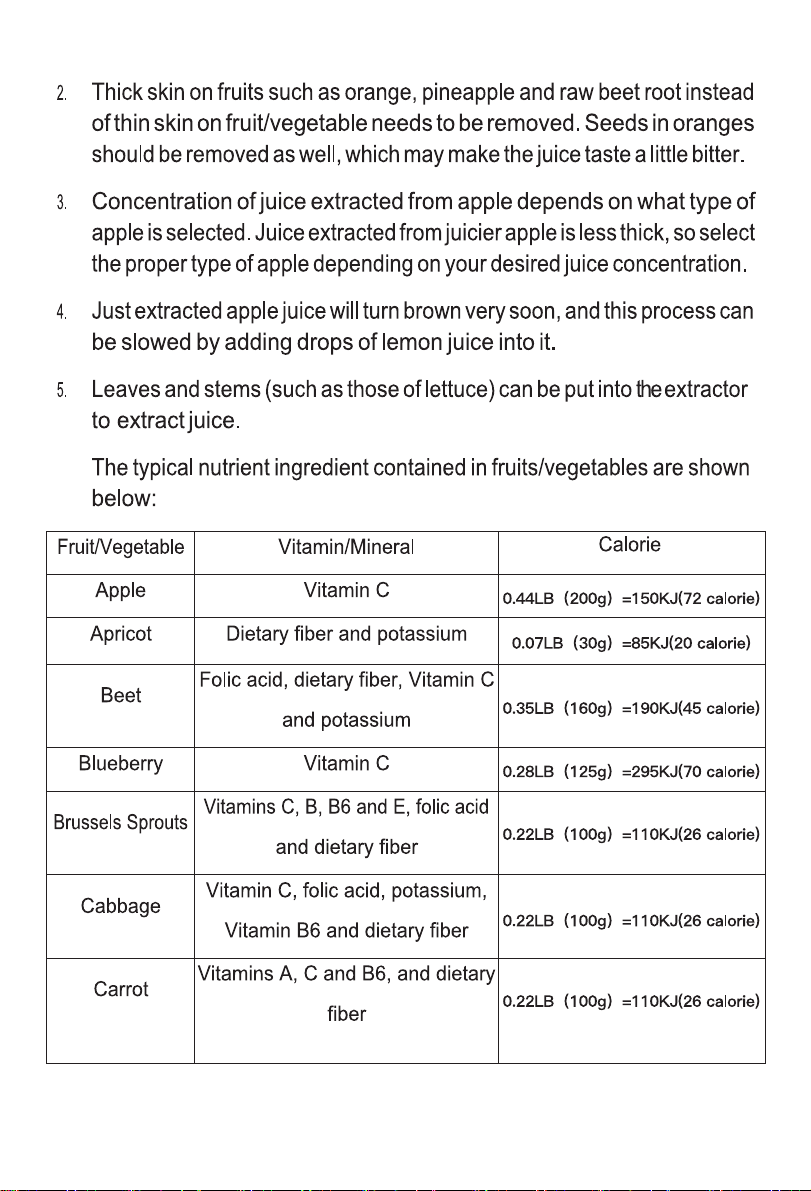
120V 60Hz 150W
NS CAREFULLY BEFORE ASSEMBLY
RETAIN THIS MANUAL FOR FUTURE REFERENCE
12
14
16
16
18
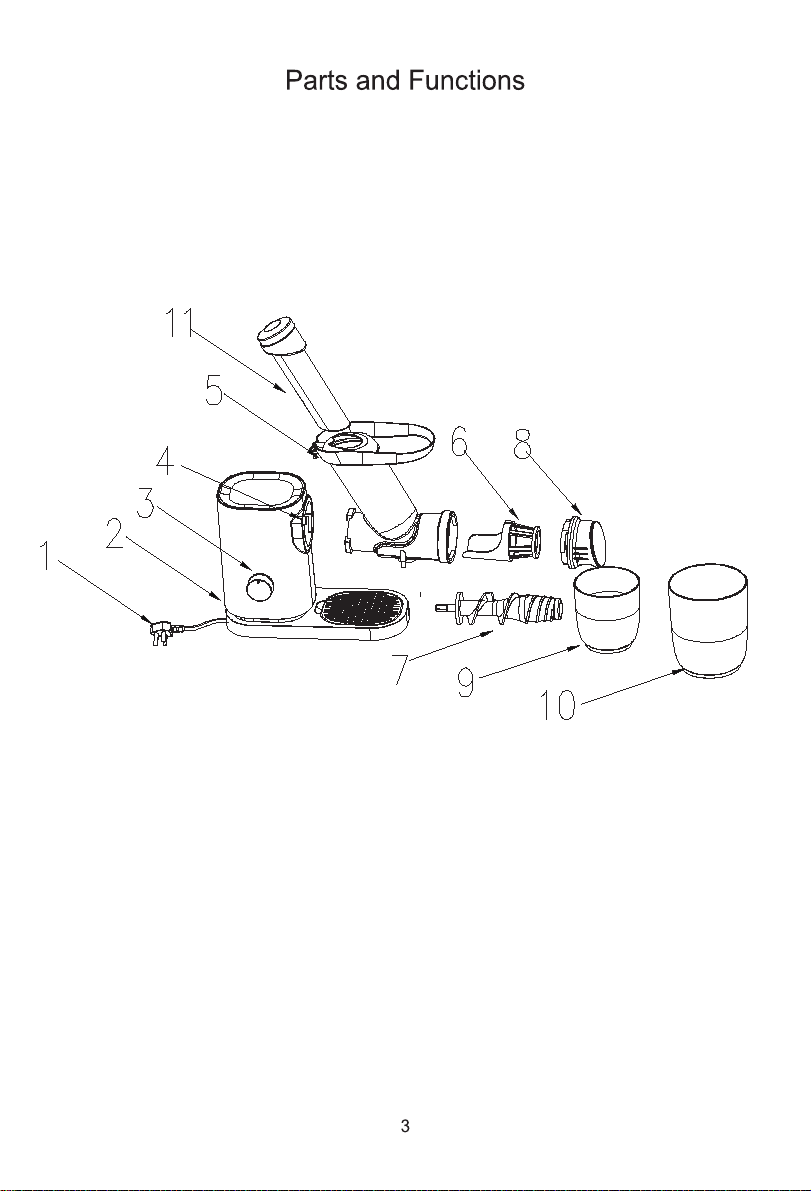
No. Part name Function
Power cord It is used for connecting the power supply to provide power.
Main body As a main part and the power source of the appliance,
Power switch It controls the operating statuses of the appliance.
Locking Button
It is used for locking the drum to prevent it from getting
loose from the main body during use.
Drum
It is a main part for juicing. Food ingredients are loaded from the
Feed Chute at the top and then discharged in forms of juice and
pulp via the juice outlet and the pulp outlet respectively.
Juice strainer
By means of breaking in with the Auger, it is used for grinding
and filtering the extracted food ingredients to get juice
Auger
As a main part for juicing, it is used for conveying food
ingredients and grinding them by breaking in with the
juice strainer or the squeezer.
End cap
It is used for grinding food ingredients by breaking in with the
Auger(For fruits and vegetables).
Juice container It is used to hold and collect juice.
Pulp container It is used for loading Pulps.
Plunger
It is used for squeezing the fed food ingredients gently for
their full contact with the auger and higher juice extraction
efficiency.
Switch operation instructions:
“SOFT”: it is used for juicing soft
food ingredients.
“HARD”:it is used for juicing hard
food ingredients.
“0” : Close and stop
“Rev” : It is used when pulp
discharge blocked or the motor is locked
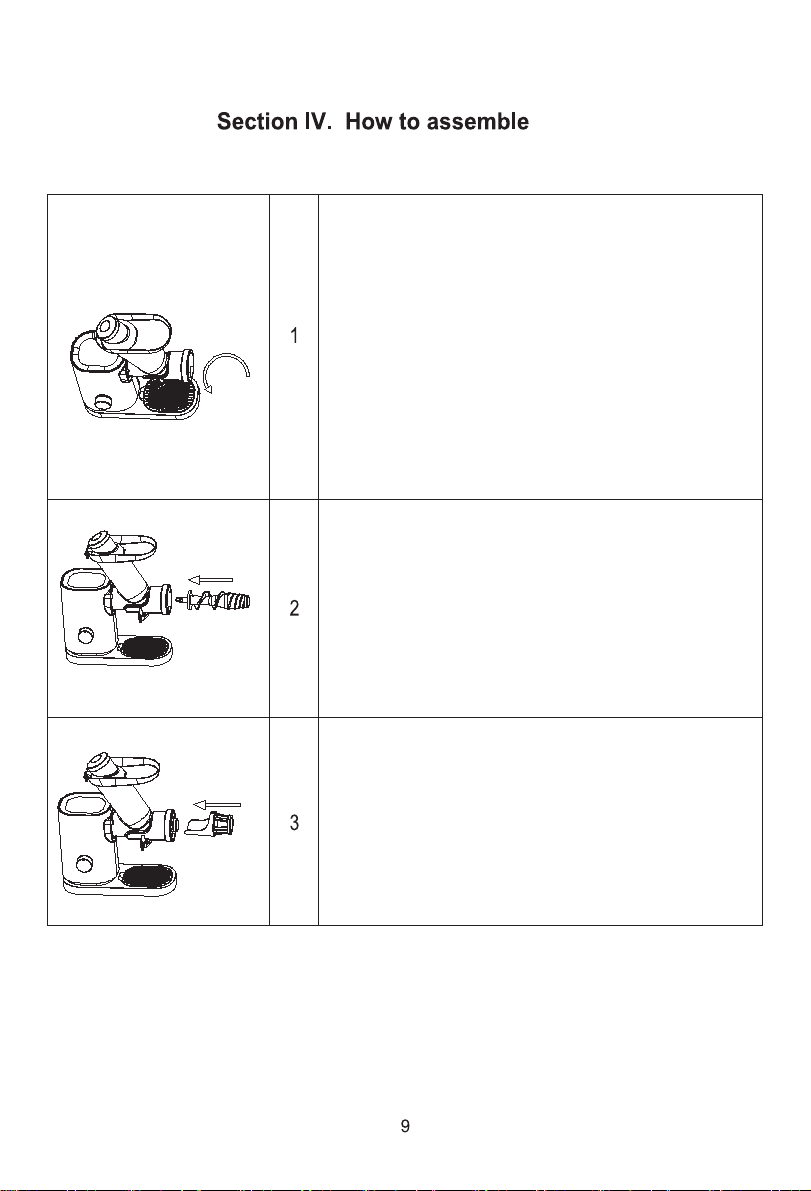
Connect the juicing body and the
main body:1.Have the triangular
aligning sign “▼” on the juicing
body align with the aligning
“unlocking triangular sign” on the
main body and then put the juicing
body into the main body (the three
clips on the juicing body will realize
alignment).Then turn the juicing
body anticlockwise. When there is
a click, it suggests that the
connection is finished.
Have the hexagonal shaft of the Auger
align with the hole on the main body and
push it horizontally until it reaches the
bottom (when alignment fails, just turn
the Augers lightly).
Fit the larger-hole end of the juicer
strainer into the tail of the Auger and
push it while the three clips of the juicer
strainer align with the three clamping
slots in the drum. (The juice strainer is
used with the juicing button in the rear
only. This function is used for juicing.)
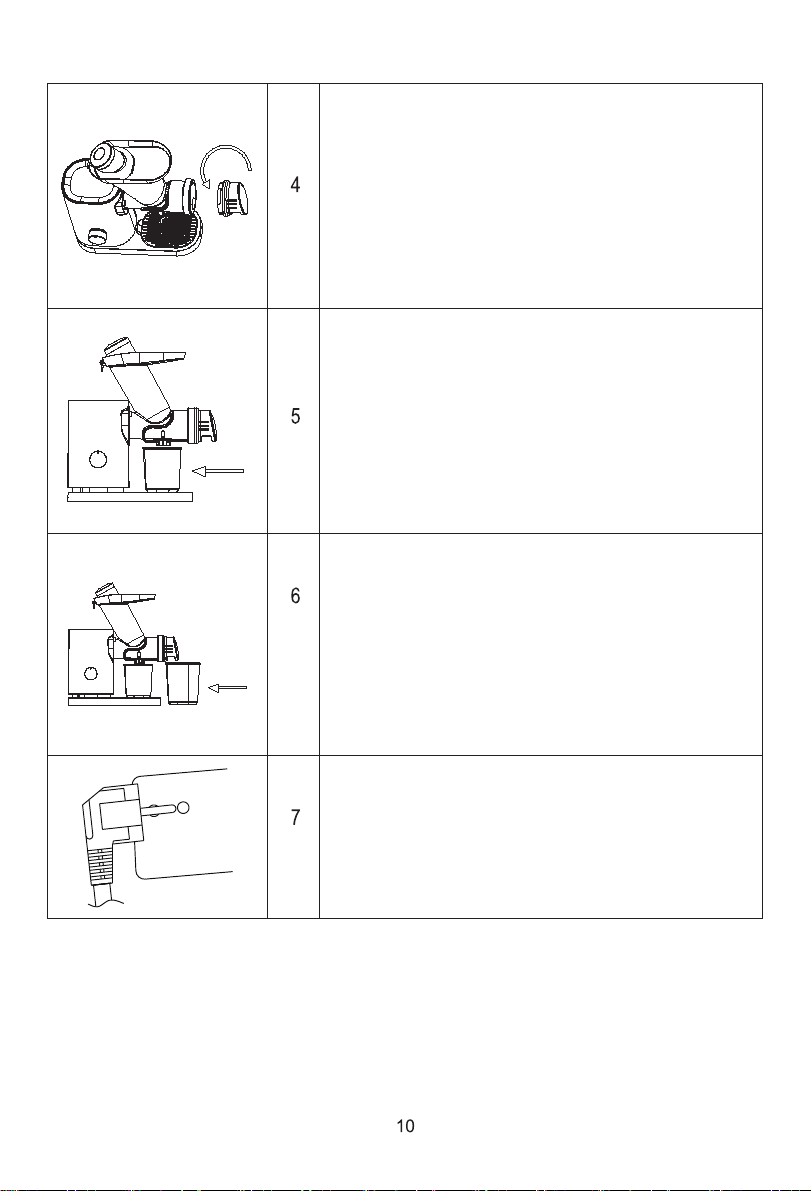
Place the end cap onto the drum
by aligning the triangle alignment
mark “▼” on end cap with the
unlock triangle mark on the drum,
and then rotate the end cap
counter clockwise.
Put the Juice container in the
corresponding groove on the
main body and have its opening
align with the bottom of the juice
outlet of the drum.
Put the pulp container below the
pulp outlet of the drum.
Connect the power supply for use
of the appliance (make sure the
switch is on the OFF position
before the power supply is
connected).
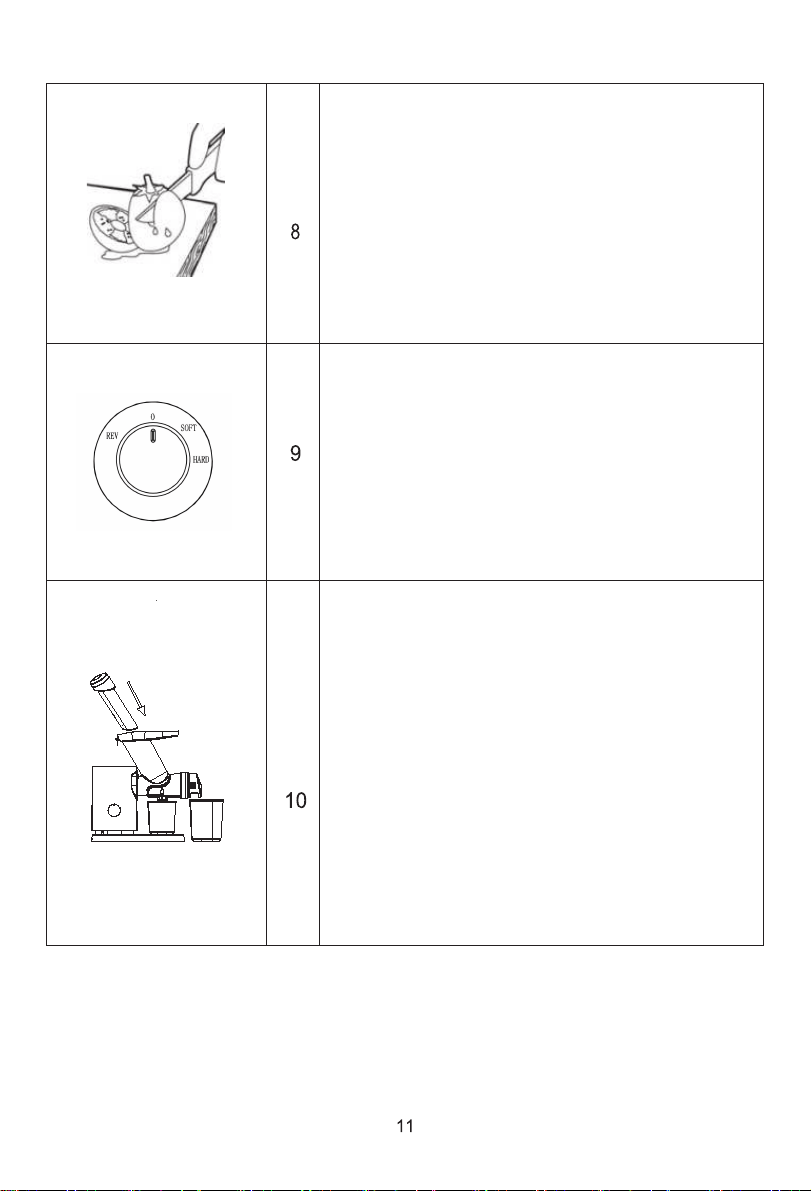
Put food ingredients into the feed
chute on the drum and then push
the food ingredients with help of
the plunger.
After the “SOFT or HARD” button
of the switch is pressed, the
appliance will begin to run for
10 minutes or a shorter time.
Wash vegetables and fruits, cut
them into blocks fitting the size
of the feed port and put them
on the tray.
12
13
14
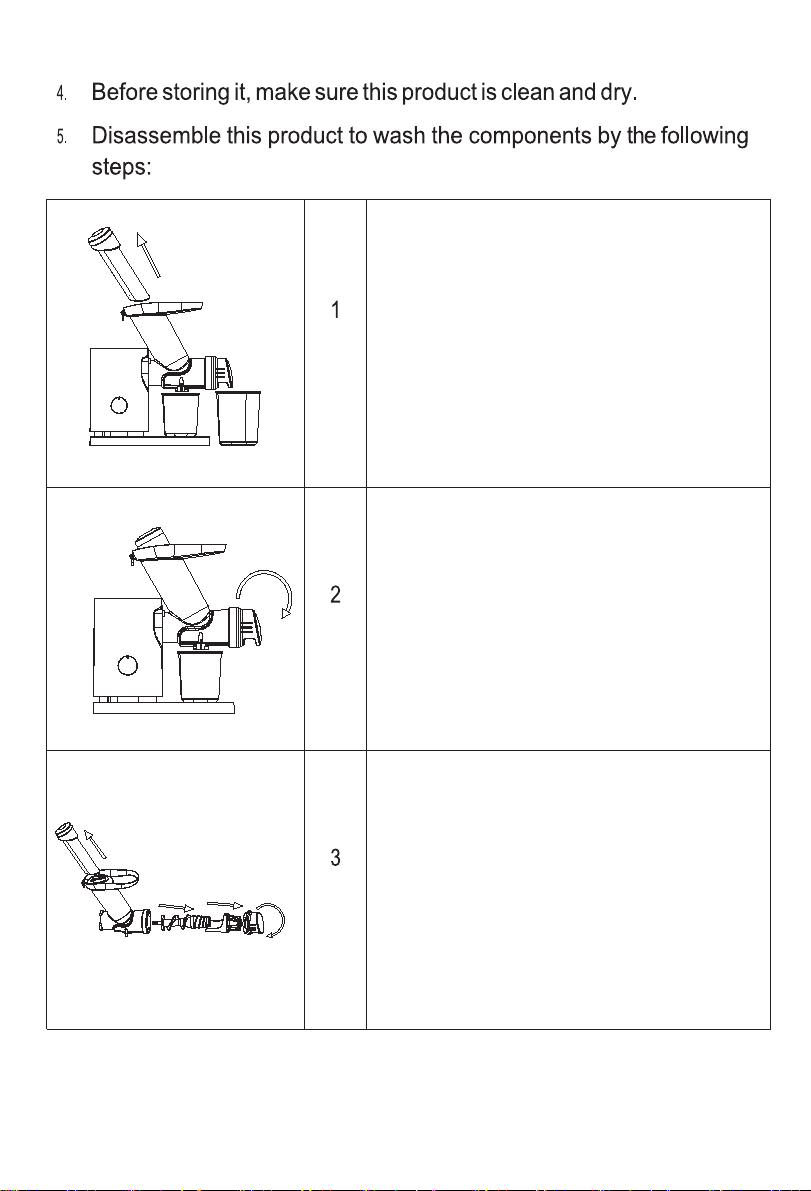
Take down the plunger
Press the locking button on the
side of the drum and turn the
drum clockwise at the same
time to take out the drum.
The drum cannot be dismantled
if the button is not pressed.
After taking down the drum,
take down the juicing button
(or the noodle button and so on),
the tray, the juice strainer (or
the end cap) and the auger in
order. The dismountable parts
may be flushed with clean water.
15
ZM1507
16

17

18