Loading ...
Loading ...
Loading ...
36
OPERATION
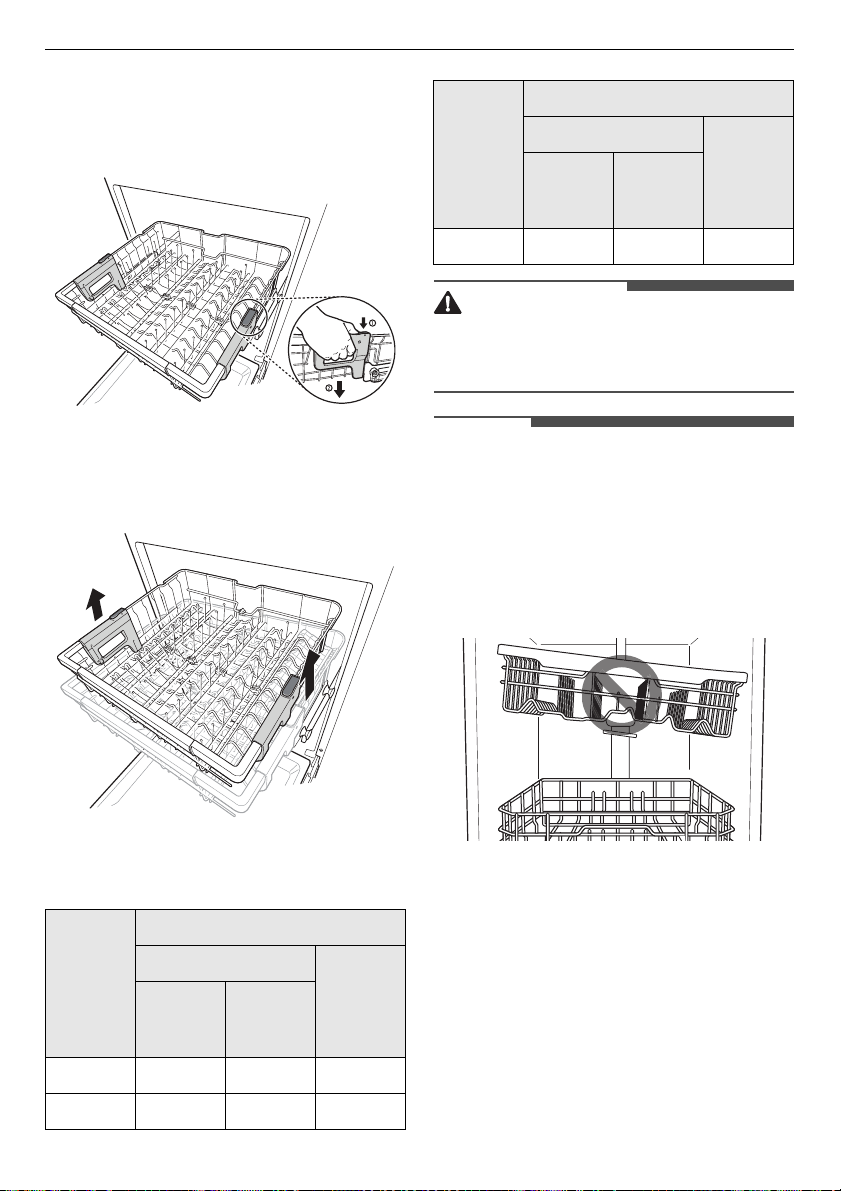
Lowering the Rack
Hold the rack at the centre of each side to support
its weight. Then, push the button on each side to
release the rack and lower it to the lower position.
Raising the Rack
Lift the rack at the centre of each side until the rack
locks into place in the upper position. It is not
necessary to lift the lock levers to raise the rack.
Possible plate size according to the
upper rack position
WARNING
• Before adjusting, ensure the rack is empty of all
dishes. Otherwise dishes may get damaged or
you may get injured.
NOTE
• Raise the upper rack without pushing the
buttons on each side. Pushing the buttons when
raising the rack will prevent the rack from
locking into position.
• To set the rack to the middle position, it may be
easier to lower the rack all the way down and
then raise each side of the rack individually until
it clicks into place.
• There is a 56 mm gain in height when the upper
rack is moved to the lower position.
• After adjusting the rack levels, check that the
spray arms are free to rotate.
• With the lower position of the upper rack, check
if the bottom part of upper rack including spray
arm is not disturbing items on the lower rack.
• When the upper rack is in the lower position,
push in the upper rack first, and the lower rack
later.
• Pull out the lower rack first, and the upper rack
later.
Upper
Rack
Position
Plate Size (mm)
Upper Rack
Lower
Rack
with
Cutlery
Rack
without
Cutlery
Rack
Upper 165 215 300
Middle 193 243 272
Lower 221 271 244
Upper
Rack
Position
Plate Size (mm)
Upper Rack
Lower
Rack
with
Cutlery
Rack
without
Cutlery
Rack
Loading ...
Loading ...
Loading ...