Loading ...
Loading ...
Loading ...
WATERDISPENSER
Your refrigerator includes
an automatic water
dispenser on the front of
the refrigerator door. The
dispenser is designed to
accommodate containers
up to 71/2inches high.
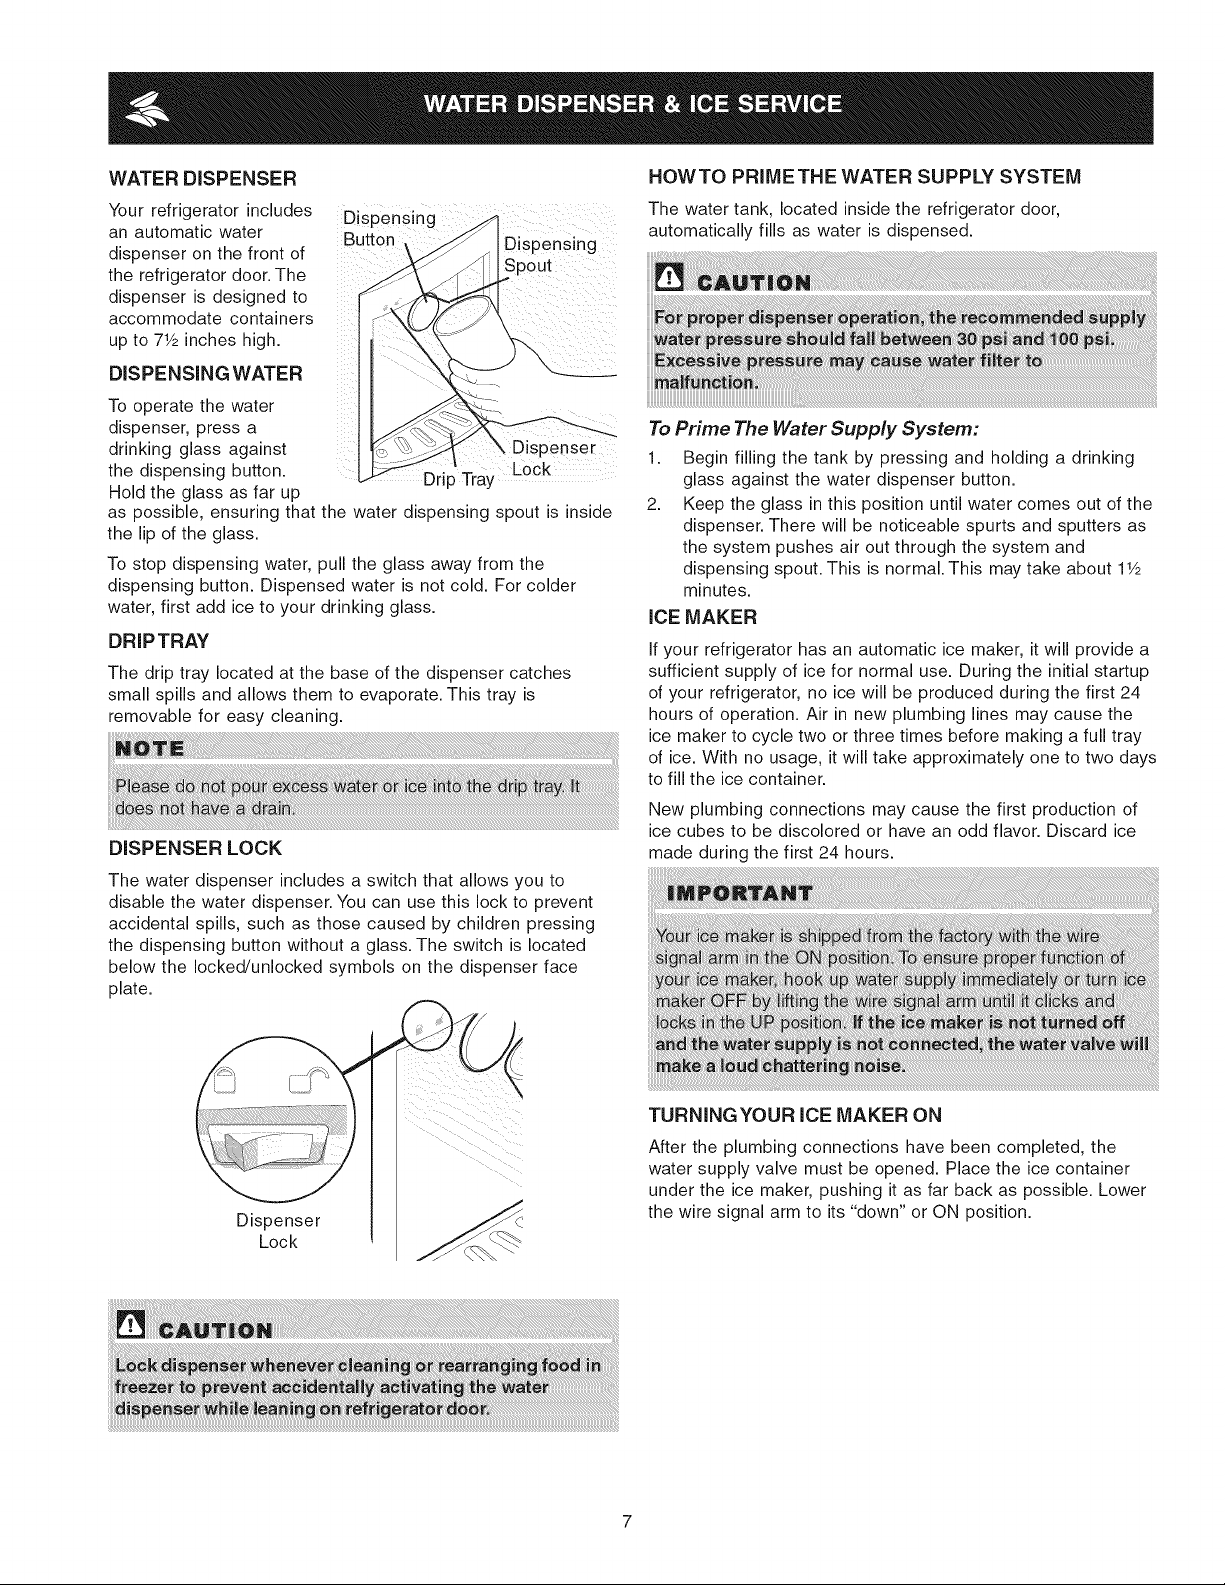
Dispensing
Button
Dispensing
pout
DISPENSING WATER
To operate the water
dispenser, press a
drinking glass against 3enser
the dispensing button. Drip Tray Lock
Hold the glass as far up
as possible, ensuring that the water dispensing spout is inside
the lip of the glass.
To stop dispensing water, pull the glass away from the
dispensing button. Dispensed water is not cold. For colder
water, first add ice to your drinking glass.
DRIPTRAY
The drip tray located at the base of the dispenser catches
small spills and allows them to evaporate. This tray is
removable for easy cleaning.
DISPENSER LOCK
The water dispenser includes a switch that allows you to
disable the water dispenser. You can use this lock to prevent
accidental spills, such as those caused by children pressing
the dispensing button without a glass. The switch is located
below the locked/unlocked symbols on the dispenser face
plate.
HOWTO PRIMETHE WATER SUPPLY SYSTEM
The water tank, located inside the refrigerator door,
automatically fills as water is dispensed.
To Prime The Water Supply System:
1. Begin filling the tank by pressing and holding a drinking
glass against the water dispenser button.
2. Keep the glass in this position until water comes out of the
dispenser. There will be noticeable spurts and sputters as
the system pushes air out through the system and
dispensing spout. This is normal. This may take about 11/2
minutes.
iCE MAKER
If your refrigerator has an automatic ice maker, it will provide a
sufficient supply of ice for normal use. During the initial startup
of your refrigerator, no ice will be produced during the first 24
hours of operation. Air in new plumbing lines may cause the
ice maker to cycle two or three times before making a full tray
of ice. With no usage, it will take approximately one to two days
to fill the ice container.
New plumbing connections may cause the first production of
ice cubes to be discolored or have an odd flavor. Discard ice
made during the first 24 hours.
Dispenser
Lock
TURNINGYOUR ICE MAKER ON
After the plumbing connections have been completed, the
water supply valve must be opened. Place the ice container
under the ice maker, pushing it as far back as possible. Lower
the wire signal arm to its "down" or ON position.
Loading ...
Loading ...
Loading ...