Loading ...
Loading ...
Loading ...
Automatic Icemaker and Ice & Water Dispenser (continued)
Once '('our Icemaker & Dispenser
are in Operation
Throw away the first few batches of ice cubes (16 or 24
cubes). Thiswill flush away any impurities in thewater line..
Do the same thing after vacations or extended periods when
ice isn't used
Toclean out the line, pour the firstsix glassfuls of water in the
kitchen sink.The firstwater through the systempicks up a
slight "plastic" taste from the water tubing
To make sure the bin fills with ice, level the cubes
occasionally. When cubes fall into the bin they may pile up
close to the icemaker and pushthe feeler arm to the STOP
position before the bin gets full Keeping the cubes level
allows the icemaker to fill the bin-
Caution:
Under certain rare circumstances,ice cubes may be
discolored, usualtyappearing with a green-bluishcolor
Thecause of this unusualdiscoloration isapparently due to
a combination of factors suchascertain characteristicsof
local waters, household plumbing and the accumulation of
copper sailsin an inaclive water supply line which feeds
the icemaker. Continued consumption of suchdiscolored
ice cubesmay be injuriousto health. Ifsuchdiscoloration is
observed, discard theice cubes and contact your Sears
Service Center
To Stop Dispensing
Release pressure from the pad and
wait a few seconds to catch the last
bitsof ice or drops of water. There
may be some dripping after
dispensing of crushed ice or water.
Ifthere isa lot of dripping, the spill
should be wiped dry right away
Do not pour water in the spill shelf
because it isnot self draining-pour it in _hekilchen sink The
shelf and itsgrille should be cleaned regularly Presshereto
removegri!!
according to Care and Cleaning instructions.
The grille iseasily removed by
pressing on the back right corner
If Ice Clumps Form in the Storage Bin....
The icemaker ejects cubes in groups of eight, and itis
normal for several cubes to be joined together However, if
you don't usethe ice very often ice clumps may form in the
storage bin and can dog the dispenser If this happens:
• Removethe storage bin from the freezer
• Break up ice clumpswith your hands Throw away any
clumps that you can t break up.
o Replace the bin before the remaining cubes melt and fuse
together
To Dispense Ice and Water
• Setthe selector switch to CUBES, CRUSHED ICE
(on some models) or WATER
o Grip the glass or other container near the rim and press
the rim against the center of the pad
When Dispensing Ice:
o Some crushed ice may be
dispensed even though you
selected CUBES Thishappens
occasionally when a few cubes
get channeled to the crusher
o Sometimes a mound of snow will
form on the door in the ice chute
Thiscondition is normal, and usually occurs when you
have dispensed crushed ice repeatedly Thesnow will
eventually evaporate
When Dispensing Water:
• The first glass of water dispensed
may be warmer than the following
ones. Thisis normal.
• Dispensedwaler iscool, noticed.For
colder water, simply add crushed ice
or cubes before dispensing water
CAUTION: Never put fingers or other
objects into the dispenser opening
To Remove Ice Storage Bin
Liftthe left corner to free the bin from
the shelf Pullthe bin straight out while
supporting itat front and back.
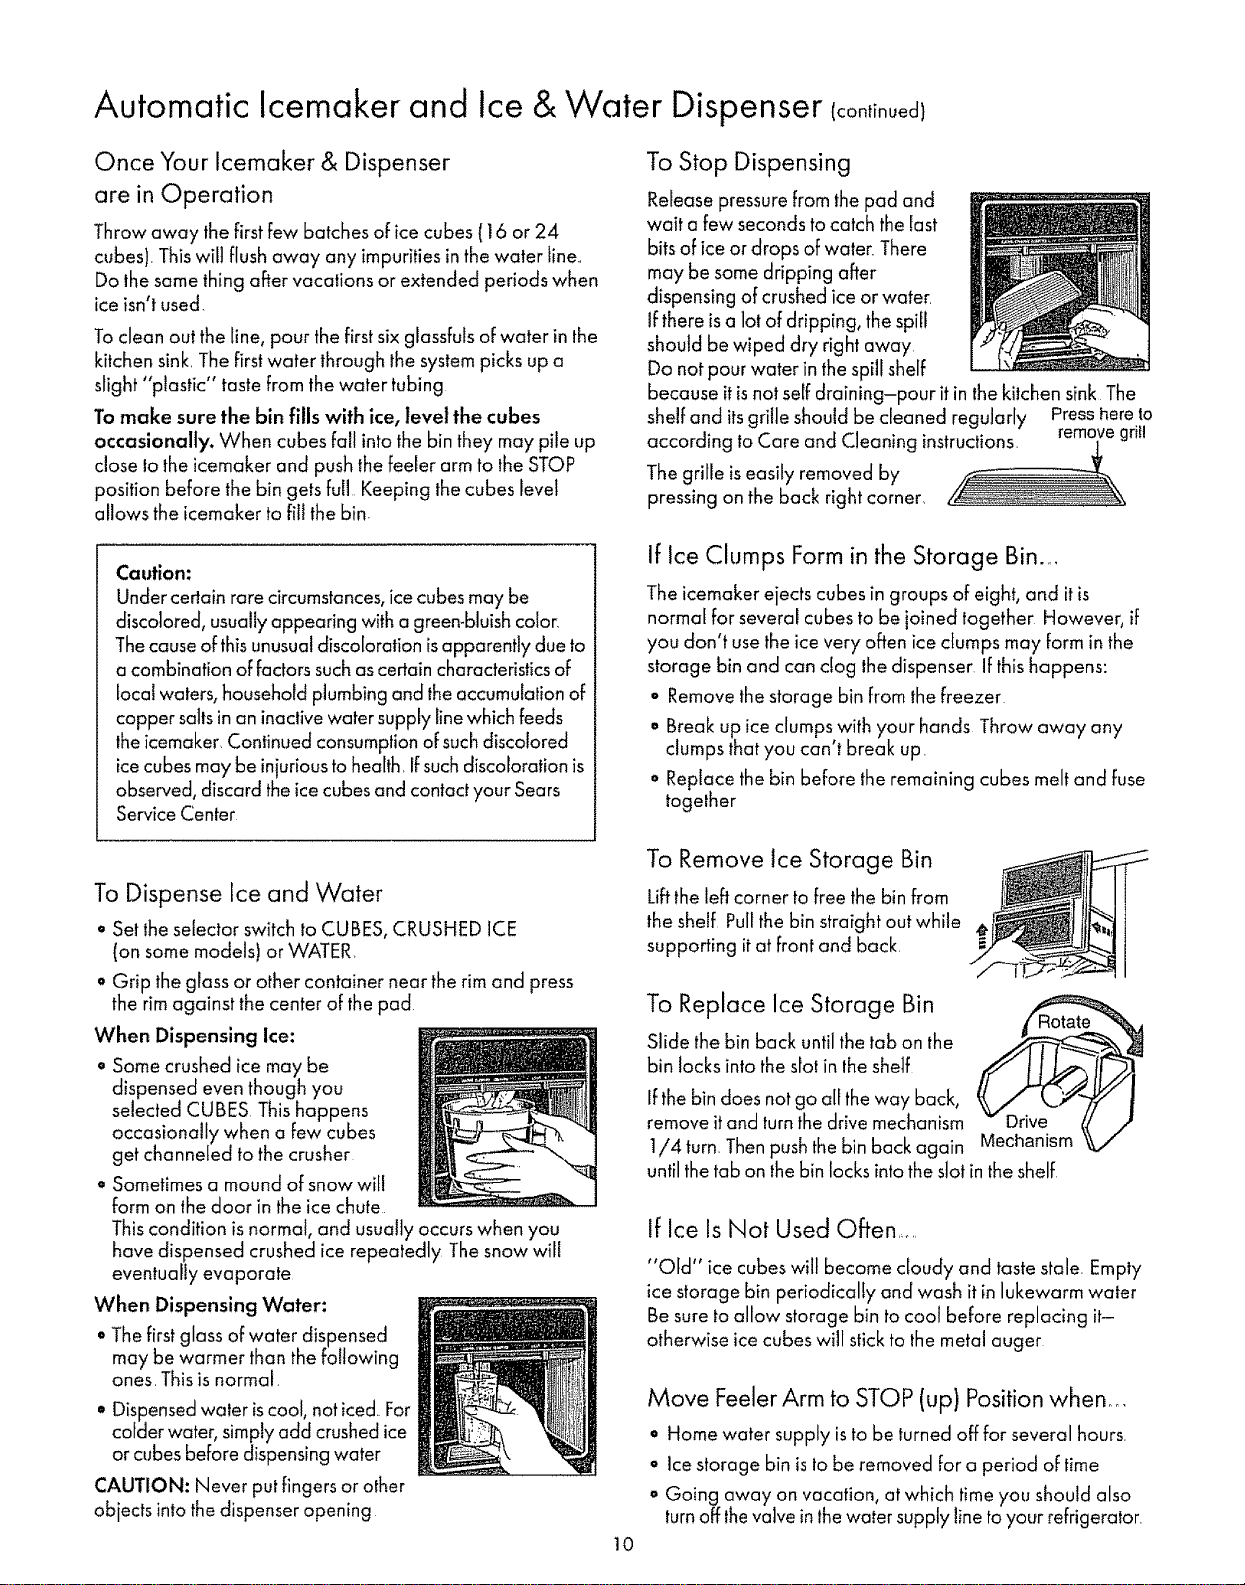
To Replace Ice Storage Bin
Slide the bin back until the tab on the
bin locks into the slot in the shelf
Ifthe bin does not go all the way back,
remove it and turnthe drive mechanism
1/4 turn. Thenpush thebin back again
until thetab on thebin locks intothe slot in the shelf
10
If Ice Is Not Used Often ......
"Old" ice cubes will become cloudy and taste stale. Empty
ice storage bin periodically and wash it in lukewarm water
Besure to allow storage bin to cool before replacing it-
otherwise ice cubes will stick to the metal auger
Move FeelerArm to STOP(up) Positionwhen ....
° Home water supply isto be turned off for several hours.
o Ice storage bin is to be removed for a period of time
° Going away on vacation, at which time you should also
turnoff thevalve in thewater supply line toyour refrigeralor.
Loading ...
Loading ...
Loading ...