Loading ...
Loading ...
Loading ...
19
SHELVES, BINS AND DRAWERS
Shelf Height Adjustment
Shelf height can be adjusted by changing its location from bottom
support to upper support and vice versa.
■ Open right side door to its full opening.
■ Open left side door to its full opening and then lift the door to
open 180°.
■ Take shelf out of refrigerator and place it to desired mounting
position.
■ Ensure shelf is properly seated on the shelf mounts.
Shelves and Shelf Frames
The shelves in your refrigerator are adjustable to meet your
individual storage needs.
Storing similar food items together in your refrigerator and
adjusting the shelves to t different heights of items will make
nding the exact item you want easier. It will also reduce the
amount of time the refrigerator door is open and save energy.
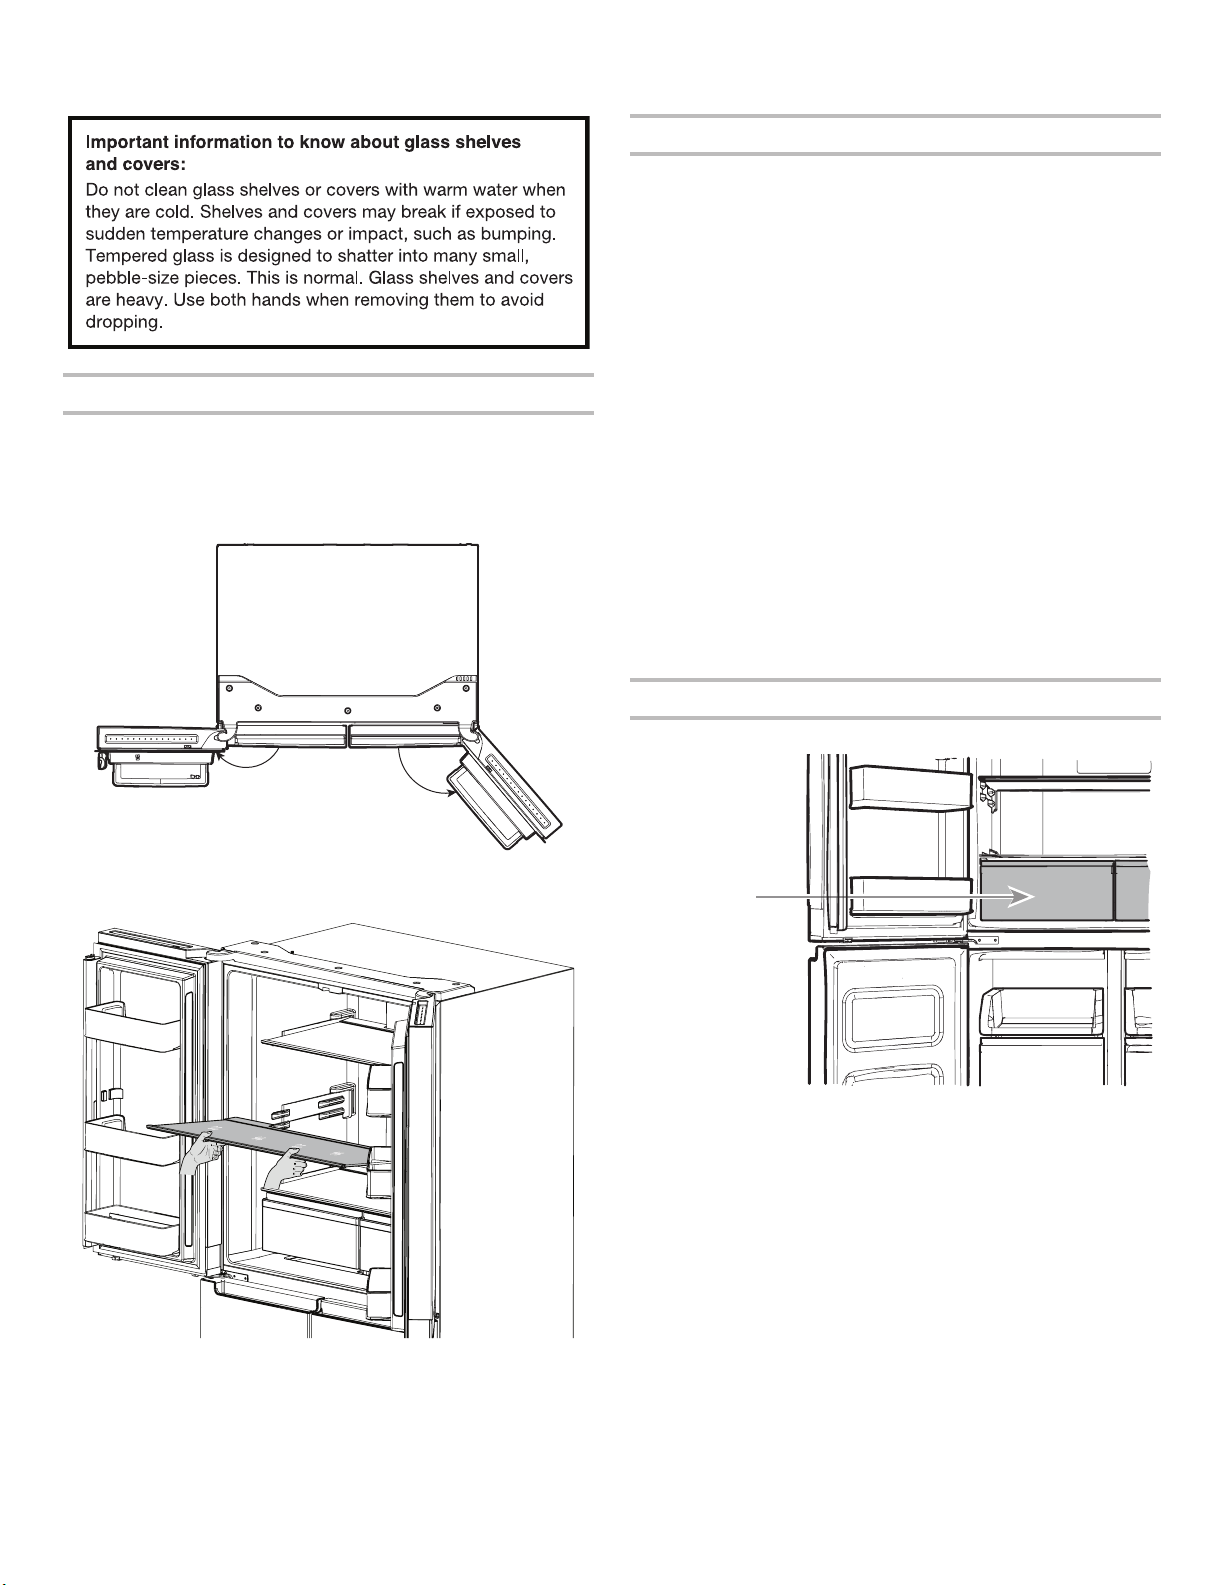
To remove and replace shelves:
1. Open right side door to its full opening and left side door to its
full opening and lift left door to open 180°.
2. Remove middle shelf or top shelf by lifting it up and out of
shelf supports. Then pull the shelf forward and tilt down to
a vertical position. Turn shelf at an angle and pull out of the
refrigerator.
3. Remove the bottom shelf by lifting it up and out of the shelf
supports. Then pull the shelf forward and tilt up to a vertical
position. Turn the shelf at an angle and pull out of refrigerator.
4. Replace middle and top shelves by putting shelf in the
refrigerator at an angle with shelf front down. Lift front of the
shelf up and slide in until the rear of shelf drops into shelf
supports. Lower the front of shelf and make sure that the shelf
is in position.
5. Replace bottom shelf by putting shelf in refrigerator at an
angle with shelf up. Lift front of shelf down and slide in until
rear shelf drops into the shelf supports. Lower front of the
shelf and make sure that shelf is in position.
Crispers
To remove and replace the Crispers:
1. Grasp handle of the Crisper and slide Crisper straight out to
the stop. Lift the Crisper off the bottom guide.
2. Replace/putting back the Crisper by placing it on bottom
Crisper guide and pushing it past the Crisper stop into
position.
180°
130°
Crisper
Loading ...
Loading ...
Loading ...