
Loading ...
Loading ...
April 2015
NOTE - If the blade transmission belt slips, the correct tension can be achieved (This can be seen
when the rotation of the cutting blade can be stopped while cutting). Please see the following:
1. Approach the regulating components on the bottom.
2. Loosen the bolt on the tension belt screws then turn the screws in a clockwise direction to
achieve correct tension of the belt.
3. Tighten the bolt on the screws.
BLADE SHARPENING
Note - The blade is highly resistant, normally needing to be sharpened about once a year when used
regularly. Should the blade become blunt or dull, please see the following:
1. Unplug the unit.
2. Check that the gauge plate is closed (graduated knob in position “0”).
3. Carefully clean the part of the blade sharpened.
4. Reinsert the plug.
5. Loosen the locking knob on the sharpener group.
6. Raise the sharpener, turning it by 140 degrees so that both grinding wheels are in working
position.
7. Lower the sharpener group until it locks. During this procedure, press button to bring the
sharpening wheel into contact with the cutting edge of the blade.
8. Secure the group by turning the locking knob.
9. Set the gauge plate by turning the graduated knob to no. 2.
10. Switch on, letting the blade turn for 1-2 minutes. When the blade is still, check to see if any burr
has formed on the edge.
11. After having verified the presence of burr, switch on and gently press button for about 3 sec-
onds to remove the burr produced during sharpening in (in this last phase both grinding wheels
should be working).
12. Turn the graduated knob back to position “0”.
13. After sharpening, move the sharpener back to its original position, clean the edge of the blade
and the grinding wheels with alcohol.
14. After several sharpening operations, the grinding wheels should be cleaned with a brush to
remove traces of alcohol.
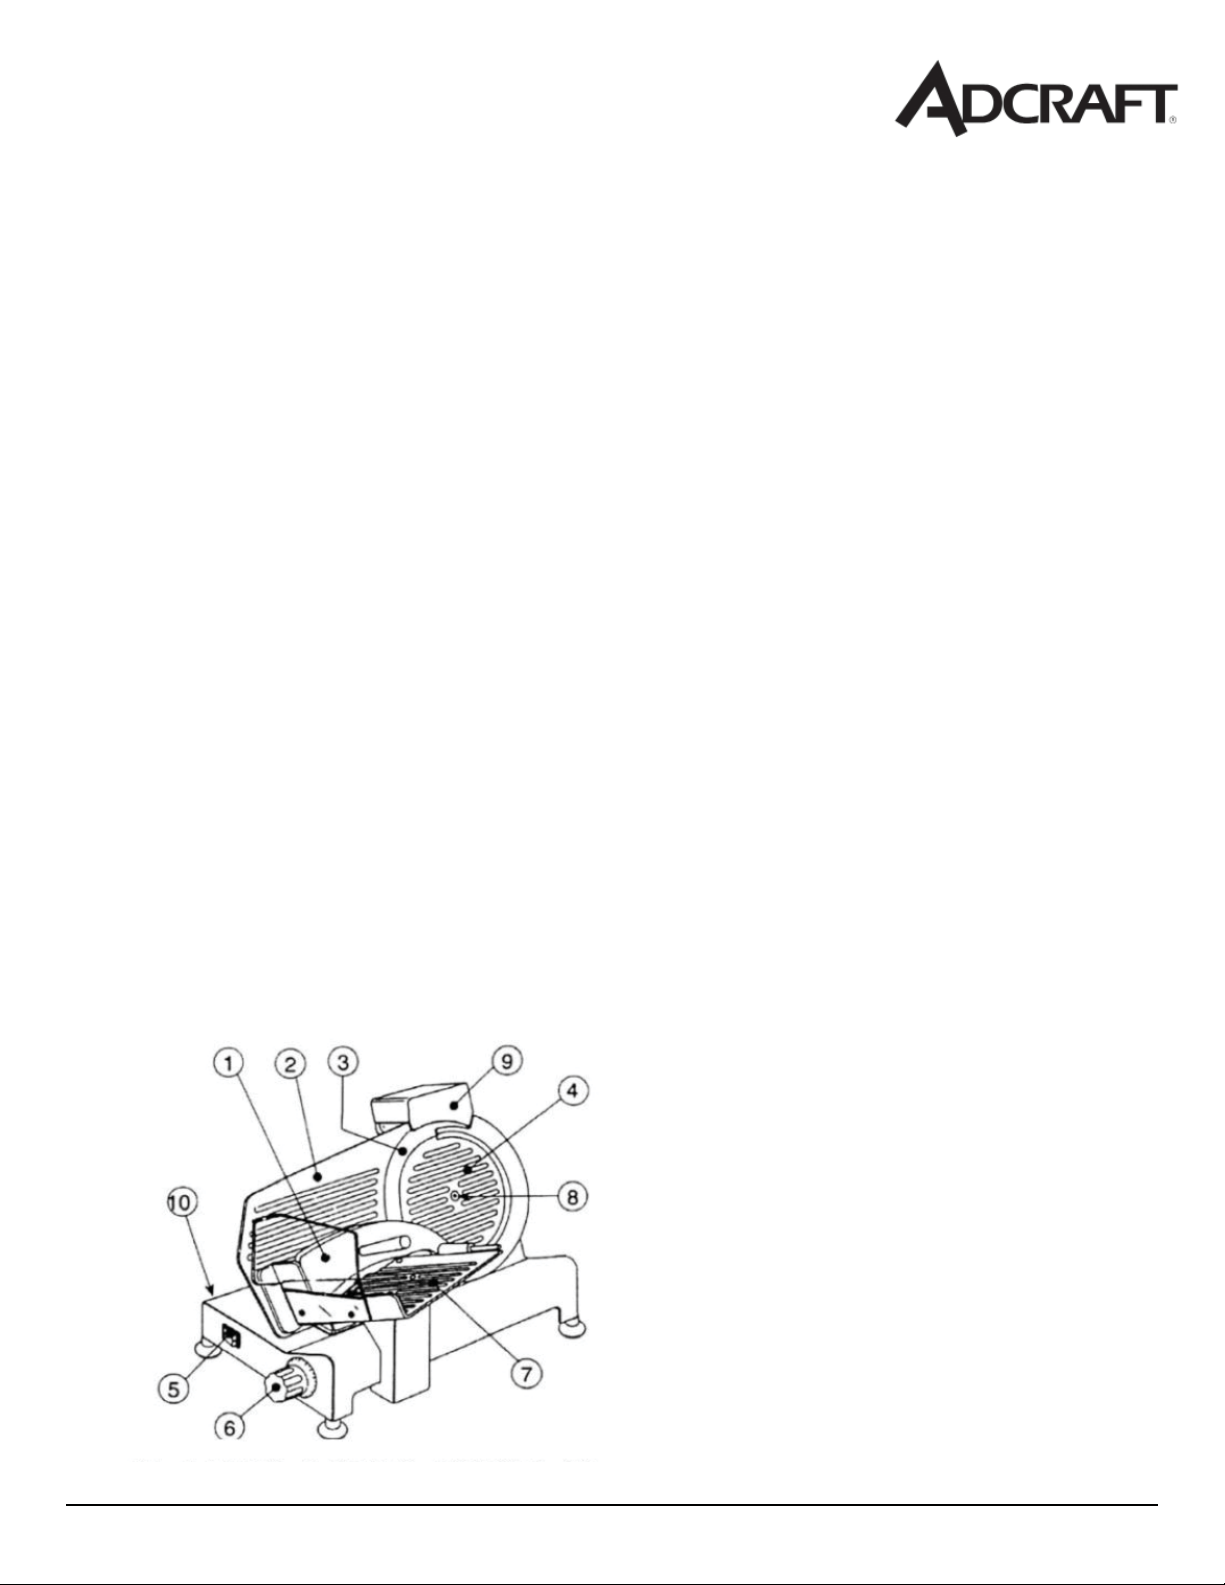
1. Food holder
2. Gauge Plate
3. Blade
4. Blade Guard
5. On/Off Switch
6. Graduated Knob
7. Carriage
8. Blade Guard Bolt
9. Sharpener
10. Body
Loading ...
Loading ...
Loading ...