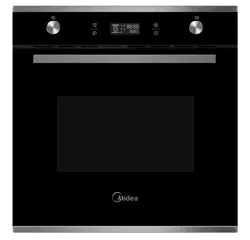
Midea
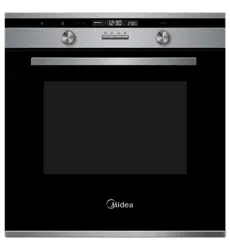
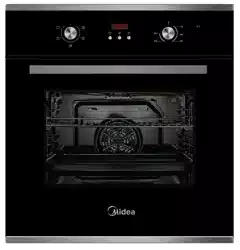
Built-in Electric Oven
Instruction
MO5BL
SAVE THESE INSTRUCTIONS CAREFULLY
Read these instructions carefully before using your oven,and keep it
carefully. If you follow the instructions, your oven will provide you with many years
of good service.


2
ACKNOWLEDGMENT
provides. Before using this product please study this entire Instruction Manual carefully. Keep this
manual in a safe place for future reference. Ensure that other people using the product are familiar
with these instructions as well.
WARNING
an unpleasant smell. This is due to the bonding
agent used for the insulating panels within the oven.
merely need to wait the smell to disappear before
putting food into the oven.
The appliance and its accessible parts become hot
during use. Care should be taken to avoid touching
heating elements.
Children less than 8 years of age shall be kept
away from the oven unless being continuously
supervised.
This appliance can be used by children aged from
8 years and above and persons with reduced
experience and knowledge if they have been given
supervision or instruction concerning use of the
appliance in a safe way and understand the hazards
involved. Children shall not play with the appliance.
Cleaning and user maintenance shall not be made
by children without supervision.

3
Do not use harsh abrasive cleaners or sharp metal
scrapers to clean the glass of the oven.
This can scratch the surface and may result in
permanent damage to the glass.
Do not allow children to go near the oven when it is
Ensure that the appliance is switched off before
replacing the oven lamp to avoid the possibility of
electric shock.
The means for disconnection must be incorporated

4
SAFETY HINTS
Do not use the oven unless you are wearing something on your feet. Do not touch the oven with
wet or damp hands or feet.
For oven: Oven door should not be kept open often during the cooking period.
The appliance must be installed by an authorized technician to put into use. The producer is not
unauthorized personnel.
appliance or break the door.
Some parts of appliance may be kept heat for a long time; it is required to wait for it to cool down
before touching onto the points that are exposed to the heat directly.
Excess spillage must be removed before cleaning.
Only use the temperature probe recommended for this oven.
A steam cleaner shall not be used.
FITTING THE OVEN INTO THE KITCHEN UNIT
IMPORTANT
Ensure that cabinetry can withstand temperatures of at least 120 degrees. Materials that cannot
withstand such temperatures may melt and deform the unit.
Once the oven has been positioned inside the cabinet electrical wiring must be completely
DECLARATION OF COMPLIANCE
reach of children because these are dangerous to children.
5
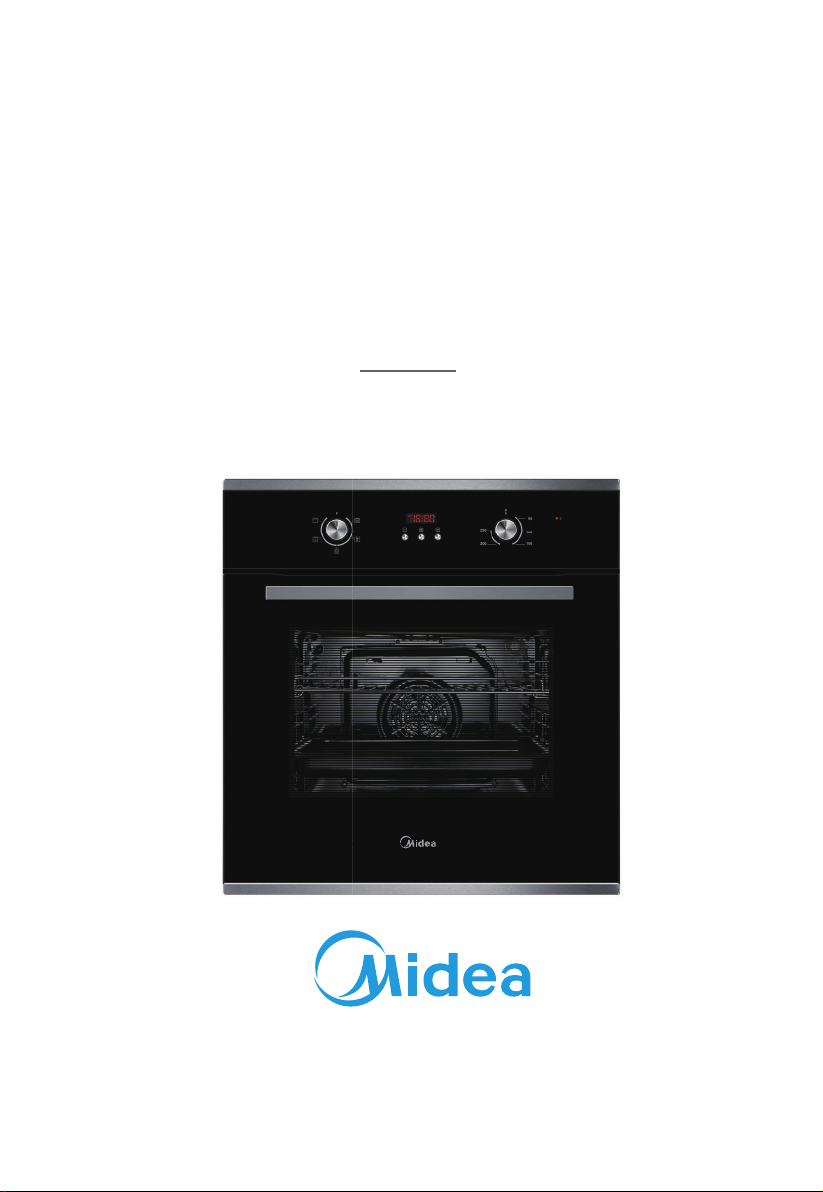
HOW TO USE
Stay on: For the oven to be used in the “
too long. Close supervision is necessary during toasting and the time should not be set too long.
the switch back to the time you require.
To set functions by turning the function knob to desired level.
To set the time of cooking by turning the timer knob to desired time per your food cooking guide.
To set the temperature by turning the temperature knob.
PRODUCT DESCRIPTION
Cooking function
Increasing control Temperture knob
Decreasing control Time function
Symbol Function description
Oven Lamp: It enables the user to observe the progress of cooking without
opening the door.
Defrost: The circulation of air at room temperature enables quicker thawing of
etc.
Convectional with fan: Combination of the fan and back element provides more
on the outside and still moist on the inside. Note: This function is suitable for
grilling or roasting big pieces of meat at a higher temperature.
Radiant grilling: The inner grill element switches on and off to maintain
temperature. Best results can be obtained from using the top shelf for small items
and lower shelves for large items.
Grilling with fan: The inner grill element work with fan.

6
OPERATION INSTRUCTIONS
To set the correct time of day
than 3 seconds.
Oven On and Off
If the timer is in standby modepress
manual mode and the symbol
1> Set the desired cooking function and the temperature degree.
return to standby mode.
Time function setting
setting is Manual mode - Minute minder-Dur-End-Manual mode. Then select cooking function
Manual mode :
be controlled by the user.
continue using the oven. Or press
together for more than 3 seconds to enter into
standby mode if oven will not be used.

7
Audible warning time adjustment:
This function can be used to receive audible warning at the completion of the adjusted time
period.
1> Press
symbol will begin to light
continuously. When the
adjustment is done.
symbol begins to
and the
symbol disappears on the screen. Audible warning time adjustment is for
warning purposes only.
Press
will not be used.
Semi-automatic programming according to cooking period:
oven is adjusted to the desired cooking function and temperature degree.
The maximum setting of cooking period is 10 hours.
1> Press
will appear on the screen and the symbols A
will light on the screen While doing
function and oven temperature knob to position Pressing any butt on les s th an 3 sec on
ds it will stop the audible warning.
Pressing
for more than 3 seconds set the oven to Manual mode again to use the
oven.
oven. The food to be cooked is put into the oven.The oven is adjusted to the desired cooking
function and temperature degree.
1> Press
3> Press
operate.
Pressing
for more than 3 seconds set the oven to Manual mode again to use the
oven.

8
Full-automatic programming:
be cooked is put into the oven The oven is adjusted to the desired cooking function. The oven
temperature is adjusted to the desired degree depending on the food to be cooked.
First: Press
cooking period for the food you wish to cook. Press
Second: keep pressing on
button to
on the screen.The symbol
disappears until the time cooking starts.
You can set a time which can be up 23.59 hours after the time obtained by adding the cooking
period to the day's time.
The oven will start operating at the time calculated by deducting the cooking period from the set
Pressing for more than 3 seconds set the oven to Manual mode again to use the oven.
means cancle automatice progamme and enter into corresponding mode If you need to reset
above steps again.
date will progressively and rapidly increase or decrease.
to manual mode.
for more than 3 seconds can cancel
current setting and enter manual mode.
sounds it can cancle the curent time function setting and enter standby mode.
5> We suggest that you run the oven elements for 15 minutes at 200 degrees to burn off any
residuce from their surfaces.

9
ACCESSORIES
grilling.
Universal pan: For cooking large quantities of food such as moist
juices.
Telescopic runner: Some models may be supplied with telescopic
runners
. These telescopic runners and slider
brackets could
be
disassembled by unscrewing the screws used
with fan.
functions with bottom heater to prevent heat gathering at bottom.
10
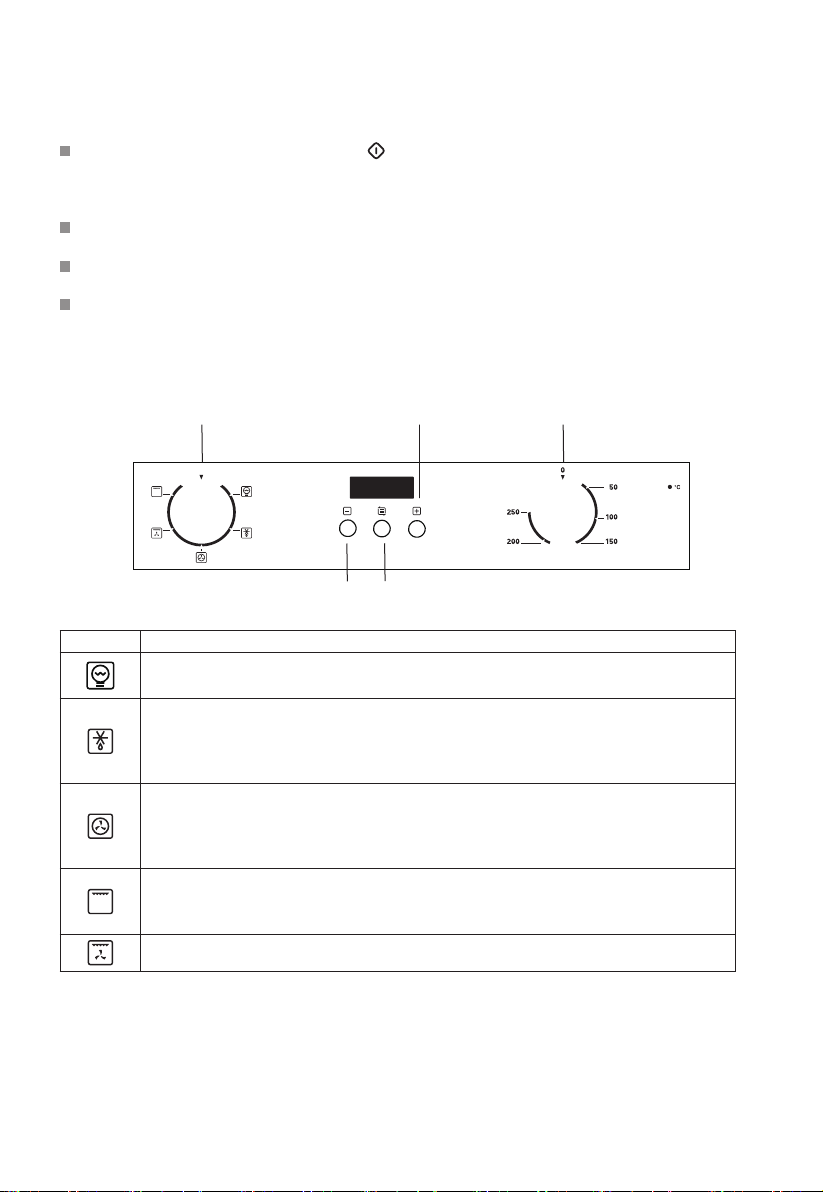
SHELF PLACEMENT WARNING
SECURING THE OVEN TO THE CABINET
1. Fit oven into the cabinet recess.
2. Open the oven door.
3. Secure the oven to the kitchen cabinet with two distance holders
BULB REPLACEMENT
1 > Disconnect power from the mains outlet or switch off the circuit breaker of the unit's mains outlet.
2 >
the bulb with a new one of the same type.
3 > Screw the glass lamp cover back in place.

11
Remark:
NOTE: The number of accessories included depends on the particular appliance model purchased.
VENTILATING OPENINGS
continue working for 15 minutes after the oven stop cooking.
CONNECTION OF THE OVEN
INSTALLATION
1. The cabinet does not include the power switch or socket dimensions.

12
Disassembly of oven door components
angle. Then pull the buckle at the door hinge backward.
2. Close the door to an angle approximately 30°. Hold the
door with one hand on each side. Lift up and slowly pull
the door out from the oven.
3. Open the door rotation bracket assembly. Refer the
action in the following picture.
middle glass door out in the same way.
WARNING:
Don't forcibly pull out the door and take care with glass
WARNING:
WARNING:
Do not lift or carry the oven door by the door handle.
REMOVING THE DOOR FROM OVEN (OPTIONAL)
˚
door panels during the dismantling process.

13
CLEANING AND MAINTENANCE
unit facilitates maintenance to a minimum. The parts of the unit which come into contact with food
have to be cleaned regularly.
Set all controls in the OFF position.
Wait until the inside of the unit is not hot but only slightly warm - cleaning is easier than that
when it is warm.
which can scratch the surface or damage the glass.
Do not use a high pressure cleaner for cleaning the unit . The baking pans may be washed in
mild detergent.
inappropriate waste handling of this product. The symbol on the product indicates that this product
may not be treated as household waste. Instead it shall be handed over to the applicable collection
point for the recycling of electrical and electronic equipment. Disposal must be carried out in
accordance with local environmental regulations for waste disposal. For more detailed information
household waste disposal service or the shop where you purchased the product.


Maintenance schedule:
service call every 3 years for the life of the appliance.
FOR SPARE PARTS OR TO FIND THE ADDRESS OF
YOUR NEAREST STATE SPARE PARTS CENTRE IN AUSTRALIA
MIDEA HOME APPLIANCES AUSTRALIA PTY LTD
After-sales service No.: 1800 88 60 10