Loading ...
Loading ...
Loading ...
Clean burner cap after each use especially if a spillover
occurs. A soiled burner may result in improper ignition or an
uneven flame. When cleaning the sealed surface burner,
use care to prevent damage to the ignitor. If a cleaning cloth
should catch the ignitor, it could be damaged or broken.
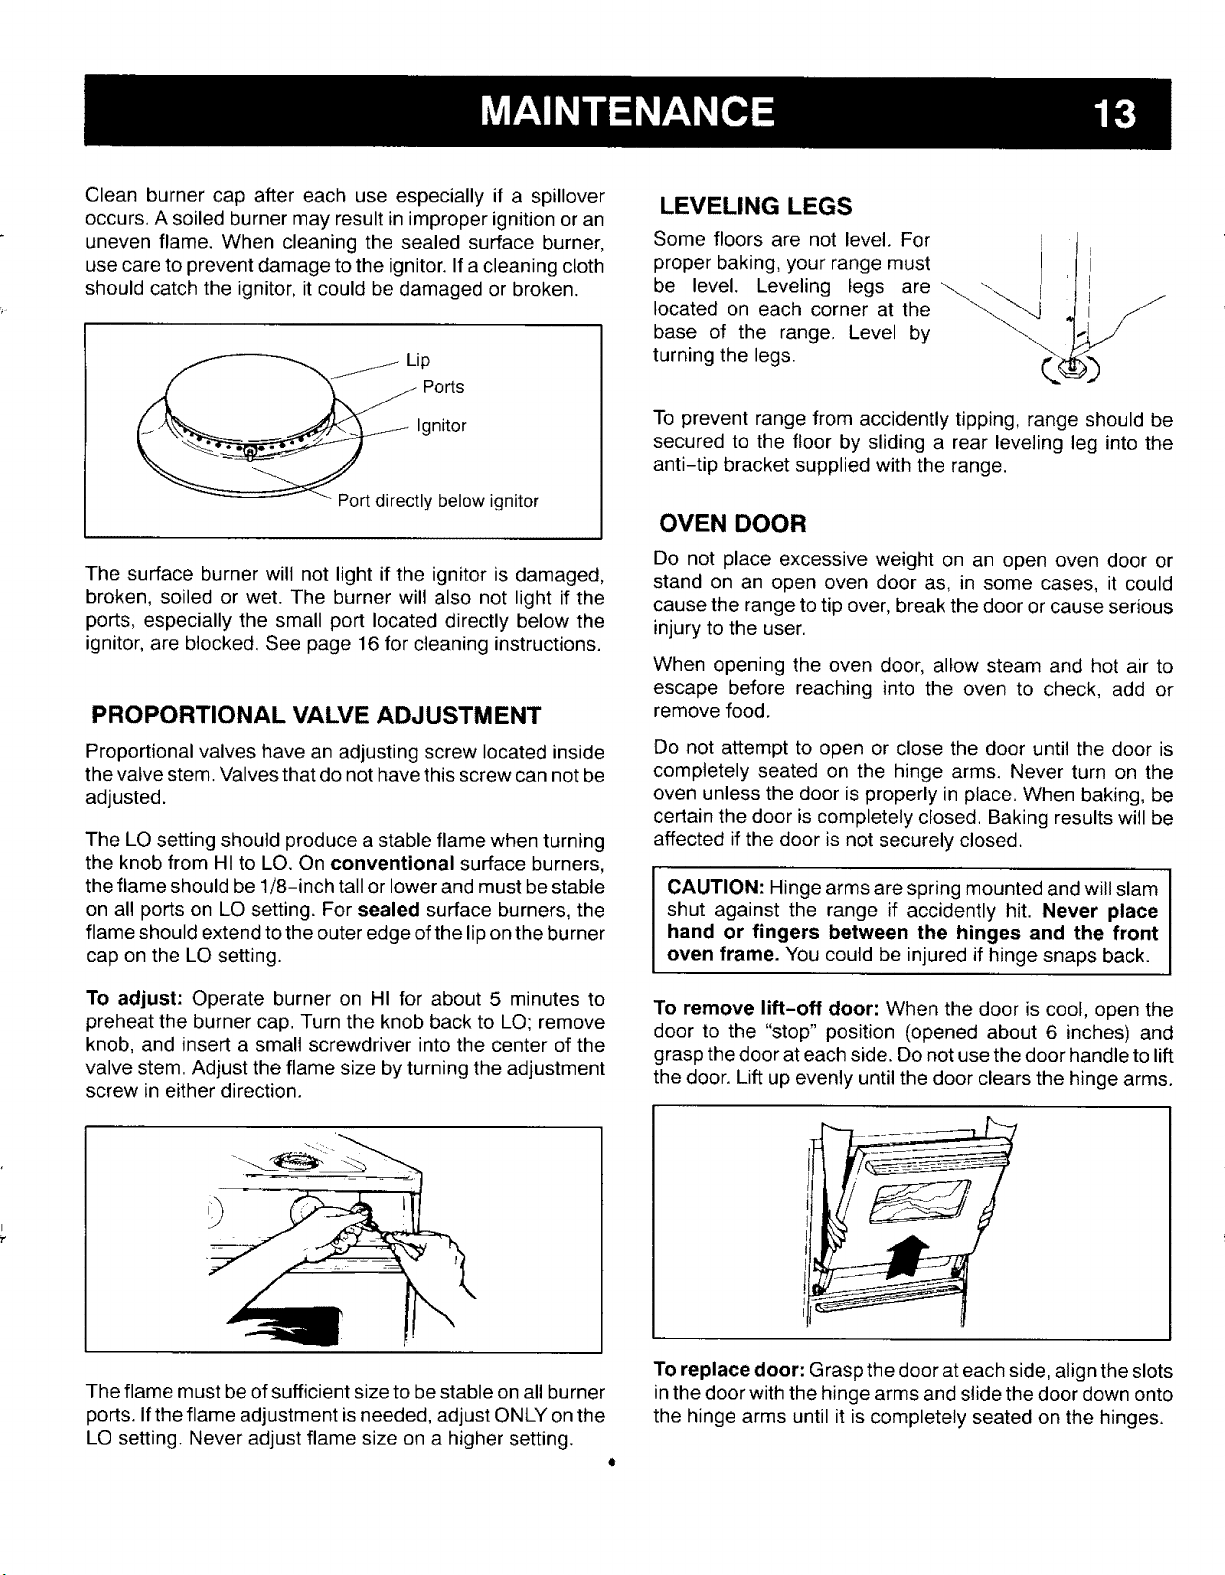
_t Lip
Ports
Ignitor
ly below ignitor
The surface burner will not light if the ignitor is damaged,
broken, soiled or wet. The burner will also not light if the
ports, especially the small port located directly below the
ignitor, are blocked. See page 16 for cleaning instructions.
PROPORTIONAL VALVE ADJUSTMENT
Proportional valves have an adjusting screw located inside
the valve stem. Valves that do not have this screw can not be
adjusted.
The LO setting should produce a stable flame when turning
the knob from HI to LO. On conventional surface burners,
the flame should be 1/8-inch tall or lower and must be stable
on all ports on LO setting. For sealed surface burners, the
flame should extend to the outer edge ofthe lip on the burner
cap on the LO setting.
To adjust: Operate burner on HI for about 5 minutes to
preheat the burner cap. Turn the knob back to LO; remove
knob, and insert a small screwdriver into the center of the
valve stem. Adjust the flame size by turning the adjustment
screw in either direction.
LEVELING LEGS
Some floors are not level. For ]
proper baking, your range must
be level. Leveling legs are'--...'-...]
located on each corner at the
base of the range. Level by
turning the legs.
J
I
0
To prevent range from accidently tipping, range should be
secured to the floor by sliding a rear leveling leg into the
anti-tip bracket supplied with the range.
OVEN DOOR
Do not place excessive weight on an open oven door or
stand on an open oven door as, in some cases, it could
cause the range to tip over, break the door or cause serious
injury to the user.
When opening the oven door, allow steam and hot air to
escape before reaching into the oven to check, add or
remove food.
Do not attempt to open or close the door until the door is
completely seated on the hinge arms. Never turn on the
oven unless the door is properly in place. When baking, be
certain the door is completely closed. Baking results will be
affected if the door is not securely closed.
CAUTION: Hinge arms are spring mounted and will slam
shut against the range if accidently hit. Never place
hand or fingers between the hinges and the front
oven frame. You could be injured if hinge snaps back.
To remove lift-off door: When the door is cool, open the
door to the "stop" position (opened about 6 inches) and
grasp the door at each side. Do not use the door handle to lift
the door. Lift up evenly until the door clears the hinge arms.
The flame must be of sufficient size to be stable on all burner
ports. If the flame adjustment is needed, adjust ONLY on the
LO setting. Never adjust flame size on a higher setting.
To replace door: Grasp the door at each side, align the slots
in the door with the hinge arms and slide the door down onto
the hinge arms until it is completely seated on the hinges.
Loading ...
Loading ...
Loading ...