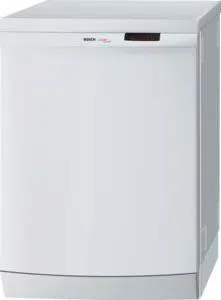
User Manual Bosch SHU43C02UC/17 dishwasher
Most Bosch dishwashers are equipped with special features that allow you to tailor your dishwasher to your specific dishwashing requirements. Not every model of Bosch dishwashers wilt have all of these features, so you should check with the Model Features Chart on page 6 in this manual to find out which special features your dishwasher model has.
Standard Dispenser
The Standard RinseAid Dispenser Regulator (see Figure 31 ) leaves our factory set at 3.5. Follow these guidelines to adjust to adjust the amount of rinse aid dispensed:
Premium Dispenser
Delay Start
This feature allows you to delay the start of the selected wash cycle for up tp 19 hours.
Front Control
Press the On/Off Button
Top Control
Open the dishwasher door far enough to expose the control buttons.
Top Rack Only Cycle
This cycte allows you to save energy, water, and detergent by washing loads small enough to fitl onty the upper rack. Note: The Top Rack Only cycle does not reduce wash time.
To use the Top Rack Only Cycle:
OptiMISER
This feature, used in conjunction with the other wash cycles, reduces wash time by about 30%. NOTE: OptiMISER isn't used with the Quick Wash or Rinse and Hold cycles.
To useOptiMISER :
Cycle Completion Signal
This feature is a tone that sounds when when your Bosch dishwasher finishes washing and drying your dishes, and is available ONLY on Top Control models. You can either disable the tone, or you can set it at one of three volumes (dishwashers with this feature leave our factory with the tone set on the middle volume).
Changing the Cycle Completion Signal Volume
Additional Drying Heat
Front Control
Top Control
Note: Only Top Control Models with an LED display have theAdditional Drying Heat
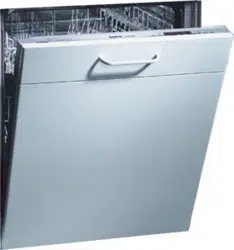
Many models of Bosch dishwashers have various rack accessories that greatly expand and enhance the dishwasher's capabilities. In addition to the accessories discussed in this manual, you can find many more at our website, www.boschappliances.com. Not every model of Bosch dishwasher will have every rack accessory. Check the Model Features Chart in this manual to find out which rack accessories are on your dishwasher.
Flip Tines
Flip Tines fold down to make loading the racks easier in some instances. Before you attempt to fold down a set of tines, check with the Model Features Chart on page 6 in this manual to ensure that the rack is equipped with Flip Tines. To operate the Flip Tines, simply grasp the tines and gently fold them downward.
Cup Shelves
Grasp the Cup Shelves, as shown in Figure 37, and fold them down. Place cups upsidedown on the cap shelves.
Silverware Baskets
There are two types of Silverware baskets available for Bosch dishwashers; 1) the Standard Silverware Basket, and 2) the Flexible Silverware Basket. The Standard Silverware Basket This basket fits in the front-middle of the lower rack, as shown in Figure 38
The Flexible Silverware Basket
This basket is designed for maximum versatility. The basket splits along its length, resulting in two halves that may be placed in a variety of positions in the lower rack, greatly increasing the lower rack's loading versatility
To split the Flexible Silverware Basket:
Some suggestions for placing the two halves in the lower rack are shown in
Knife Rack
The Knife Rack, shown in Figure 42, may be used for a variety of purposes, but it is primarily designed to hold fine silverware and cutlery.
The Knife Rack may be removed by gently pulling it from the two clips that hold it to the rack.
Rack Attachment
When installed on the back of the tower rack, as shown in Figure 43, the Rack Attachment serves a variety of uses such as holding cups, large knives, spatulas, or other large utensils.
Install the Rack Attachment by gently levering it into position along the back of the lower rack until it is held in place as shown in Figure 43.
General Maintenance
Certain areas of your Bosch dishwasher require occasional maintenance. The maintenance tasks are easy to do and wilt ensure continued superior performance from your Bosch dishwasher. These tasks are:
WARNING: TO AVOID MOLD GROWTH AND/OR FLOOR DAMAGE, DO NOT ALLOW STANDING WATER FROM SPILLS AND SPLASHOUT TO REMAIN AROUND AND/OR UNDER YOUR BOSCH DISHWASHER.
Winterizing Your Bosch Dishwasher
Dishwasher If your Bosch dishwasher is installed in location that experiences freezing temperatures (e.g., in a holiday home), you must drain all the water from the dishwasher's interior. Turn off the water supply, disconnect the drain hose, and allow your dishwasher to completely drain into a bucket or other appropriate receptacle.
Check/Clean the Large Object Trap
Your Bosch dishwasher has a filter system made up of a Large Object Trap/Cylinder FitterAssembty, as shown in Figure 45, and a Fine Filter on the ftoor of the dishwasher tub, as shown in Figure 46. Some modets have an additional Micro Filter under the Fine Filter, as shown in Figure 47. Check with the Modet Features Chart on page 6 of this manual to see if your model has the additional Micro Fitter. During normal use the filter system is self-cleaning. For your convenience the filter system is accessible and easily cleaned.
The Large Object Trap prevents targe objects such as bones, glass, toothpicks, and straws from entering the pump system and causing damage or noise. Frequently inspect the Large Object Trap and clean the filter system whenever you find foreign objects.
To Remove the Large Object Trap:
To Reinstall the Large Object Trap:
Check/Clean the Spray Arms
Occasionally check the spray arms to ensure that the spray nozzles are clear and unobstructed. If the nozztes require cleaning, the spray arms are easy to remove and reinstall.
To remove the lower spray arm:
To reinstall the lower spray arm:
Gently press the lower spray arm back into its installed position.
To remove the upper spray arm:
To reinstall the upper spray arm:
Check/Clean the Stainless Steel Inner Door and Tub
Clean the outer edges of the inside door panel regularly to remove food particles that collect there from normal loading. If spots begin to appear on the stainless steel tub or inner door, make sure the rinse agent reservoir is full.
Clean the Exterior Door Panel Colored Doors:
Use only a soft cloth that is lightly dampened with soapy water. Do not use paper towels or abrasive cloths
Stainless Steel doors:
Use a soft cloth with a non-abrasive cleaner (preferably a liquid spray) made for stainless steel. For the best results, apply the stainless steel cleaner to the cloth, then wipe the surface. Do not use metal scouring 3ads to clean the stainless steel surface, as they can scratch the surface and Ieave their own metal particles that can rust.
Clean the Door Gasket
Regularly clean the door gasket with a damp ctoth to remove food particles and other debris.
| Dishes do not dry. | Rinse-aid dispenser is empty, Fill rinse-aid dispenser |
| Indicator light(s) do not come on | A fuse may have blown or a circuit breaker tripped: Replace fuse or reset circuit breaker at your fuse box/breaker box. |
| Dishwasher does not start | Door of dishwasher not properly closed. Close dishwasher making sure that door latches. |
| Dishwasher runs a long time | If the dishwasher completes the cycle, but the run time seems exceptionally long it is probably due to cold incoming water To avoid this problem it is recommended that before starting the dishwasher: open the hot water faucet at the sink nearest the dishwasher and run the water until it runs hot. Then turn off the water and start the dishwasher. |
| Machine cycle does not advance to rinse | Water line is closed or inlet flter is blocked. Open water valve and/or check inlet filter |
| Water not pumped from dishwasher | Kink in drain hose. Filter clogged. Kitchen sink clogged. Air gap (type installed at sink) clogged. Check drain hose and fine and coarse filters (see section titled CARE and CLEANING). Check kitchen sink to make sure it is draining well. If problem is kitchen sink not draining you may need a plumber rather than a serviceman for the dishwasher. |
Reference file: Bosch SHU43C02UC/17 dishwasher
Additionally, the document applies to other Bosch models: SHI66A! SHU33A, SHU43C, SHU53A, SHU66C, SHV46C, SHV66A, SHX33AI SHX46A, SHX46B, SHX56B, SHY56A, SHY66C