Loading ...
Loading ...
Loading ...
Prior to shipment, this gun was treated
with an anticorrosive agent. Before
using this gun make sure that it is
carefully flushed with thinner.
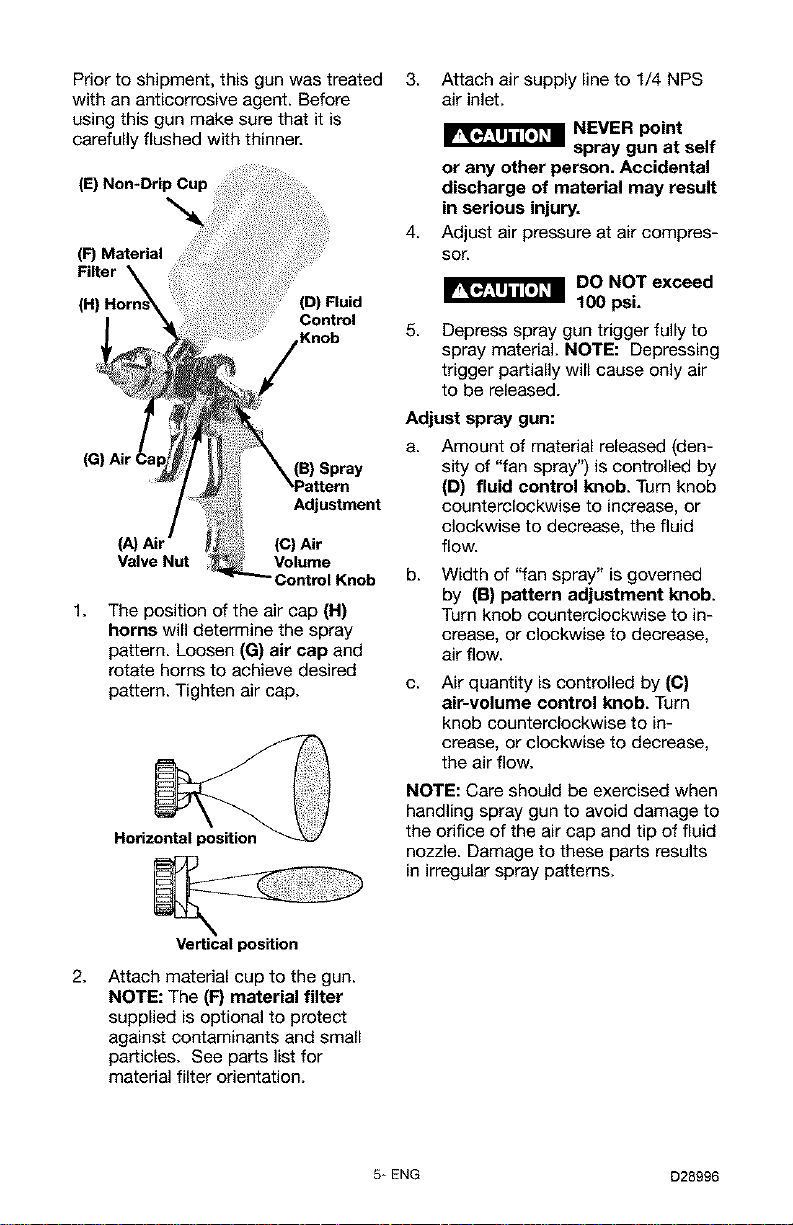
(E) Non-Drip Cup
(F) Material
(D) Fluid
Control
Knob
1.
(B) Spray
Adjustment
(C) Air
Valve Nut Volume
d Knob
The position of the air cap (H)
horns will determine the spray
pattern. Loosen (G) air cap and
rotate horns to achieve desired
pattern. Tighten air cap.
Horiz
3. Attach air supply line to 1/4 NPS
air inlet.
4.
NEVER point
spray gun at self
or any other person. Accidental
discharge of material may result
in serious injury.
Adjust air pressure at air compres-
sor.
DO NOT exceed
ILJ_J..._U.U,U_=
100 psi.
5.
Depress spray gun trigger fully to
spray material. NOTE: Depressing
trigger partially will cause only air
to be released.
Adjust spray gun:
a.
Amount of material released (den-
sity of "fan spray") is controlled by
(D) fluid control knob. Turn knob
counterclockwise to increase, or
clockwise to decrease, the fluid
flow.
b.
Width of "fan spray" is governed
by (B) pattern adjustment knob.
Turn knob counterclockwise to in-
crease, or clockwise to decrease,
air flow.
C.
Air quantity is controlled by (C)
air-volume control knob. Turn
knob counterclockwise to in-
crease, or clockwise to decrease,
the air flow.
NOTE: Care should be exercised when
handling spray gun to avoid damage to
the orifice of the air cap and tip of fluid
nozzle. Damage to these parts results
in irregular spray patterns.
2.
Vertical position
Attach material cup to the gun.
NOTE: The (F) material filter
supplied is optional to protect
against contaminants and small
particles. See parts list for
material filter orientation.
5* ENG D28996
Loading ...
Loading ...
Loading ...